Loss of Airflow From A/C Outlets after Extended Periods of Highway Driving #98-T-10A - (Jan 13, 2003)
Loss of Airflow from A/C Outlets after Extended Periods of Highway Driving
(Adjust A/C Compressor Set Point.)1994-1999 Saturns equipped with R-134a air conditioning.
Condition:
After extended periods of highway driving, some customers may notice a loss
of airflow from the A/C outlets.
Cause:
A/C compressor suction set point may be low for some customer usage and driving
patterns, resulting in evaporator freeze after extended periods of highway driving.
Correction:
Adjust A/C compressor set point using the following procedure.
Procedure:
Notice
This procedure should never be repeated on the same A/C compressor. If condition
is not corrected by this bulletin, refer to the diagnostic flow chart in the appropriate
year "HVAC Service Manual."
- Confirm with customer that A/C system functions normally in all conditions,
except extended driving at highway speeds.
- If A/C system does not function normally at any other
condition
, refer to the A/C system diagnostic flow chart in the appropriate
year "HVAC Service Manual."
- If A/C system Functions normally during all other conditions
, proceed to the next step.


Important
Engine does not need to be running for the A/C compressor set point adjustment.
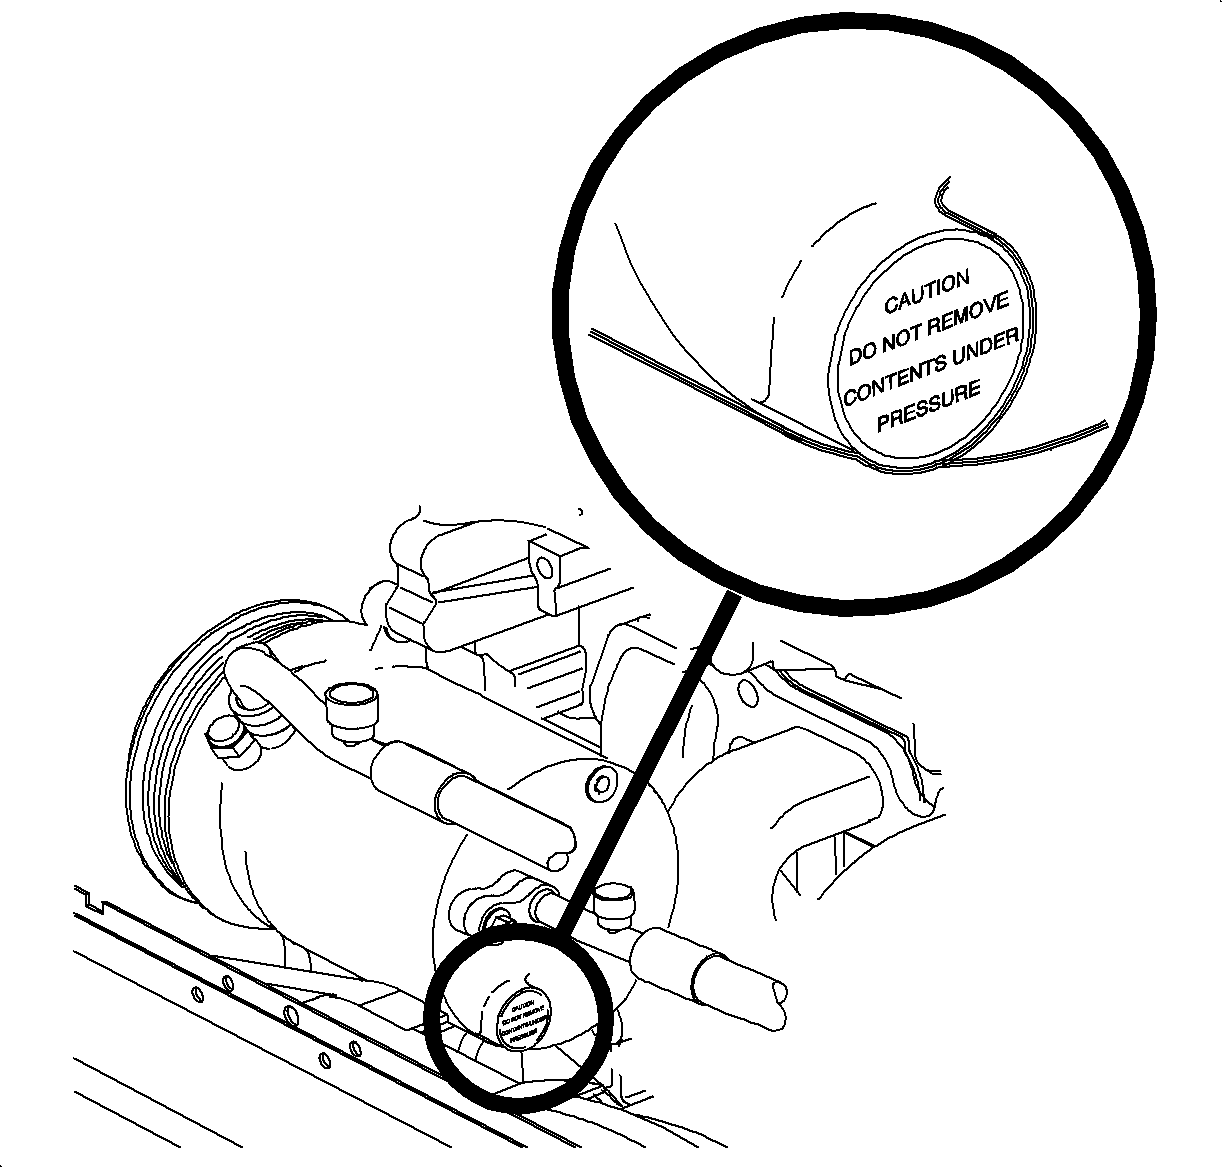
- Locate the set screw on the rear head of the A/C compressor. The set screw will
be covered with either a solid silver label or a silver label with the words: CAUTION!
DO NOT REMOVE CONTENTS UNDER PRESSURE.
Notice
Do not remove this label.


Caution
Be careful to keep hands clear of the engine cooling fan. The engine cooling
fan may operate unexpectedly.
Notice
If the silver label has been broken, or an orange replacement label is present,
DO NOT continue with this procedure. Additional adjustment of the set screw could
result in reduced A/C system performance at higher ambient temperatures.
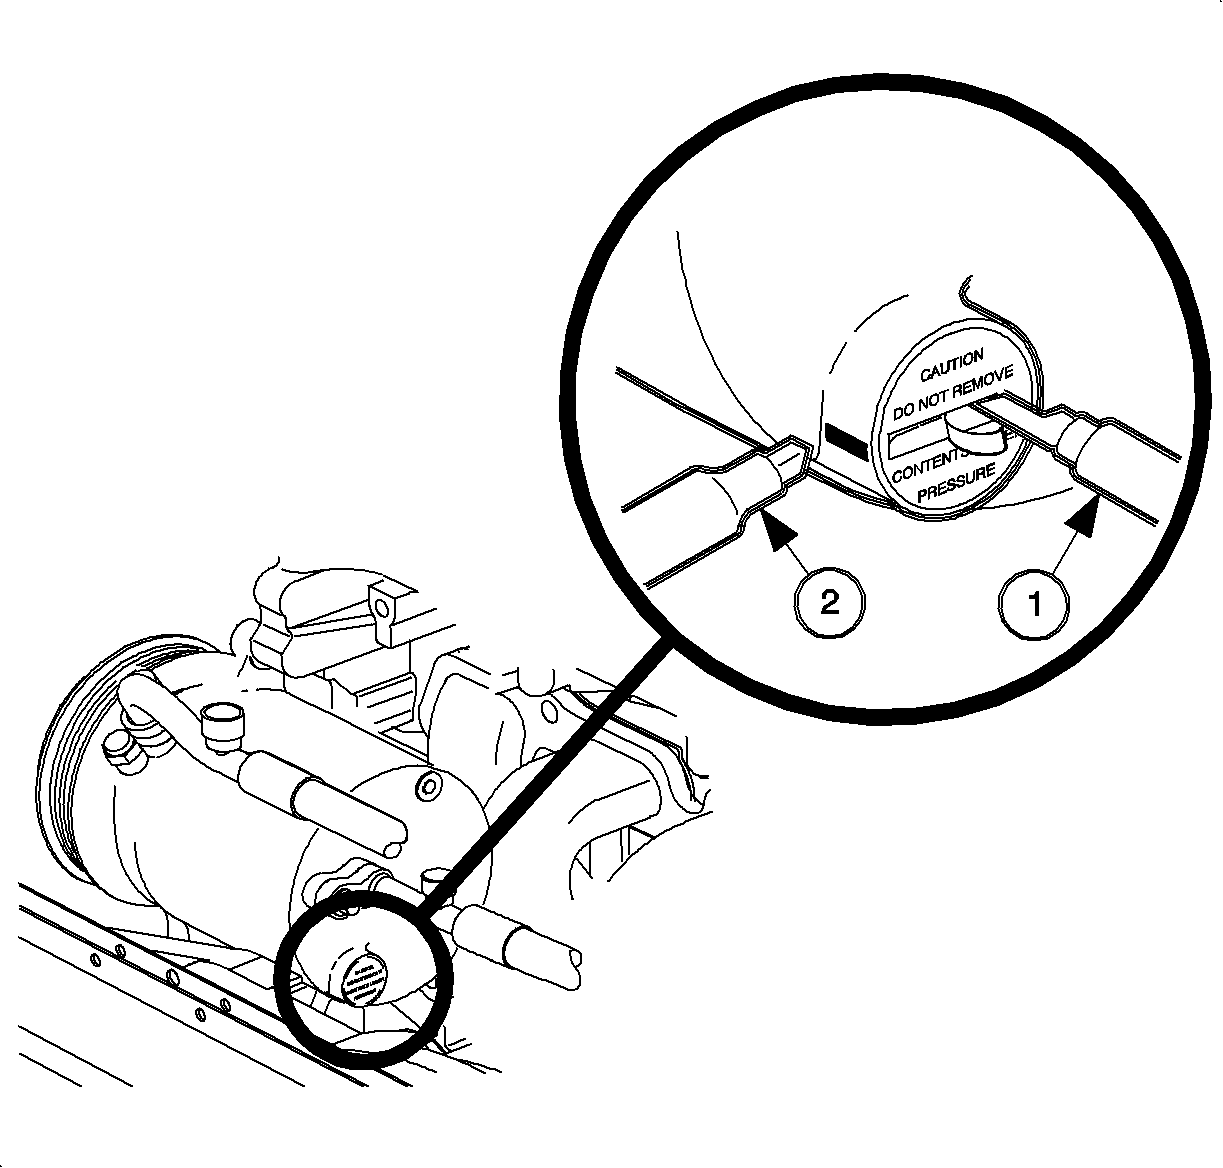
- Determine where the large slot in the set screw is located. The slot can be
felt through the label with a screwdriver.
- Using a utility knife, cut through the label for access to the slot screw
(1).
- Using a permanent ink marker, make a mark on the A/C compressor to indicate
the current position of the set screw in relation to the compressor rear head (2).


Caution
Do not turn the set screw on the back of the A/C compressor counterclockwise.
The A/C system is under pressure and turning the set screw counterclockwise could
cause the set screw and/or hot refrigerant/oil mixture to be discharged under pressure.
The refrigerant/oil mixture can cause burns and/or bodily injury.
Notice
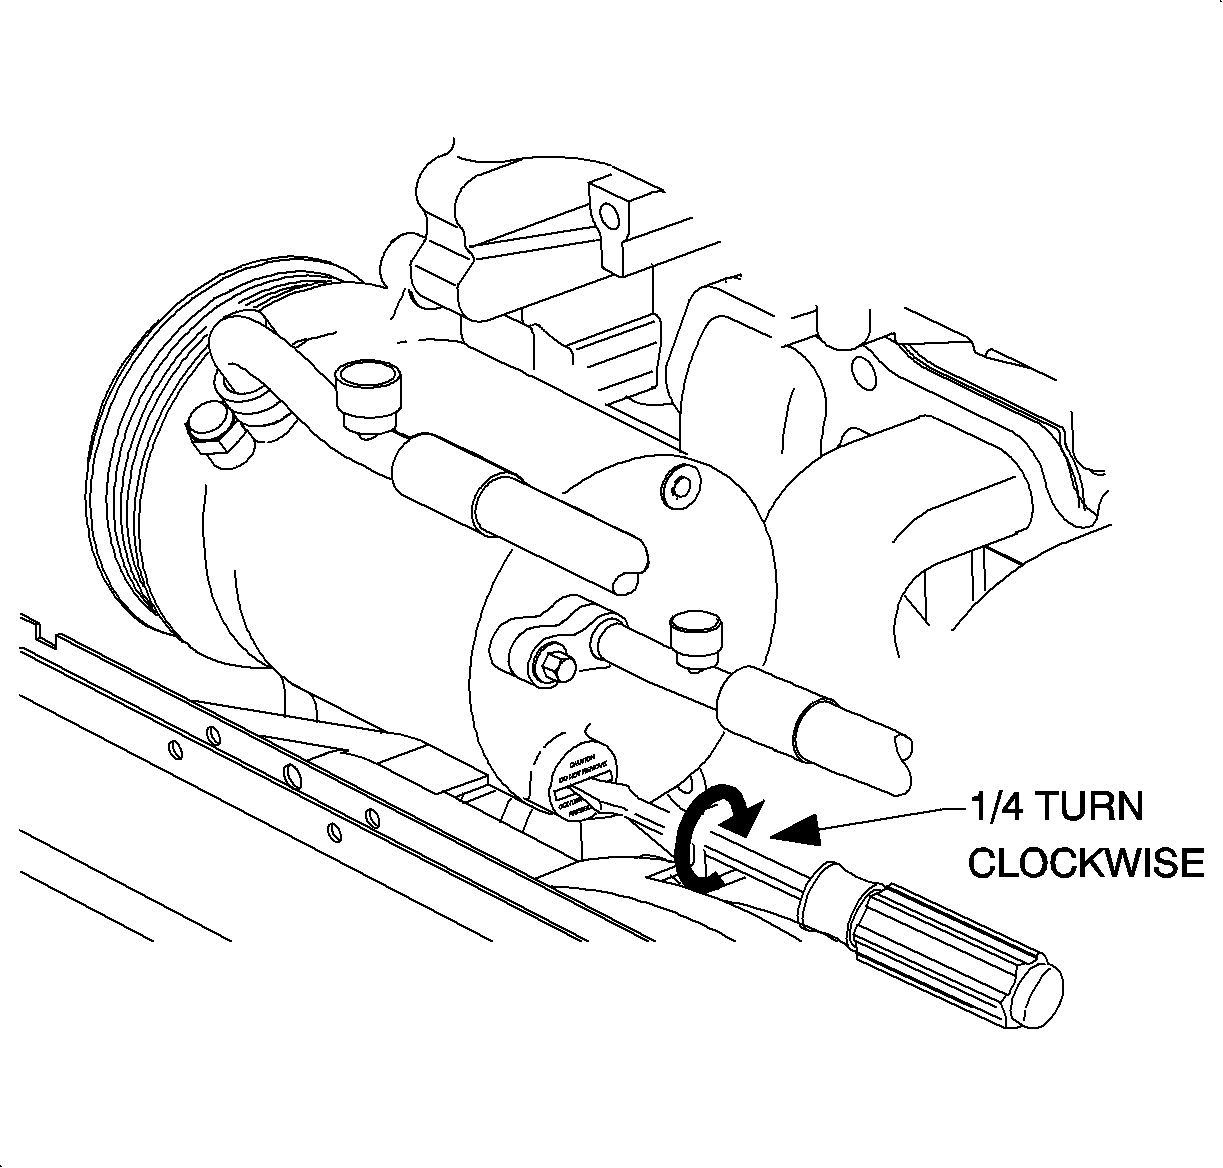
Do not turn the set screw more than 1/4 turn clockwise. Adjusting the set point
changes the pressure at which the A/C compressor goes to minimum displacement. Increasing
the adjustment beyond 1/4 turn clockwise will not make the system colder and could
reduce A/C system performance at higher ambient temperatures.
- Using a large-blade screwdriver, turn the set screw 1/4 turn clockwise
as viewed from the rear of the compressor.
- Using a clean shop towel, wipe the surface area where the silver label
is located. Make certain there is no debris or oil present.
Notice
To prevent the A/C compressor set screw from being adjusted again, the orange
A/C refrigerant caution label P/N 21031284 must be installed over the old silver
label.
- Install a new orange A/C refrigerant caution label P/N 21031284 over
the old silver label that was cut in step 3a.
- Start the engine and inspect that the A/C system is functioning normally.
Parts Requirements:
P/N 21031284 Label -- A/C Refrig Caution.
Claim Information
To receive credit for this repair during the warranty period, submit a claim
through the
Saturn Dealer System as follows:
Case Type
| Description
| Labor Operation Code
| Time
|
VW
| Adjust A/C Compressor Set-Point
| T9769
| 0.3 hrs
|
GM bulletins are intended for use by professional technicians,
NOT a "do-it-yourselfer". They are written to inform these
technicians of conditions that may occur on some vehicles, or to
provide information that could assist in the proper service of a
vehicle. Properly trained technicians have the equipment,
tools, safety instructions, and know-how to do a job properly and
safely. If a condition is described, DO NOT assume that the
bulletin applies to your vehicle, or that your vehicle will have
that condition. See your GM dealer for information on whether
your vehicle may benefit from the information.
|

|
WE SUPPORT VOLUNTARY TECHNICIAN CERTIFICATION
|
© Copyright General Motors Corporation.
All Rights Reserved.


