
Caution
To avoid any vehicle damage, serious personal injury or death when major
components are removed from the vehicle and the vehicle is supported by a
hoist, support the vehicle with jack stands at the opposite end from which
the components are being removed.
- Raise the vehicle on a hoist.
- Remove the front wheel and tire assemblies.
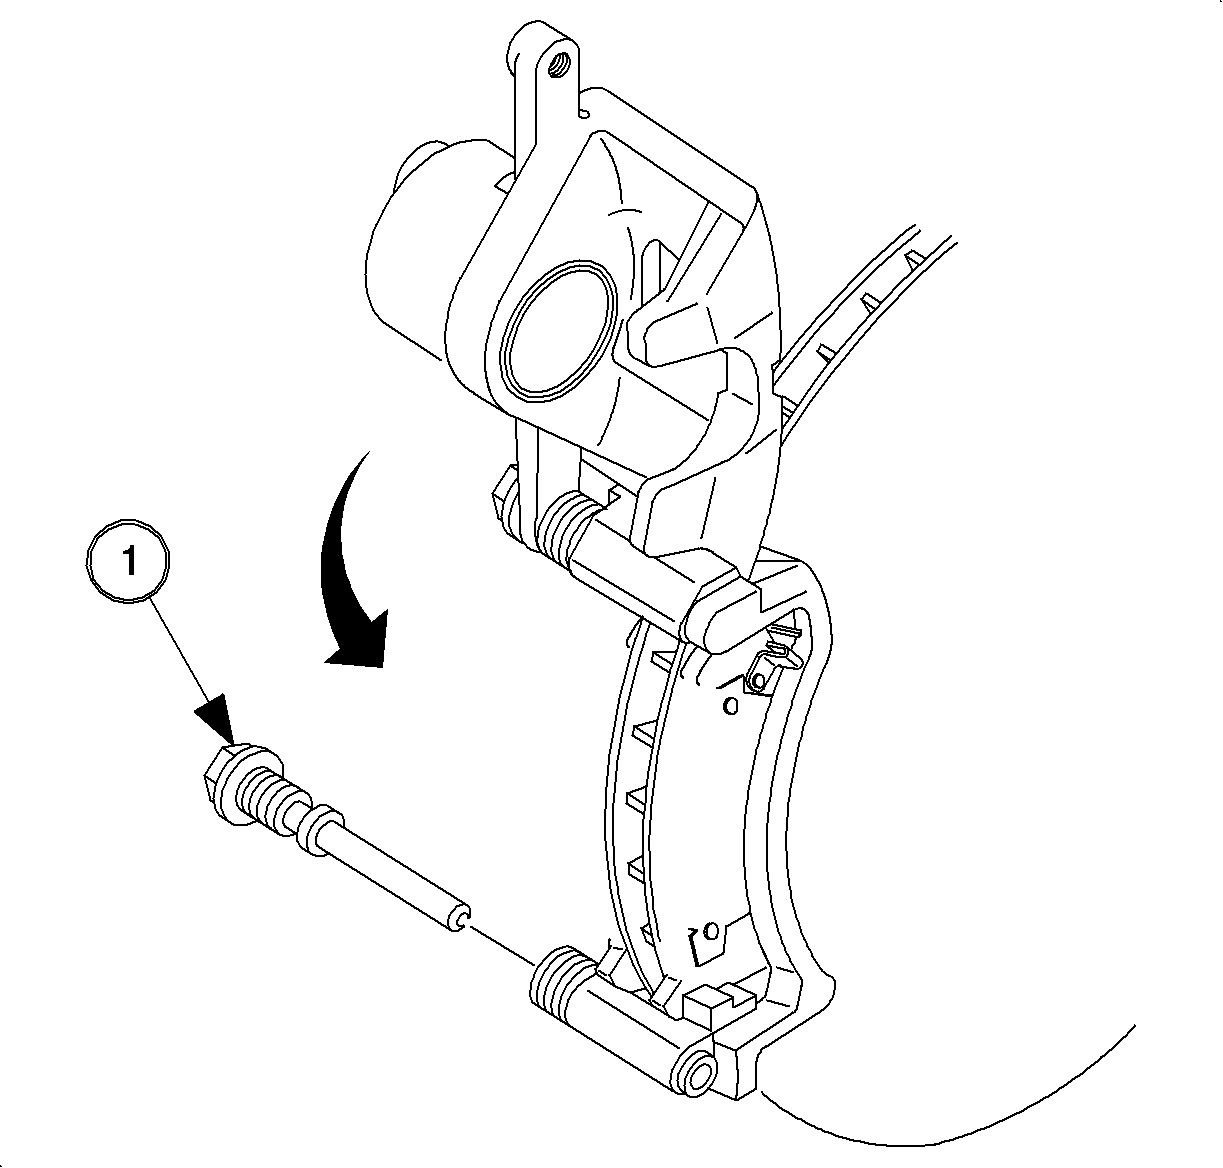
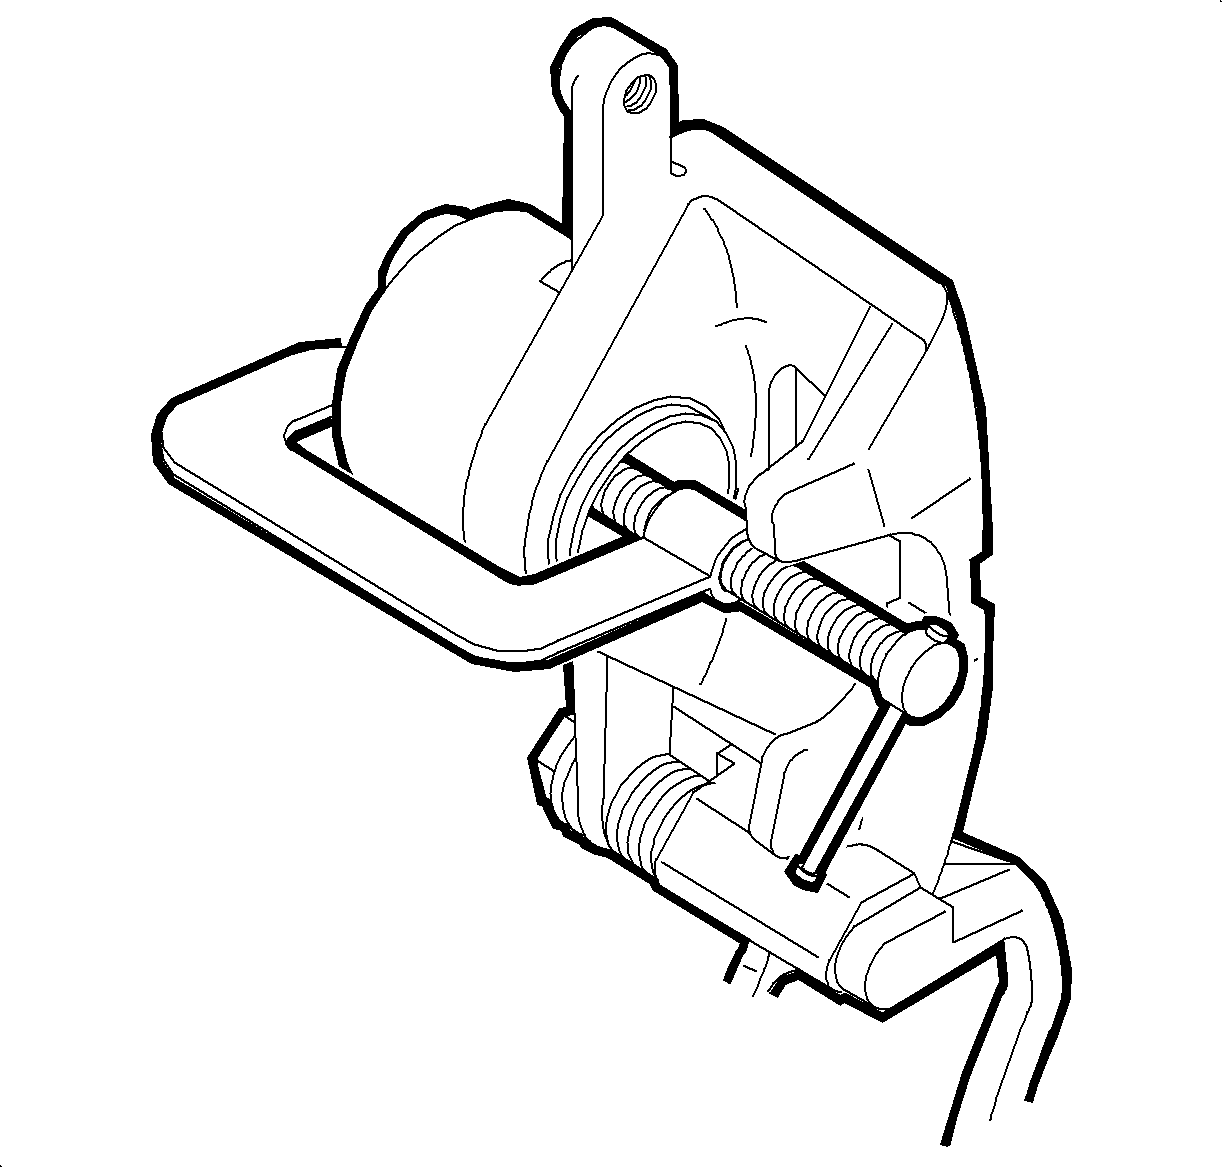
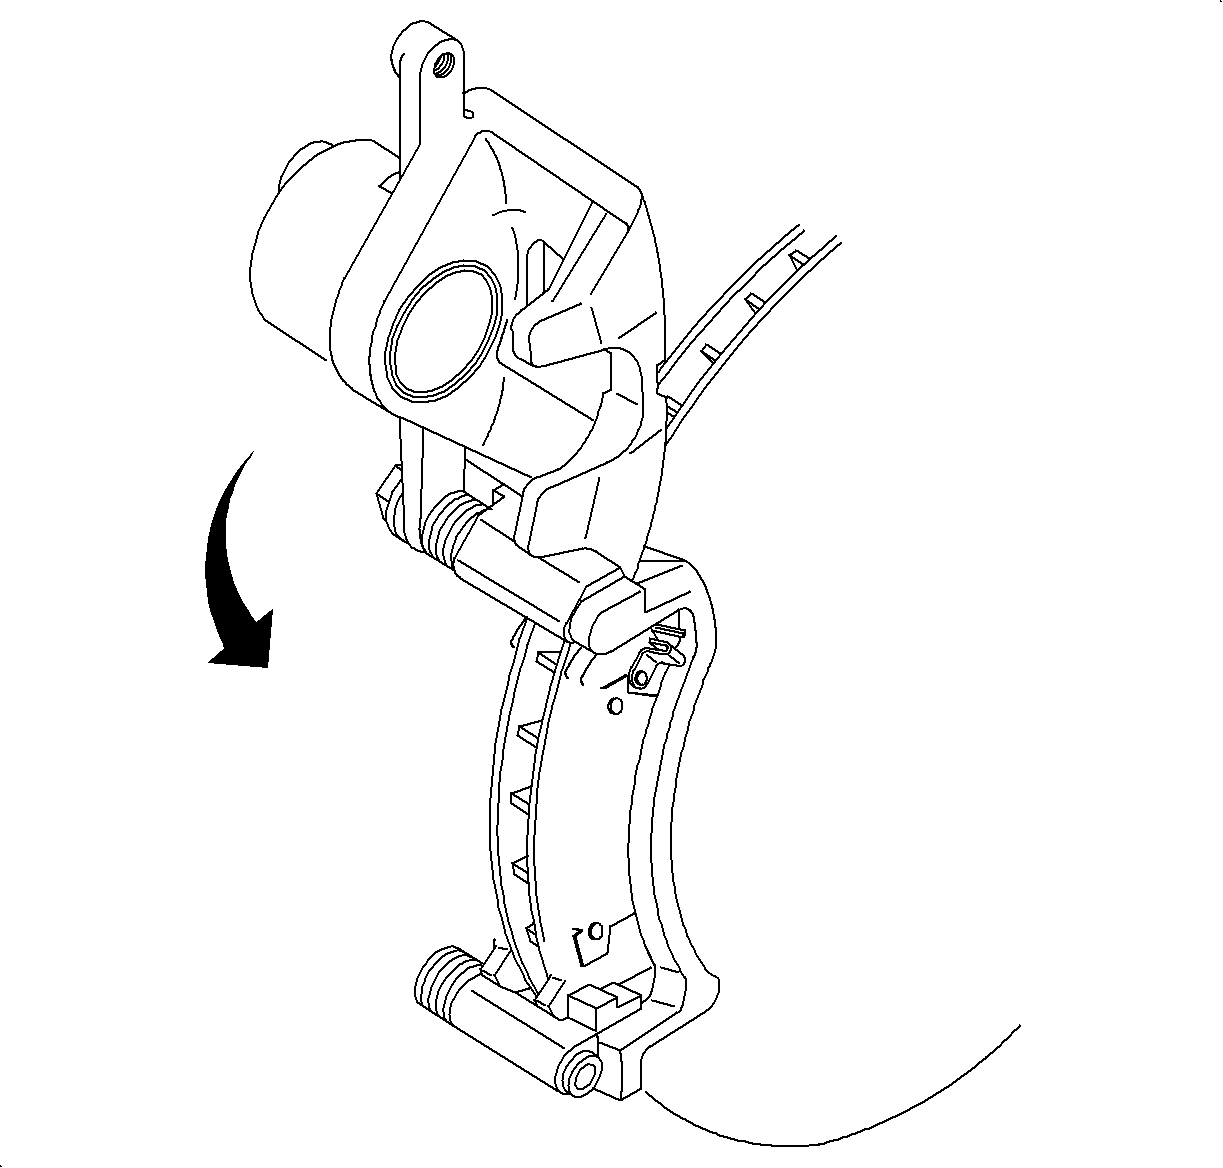
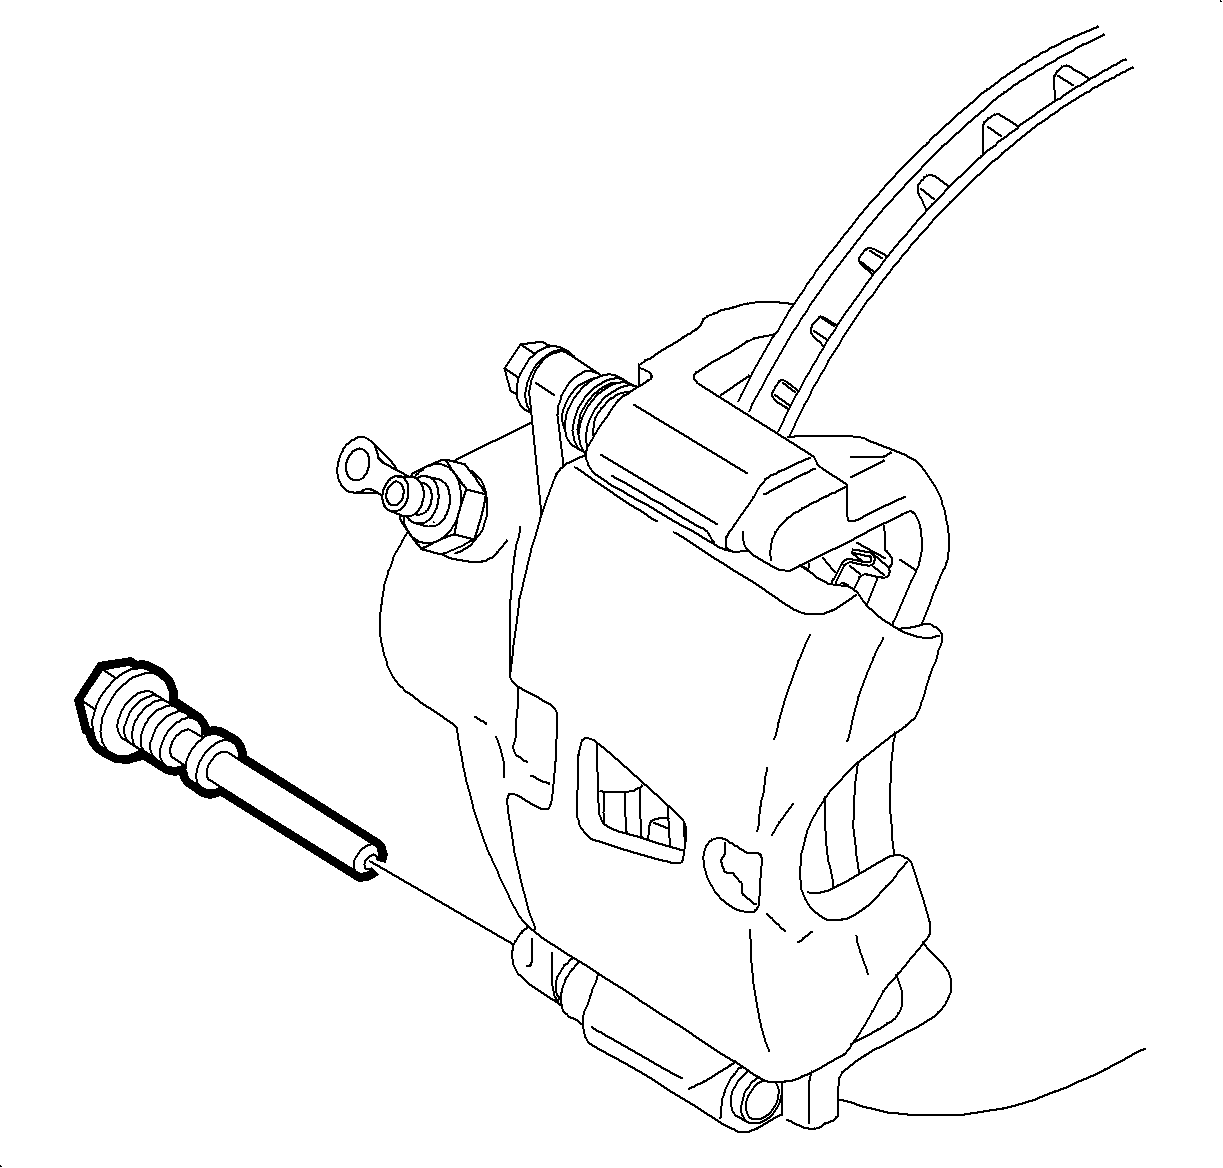
- Remove the caliper lock pin (1).
- Pivot the caliper body up, around the upper guide pin.
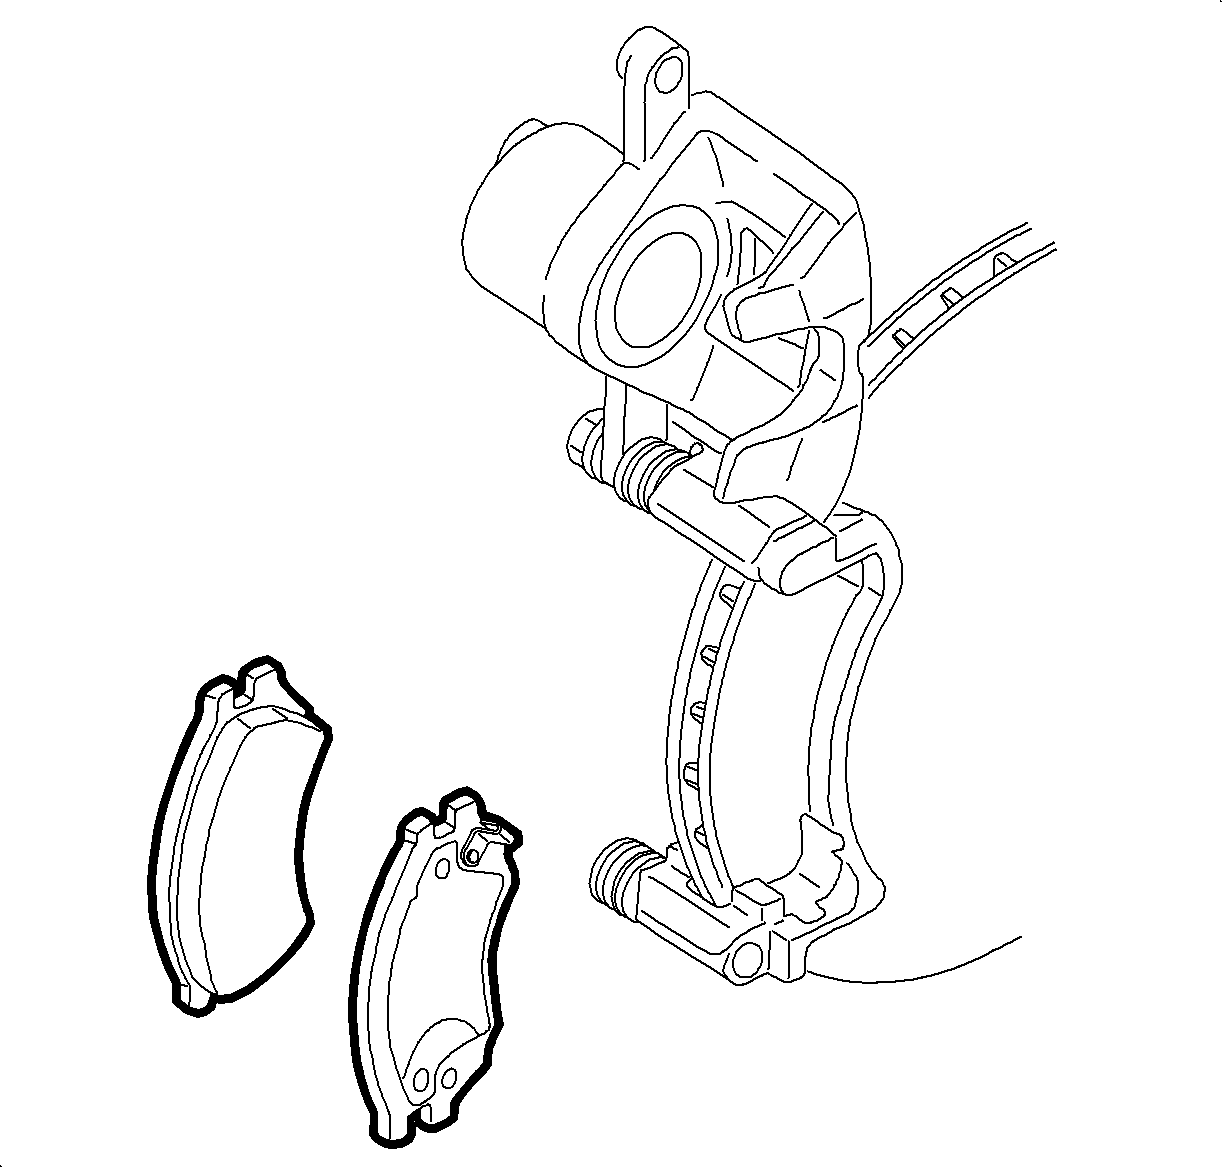
- Remove the inboard and outboard brake pads from the caliper support.
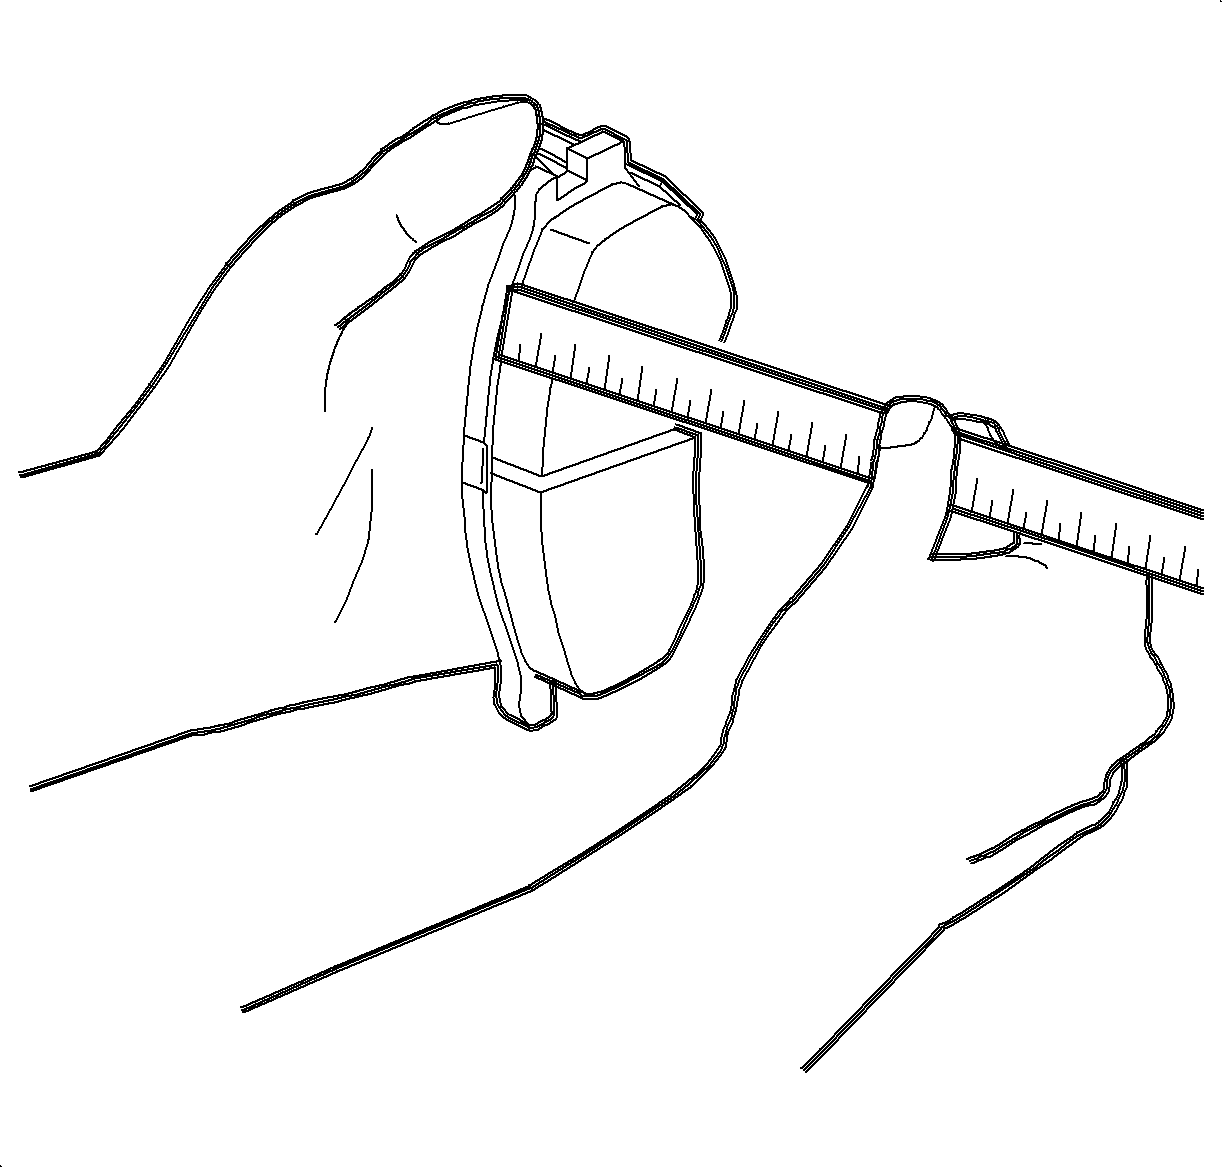
Important
Measurement is of lining material only, and does not include the backing plate.
- Measure the lining thickness with a steel rule. Refer to Lining Inspection.
Specification Discard Thickness: 2.0 mm (0.080 in)
Important
Replace the front pads as a set if any pad has a thickness at or less than the
Discard Thickness, or if any pad has severe, uneven wear.
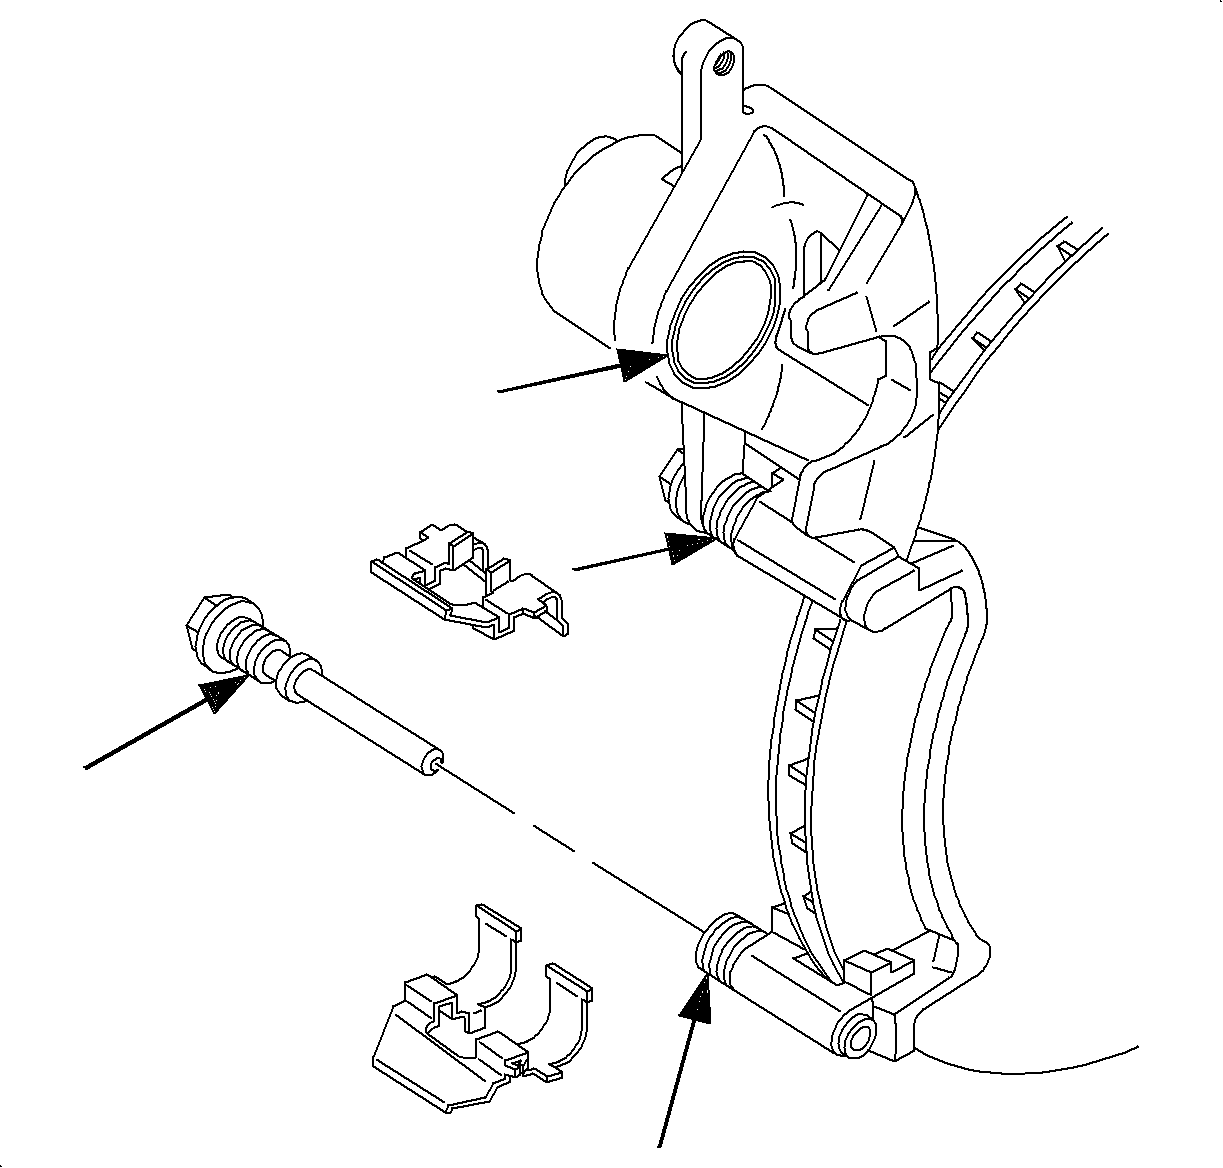
- Remove two pad clips from the caliper support.
- Inspect the caliper:
- Lock pin and guide pin boots for deterioration. If damaged, replace.
- Piston boot for deterioration. If damaged, overhaul the caliper.
- Lock pin for damage or corrosion. Replace if damaged or corroded (do not
attempt to clean away corrosion).
- Repeat steps 3-8 for the opposite side of the vehicle.
Important
Never replace brake pads on one side of the axle only. Left and right side brake
pads must be replaced only as axle sets.
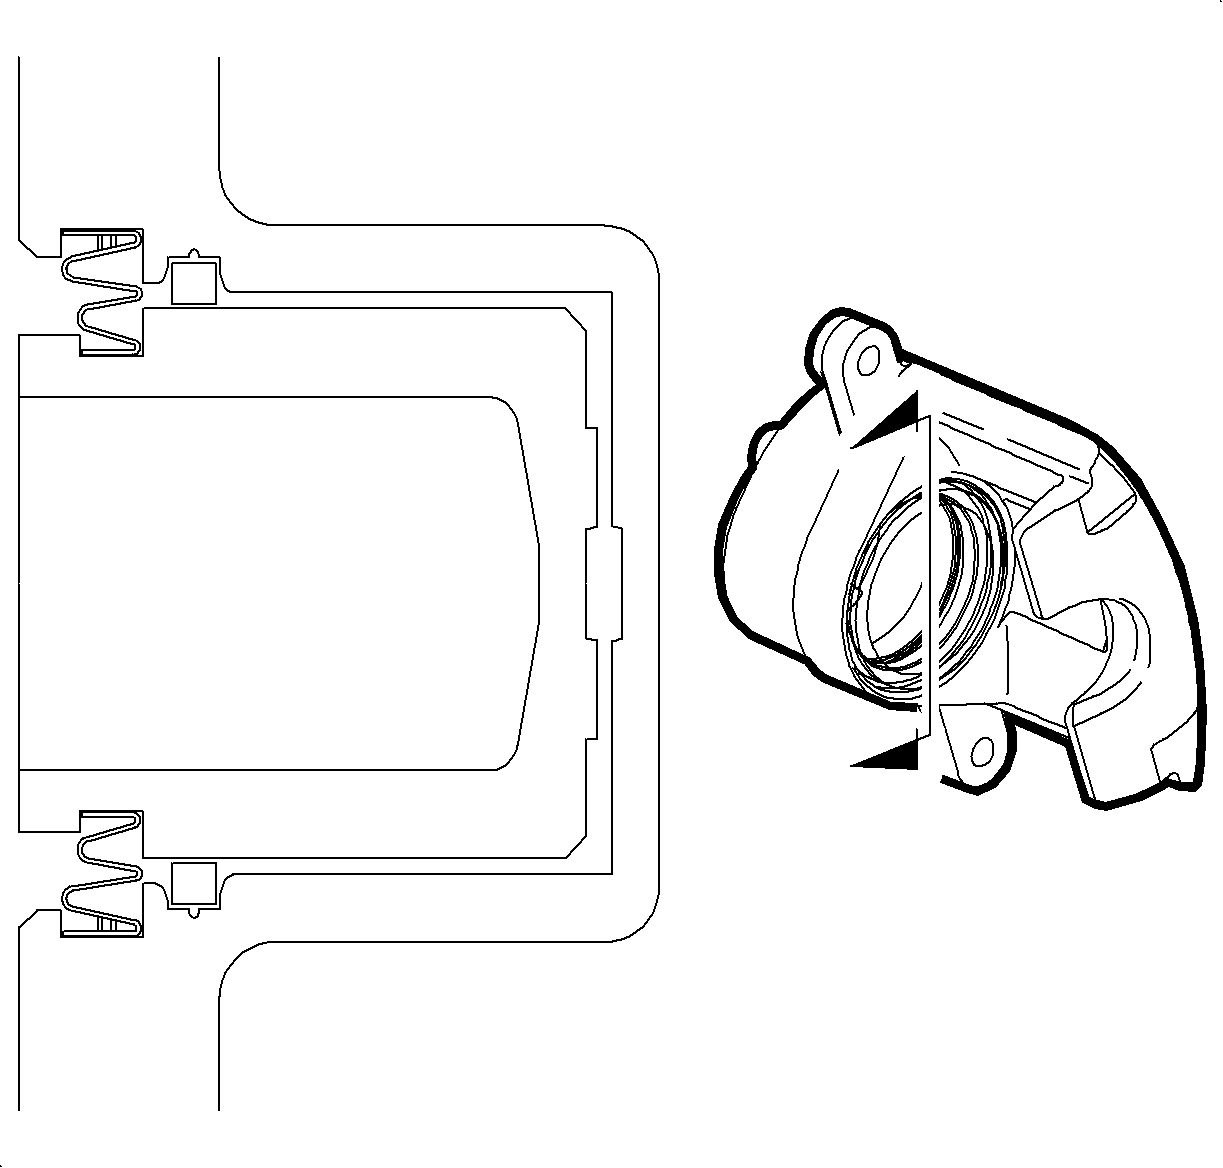
- Using a C-clamp, bottom the piston all the way into the caliper bore.
Important
Boot must lie flat, below the level of the piston face.
- Lift the inner edge of piston boot to release any trapped air.
Important
Make sure the brake pads move freely in the caliper brackets when the brakes
are assembled.
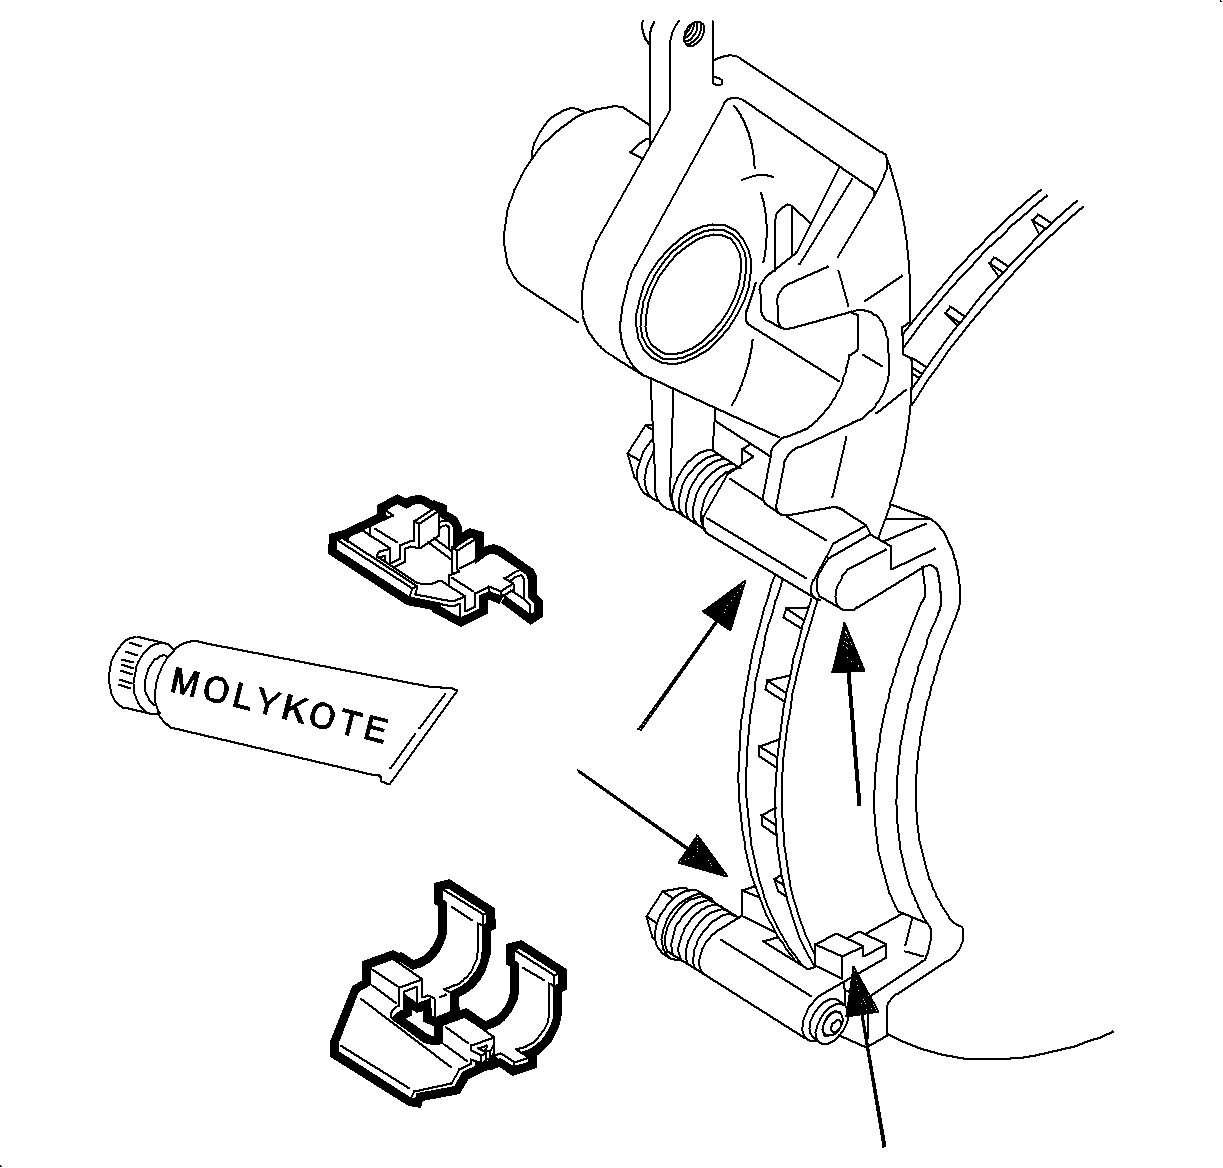
Important
Remove all rust and corrosion from the caliper brackets and the spring clips
when installing brake pads. If reusing the brake pads, remove all rust and corrosion
from the ends of the brake pads and from the notch. Be sure to install reused pads
in their original positions. Using a small amount of Molykote grease, apply lubricant
to the 4 notched areas of the caliper bracket. The lubricant should be applied to
the caliper brackets behind the spring clips only. Make sure the brake pads move
freely in the caliper brackets when the brakes are assembled.
- Install the new pad clips into the caliper support.
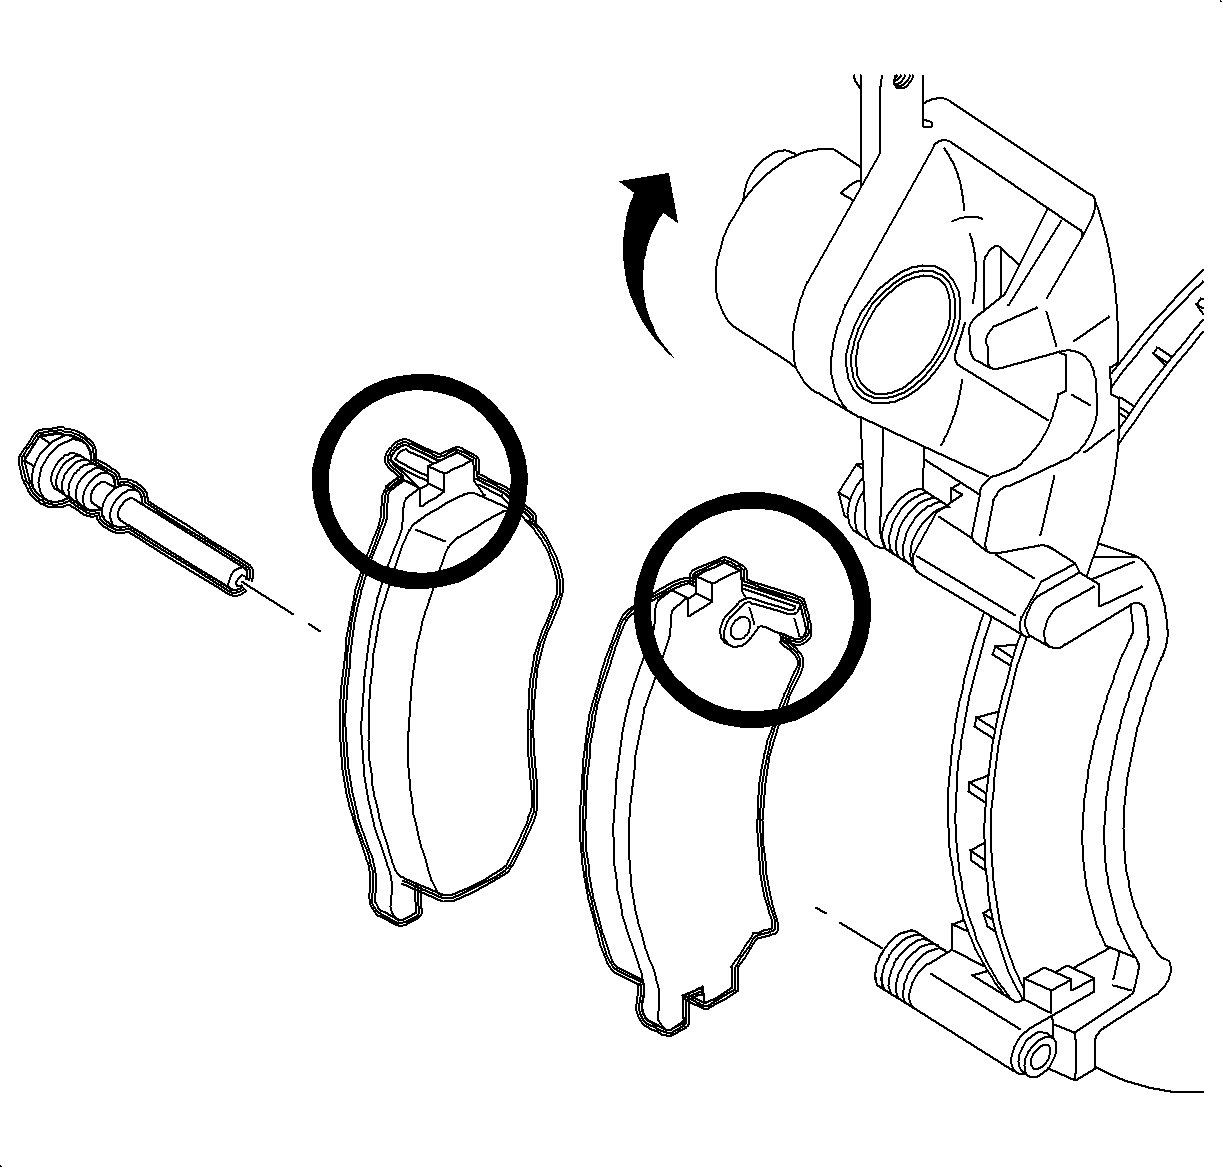
Important
Install the linings so the wear sensors are at the top of the caliper bracket.
When the linings are installed properly, forward rotation of the rotor will first
pass the sensor and then the lining.
- Install the inner and outer brake pads into the caliper support.
Notice
Be careful not to damage lock pin boot.
Important
Compress pin boots by hand as the caliper moves into position.
- Pivot the caliper body on the upper guide pin, down onto the caliper support.
Notice
Make sure guide and lock pin boots are properly aligned prior to pin installation,
or boot damage may occur.
Important
Check the position of the clips. If necessary, use a small screw driver to re-seat
or center the pad clips on the support. Make sure the brake pads move freely in
the caliper bracket. Make sure the caliper moves freely on the guide and lock pins.
- Lubricate the straight section (not threads) of the lock pin with silicone grease.
Notice
Refer to Fastener Notice in Cautions and Notices.
- Install the pin through the caliper body into the caliper support.
TightenTighten the pin through the caliper body into the caliper support to 36 N·m
(27 lb ft).
Notice
Before installing wheels, remove rust or corrosion from wheel mounting surfaces
and brake rotors/drums. Failure to do so can cause wheel nuts to loosen in service.
- Repeat steps 1 through 7 for the opposite side of
the vehicle.
- Position the wheel onto the hub.
- Install the wheel nuts and tighten in a crisscross pattern. Repeat the
tightening pattern to be sure the torque is correct.
TightenTighten the nuts to 140 N·m (103 lb ft).
- Lower the vehicle from the hoist.
Caution
Prior to operating vehicle, depress brake a few times. If this operation is
not carried out, brakes will not operate during initial brake applications and may
cause an accident resulting in personal injuries.
- Prior to operating the vehicle, depress the brake pedal several
times until the brake pads are fully seated against the rotor.