Document ID# 881099
1998 Saturn SL2/SC2/SW2
 

Engine Mount Strut Replacement

richpin06a Dogbone Motor Mount Replacement

Removal Procedure

    Object Number: 860035  Size: SH
    Click here for detailed picture of above image.

    Caution

    Ensure that the vehicle is properly supported and squarely positioned. To help avoid personal injury when a vehicle is on a hoist, provide additional support for the vehicle on the opposite end from which the components are being removed.

  1. Raise the vehicle on a hoist.
  2. Remove the right front road wheel.
  3. Important

    Remove the rear section of the splash shield first, then the front.

  4. Remove the right side splash shield.
    1. Remove the 2 push pins.
    2. Important

      If molded-in fasteners are damaged or broken, drill out with a 5/16 in. bit and replace with a push pin.

    3. Remove the lower shield to frame molded-in fastener at the frame by gently prying at 3 fastener locations.
  5. Loosen, but do not remove, the engine strut frame bracket fasteners.

  6. Object Number: 859924  Size: SH
    Click here for detailed picture of above image.
  7. Remove the engine strut-to-engine bracket bolt.
  8. Remove the engine strut-to-frame bracket bolt.
  9. Place a screw-type jack under the engine oil pan. Use a block of wood between the oil pan and jack.
  10. Raise the powertrain using a screw-type jack enough to remove the strut. Once enough clearance is obtained, remove the strut.
Installation Procedure

    Object Number: 859924  Size: SH
    Click here for detailed picture of above image.
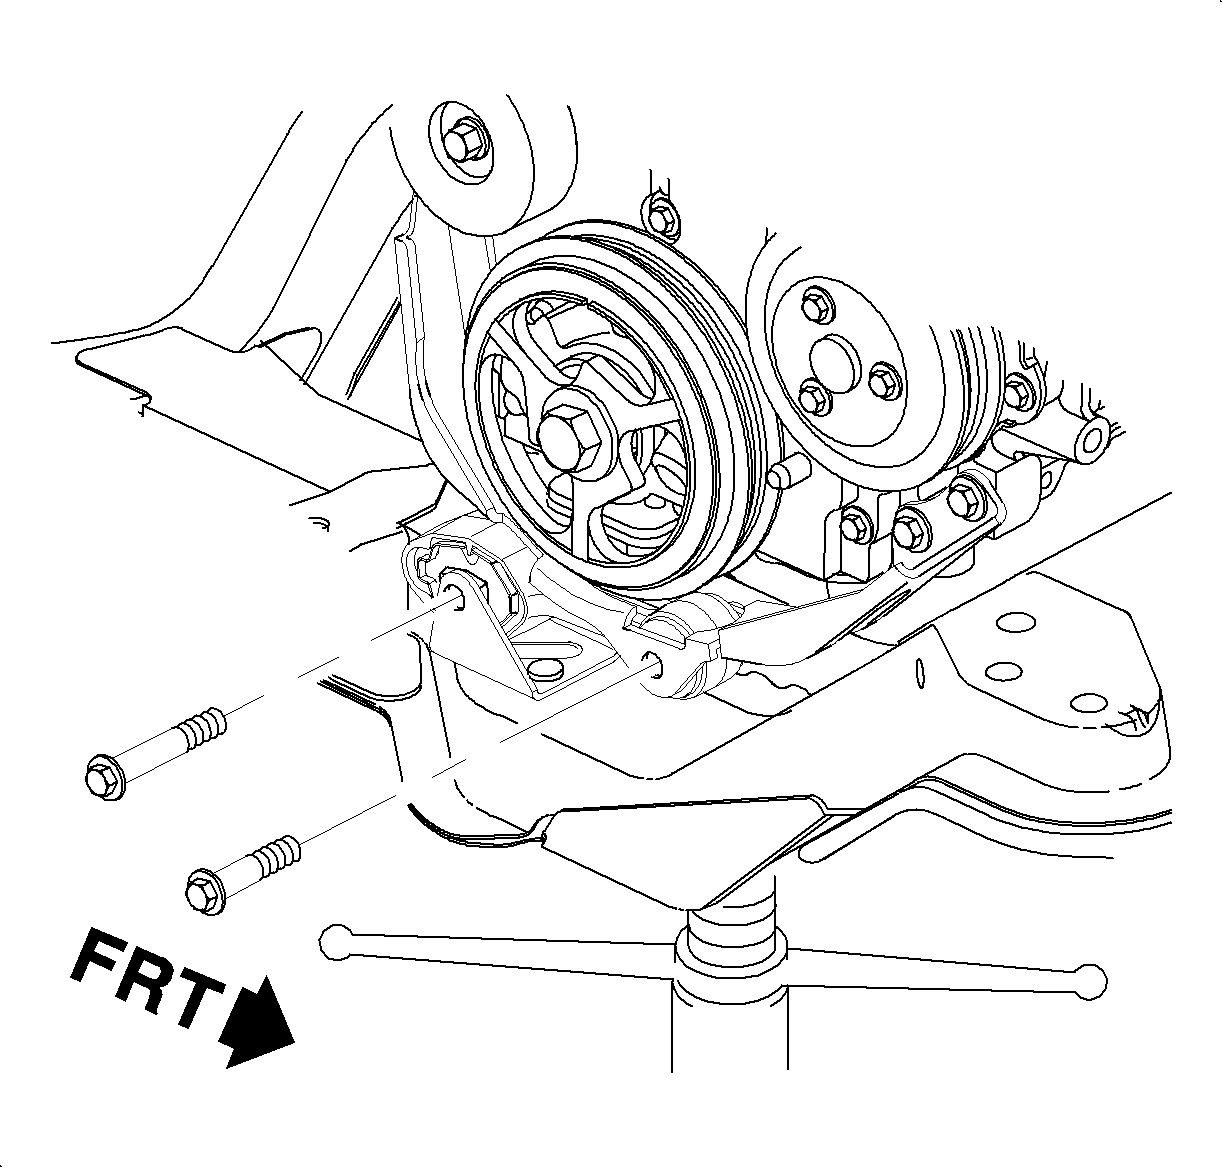
  1. Position the strut into the bracket.
  2. Lower the powertrain completely.
  3. Notice

    Refer to Fastener Notice in Cautions and Notices.

  4. Install the strut-to-cradle bracket and strut-to-engine bracket fasteners.
  5. Tighten

    Tighten the engine strut-to-frame bracket bolts to 70 N·m (52 lb ft).


    Object Number: 859933  Size: SH
    Click here for detailed picture of above image.
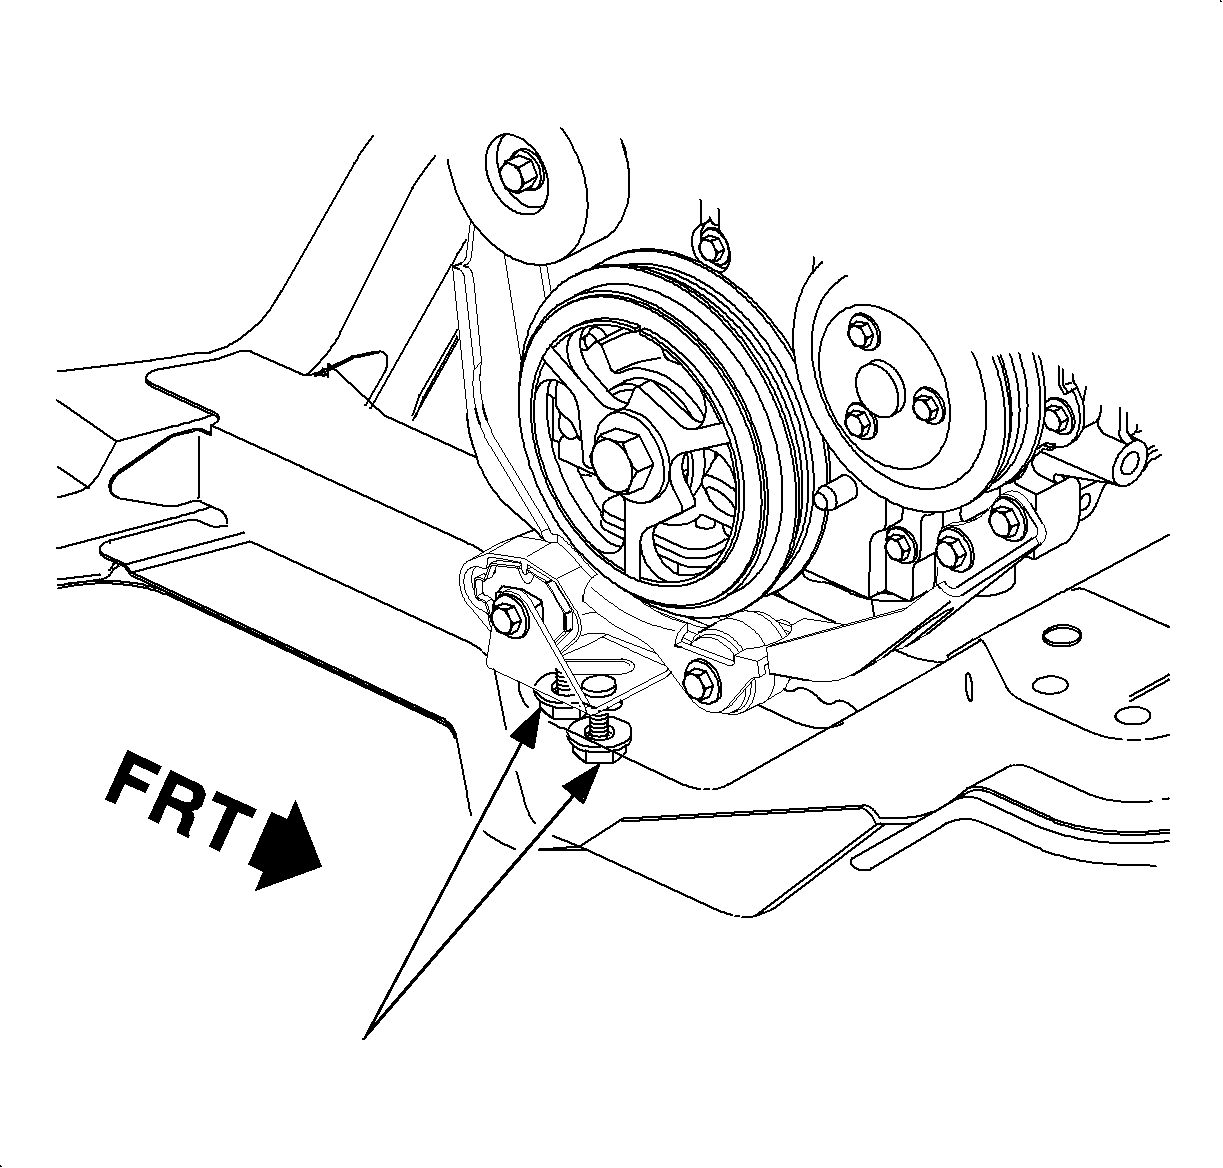
  6. Tighten the engine strut frame bracket-to-frame nuts.
  7. Tighten

    Tighten the engine strut frame-to-frame nuts to 50 N·m (37 lb ft).


    Object Number: 860035  Size: SH
    Click here for detailed picture of above image.

    Important

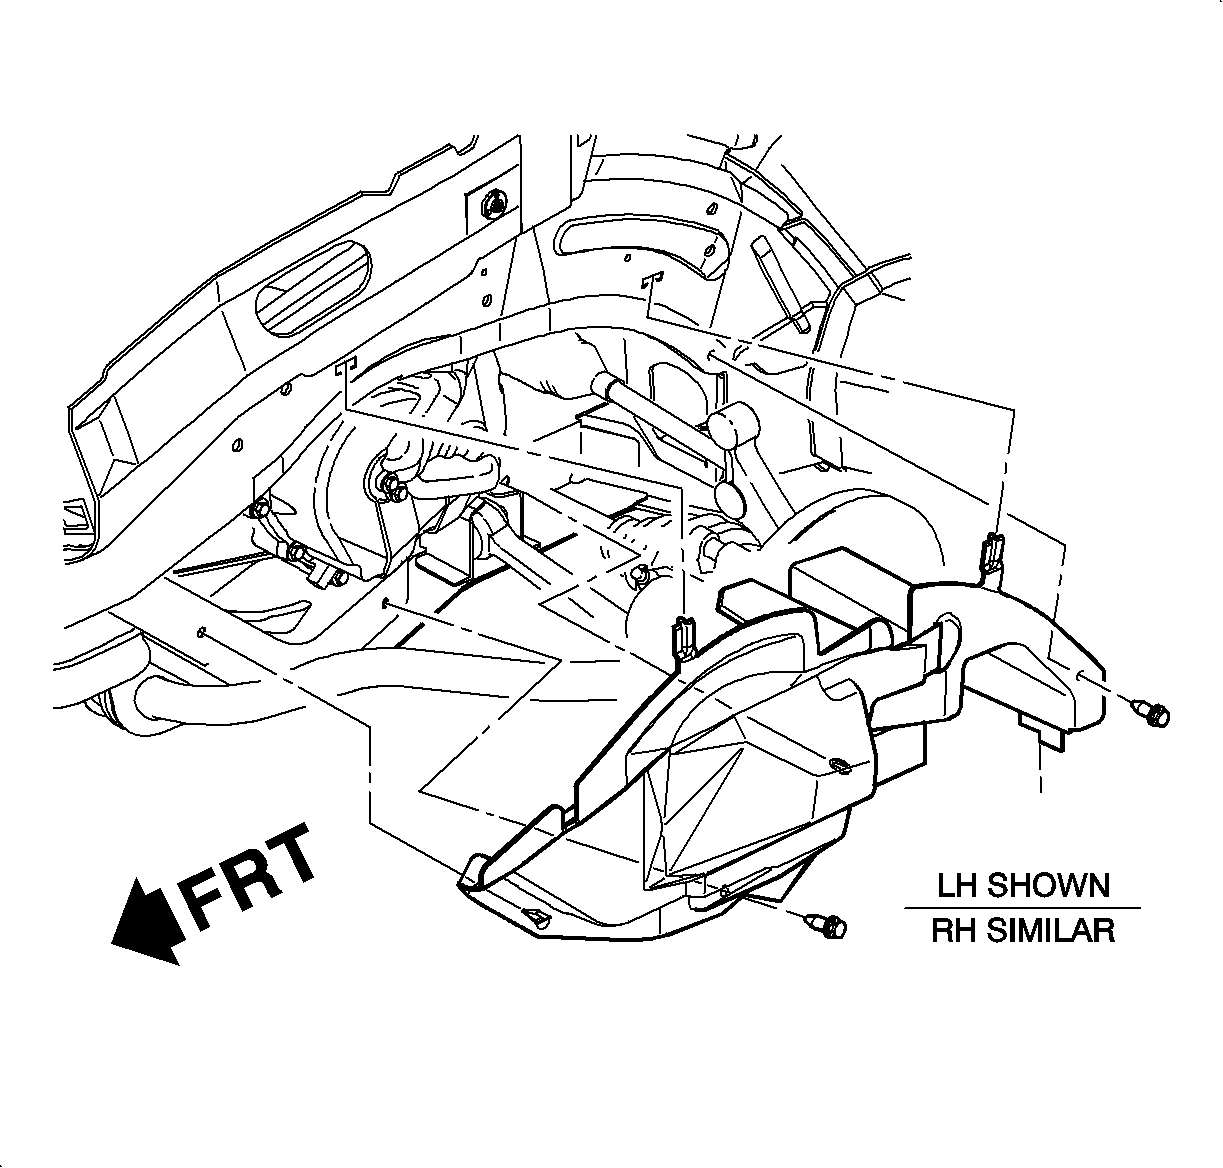
    Install the front section of the splash shield first, then the rear.

  8. Install the right side splash shield.
  9. Install the tabs in the body cut-out.
  10. Important

    Ensure that the splash shield flaps are tucked in at body locations.

  11. Align the molded-in shield fasteners with the holes in the cradle.
  12. Push straight in to install.
  13. Install the push pins.
  14. Notice

    Before installing wheels, remove rust or corrosion from wheel mounting surfaces and brake rotors/drums. Failure to do so can cause wheel nuts to loosen in service.

  15. Position the right front wheel onto the hub.
  16. Install the wheel nuts and tighten in a crisscross pattern.
  17. Repeat the tightening pattern to ensure torque is correct. Tighten

    Tighten the wheel nuts to 140 N·m (103 lb ft).

  18. Lower the vehicle from the hoist.

  Document ID# 881099
1998 Saturn SL2/SC2/SW2