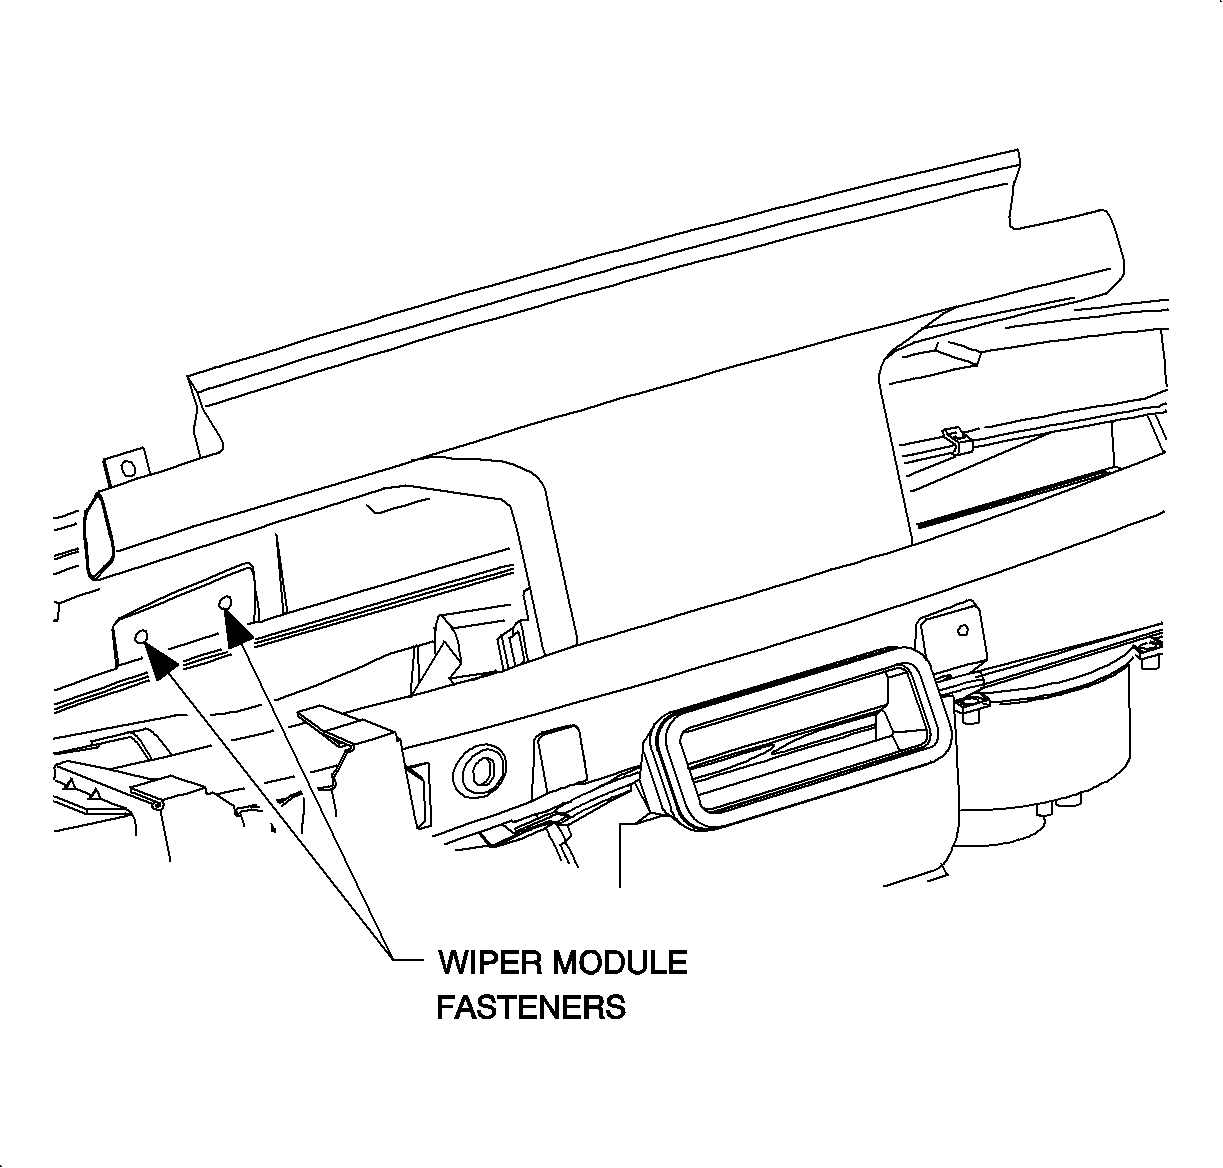
Loosen the A/C defroster duct and move it to the right to expose the wiper module
fasteners.
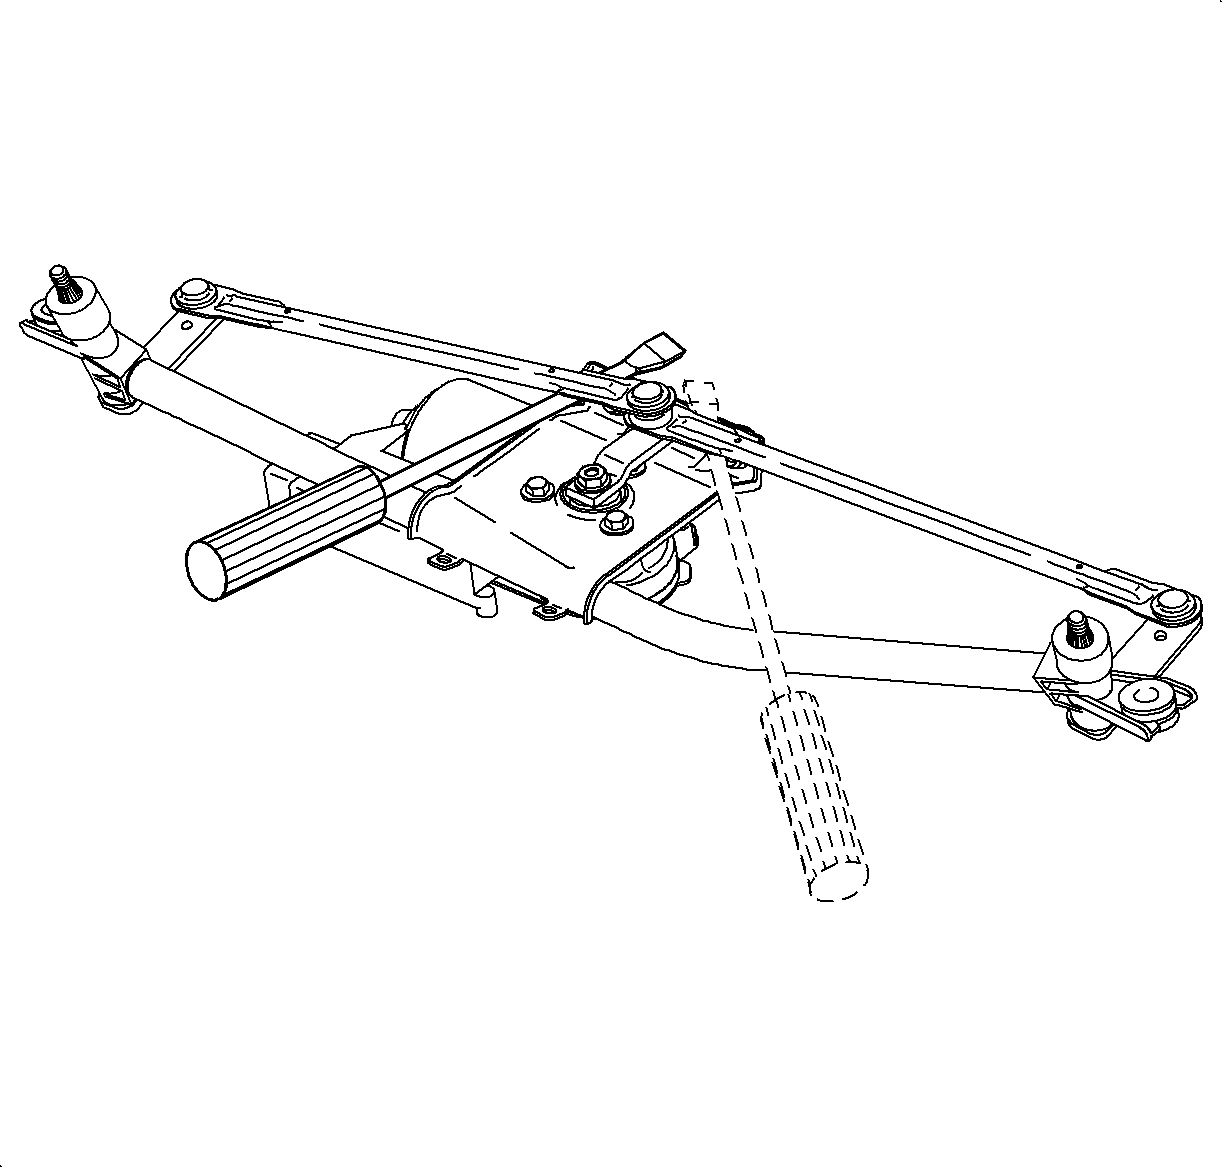
Position the wiper motor crank arm at the 12 o'clock position to ease
the removal of the wiper module.
Notice
Use care when removing wiper module from cowl to avoid pivots contacting windshield
and to keep from scratching windshield.
Remove the wiper module fasteners.
Partially remove the wiper module.
Disconnect the wiring from the motor and the module frame.
Remove the wiper module.
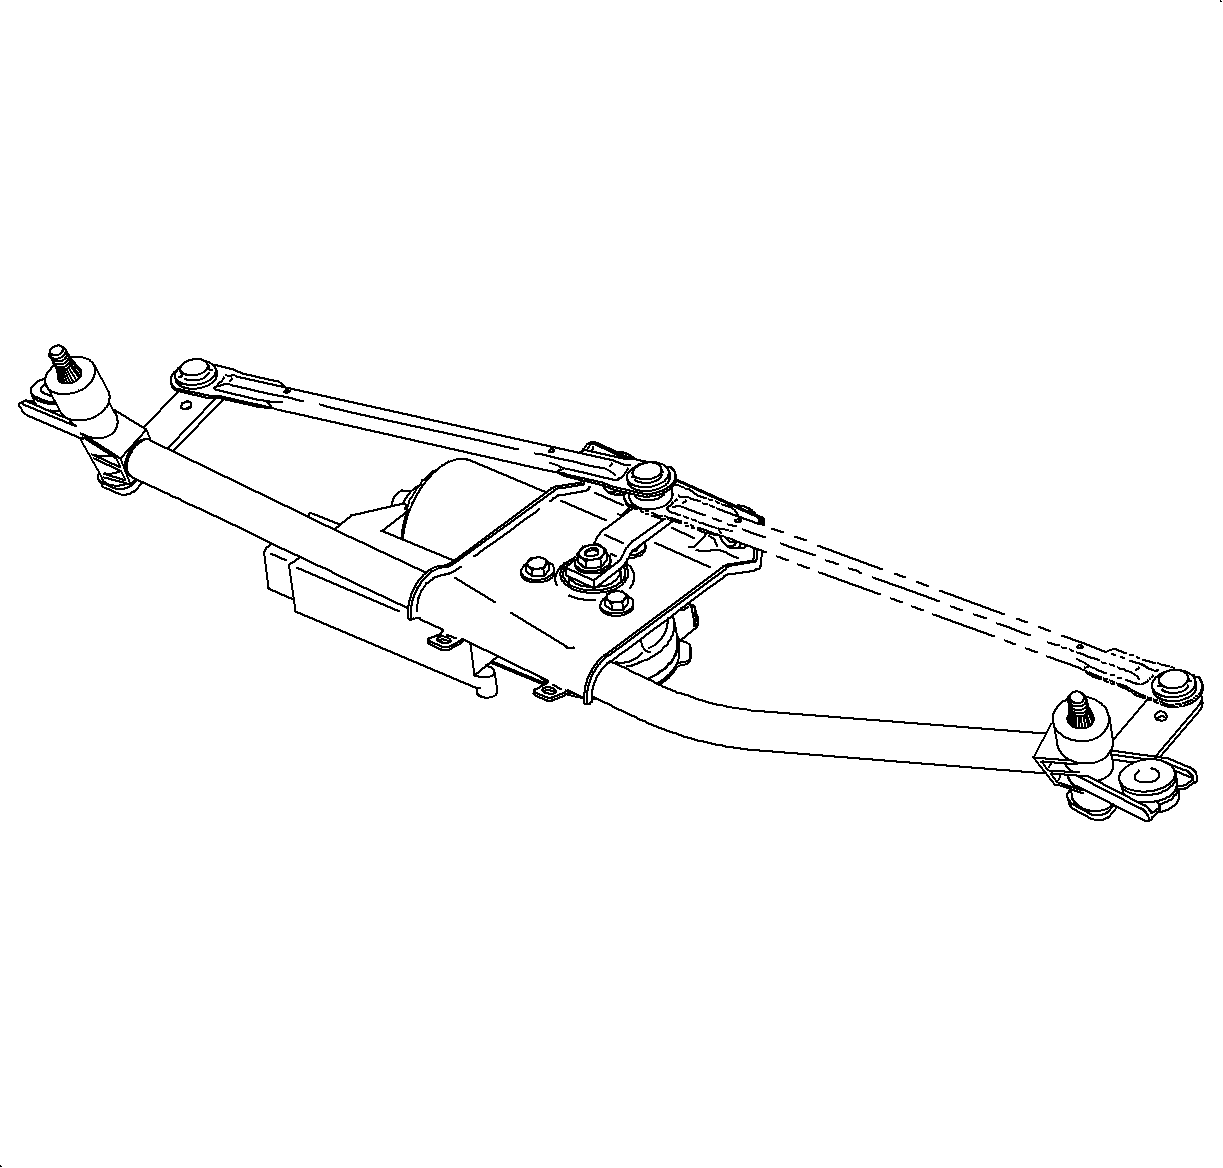
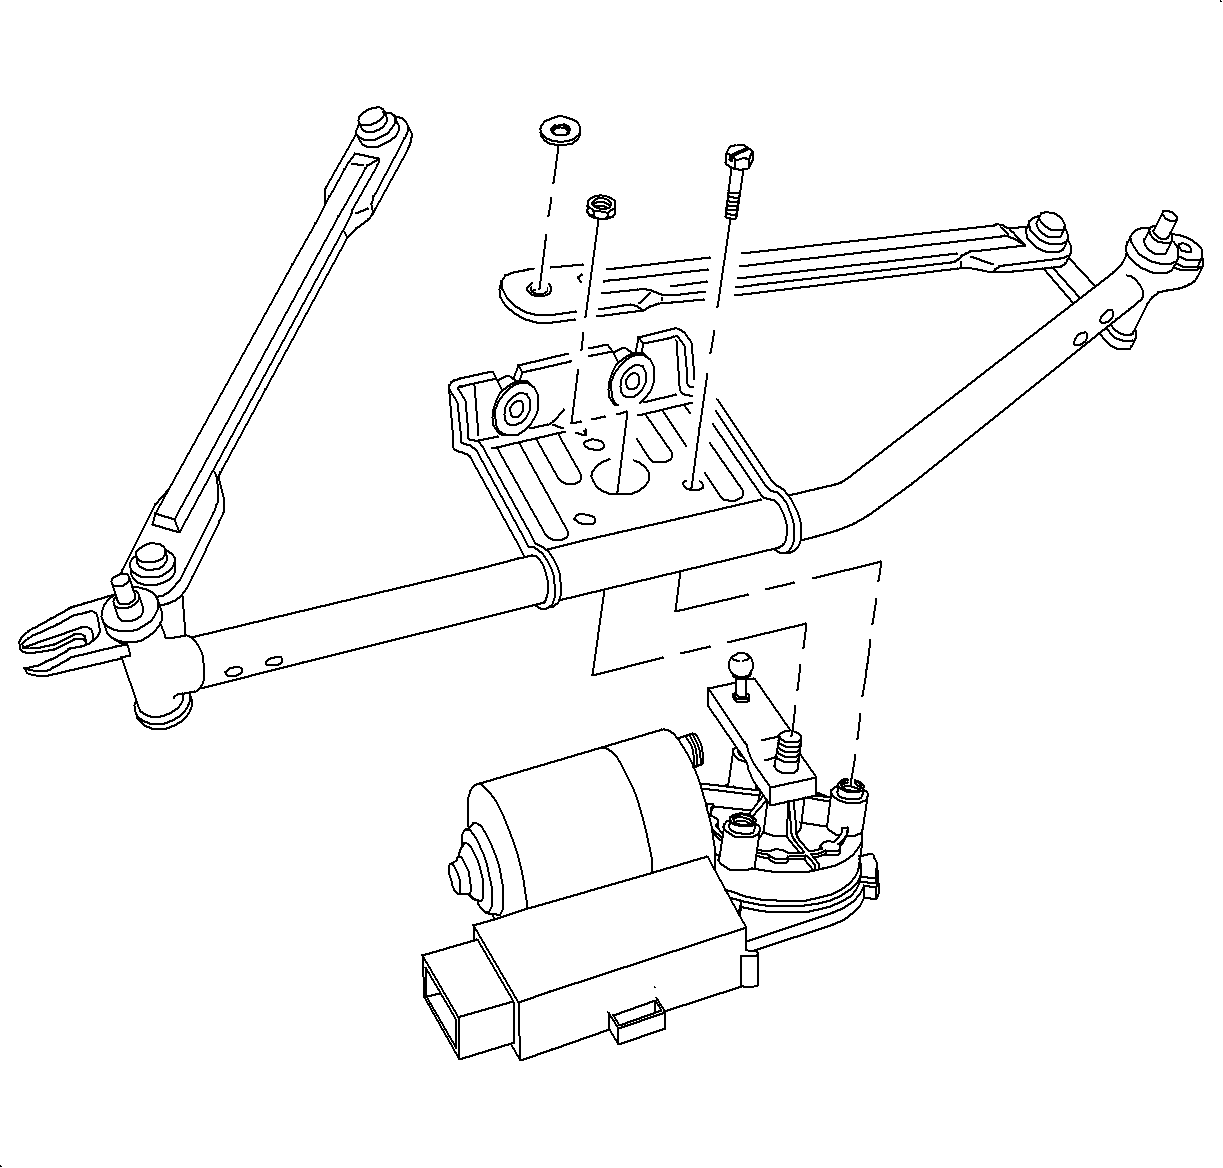
Place the wiper module in a vise or on a secured surface. Pry between the frame
assembly and the wiper links to free the wiper links from the crank arm.
Remove the wiper motor fasteners and remove the wiper motor from the wiper module.
Tighten the wiper motor-to-wiper module fasteners to 11 N·m (8 lb ft).
Important
Be certain the new wiper motor crank arm is at the 12 o'clock position
just as the old crank arm. If the wiper motor crank arm is not at the 12 o'clock
position, installation in the cowl will be difficult.
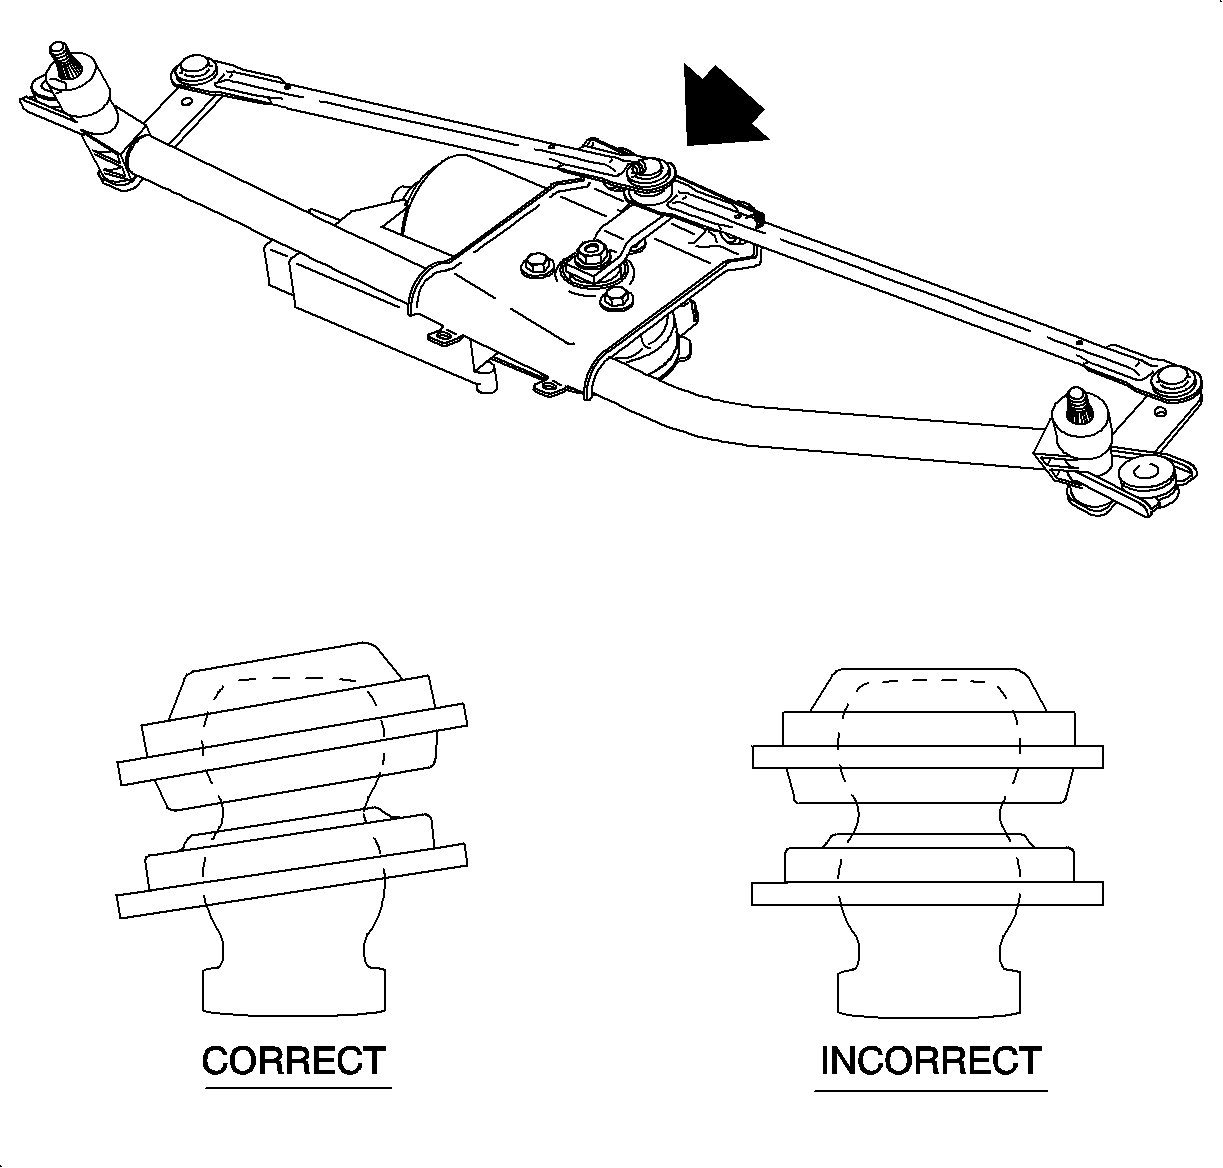
Press the transmission links onto the wiper motor crank arm firmly by hand.
Ensure that the position of the transmission links are not bottomed on the crank
arm ball.
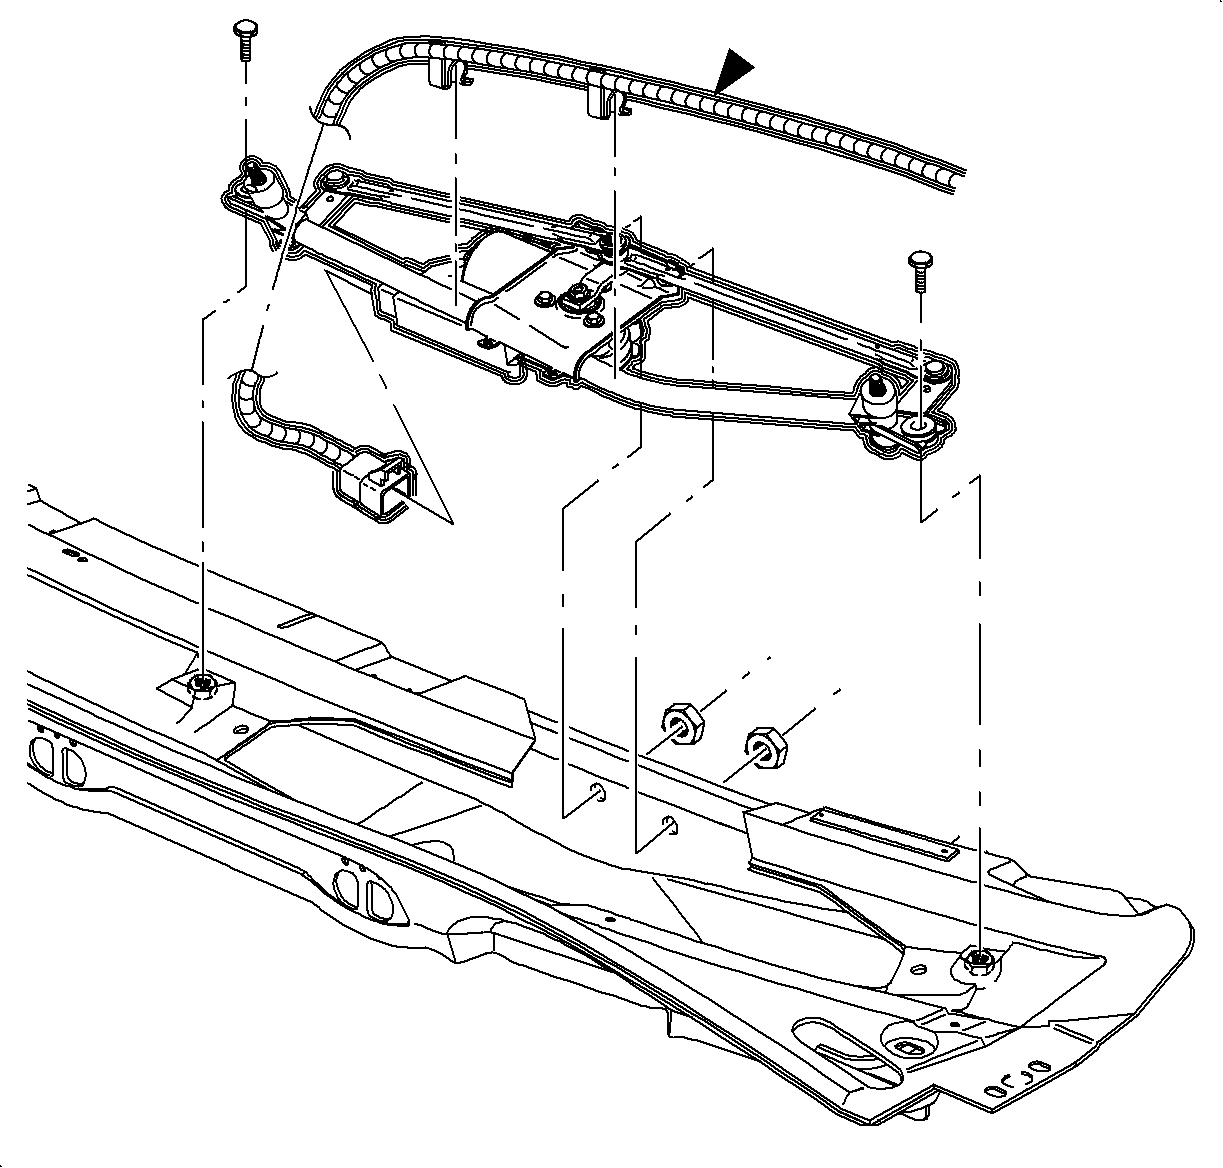
Partially install the wiper module assembly.
Connect the wiring to the wiper motor and to the module frame.
Install the wiper module assembly with the fasteners.
Tighten the outboard bolt first, the inboard second, and the
nuts last.
Tighten
Tighten the wiper module-to-cowl bolts to 18 N·m (13 lb ft).
Tighten the wiper motor-to-wiper module fasteners to 8 N·m
(71 lb in).
Turn the wiper switch ON momentarily. Once the wiper switch is turned
OFF, the wiper mechanism should be in the PARK position with the wiper motor crank
arm in the 9 o'clock position.