Powertrain Control Module (PCM) Replacement
Removal Procedure


Important
Record present radio stations and clock time. Disconnect negative battery cable.
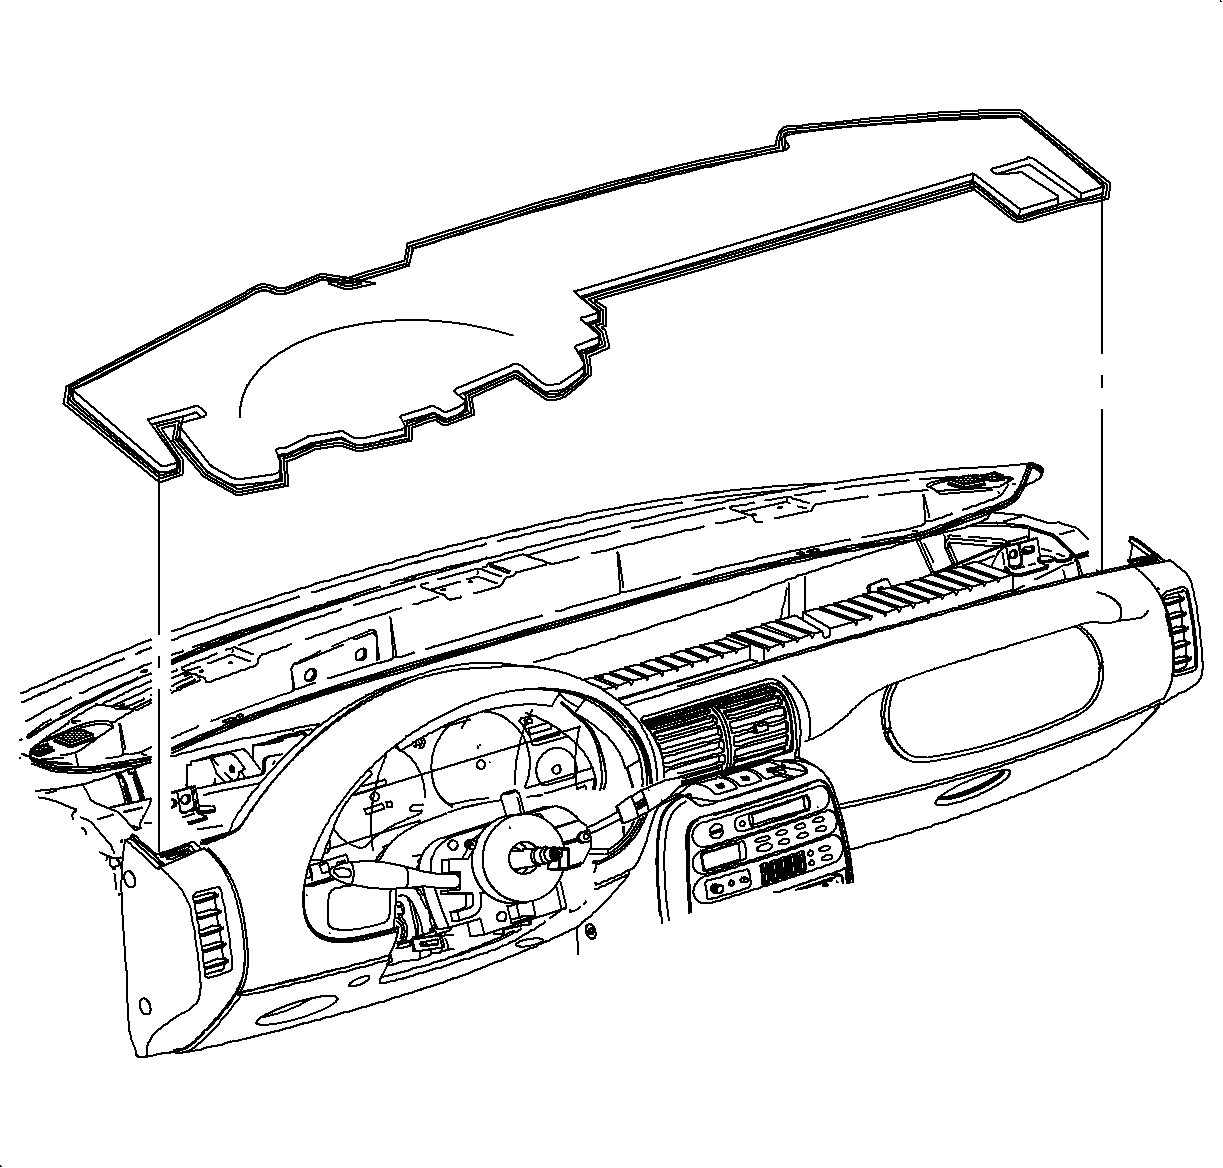
- Remove I/P upper trim panel outer cover fillers by carefully lifting up at clip
locations, starting at the rear above end cap.
- Remove I/P bolt caps by carefully prying with a small flat head screwdriver.
- Remove I/P upper trim panel screws.
- Lift I/P upper trim panel at clip locations on
rear edge to disengage clips.
- Pull I/P upper trim panel rearward out of clips at bottom of windshield.
Important
Be careful when removing or replacing I/P upper trim panel, not to damage VIN
plate.
- Remove I/P upper trim panel.
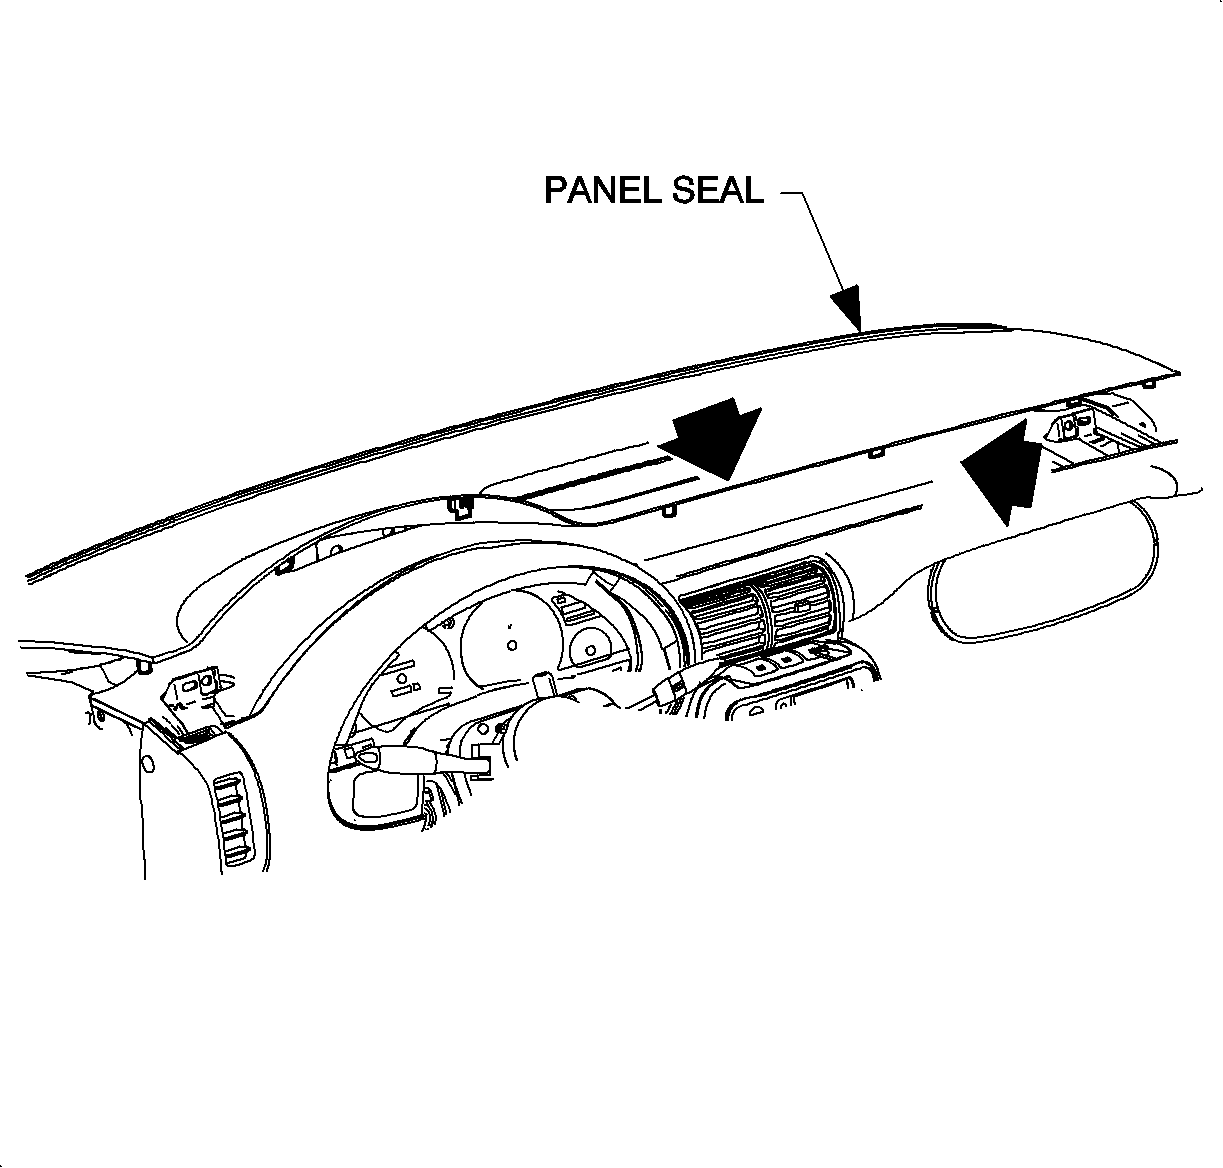
Important
Be careful when removing or replacing I/P upper trim panel, not to damage upper
trim panel seal.
- Remove I/P upper trim pad sound insulator.
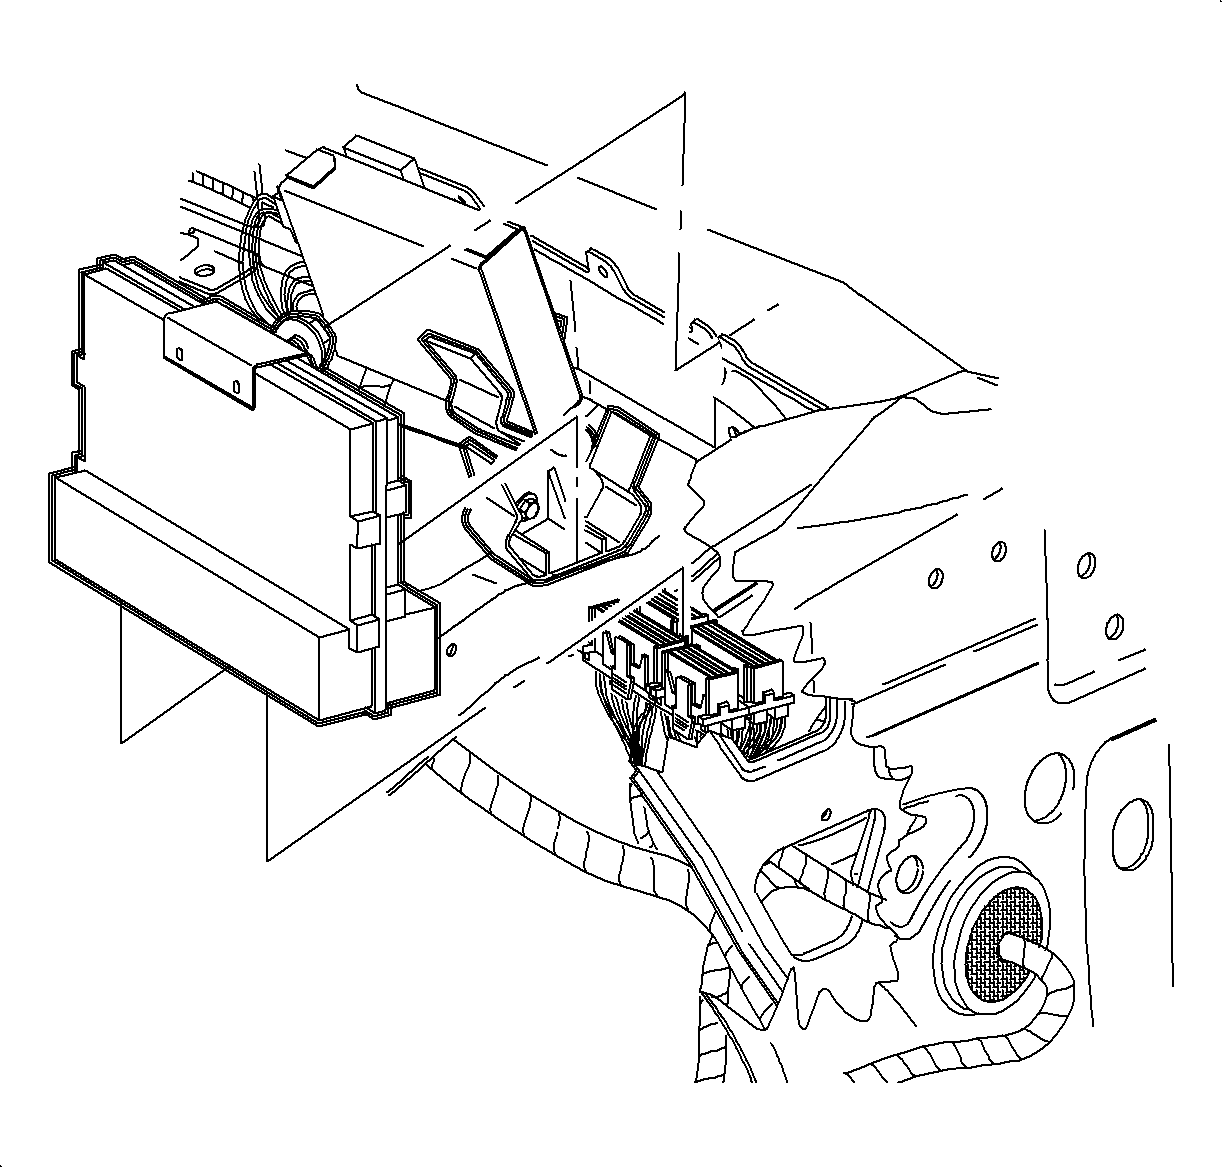
- Disconnect PCM electrical connector from under
instrument panel.
Important
Do not pull on the connectors or wires to remove the PCM. This could back out
a terminal and cause an intermittent connection.
- Loosen PCM attachment out at cross car beam and lift PCM upward (towards windshield)
to disengage PCM from ABS/PCM bracket.
Installation Procedure
- Lower PCM into ABS/PCM bracket while guiding
attachment stud into slot in cross car beam.
Notice
Torque is critical to preserve the integrity of the plastic insulator on the
PCM case. Damage to the PCM can result from over torque of the nut.
- Install and tighten nut.
TightenTighten nut to: 10 N·m (89 lb in)
- Install PCM connectors.

- Install I/P upper trim pad sound insulator.
Important
Make sure to tuck in all flaps.
Important
Be sure I/P upper trim panel seal is correctly seated on forward edge before
installing upper trim panel.
- Install I/P upper trim panel into clips at base of windshield.
Important
Be careful when removing or replacing I/P upper trim panel, not to damage VIN
plate.
- Lower I/P upper trim panel, making sure I/P upper trim panel alignment tabs
interlock with windshield garnish slots.
- Push down at clip locations to secure.
- Install I/P upper trim panel screws.
- Install I/P bolt cap.
- Reprogram PCM software and calibrations.
- Verify operation. If DTCs are present, refer to that specific code in
the Engine Controls section.