Brake Pipe Replacement
Tools Required
-
SA91108NE Universal Pipe Bender
-
SA9193BR Clamp Brake Pipe Flaring
Tool
ISO/DIN Flare

Caution
Always use double walled steel brake pipe when replacing brake pipes. The use
of any other pipe is not recommended and may cause brake system failure. Carefully
route and retain replacement brake pipes. Always use the correct fasteners and the
original location for replacement brake pipes. Failure to properly route and retain
brake pipes may cause damage to the brake pipes and cause brake system failure.
Important
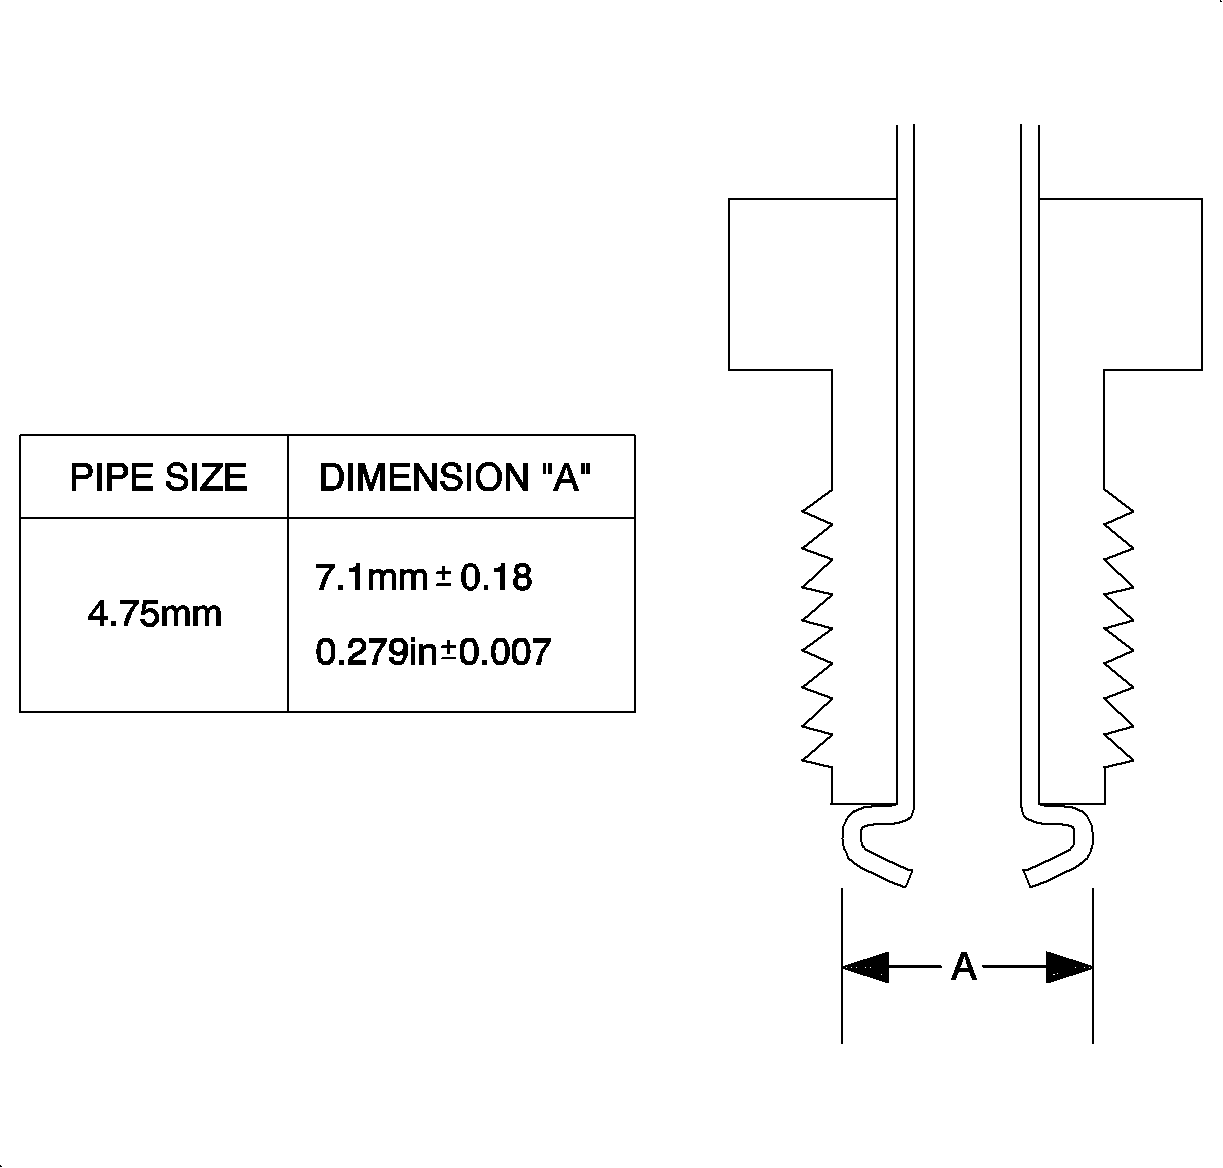
Obtain the recommended pipe and fittings of correct size. The outside diameter
of the pipe is used to specify size. Saturn uses 4.75 mm (0.187 in)
brake pipe. Refer to
Brake System Specifications
.
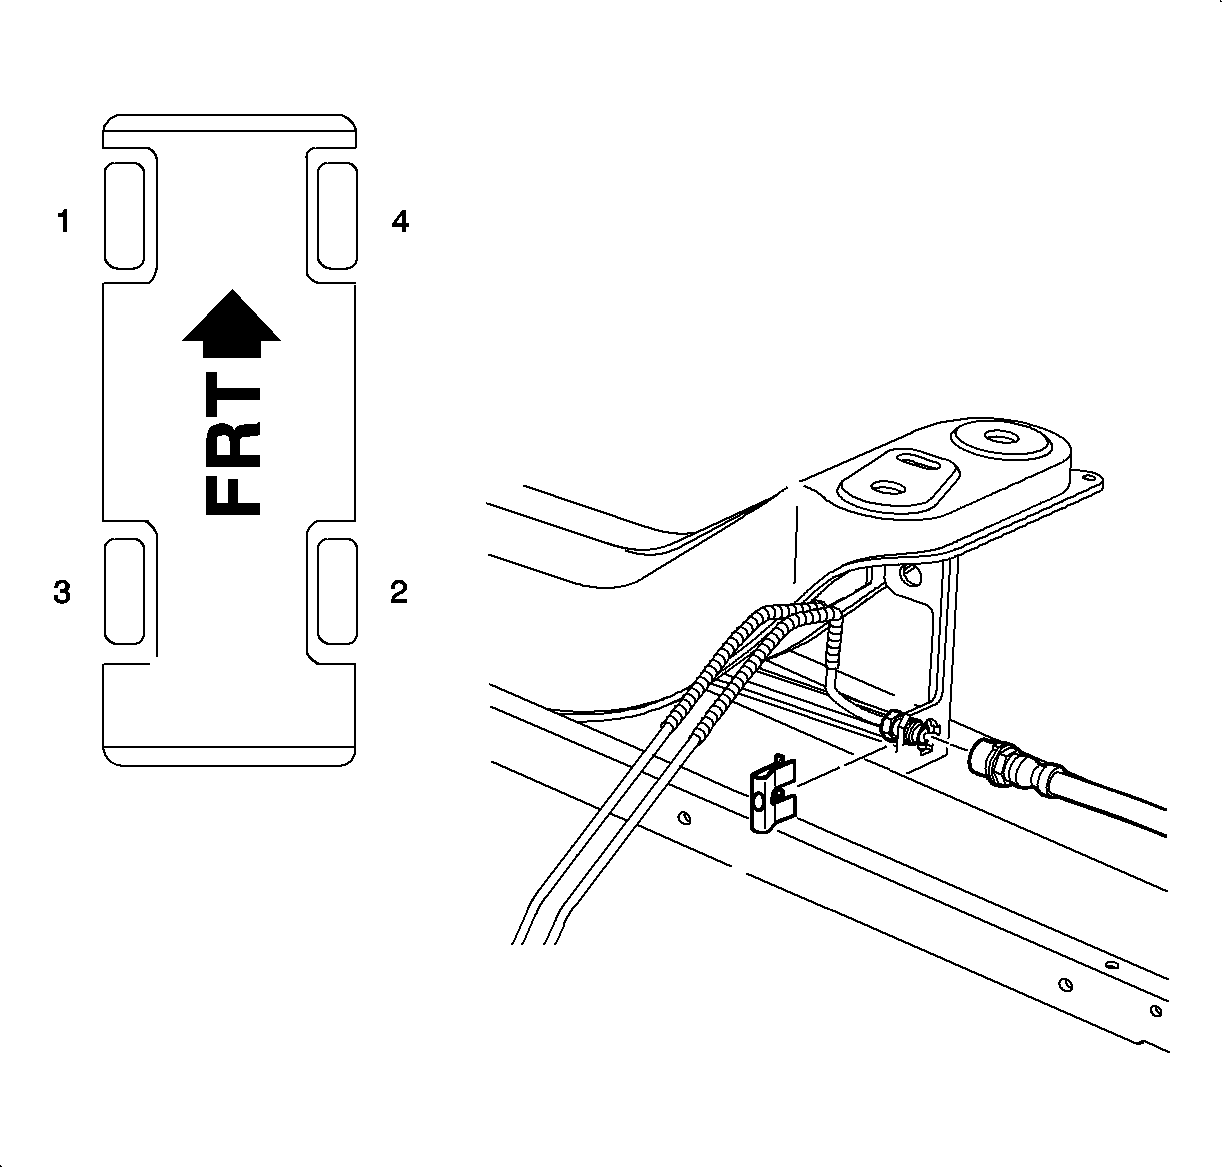
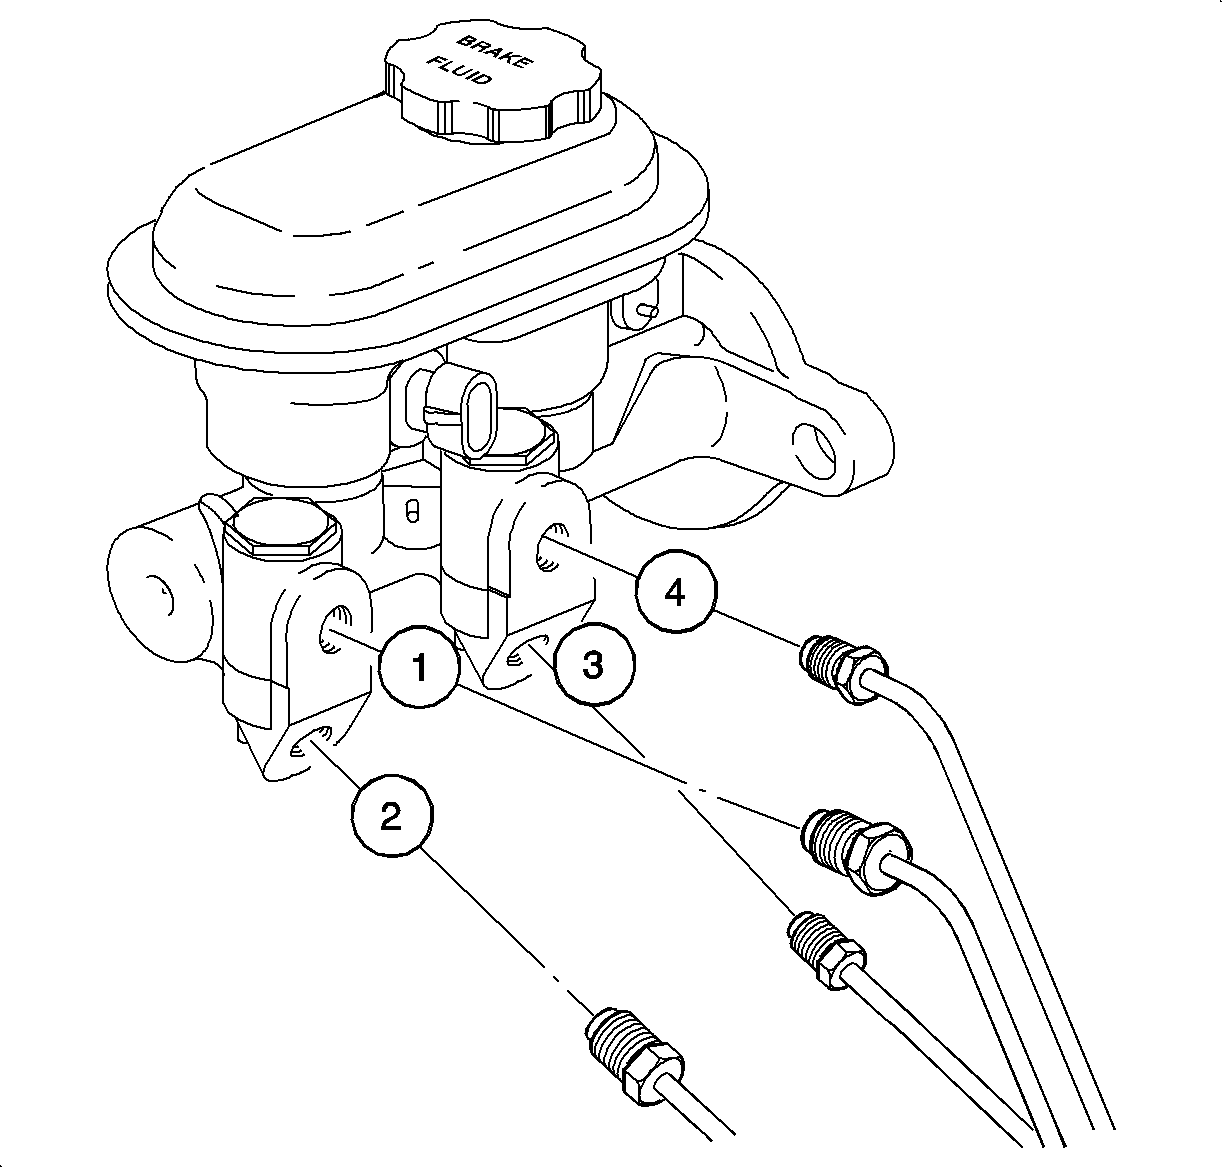
- Remove the brake pipe to be repaired from the
vehicle.
- Cut the section to be replaced from the brake pipe using an appropriate
saw. Do not use a tube cutter to cut the new pipe. The end must be flat and square
to produce a good flare.
- Determine the length of pipe required for the repair by measuring the
section to be replaced with a string adding 3.2 mm (1/8 in) for each
flare.
- Cut the new pipe using an appropriate saw. Do not use a tube cutter to
cut the new pipe. The end must be flat and square to produce a good flare.
- Remove the burrs from the inside and outside diameters of the cut pipe
using a deburring tool.
- Install required fittings.
- Clamp
SA9193BR
securely in a vice.

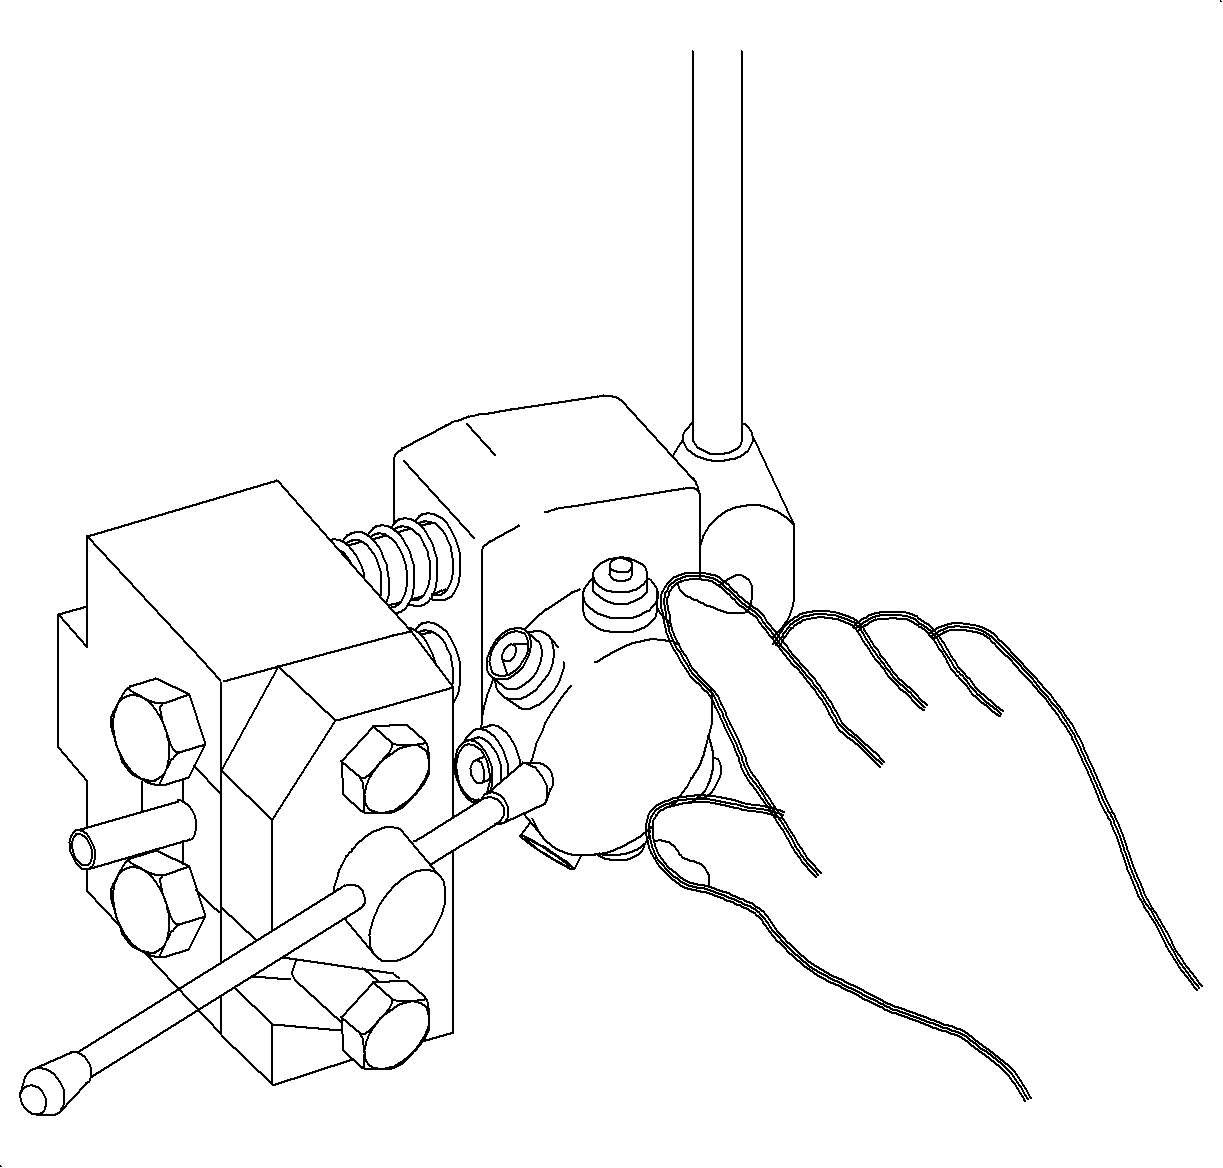
- Install the handle into the operating cam.
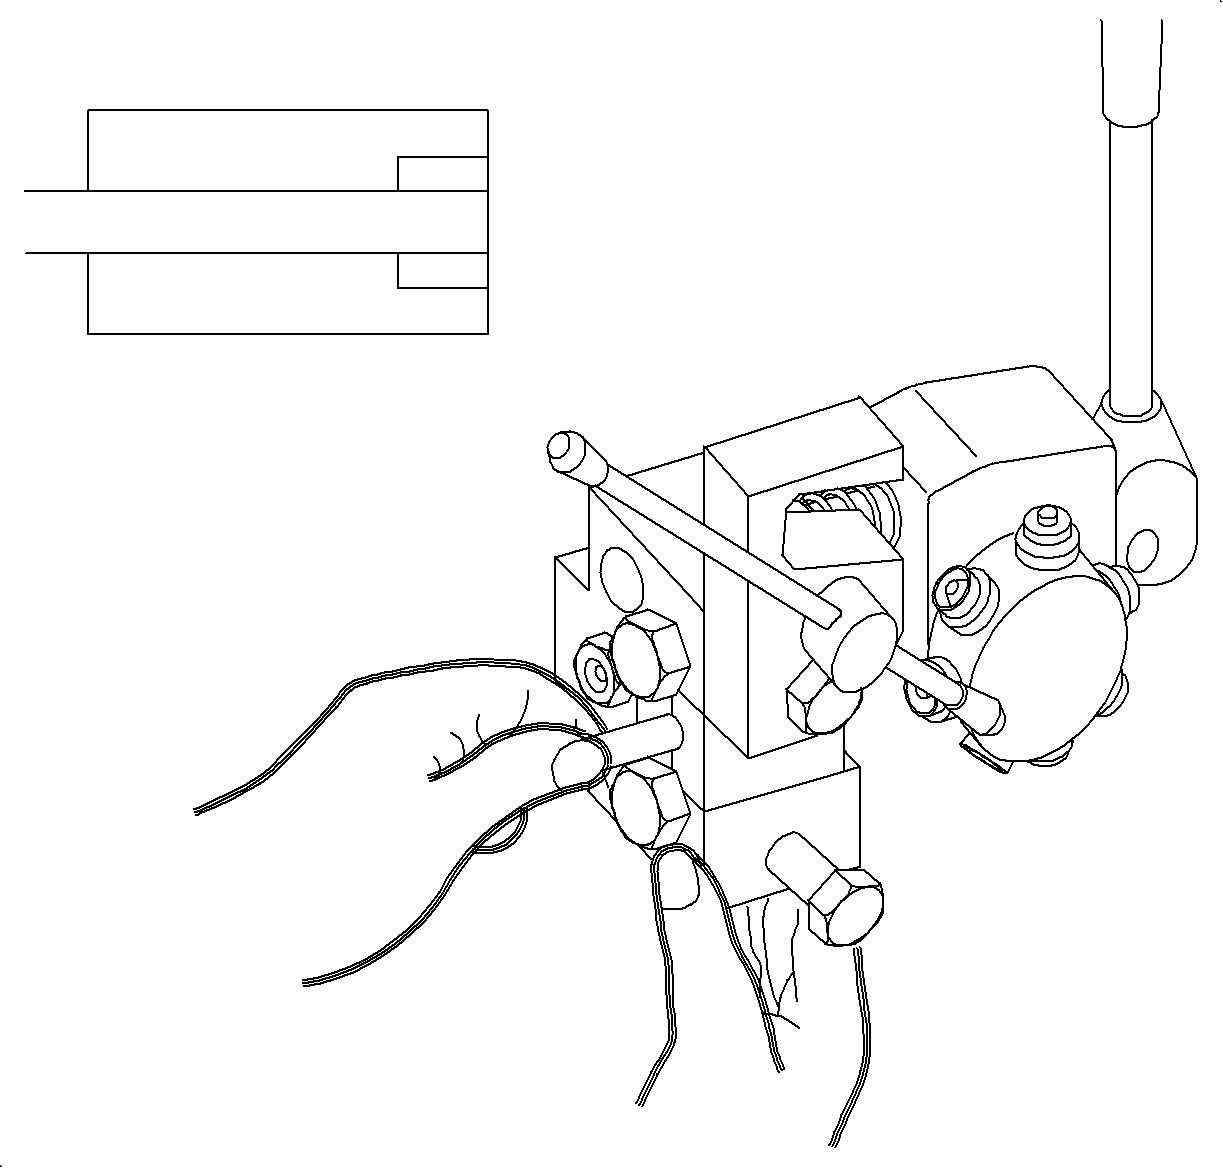
- Loosen the die clamp screw and rotate the locking
plate to expose the die carrier opening.
- Select the required die set (4.75 mm DIN) and install in
the carrier with the full side of either half facing the clamp screw and the counter
bore of both halves facing the punch turret.
- Insert the prepared pipe through the rear of the die and push forward
until the end of the pipe is flush with the face of the die.
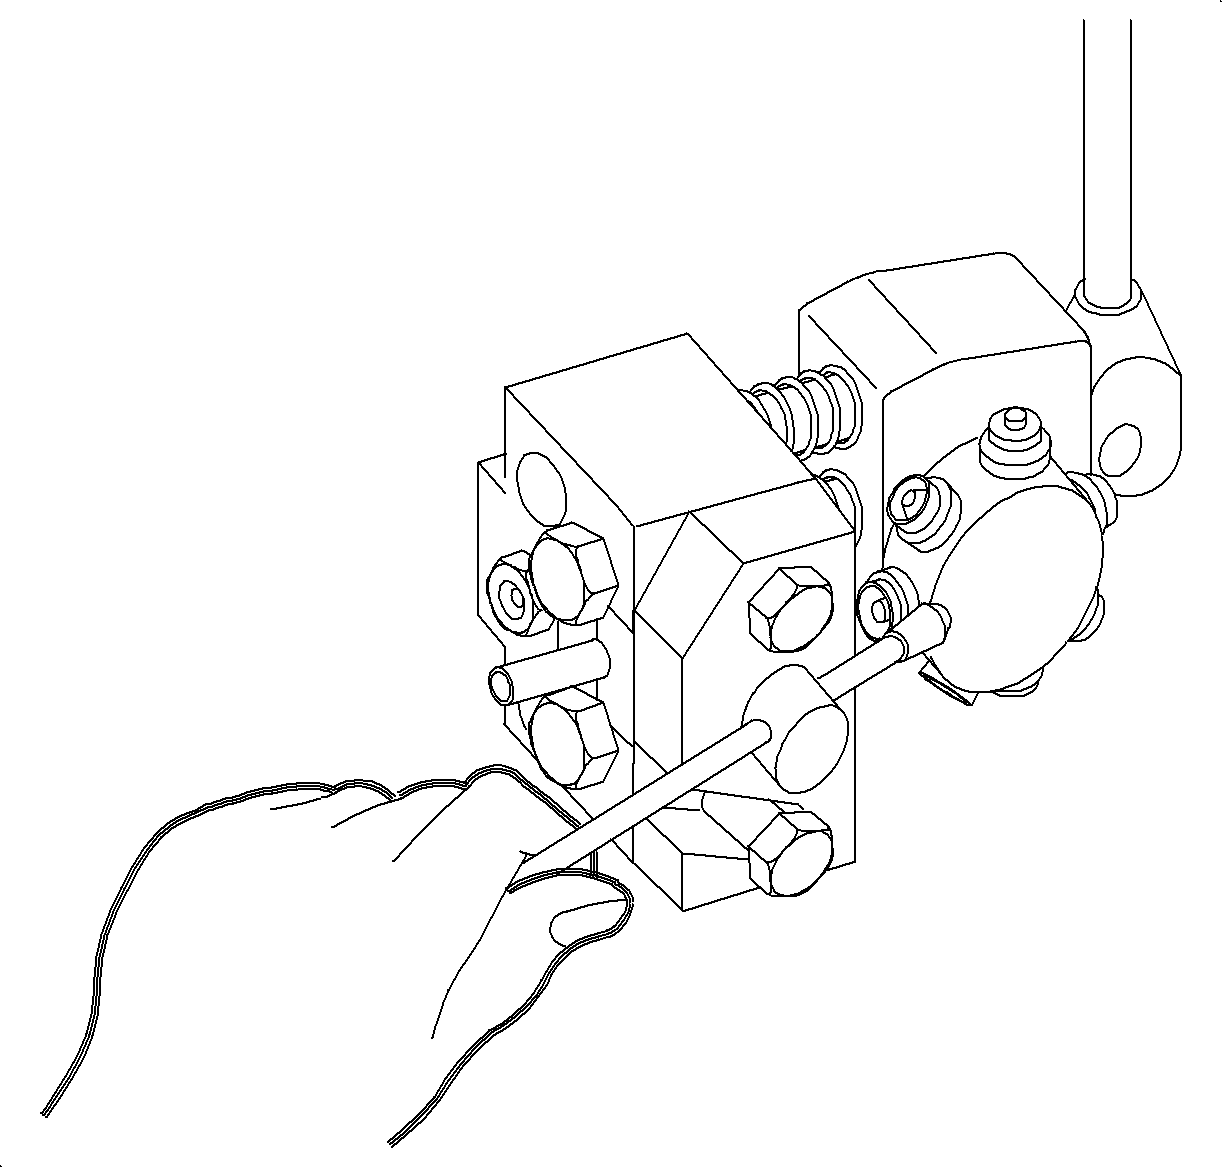
- Make sure that the rear of both halves of the
die rest against the hexagon die stops. Rotate the locking plate to the fully closed
position and clamp the die firmly by tightening the clamp screw.
- Select the appropriate OP. 1 (operation 1) punch
by rotating the punch turret until the correct size (4.75 mm DIN)
points towards the open end of the pipe to be flared.
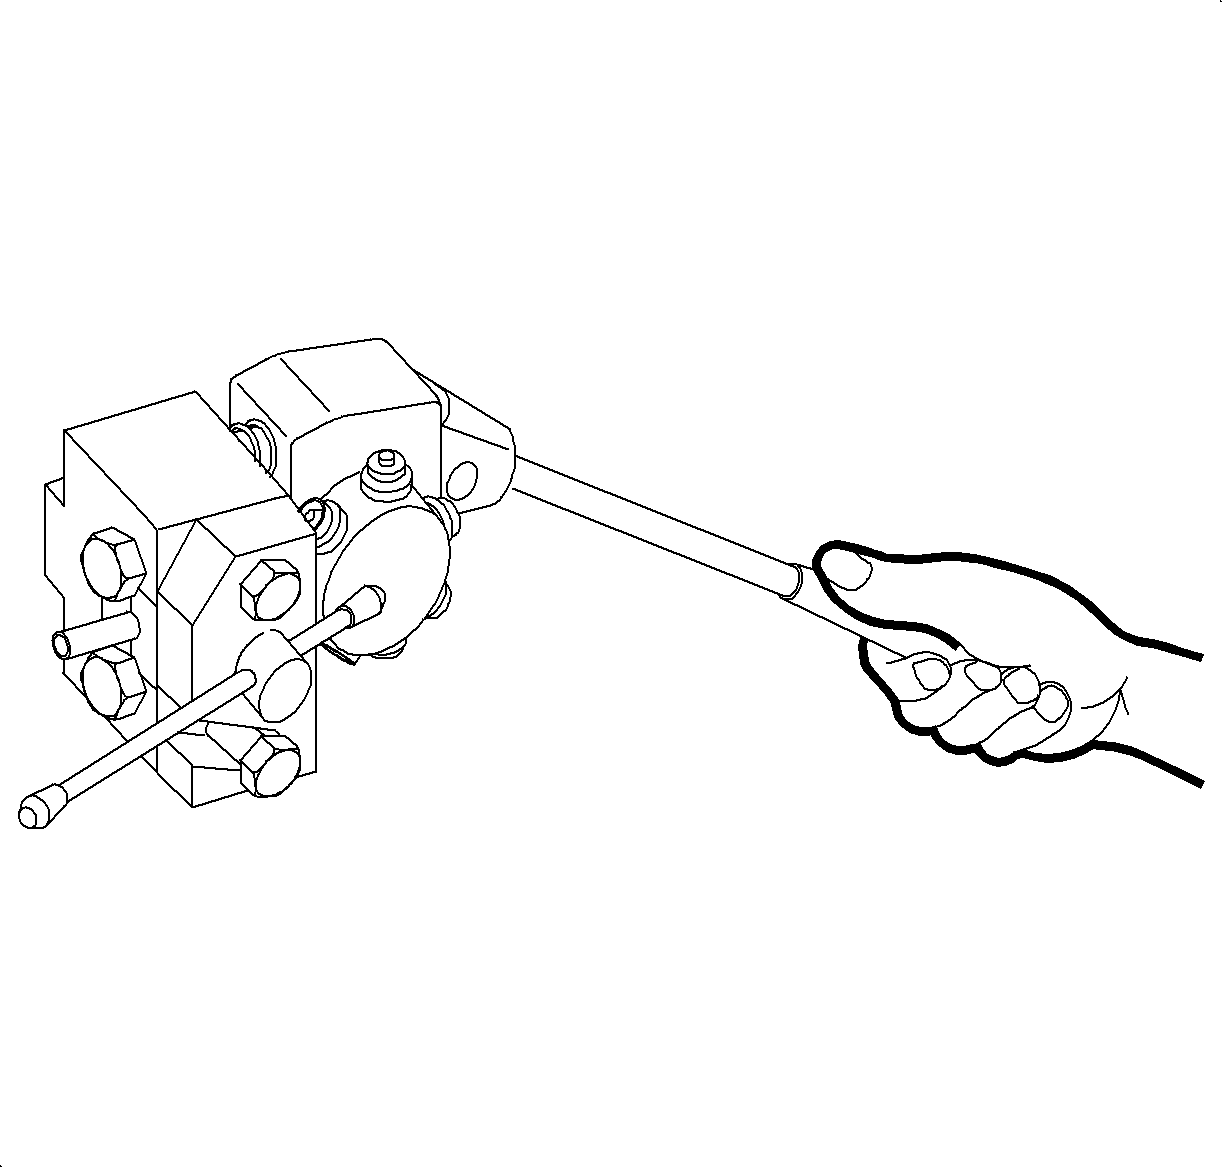
- Pull the operating handle against the resistance
of the pipe to create the flare and return the handle to original position.
- Release the clamp screw and rotate the locking plate to the open position.
- Remove the die set and the pipe and separate by gently tapping both halves
on a bench.
- Inspect the pipe flare for correct shape, size
and for any flaws.
- Repeat the procedure (steps 7 through 19) for the pipe being repaired.
- Bend the pipe using an approved pipe bending tool such as
SA91108NE
, using the section to be replaced as a guide.
- Install the new pipe to the pipe being repaired using female union.
- Install the repaired pipe assembly into the vehicle.
- Bleed the brake system. Refer to the appropriate brake bleeding procedure.
- Check the pipes and the nuts for leaks with the engine running and the
brakes applied.