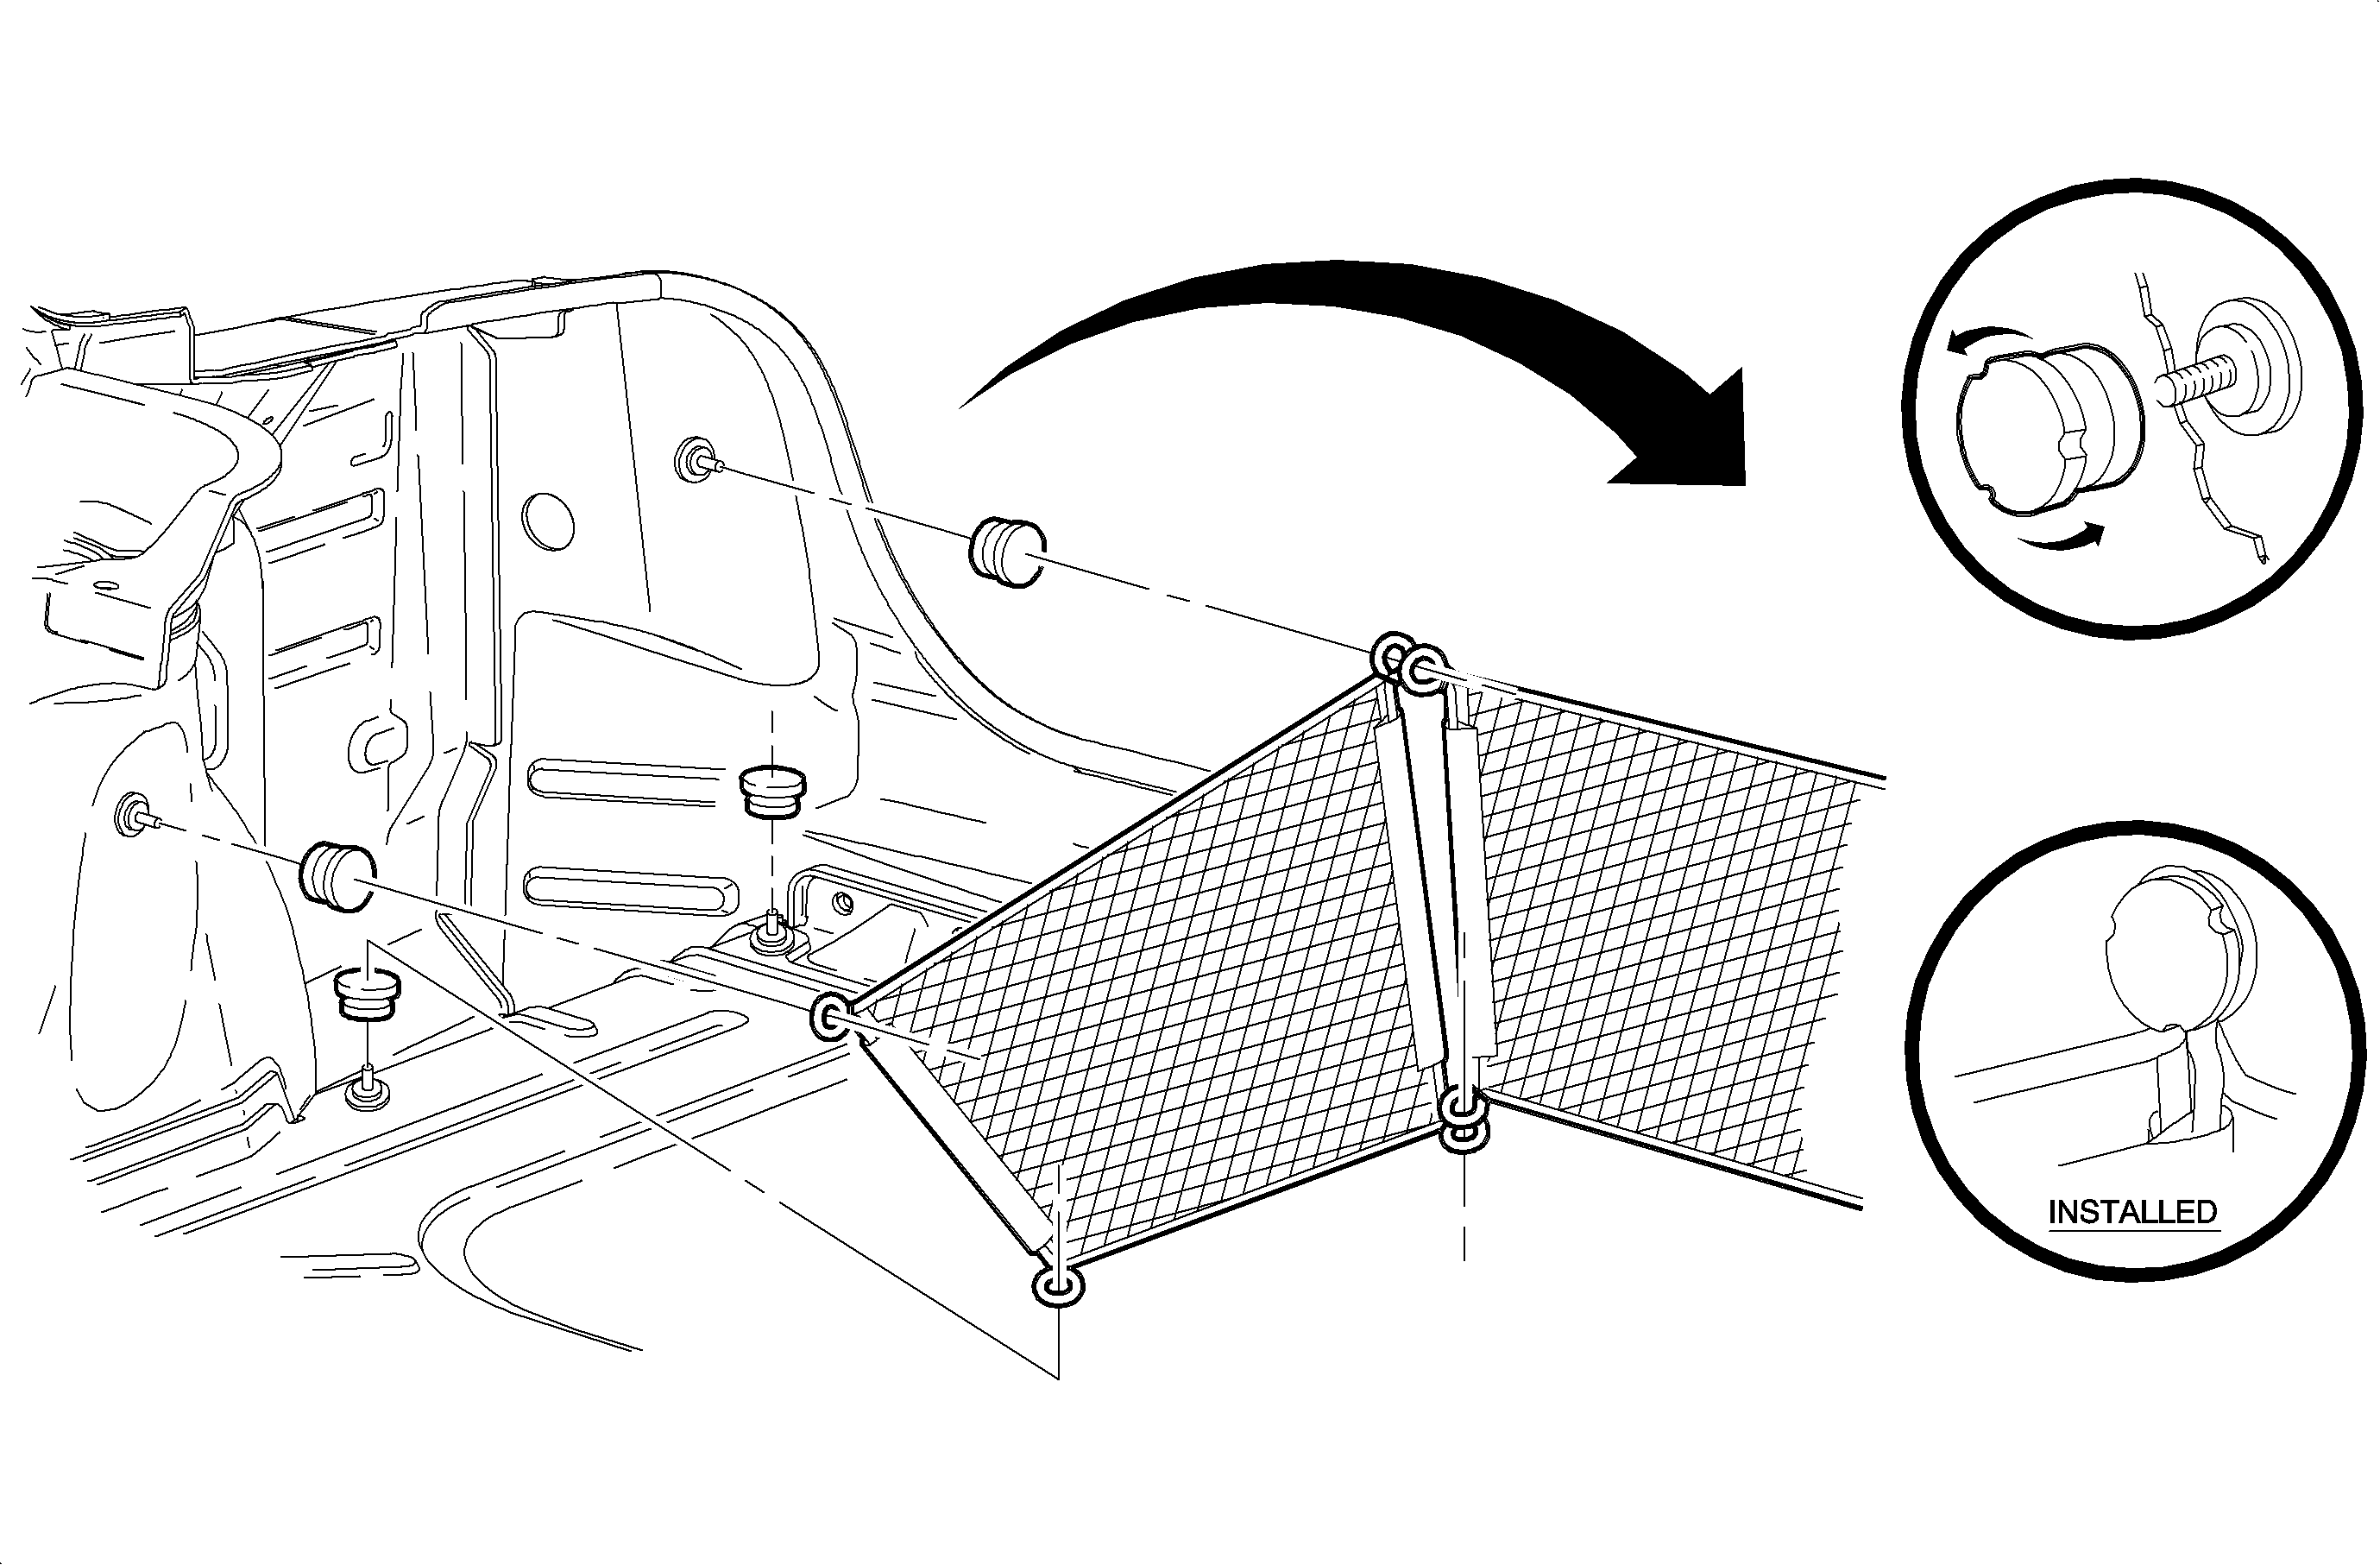
- Remove the rear compartment floor trim and the rear compartment side wall
trim.
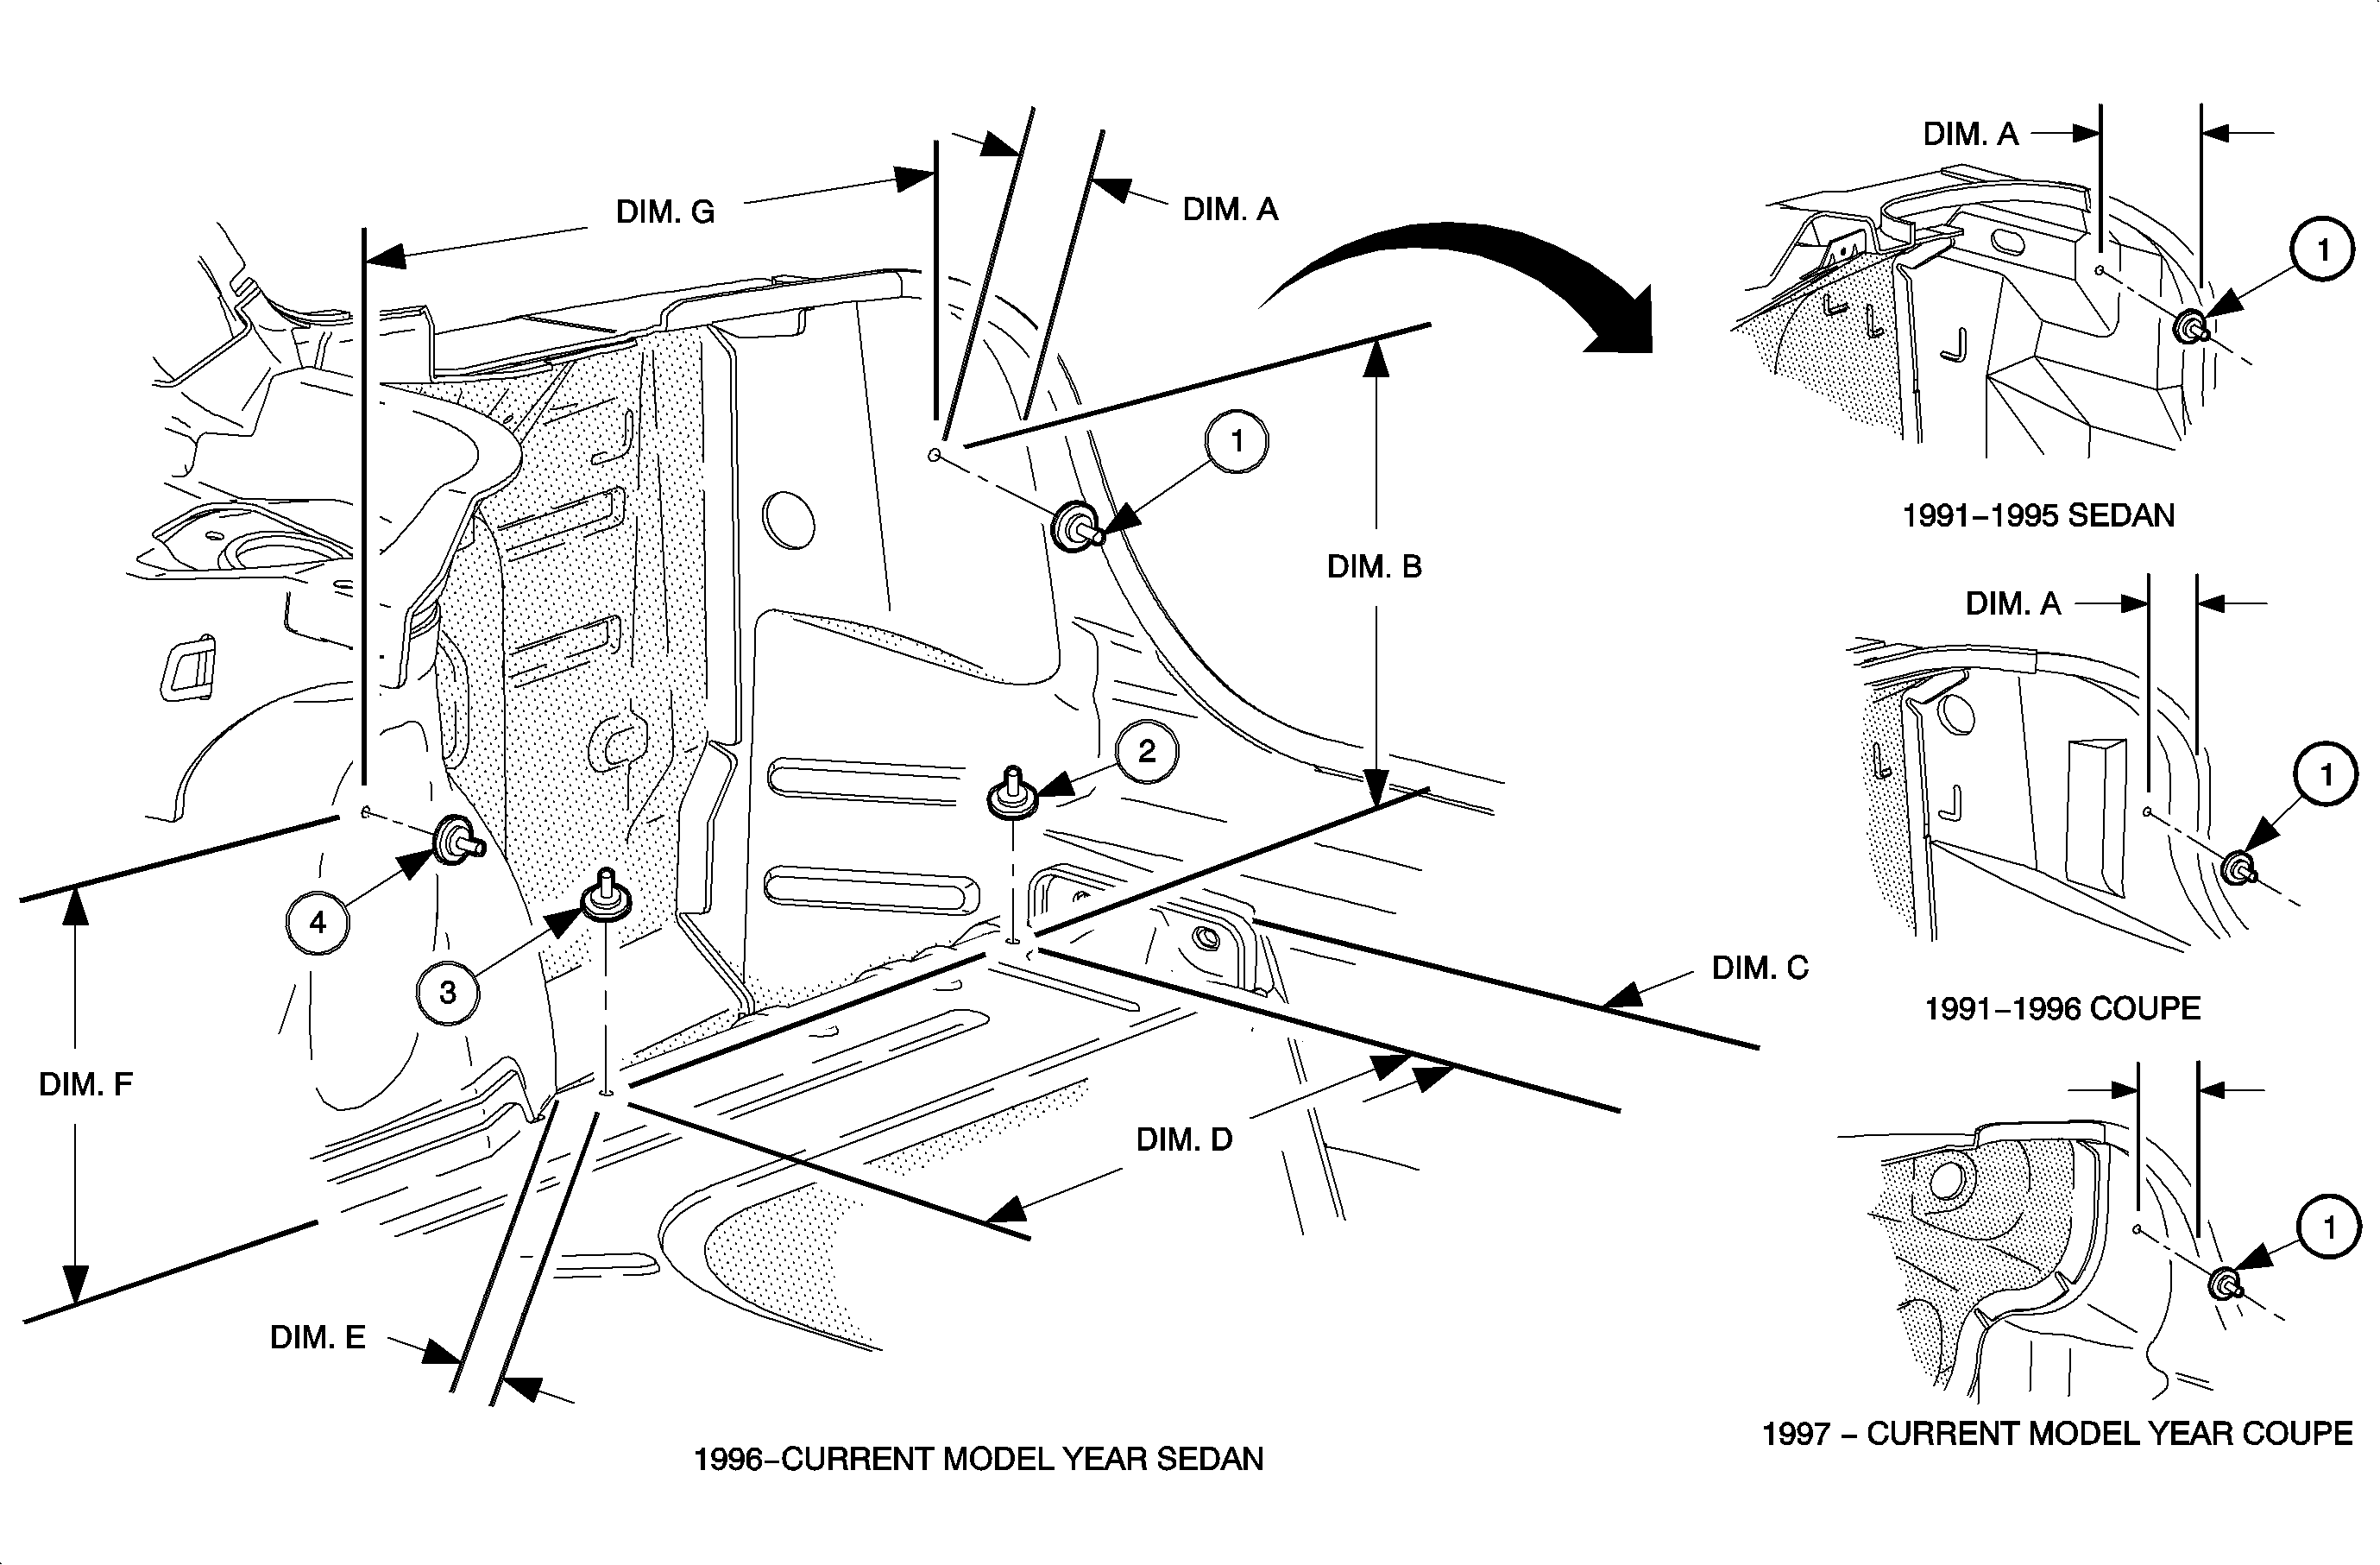
- Measure the following dimensions and mark the center of the mounting locations
for the anchor bases. Remove the undercoating as necessary to ensure a clean surface
for the anchor bases.
- A from the rear end panel assembly, interior wall, of the rear compartment
to the number 1 location.
- B from the number 1 location to the number 2
location.
- C from the rear end panel assembly to the number 2 location.
- D from number 2 location to the number 3 location.
- E from the bend in the quarter rear panel assembly, wheel housing, to
the number 3 location.
- F from the rear compartment floor to the number 4 location shock
tower.
- G from the number 4 to number 1 location.
Important
Mix part A and B of the adhesive according
to the directions on the adhesive package. Each mixture of adhesive has enough adhesive
for 4 anchor bases. Allow 24 hours cure time before installing the
convenience nets into the base caps. Allow 48 hours before loading the convenience
nets.
- Apply the adhesive equally to each anchor base.
- Install the anchor base at the anchor locations by pushing them into the
surface and turning ½ turn.
Important
It is recommended that the anchor bases mounted
on the vertical surfaces be temporarily secured with masking tape to prevent the
anchor bases from creeping downward.
- Allow the adhesive on the anchor bases to cure 1 hour at room temperature.
- Using a razor knife, slit the rear compartment side wall trim to allow
the studs on the mounting bases to pass through the rear compartment side wall trim.
Install the rear compartment side wall trim.
- Cut a small slit at the anchor bases on the rear compartment floor to
allow the studs on the anchor bases to pass through the rear compartment floor trim.
Install the rear compartment floor trim.
- Install the anchor base caps onto the anchor bases. Tighten the caps finger
tight.