
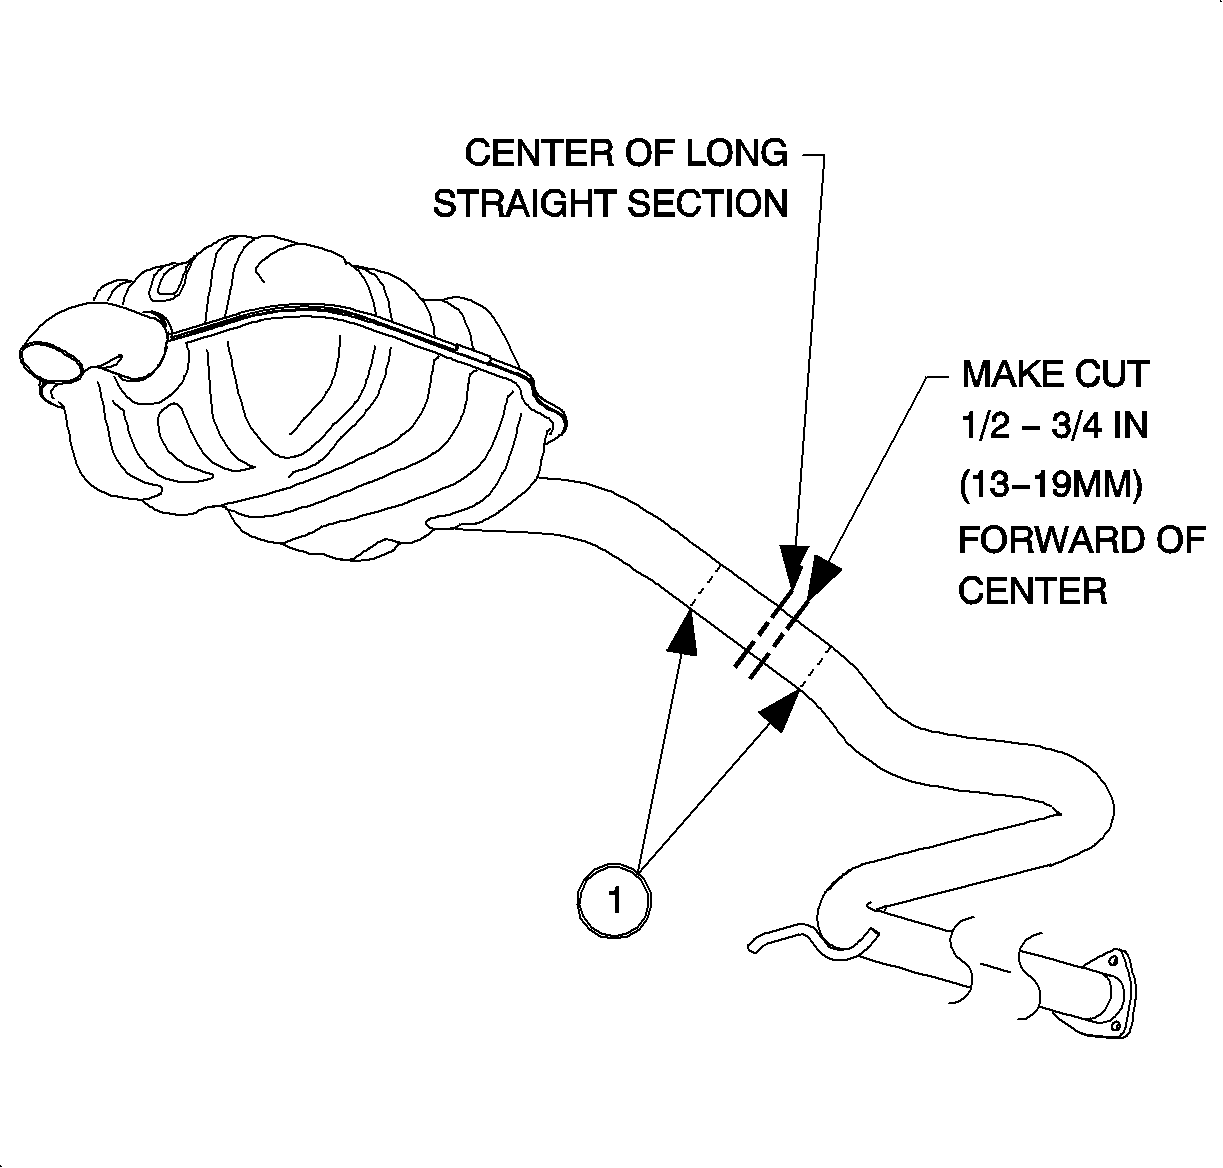
Always use a chain cutter to cut stainless steel exhaust system pipes.Notice
1998 Saturn vehicles built after and including VIN WZ217016
1999 Saturn vehicle built up to and including:
VIN XZ119715 with RPOs LL0 and NC1 (DOHC CA Emissions)
VIN XZ129456 with RPOs LL0 and NF2 (DOHC Federal Emissions)
VIN XZ129407 with RPOs L24 and NF2 (DOHC Federal Emissions)
VIN XZ134512 with RPOs L24 and NB7 (SOHC CA Emissions)
Muffler assembly may contact the muffler ramp that is welded to the spaceframe.
The clearance between muffler and muffler ramp may be inadequate. As the exhaust system heats up it expands rearward. This expansion reduces the clearance between the muffler and muffler ramp. If the clearance becomes too small the muffler may contact the muffler ramp. This may occur under the following conditions with the vehicle at normal operating temperature:
Drive the vehicle under the above condition with vehicle at operating temperature to verify that the rattle or clunk noise is caused by the muffler contacting the muffler ramp. A witness mark may be present on the muffler and muffler ramp at the point of contact. If the rattle or clunk noise is not head coming from the muffler contacting the muffler ramp, road test vehicle to locate the source of the noise and follow the diagnostic procedures in the appropriate model year service manual. If the rattle or cluck noise is determined to be from muffler to ramp contact, adequate clearance should be obtained by installing a service muffler assembly. Follow the modified muffler replacement procedure in the bulletin.
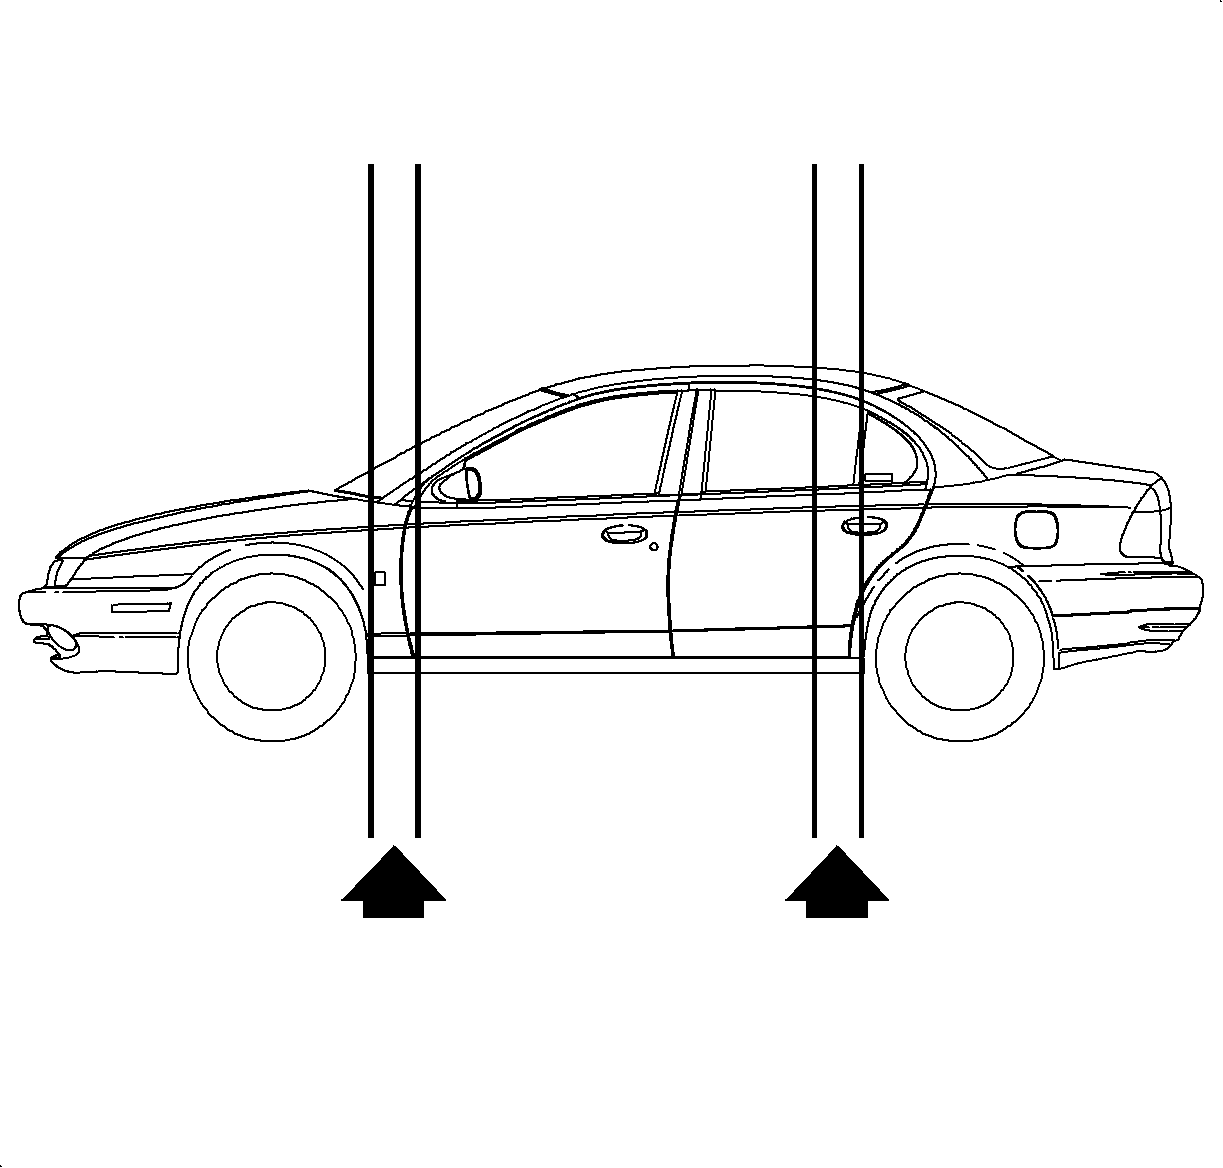
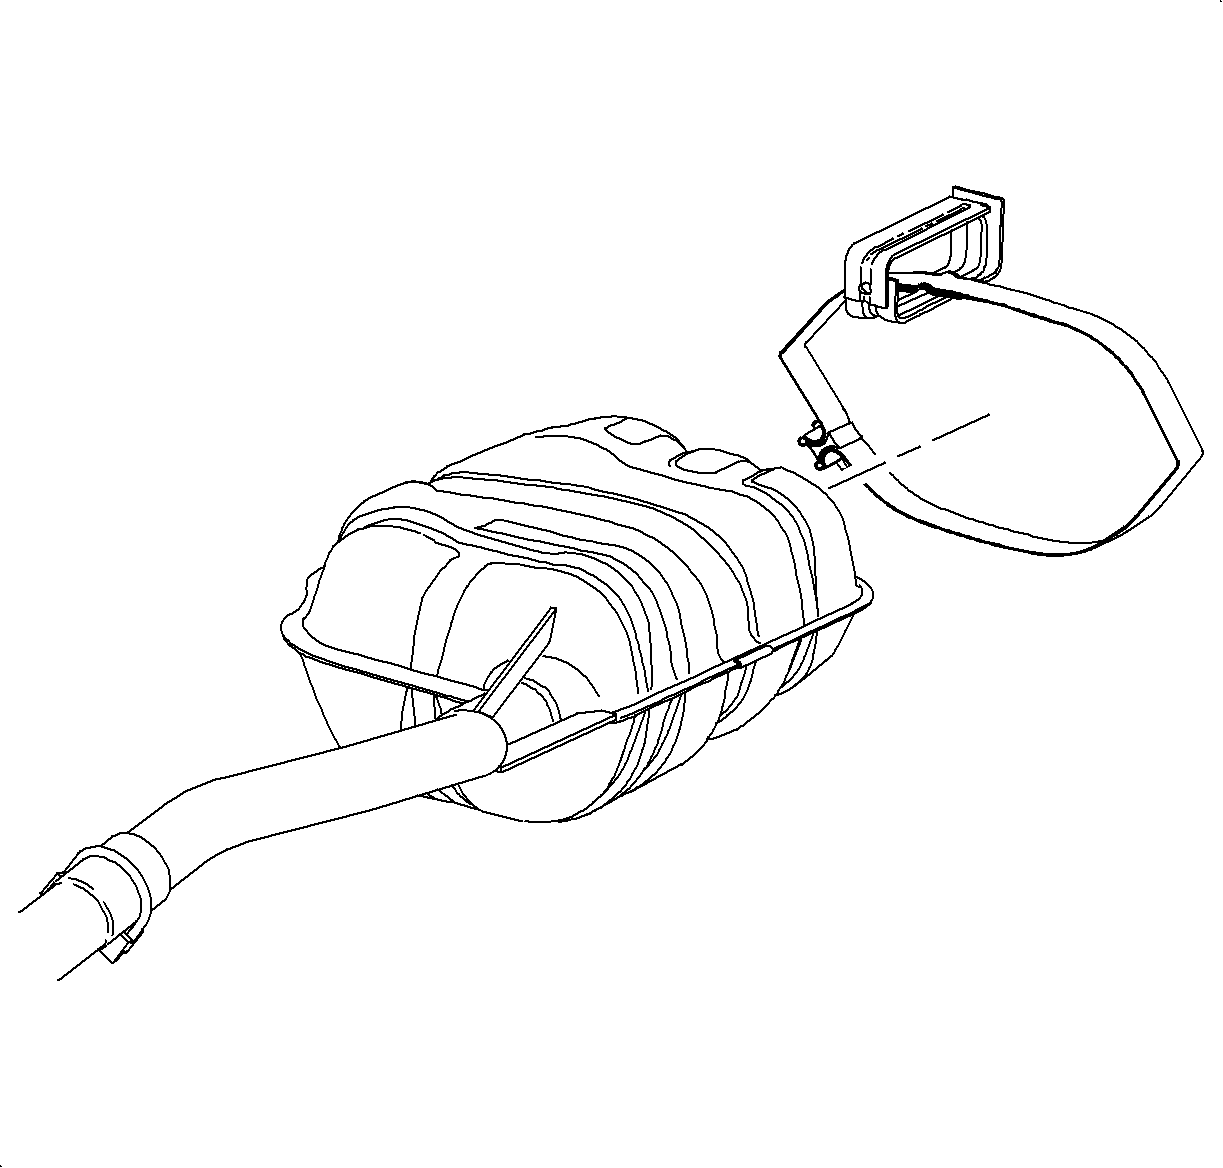
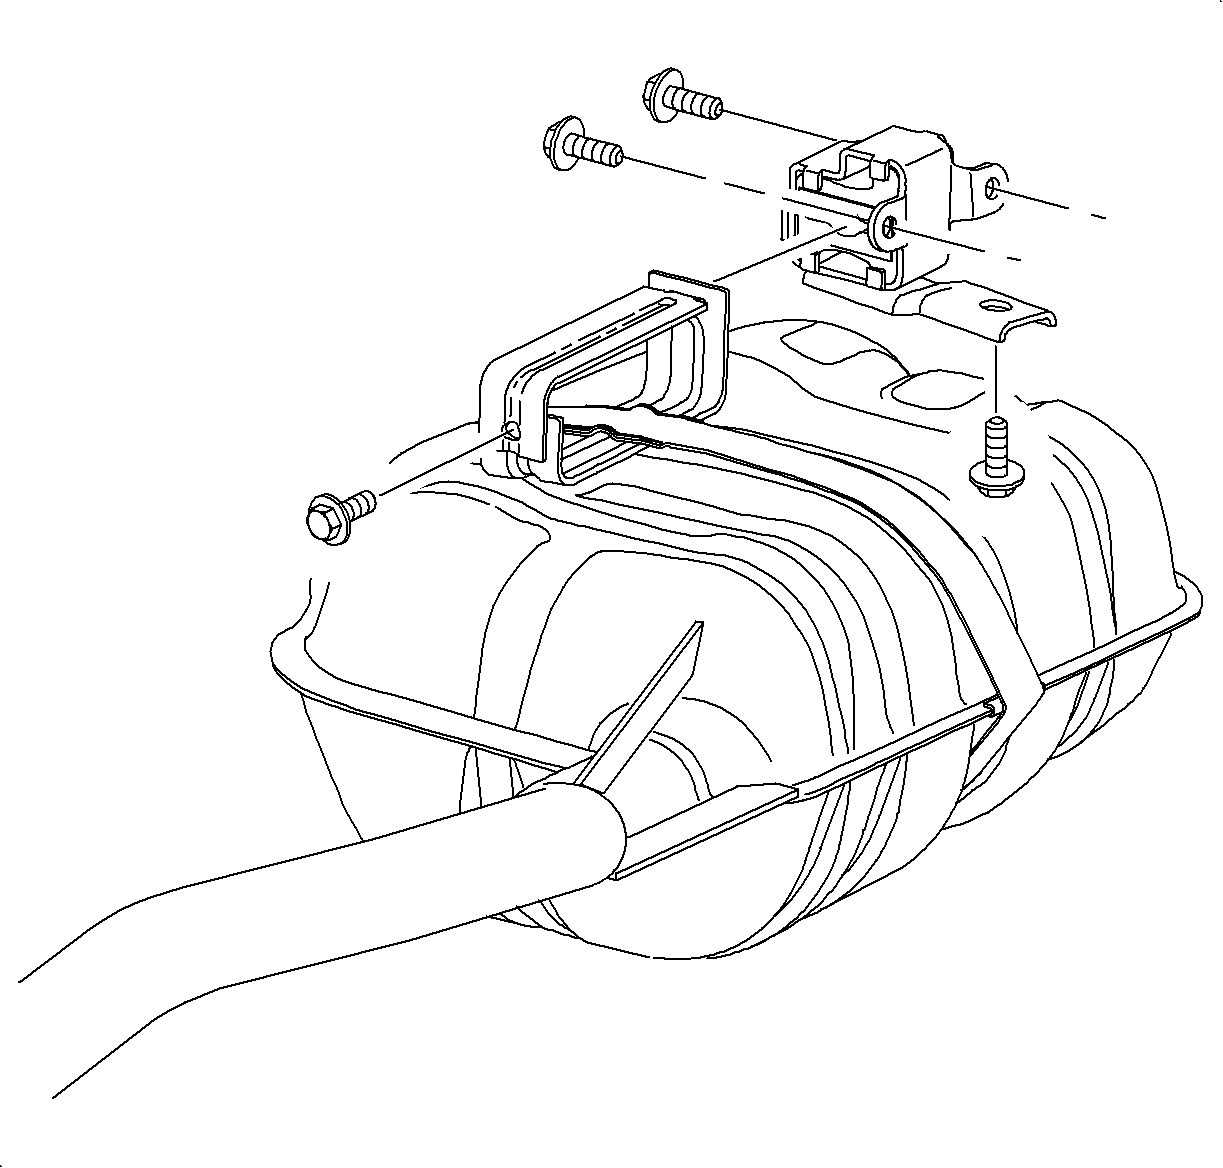
Muffler Removal
Make sure vehicle is properly supported and squarely positioned prior to lifting.
To help avoid personal injury when a vehicle is on a hoist, provide additional support
for the vehicle on the opposite end from which components are being removed.Caution
Always use a chain cutter to cut stainless steel exhaust system pipes.Notice
Muffler Installation

Make sure that after installing the replacement exhaust sections that the system
has not shifted rearward allowing contact between the hanger bracket screw and the
hanger block. If contact exists, noise will result; so, loosen the muffler strap,
shift forward on muffler to eliminate contact, and retighten.Important
Tighten 22N·m (16 lb ft).
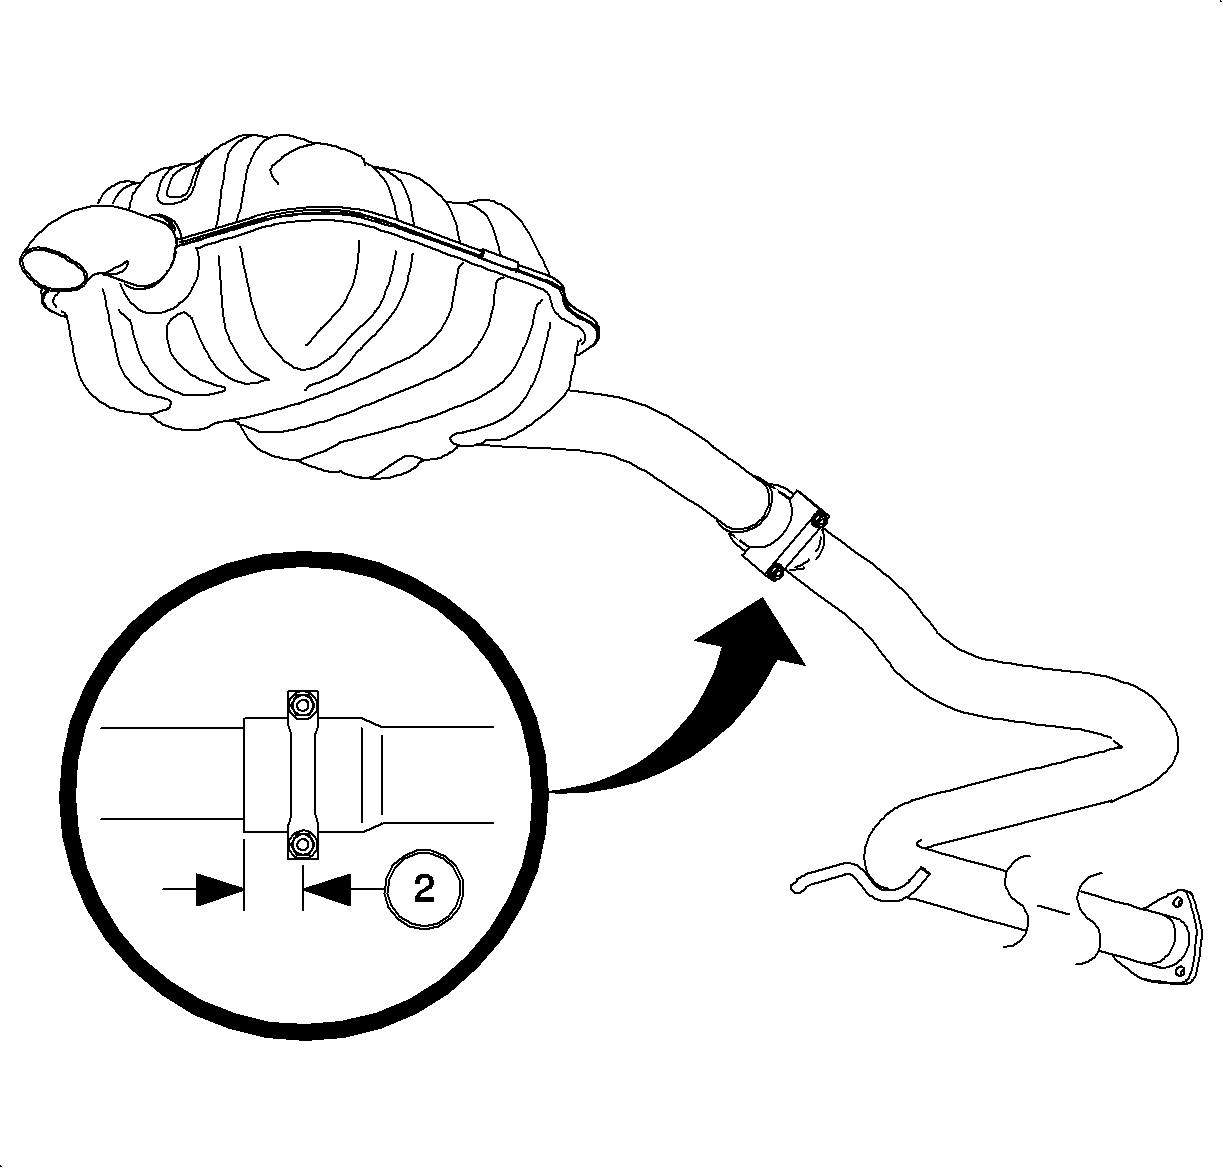
Locate muffler clamp 25 mm (1.0 in) from end of muffler inlet
pipe and position clamp with U-bolt facing away from fuel tank.Notice
Tighten the muffler clamp to 41 N·m (30 lb ft).
If muffler movement cannot be obtained or muffler isolator block is damaged,
the exhaust system will have to be carefully lowered for adjustment or replacement
of the muffler isolator block. Washers may have to be installed between muffler block
bolt and frame rail to align the hanger parallel with muffler.Important
21013078 | Muffler asm-Exh (w/ tail pipe) DOHC (LL0) |
21013146 | Muffler asm-Exh (w/ tail pipe) SOHC (LL0) |
25517280 | Clamp -- Exh Muff |
To receive credit for this repair during the warranty coverage period, submit a claim through the Saturn Dealer System using the appropriate Electronic Labor Time Guide and Labor Operation Code L2584, (Muffler Replace).
|
GM bulletins are intended for use by professional technicians,
NOT a "do-it-yourselfer". They are written to inform these
technicians of conditions that may occur on some vehicles, or to
provide information that could assist in the proper service of a
vehicle. Properly trained technicians have the equipment,
tools, safety instructions, and know-how to do a job properly and
safely. If a condition is described, DO NOT assume that the
bulletin applies to your vehicle, or that your vehicle will have
that condition. See your GM dealer for information on whether
your vehicle may benefit from the information. |

|
WE SUPPORT VOLUNTARY TECHNICIAN CERTIFICATION |
© Copyright General Motors Corporation. All Rights Reserved.