Brake Modulator/Master Cylinder Assembly Replacement
Removal Procedure
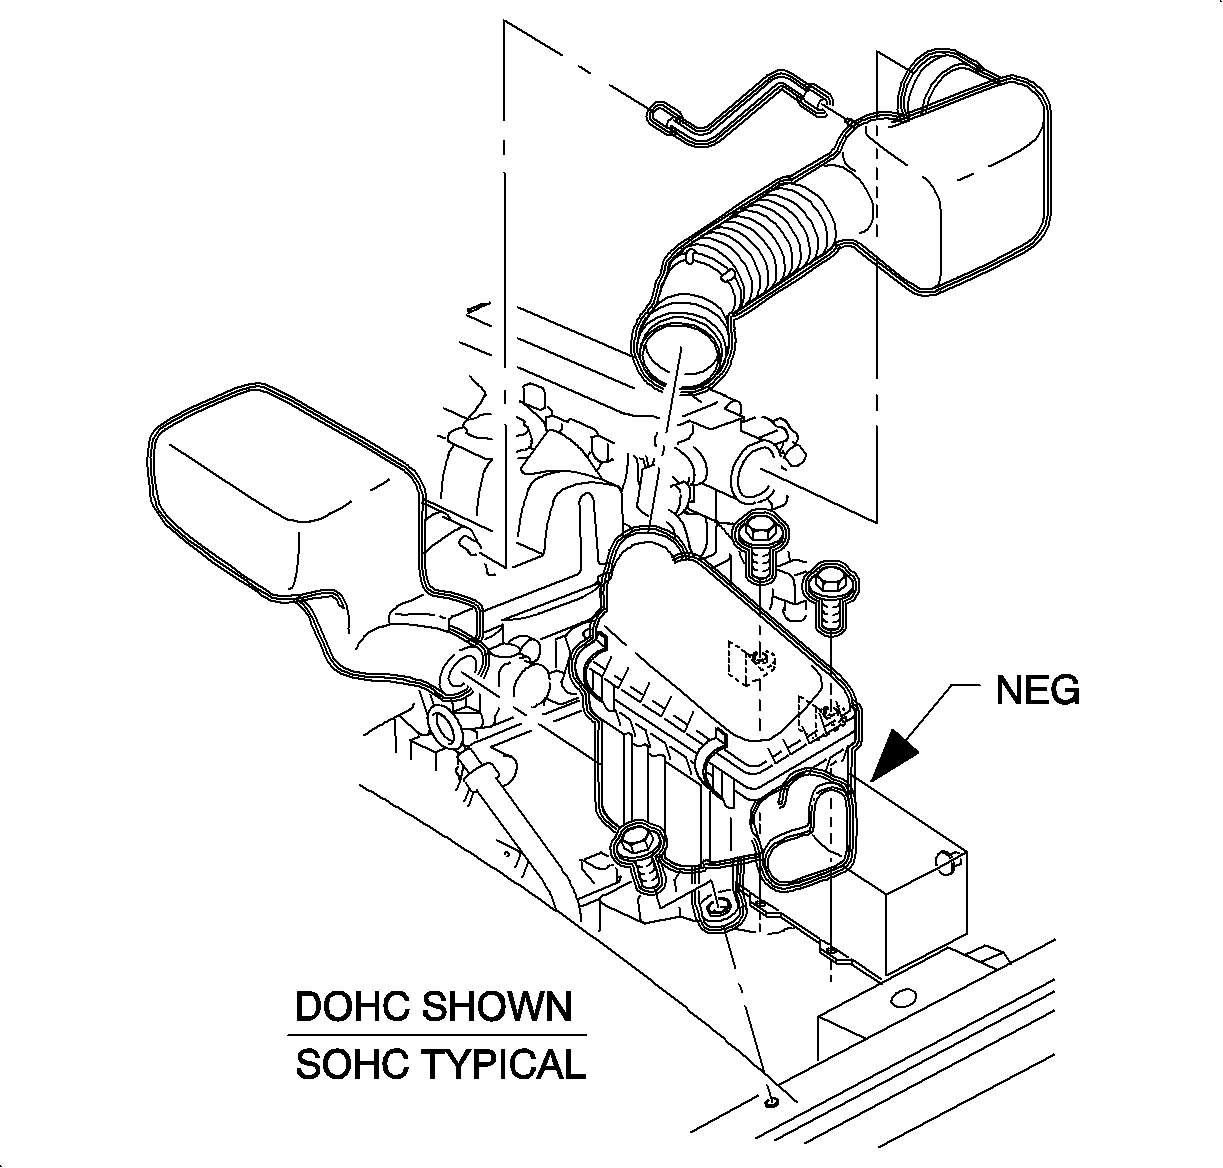

- Remove the air induction system.
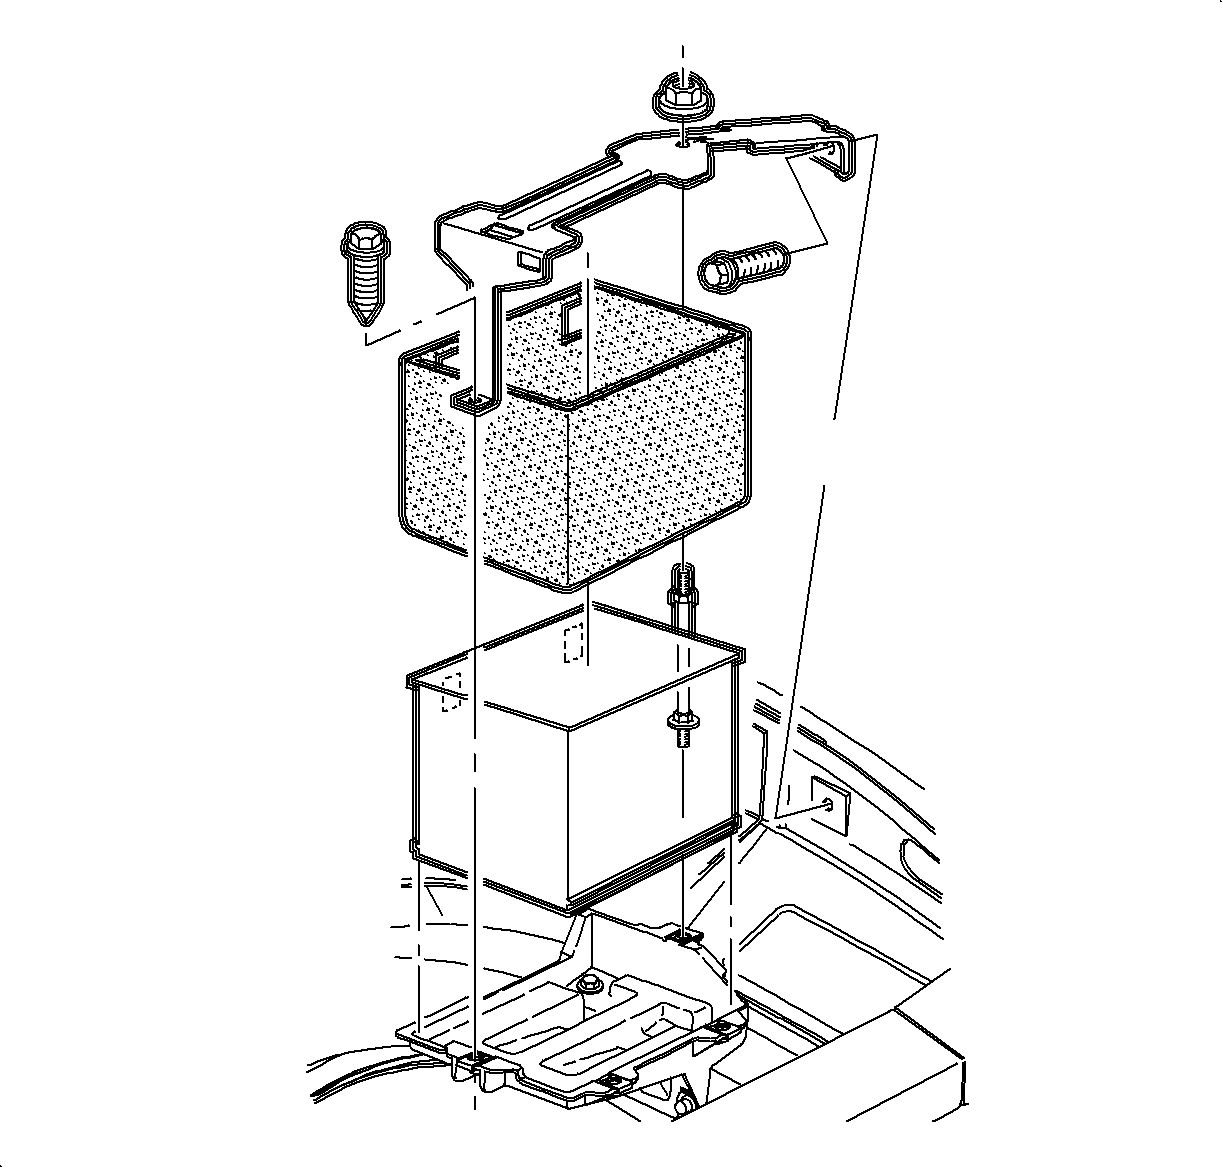
- Remove the battery.
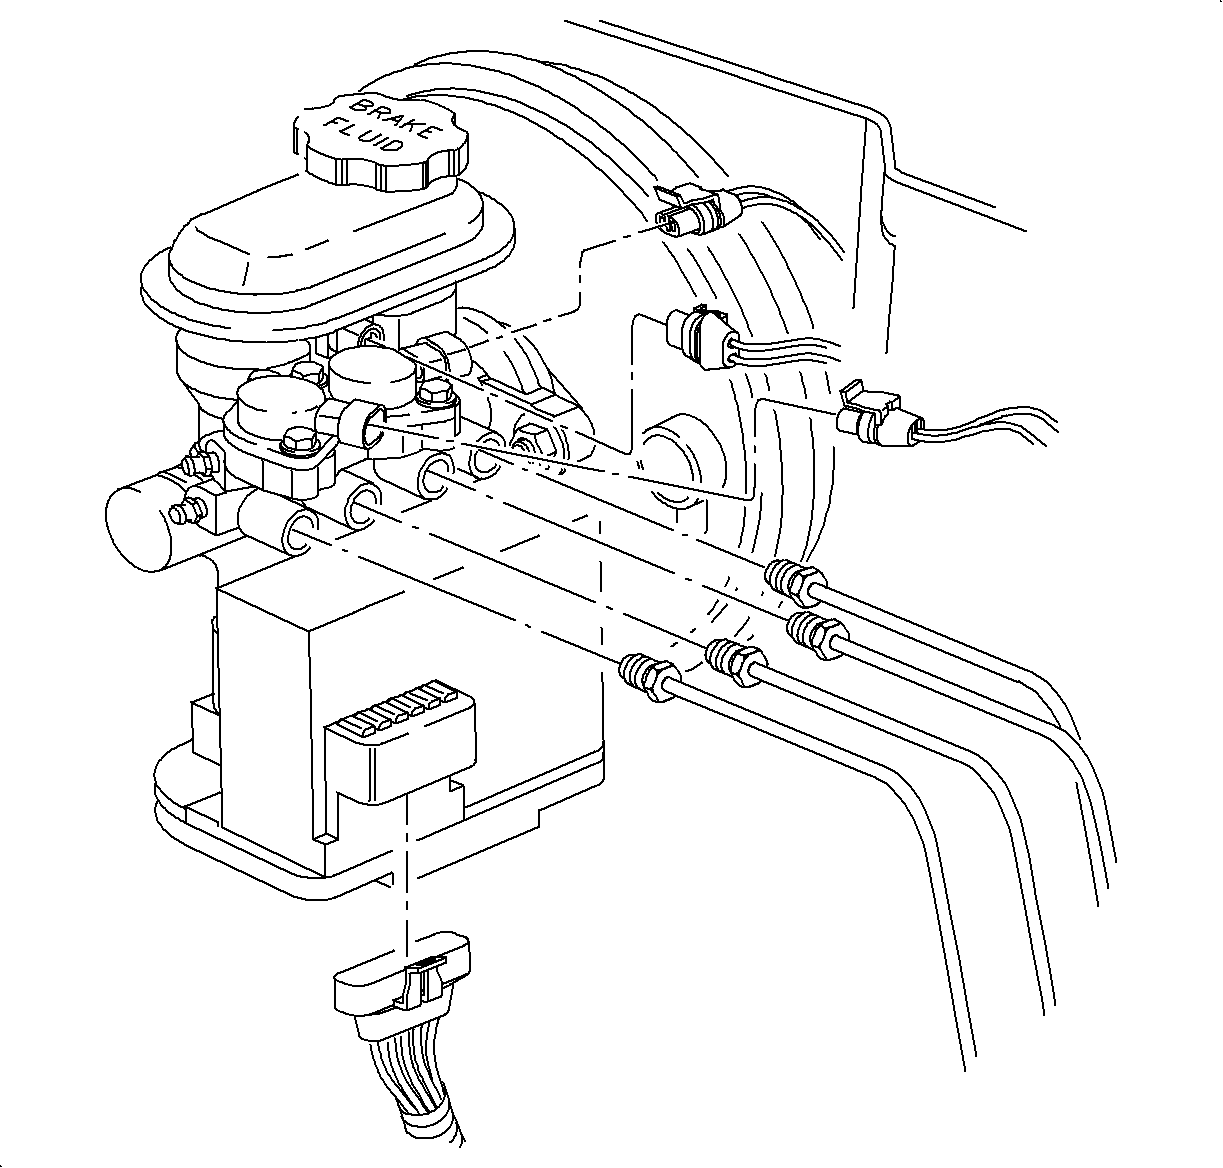
- Disconnect 2 electrical connectors from solenoid
valves.
- Disconnect brake fluid level switch connector.
- Remove connector position assurance (CPA) retainer from six-way motor
pack electrical connector.
- Disconnect 6-way electrical connector from motor pack.
Important
Place a shop cloth on top of motor pack assembly to catch any dripping brake
fluid.
- Disconnect brake pipe nuts from modulator.
Notice
Plug open brake pipes to prevent brake fluid loss and contamination.
Important
After removing brake pipe nuts, do not excessively pull or bend brake pipes
away from brake control assembly.
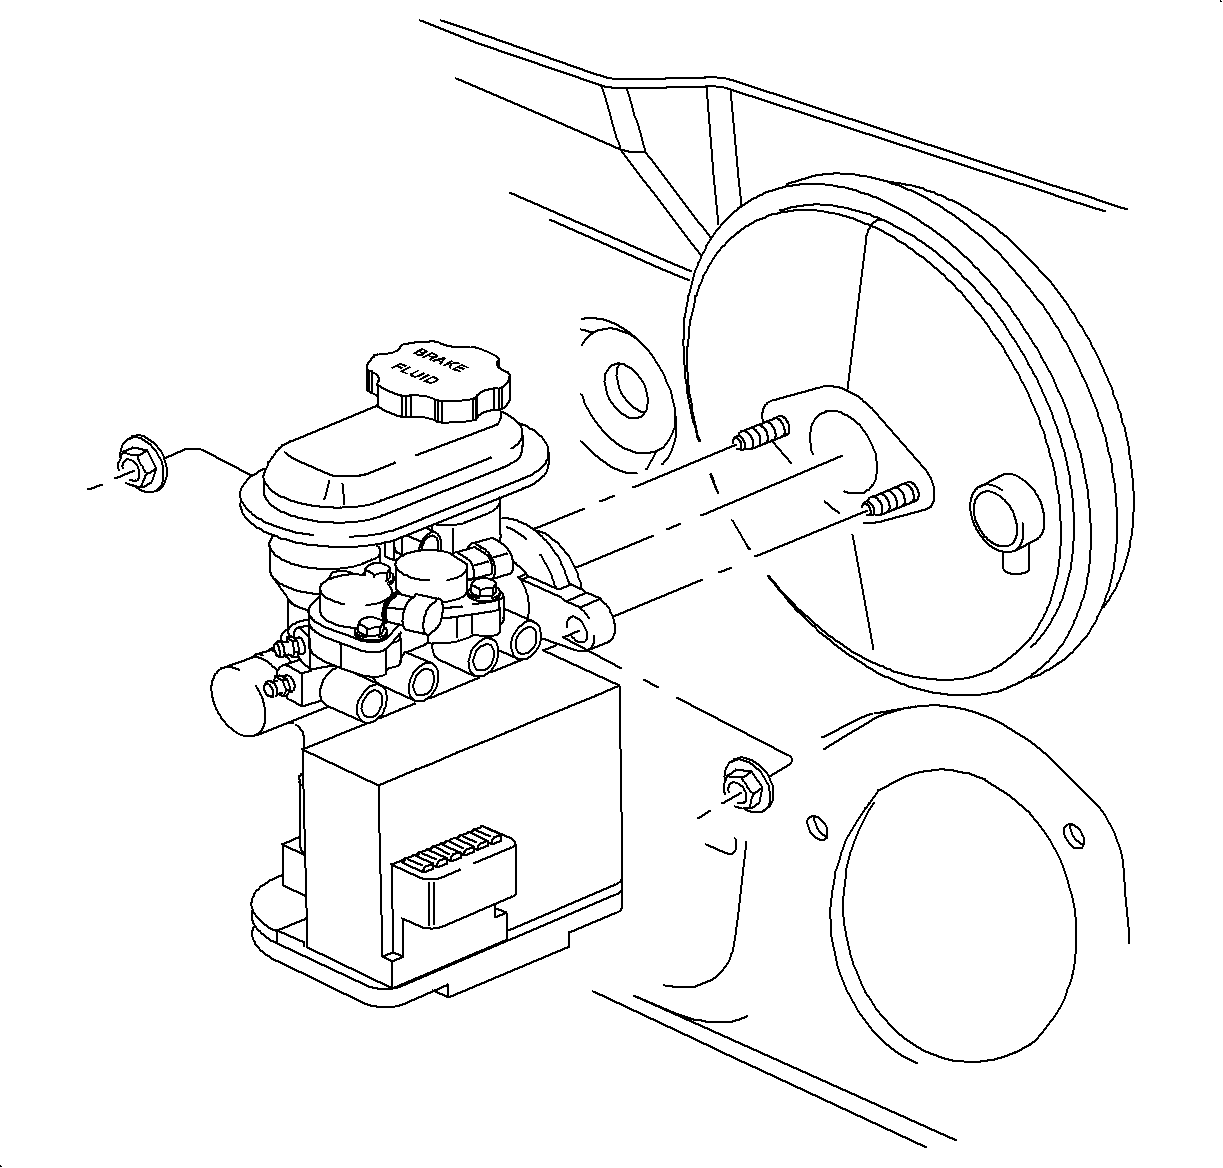
- Remove 2 brake control assembly to brake booster attachment
nuts.
- Remove brake control assembly.
Installation Procedure
- Position brake control assembly onto brake booster
studs and install fastening nuts.
TightenTighten brake booster studs to: 27 N·m (20 lb ft)
Important
Be careful not to bend brake pipes.
- Position brake lines into the brake control assembly and secure brake pipe nuts.
- Install 6 pin electrical connector onto motor pack assembly.
- Check to be sure that connector is fully seated and install CPA retainer.
- Install electrical connector onto brake fluid level switch.
- Install 2 electrical connectors onto solenoid valve.
- Install the battery.
- Install the air induction system.
- Fill brake fluid reservoir with clean brake fluid up to the
base of the reservoir filler neck.
- Bleed brake system as specified.
- Check brake fluid level.