Document ID# 881429
1998 Saturn SL2/SC2/SW2
 

Upper Valve Body Replacement

Removal Procedure

    Object Number: 862927  Size: SH
    Click here for detailed picture of above image.
  1. Remove the valvebody. Refer to Control Valve Body Assembly Removal .
  2. Remove the solenoid cover-to-valvebody bolts identified by heavy circles and remove the solenoid cover. For reference, the solenoid locations are identified as follows:

  3. Object Number: 863640  Size: SH
    Click here for detailed picture of above image.
  4. Lift solenoid connector plate off solenoid valve pins using care not to damage connector plate.
  5. Important

    Note the locations of the solenoids before removal.

  6. Remove the solenoid valves by using a twisting motion.

  7. Object Number: 863834  Size: SH
    Click here for detailed picture of above image.
  8. Remove the bolt retaining the 2 halves of valvebody. For reference, the bolts are identified as follows:
  9. Important

    Note the ball check valve positions when taking 2 halves apart.

  10. Separate the upper valve body from the lower valvebody.

  11. Object Number: 873275  Size: FP
    Click here for detailed picture of above image.
  12. Remove the spacer plate and ball check valves.
Installation Procedure

    Object Number: 863834  Size: SH
    Click here for detailed picture of above image.

    Important

    Be sure the upper and lower valvebody halves are clean and free of lint and dirt. The valvebody should be assembled in a clean area.

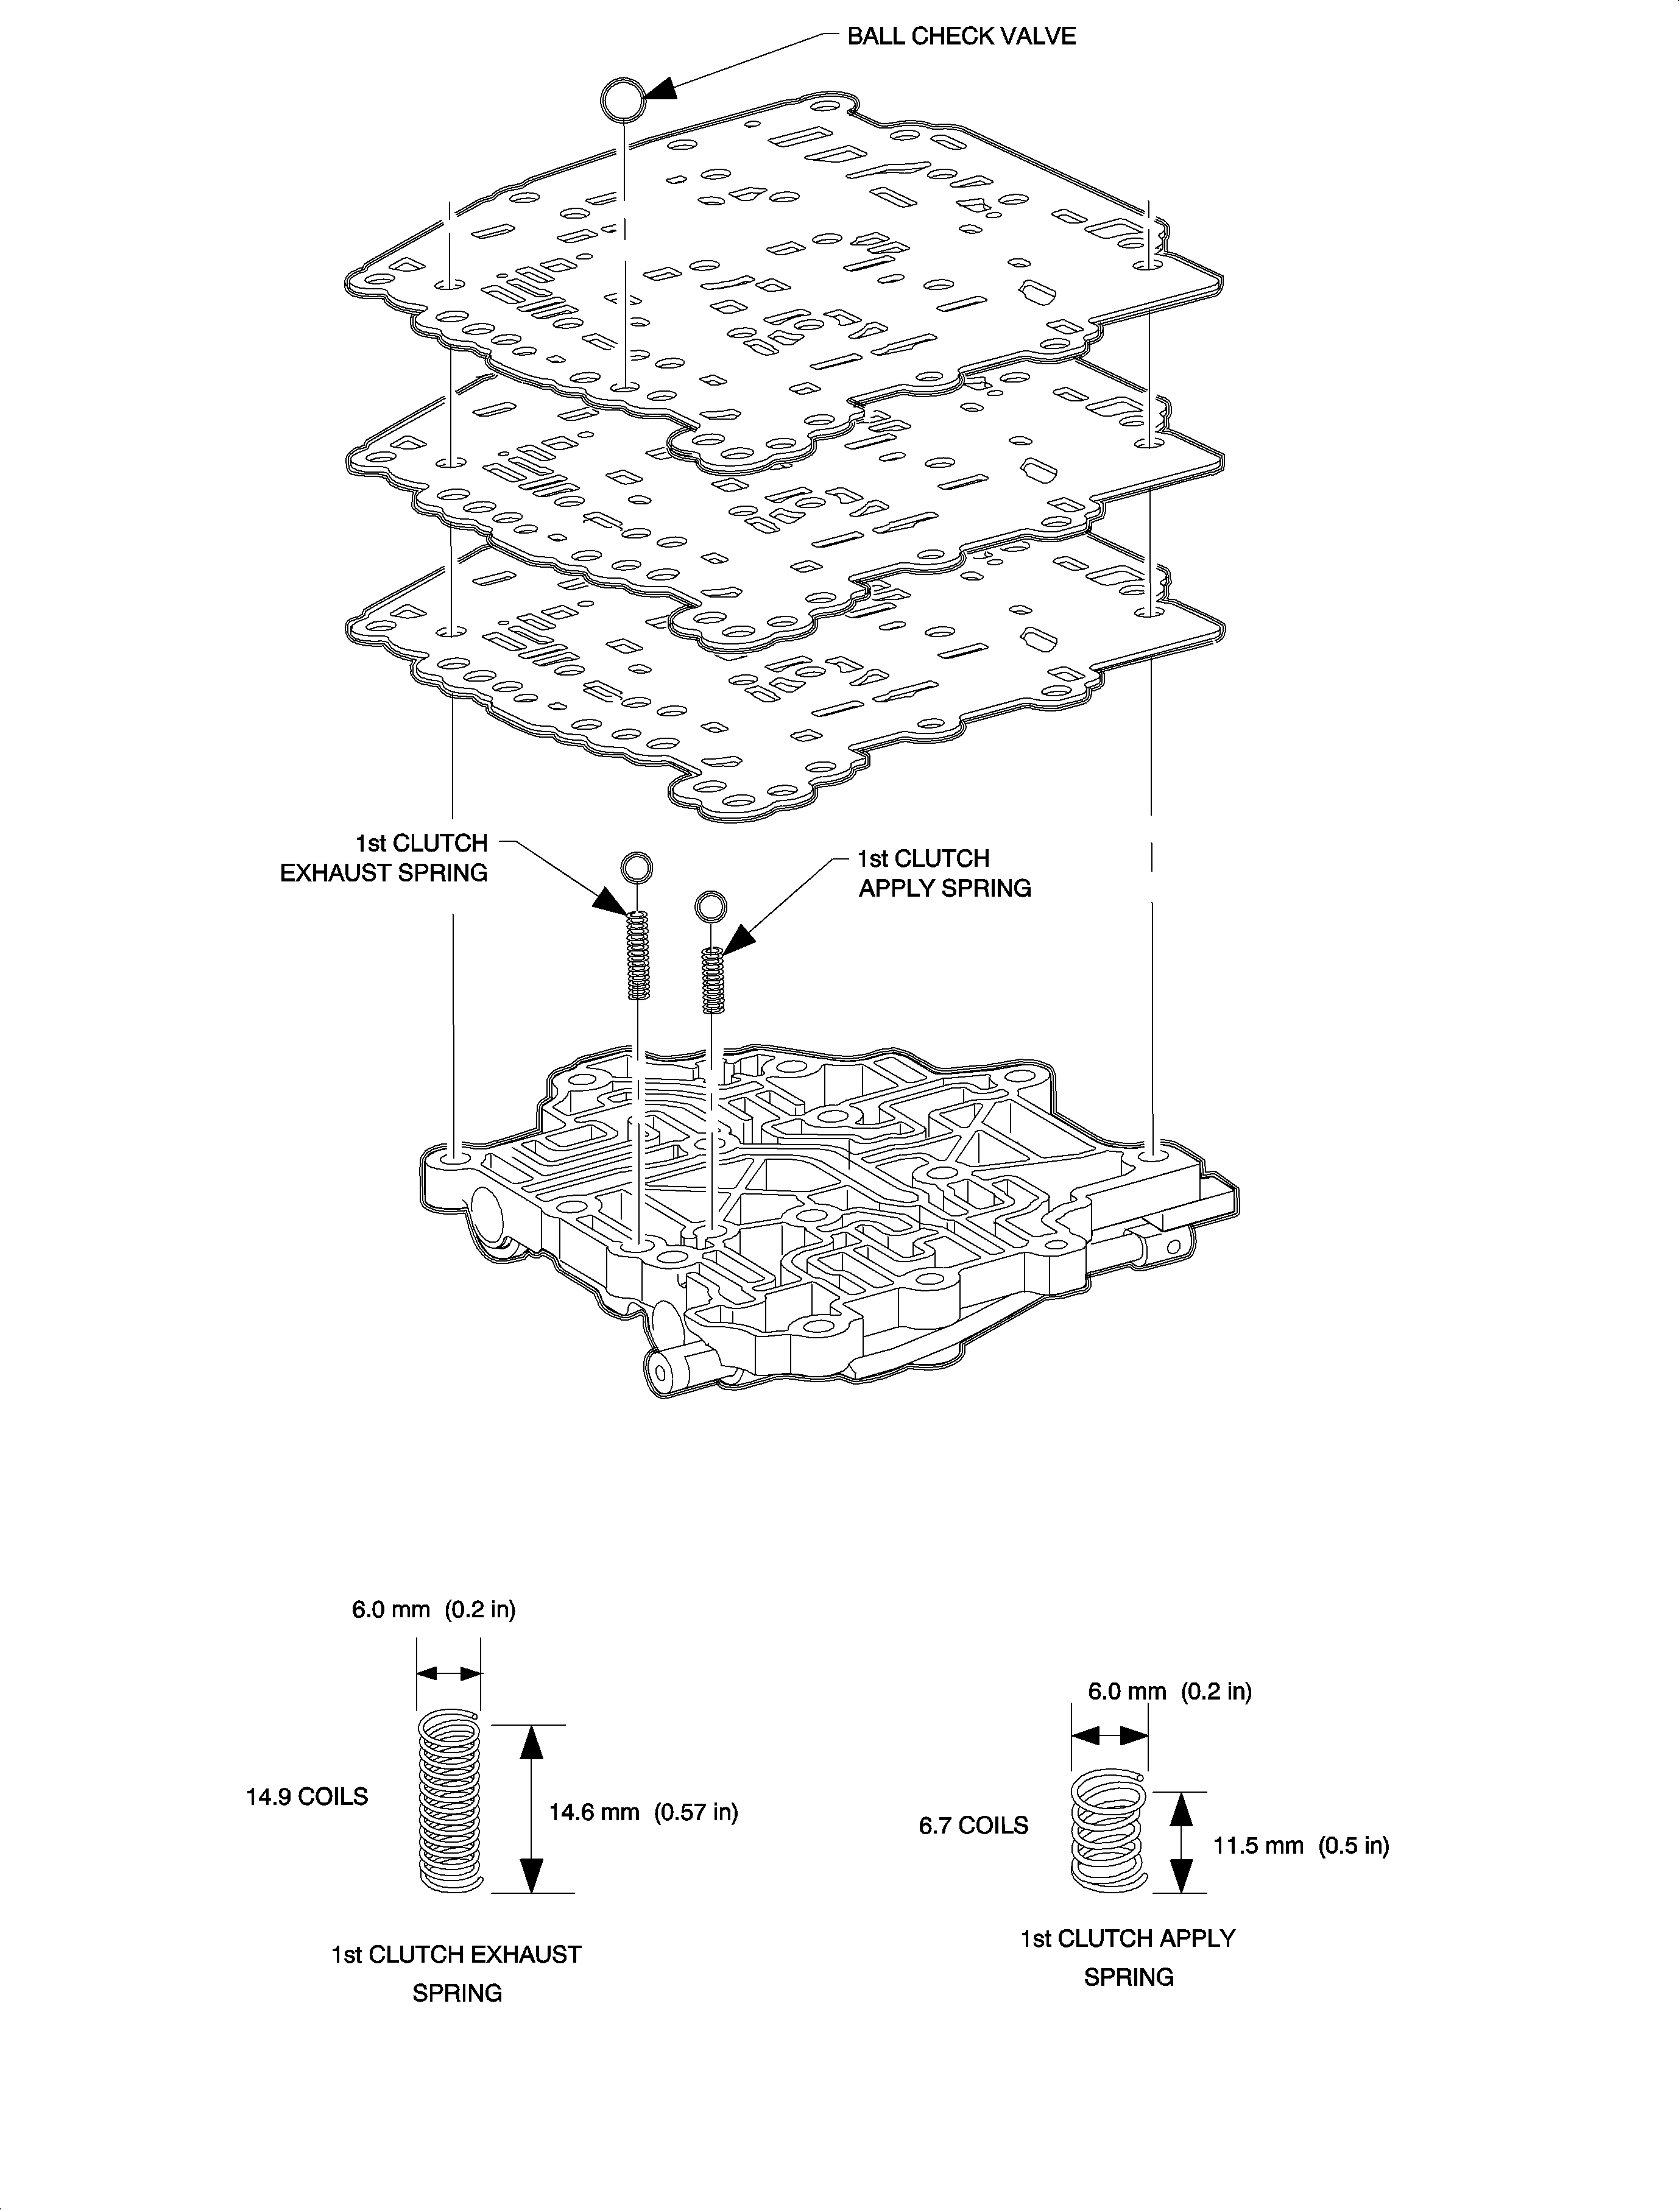
  1. Install the new spacer plate gaskets on the spacer plate.
  2. Install the 2 transaxle ball check valves in the lower valvebody, on top of the springs. Refer to illustration on facing page.
  3. Install the spacer plate on top of the lower valvebody and the transaxle ball check valves.
  4. Install the transaxle ball check valve on top of the spacer plate.
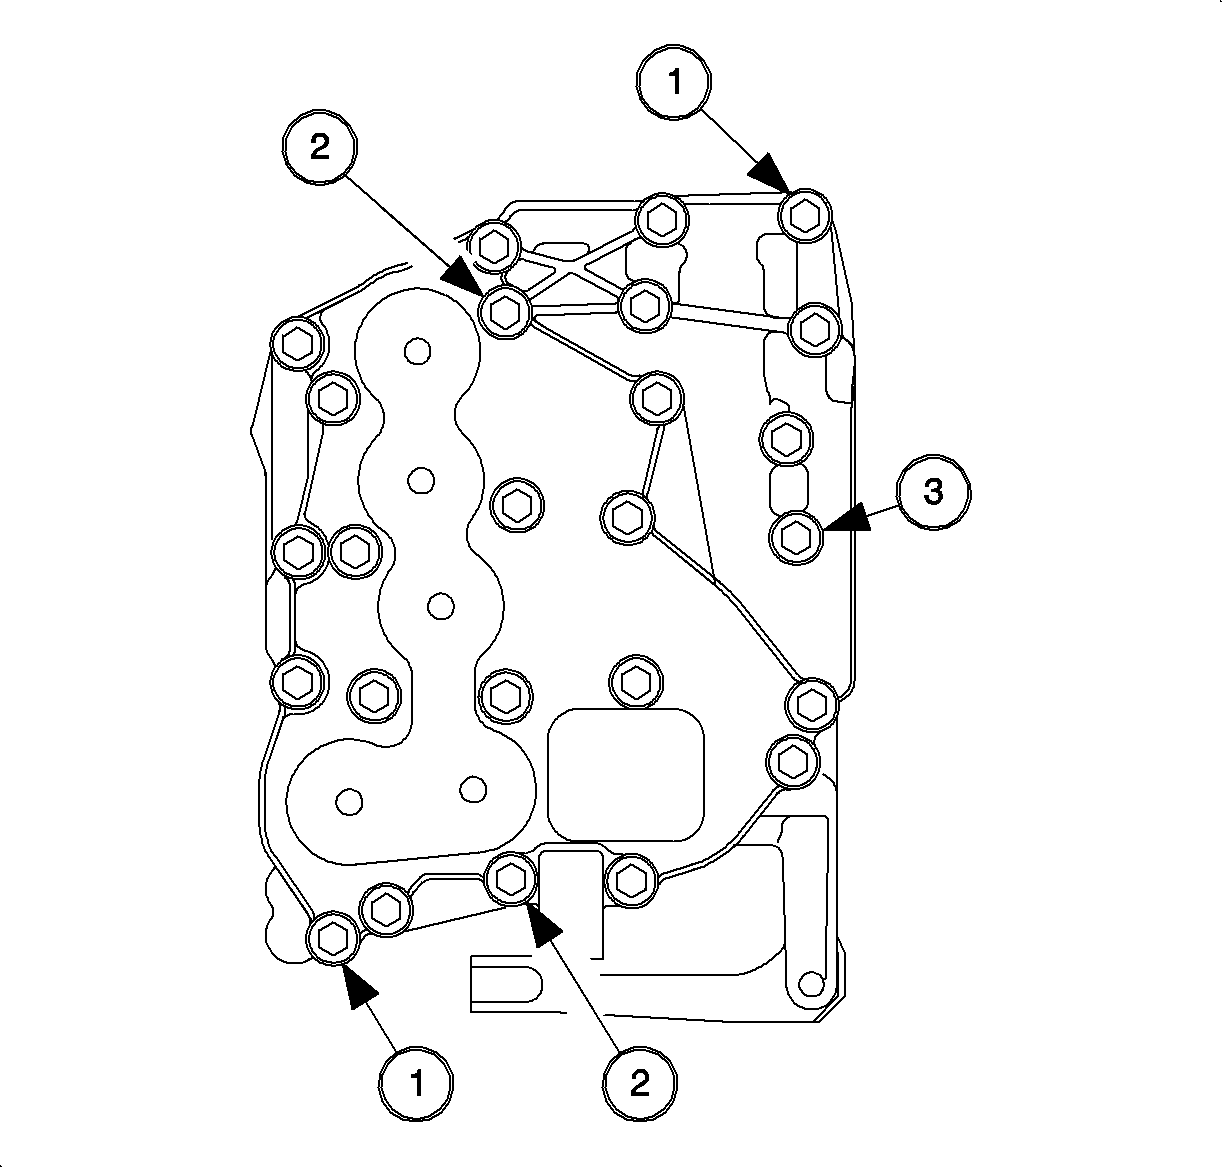
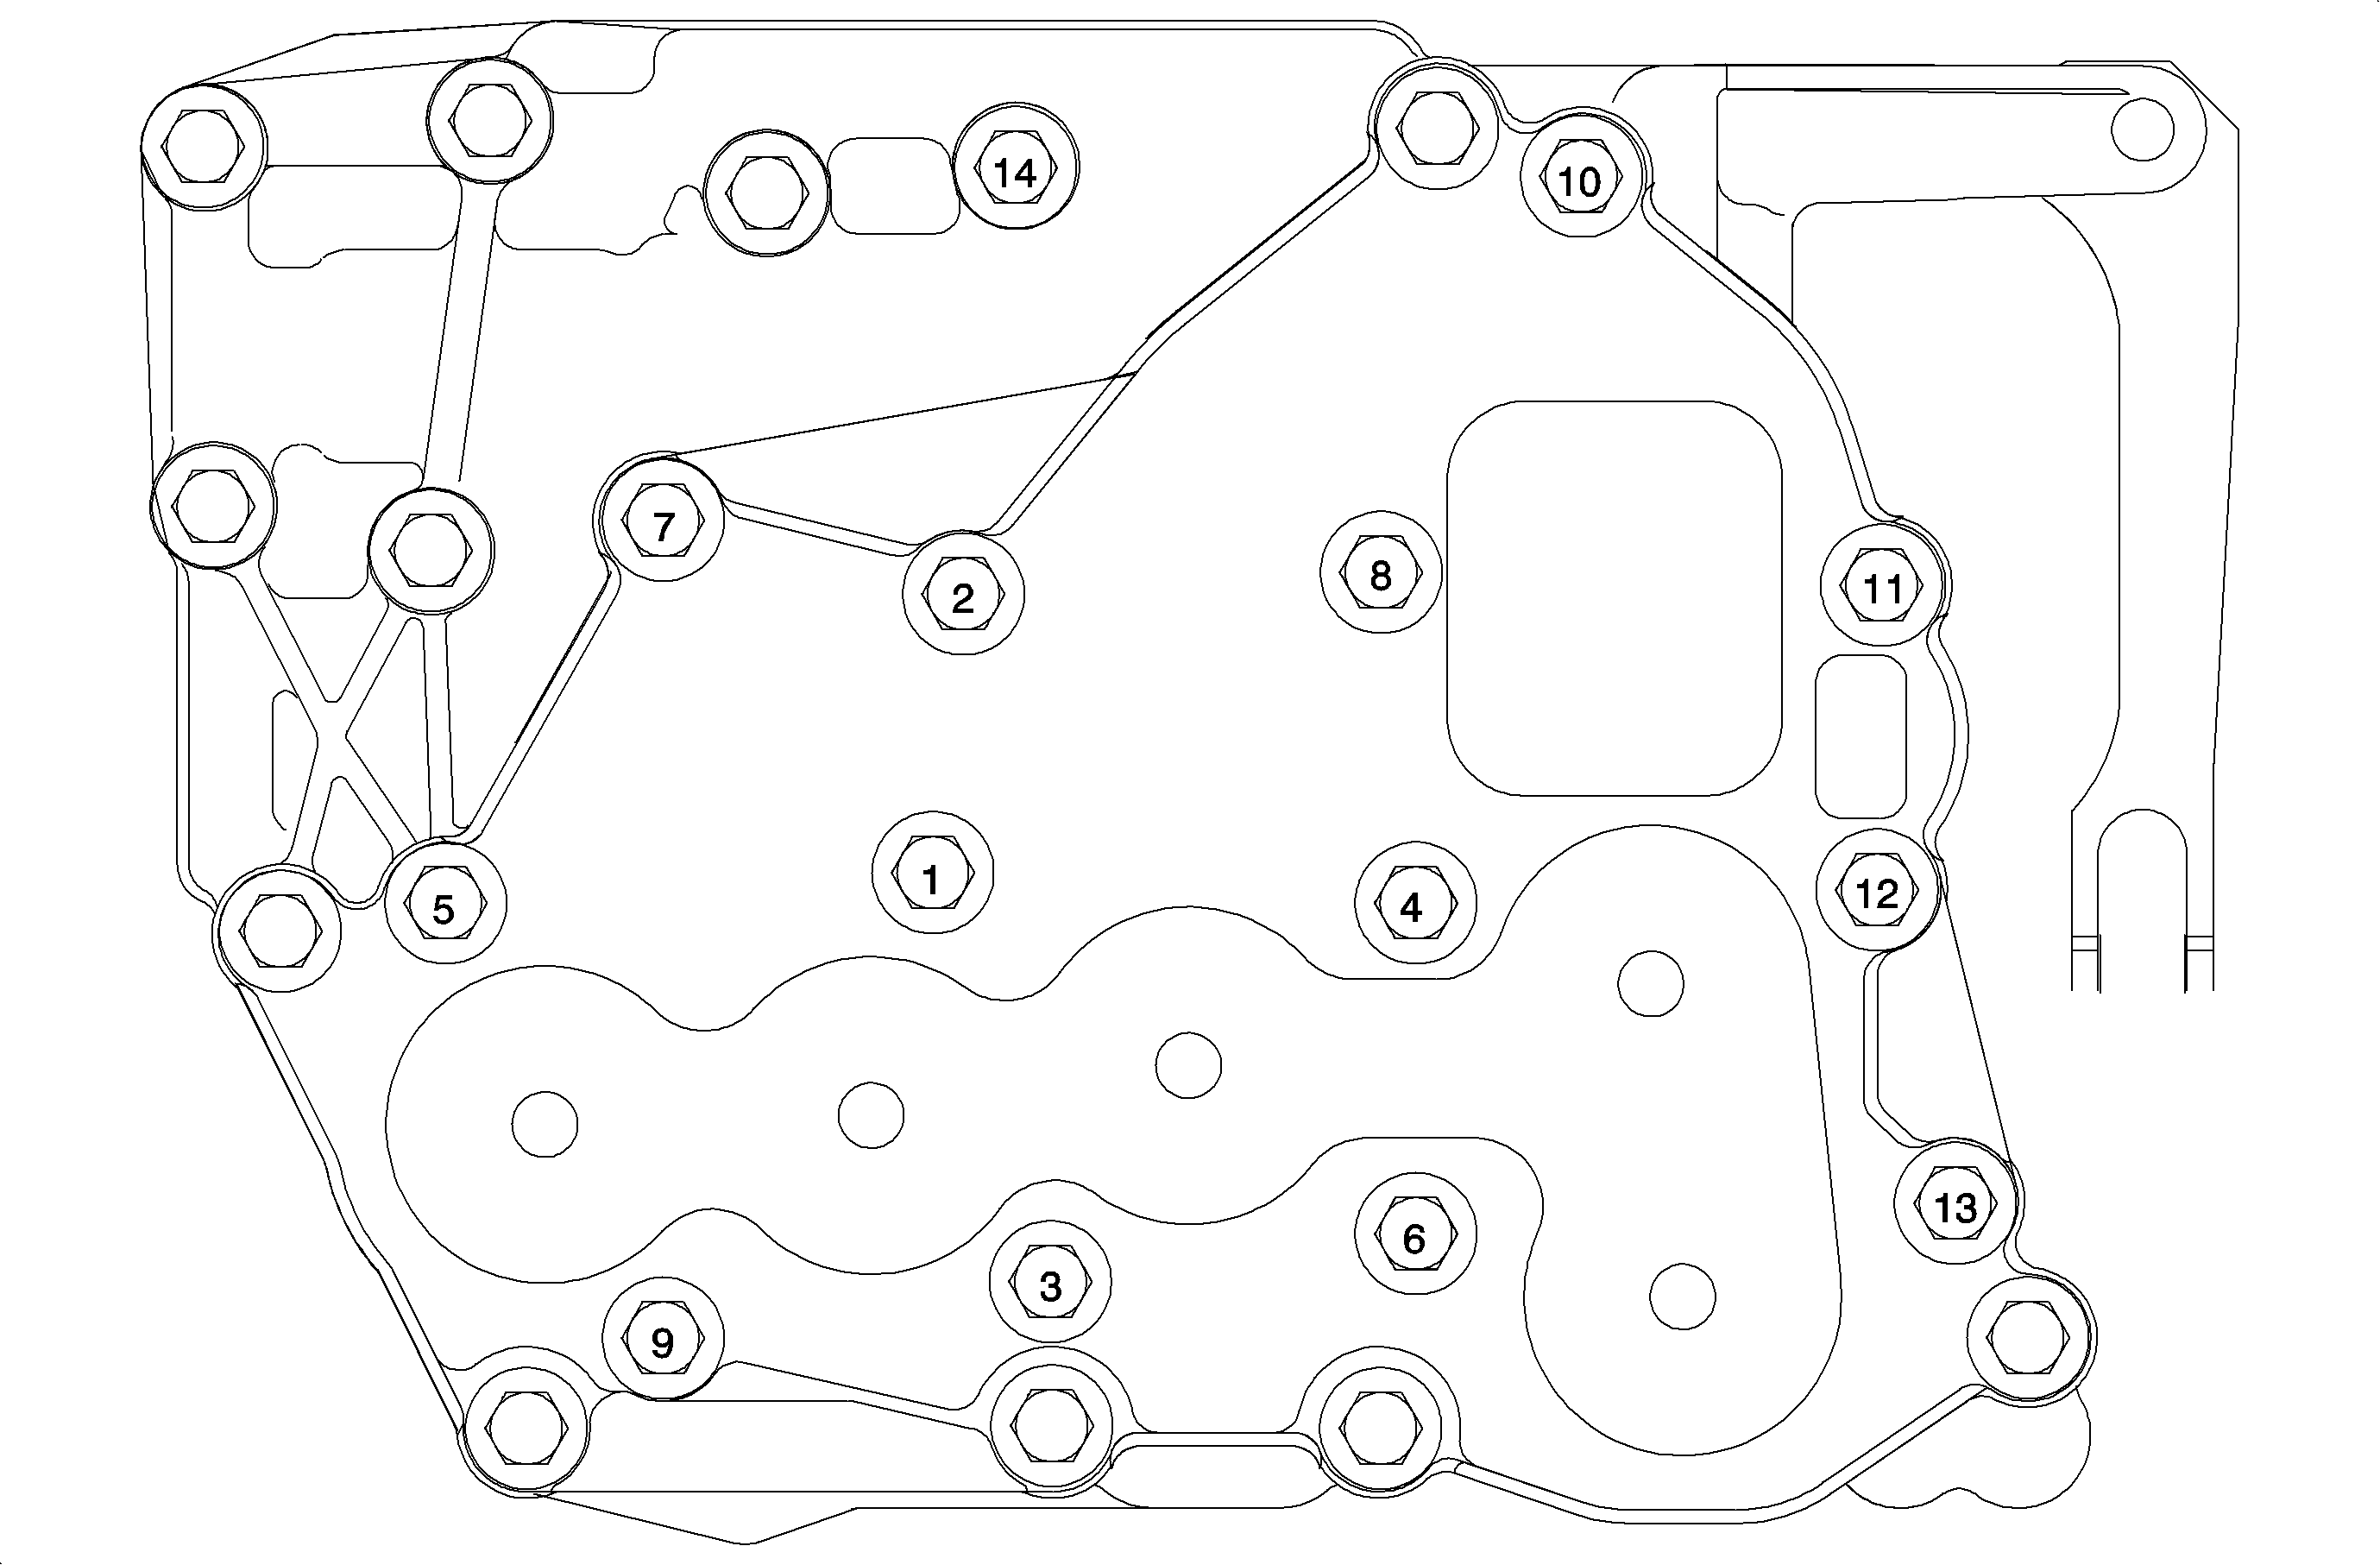
  5. Object Number: 863834  Size: SH
    Click here for detailed picture of above image.

    Important

    The dowel bolts must be placed in the holes shown to align the upper valvebody to the lower valvebody. For reference, the bolts are identified as follows:

  6. Install 2 halves of valvebody and install the 1 bolt holding the 3 halves together (3) .
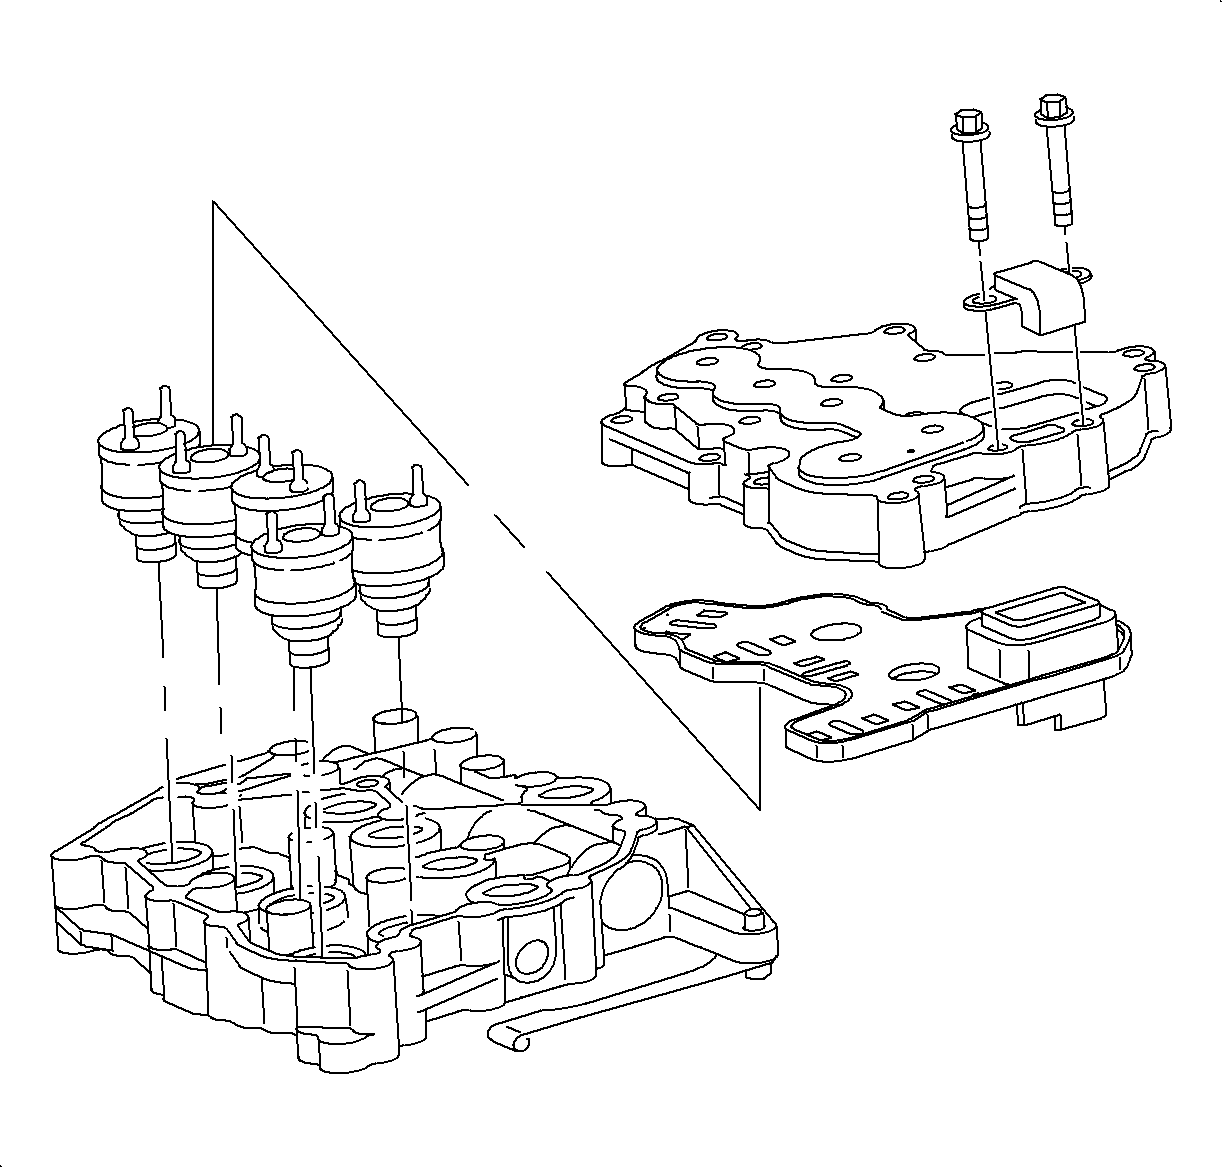
  7. Lube the solenoid valve O-rings.

  8. Object Number: 859193  Size: MF
    Click here for detailed picture of above image.
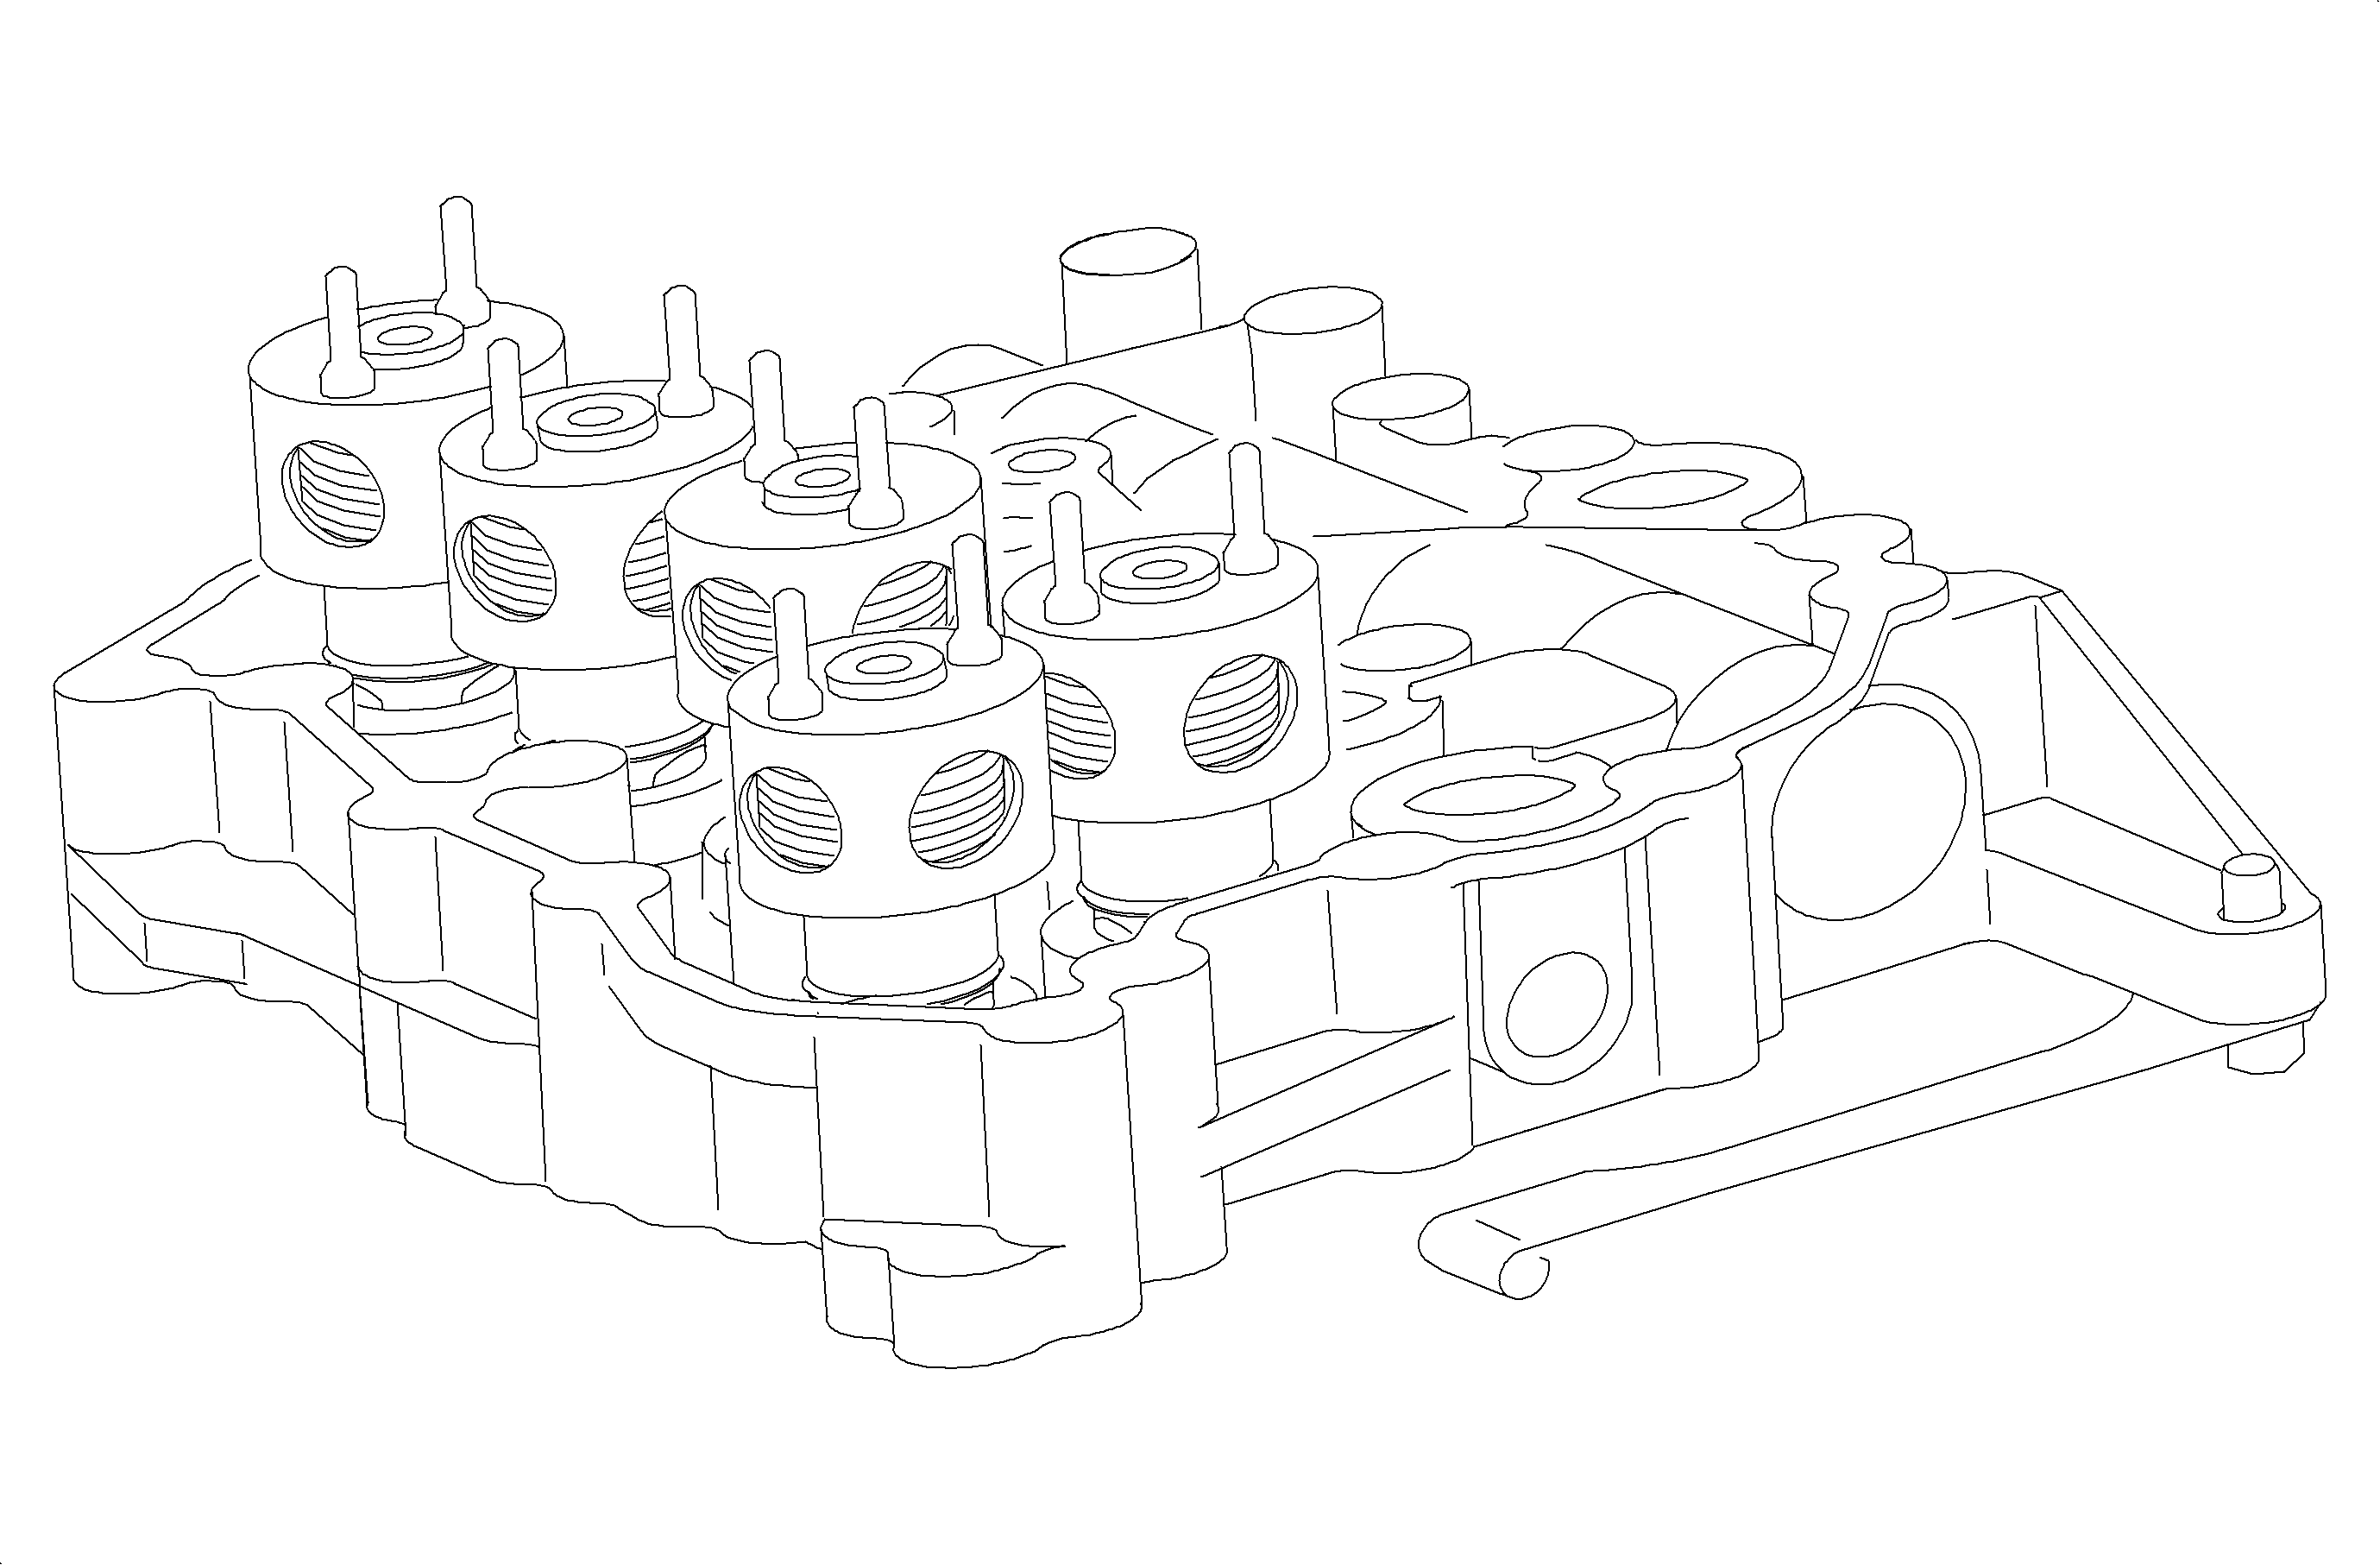
  9. Install the solenoids with a twisting motion.

  10. Object Number: 863644  Size: SH
    Click here for detailed picture of above image.
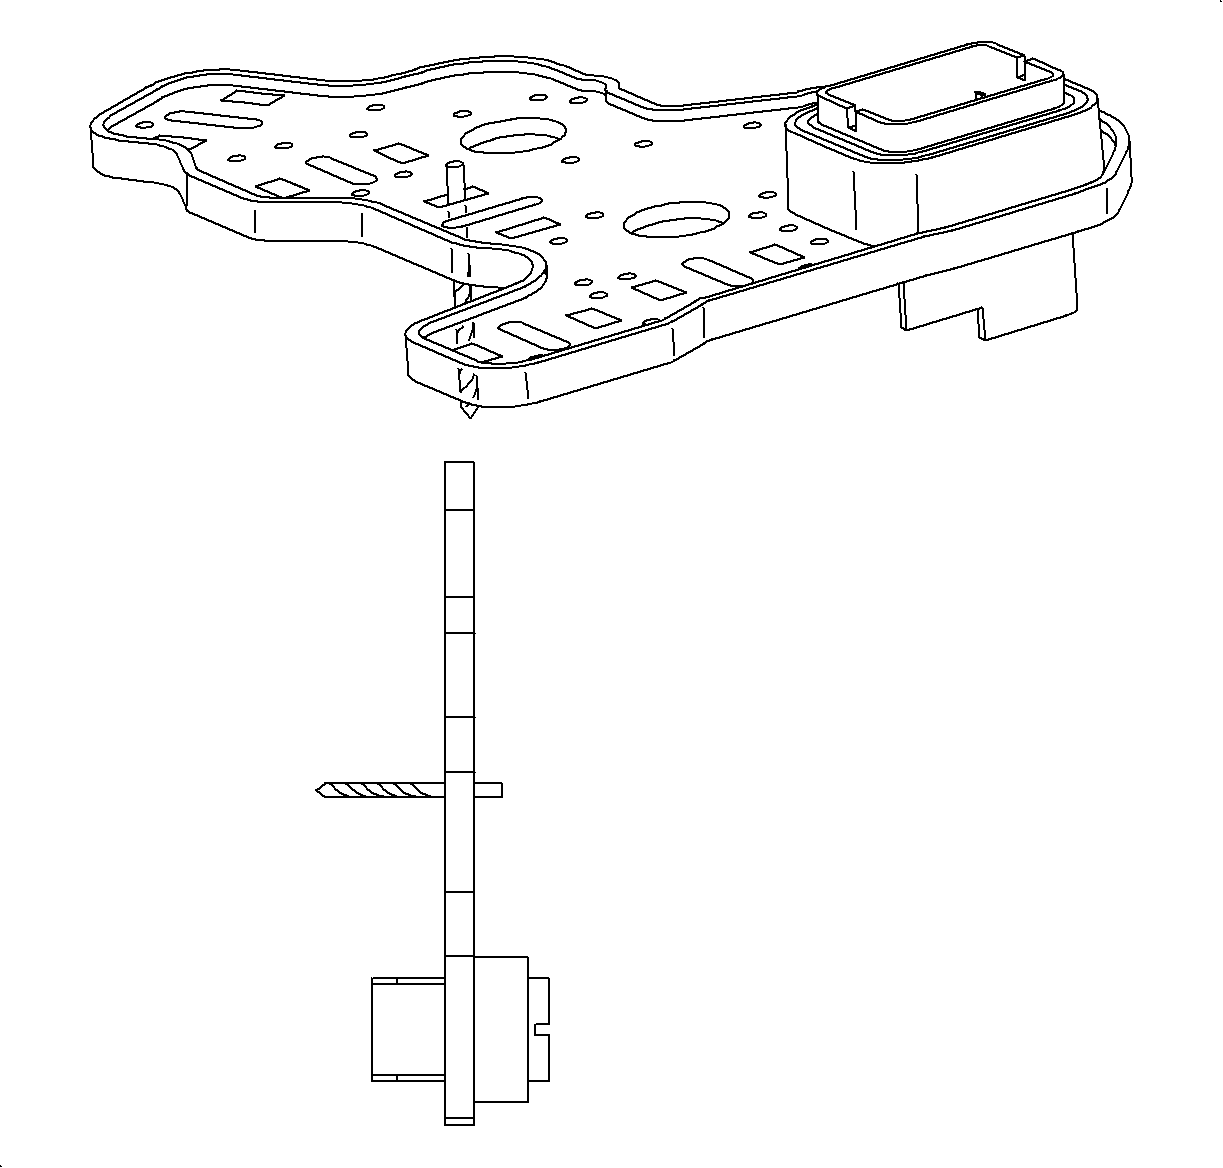
  11. Check the connector plate terminals with a #43 (2.25 mm) drill bit. There should be a slight drag on the shank. If there is no drag, replace the connector plate.
  12. Notice

    Refer to Fastener Notice in Cautions and Notices.


    Object Number: 864726  Size: MF
    Click here for detailed picture of above image.

    Notice

    Over-torqueing bolts can cause valves to bind.

  13. Torque the solenoid cover bolts using torque sequence shown in illustration.
  14. Tighten

    Tighten the valvebody assembly bolts to 11 N·m (8 lb ft).

  15. Install the valvebody assembly. Refer to Control Valve Body Assembly Removal .

  Document ID# 881429
1998 Saturn SL2/SC2/SW2