Document ID# 1207463
1998 Saturn SL2/SC2/SW2
 

Shift Control Housing Replacement

Removal Procedure

    Object Number: 873348  Size: SH
    Click here for detailed picture of above image.
  1. Remove the air induction system. (DOHC shown, SOHC similar.)

  2. Object Number: 862853  Size: SH
    Click here for detailed picture of above image.
  3. Disconnect the negative battery cable from the battery.
  4. Disconnect the positive battery cable from the battery.
  5. Remove the hold-down retaining nut (1) and screws (2), and lift off the battery hold-down retainer (3).
  6. Lift the battery out of the vehicle, and place it in a safe location.
  7. Important

    One bolt is located in the fender wall.


    Object Number: 864859  Size: SF
    Click here for detailed picture of above image.
  8. Remove the battery tray.

  9. Object Number: 890084  Size: SH
    Click here for detailed picture of above image.
  10. Disconnect the back-up light electrical connector.
  11. Place the transaxle in neutral.
  12. Remove the shift control housing retaining bolts.
  13. Remove the housing and the gasket.
Installation Procedure

    Object Number: 890084  Size: SH
    Click here for detailed picture of above image.
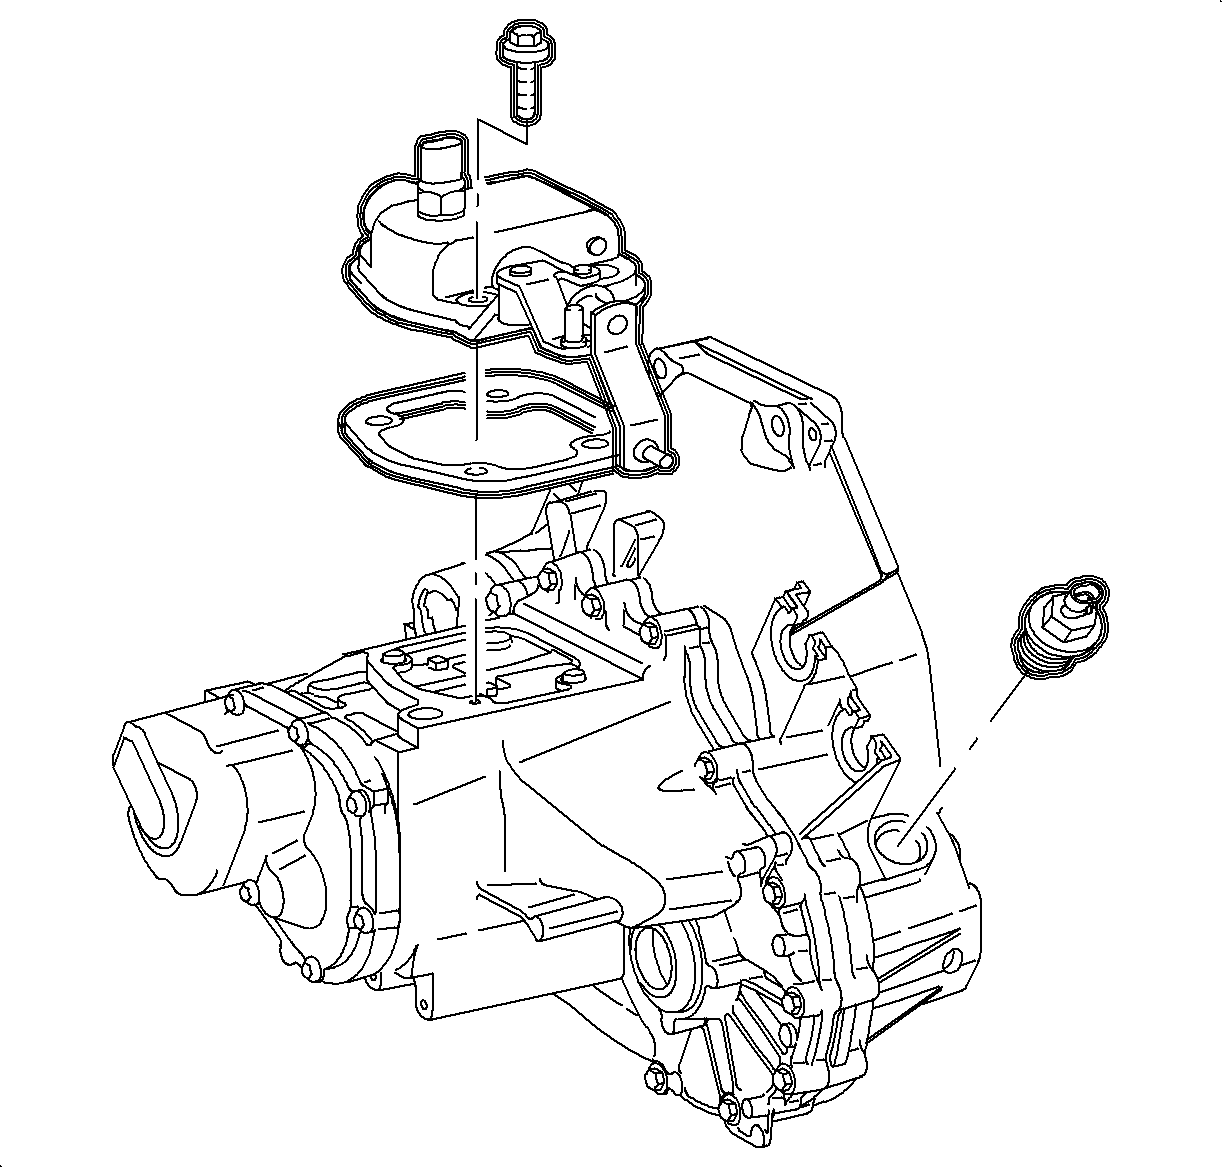
  1. Clean the gasket surfaces and install the shift housing gasket to the case.
  2. Notice

    Make sure the shift housing is completely down on case before installing bolts. Torquing bolts on a misaligned housing will damage the case.

    Important

    Clean and lubricate the fastener with Saturn Transaxle Fluid. Wipe off the excess fluid and install.

  3. Install the shifter housing assembly on the case.
  4. Tighten

    Tighten the shift control housing-to-case bolts to 28 N·m (21 lb ft).


    Object Number: 864859  Size: SF
    Click here for detailed picture of above image.
  5. Connect the back-up light switch electrical connector.
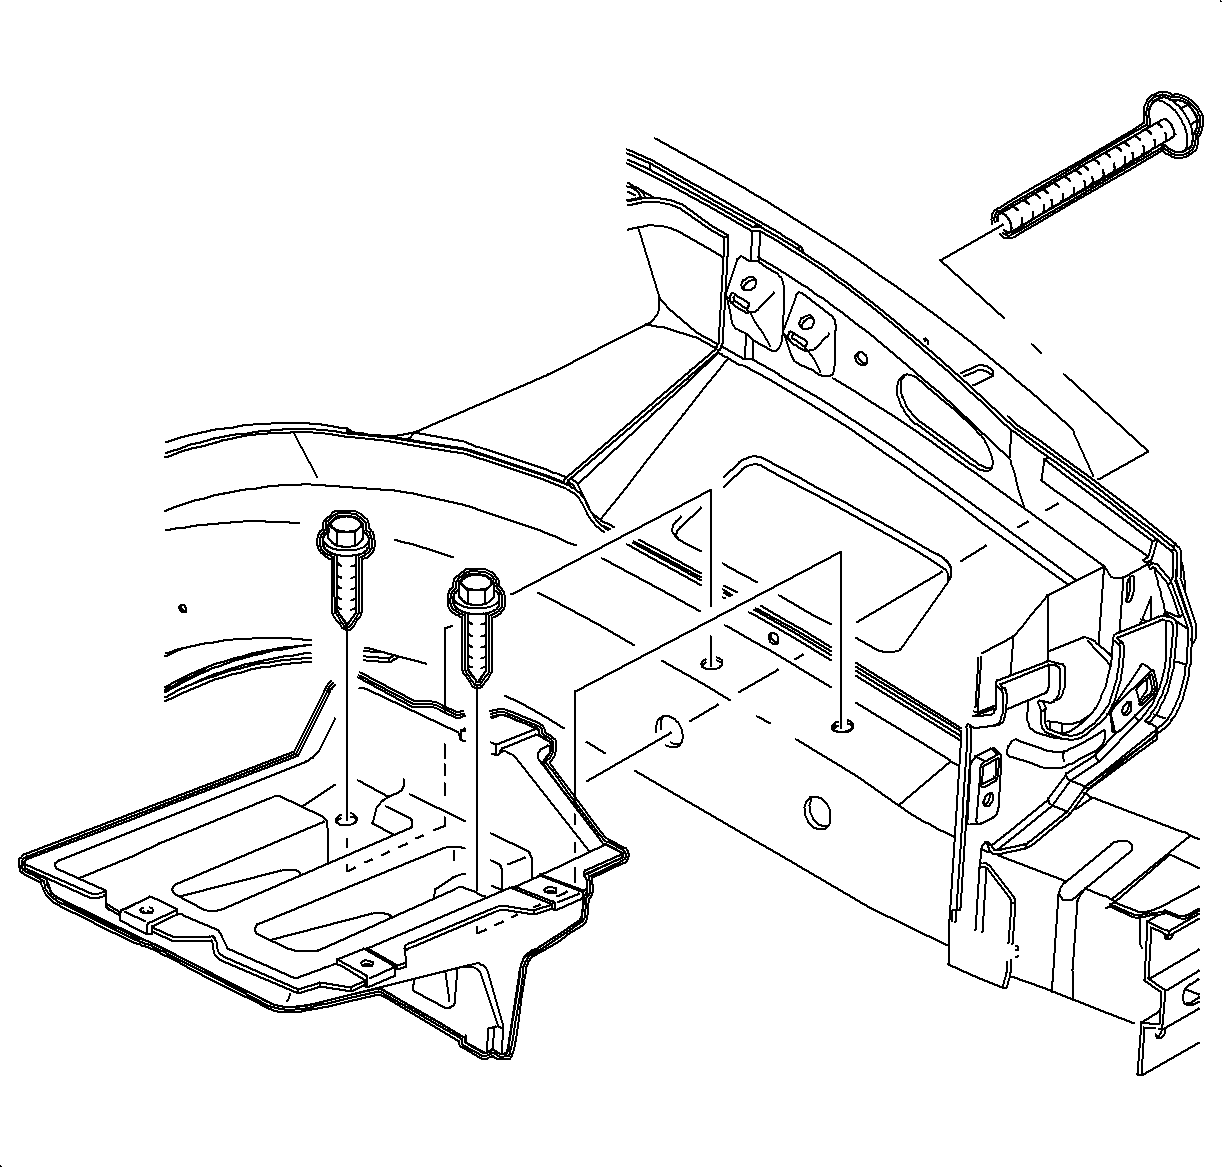
  6. Install the battery tray.
  7. Torque the battery tray bolts.
  8. Tighten

    Tighten the battery tray bolts to 10 N·m (89 lb in).


    Object Number: 862853  Size: SH
    Click here for detailed picture of above image.
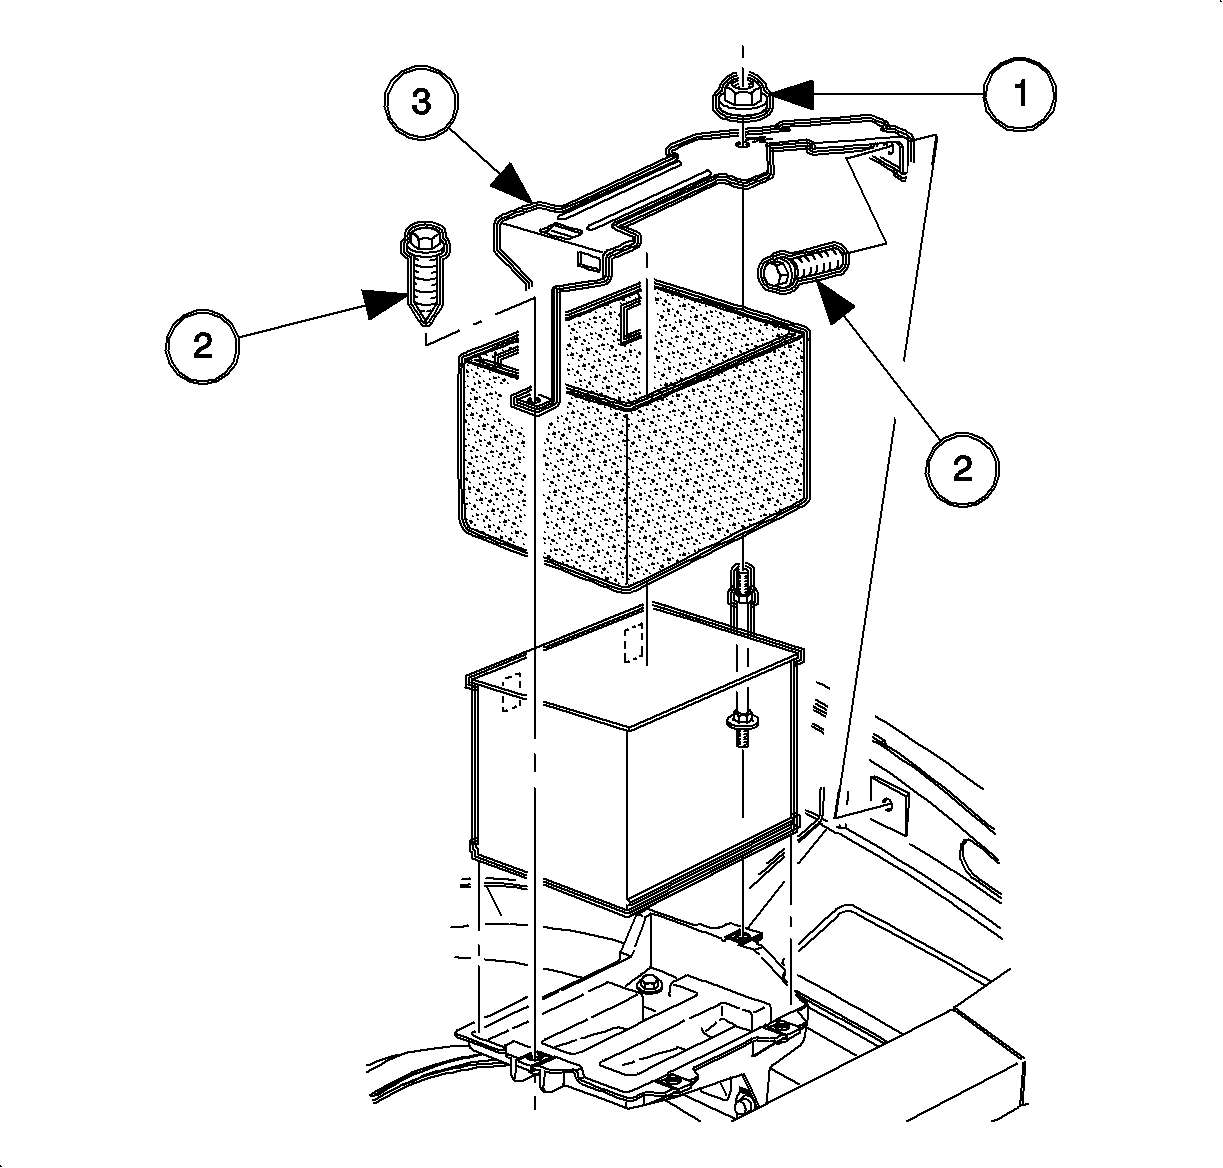
  9. Make sure the battery tray is clean.
  10. Make sure that the battery cable ends are clean and free of corrosion. (Clean with a wire brush.)
  11. Make sure that the battery is in good physical condition (e.g., no cracks, or obvious damage) and that the terminals are clean.
  12. Install the battery carefully in the battery tray; make sure that the terminals do not short against any metal during the installation.
  13. Install the battery hold-down retainer (3), locking the battery into the tray. Install and tighten the hold-down retainer nut (1) and screws (2).
  14. Tighten

    Tighten the battery hold down-to-battery tray fasteners to 9 N·m (80 lb in).

  15. Install the positive battery cable first.
  16. Tighten

    Tighten the battery terminal bolts to 17 N·m (151 lb in).

  17. Install the negative battery cable last.
  18. Tighten

    Tighten the battery terminal bolts to 17 N·m (151 lb in).


    Object Number: 873348  Size: SH
    Click here for detailed picture of above image.
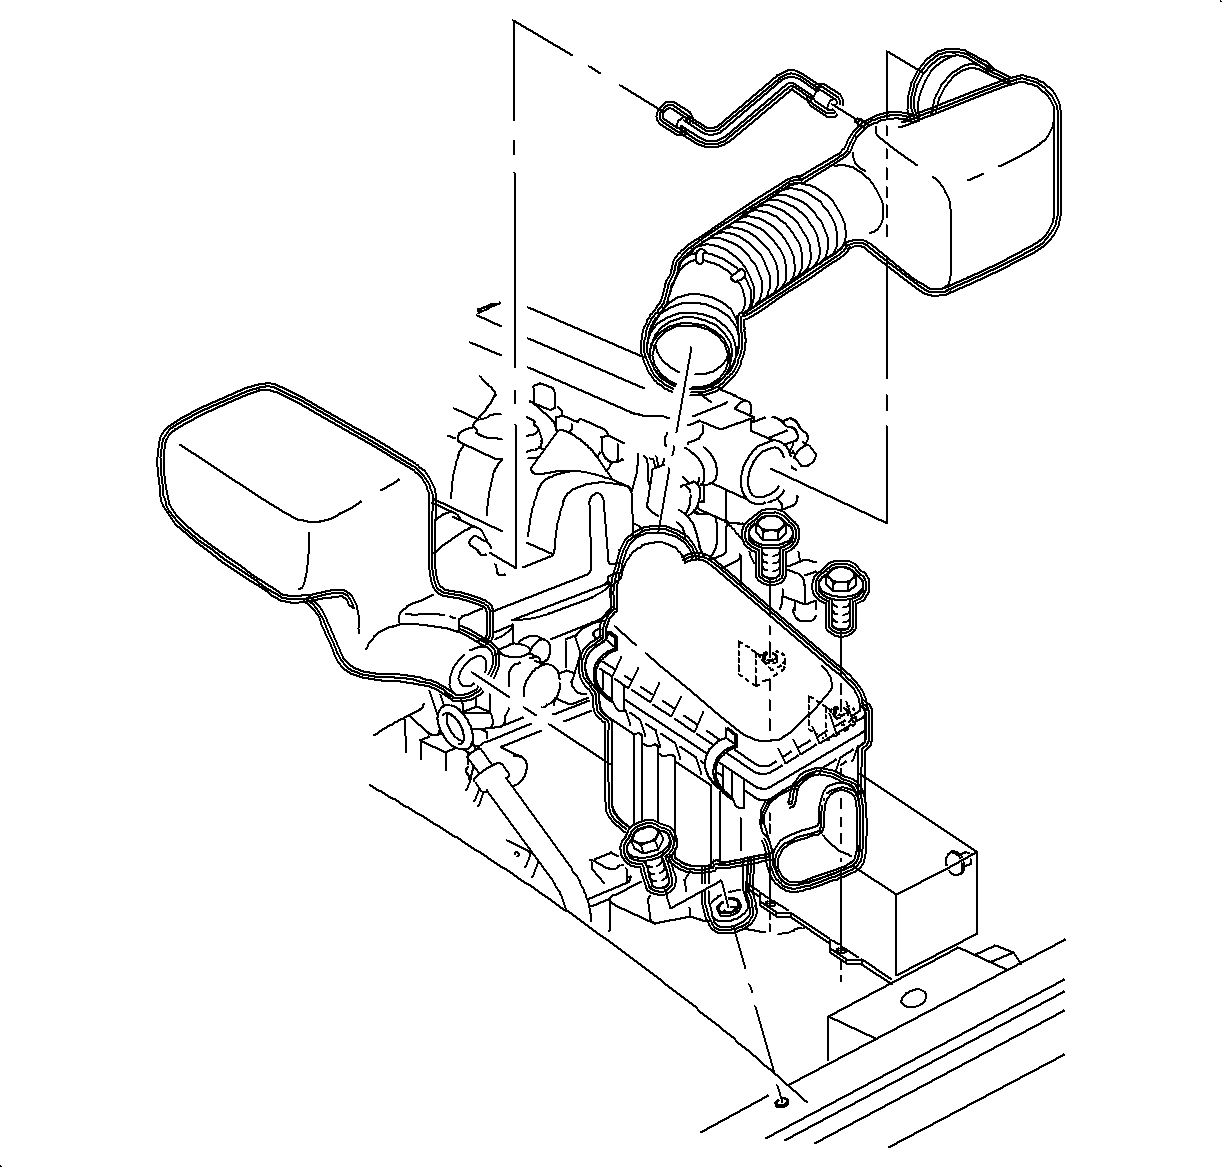
  19. Install the air induction system. (DOHC shown, SOHC similar.)

  Document ID# 1207463
1998 Saturn SL2/SC2/SW2