
- Make sure the caliper
piston is bottomed fully in the caliper bore.
- Make sure the brake pads and the pad clips are correctly installed in
the caliper support.
Important
Remove rust and corrosion from caliper brackets and spring clips. If installing
used brake pads, remove rust and corrosion from the ends of the brake
pads. Make sure the brake pads move freely in the caliper brackets when the brakes
are assembled.
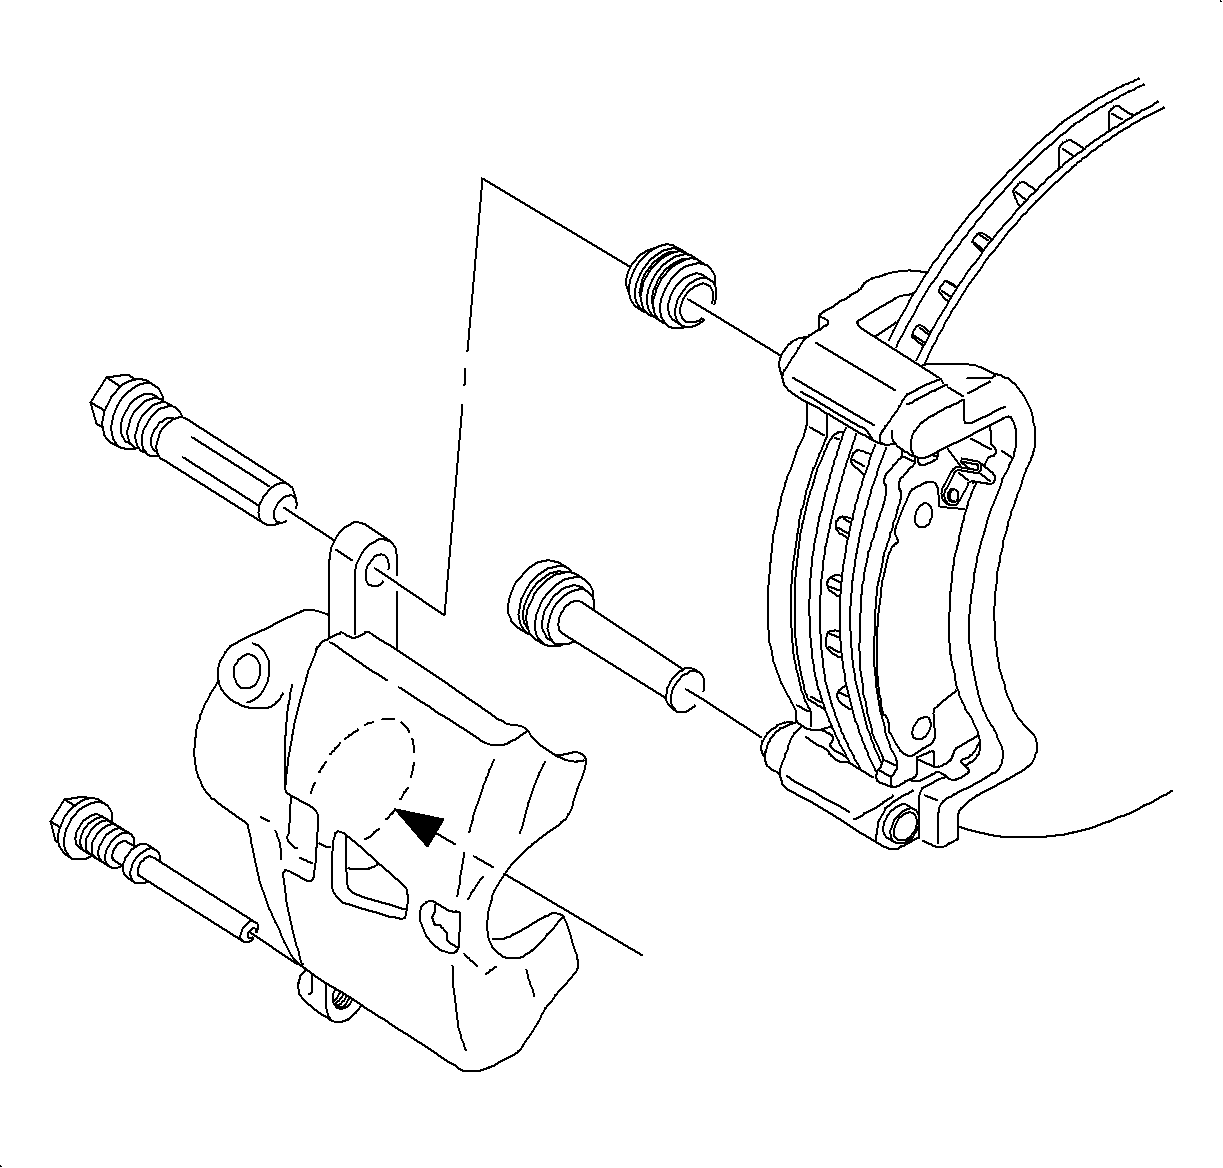
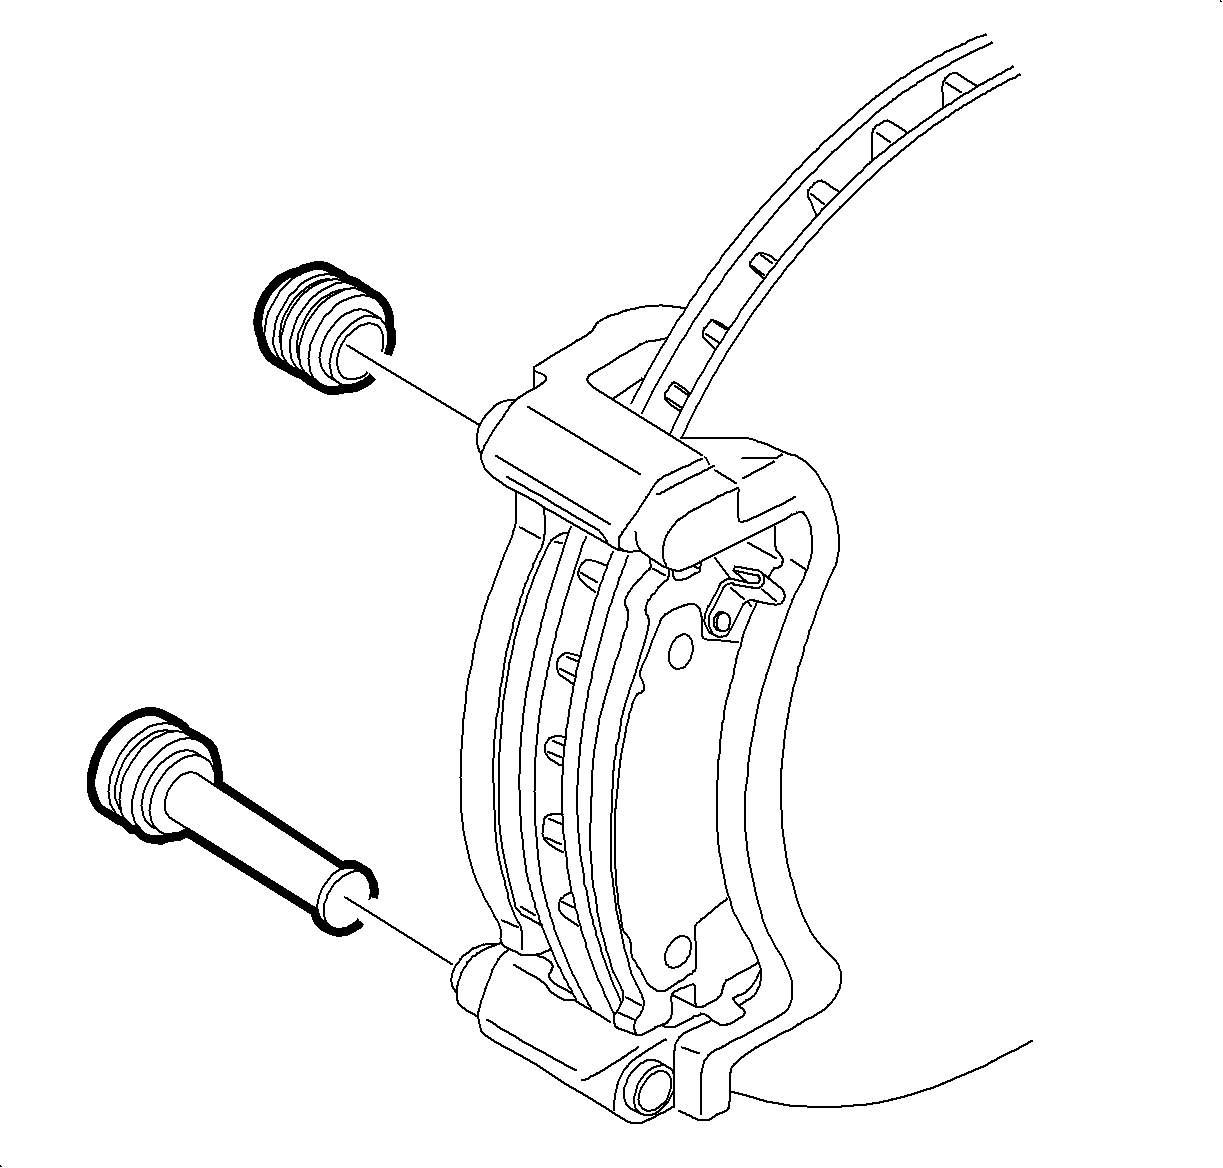
- Lubricate the pin boots with silicone grease.
- Install the lock pin boot into the caliper support.
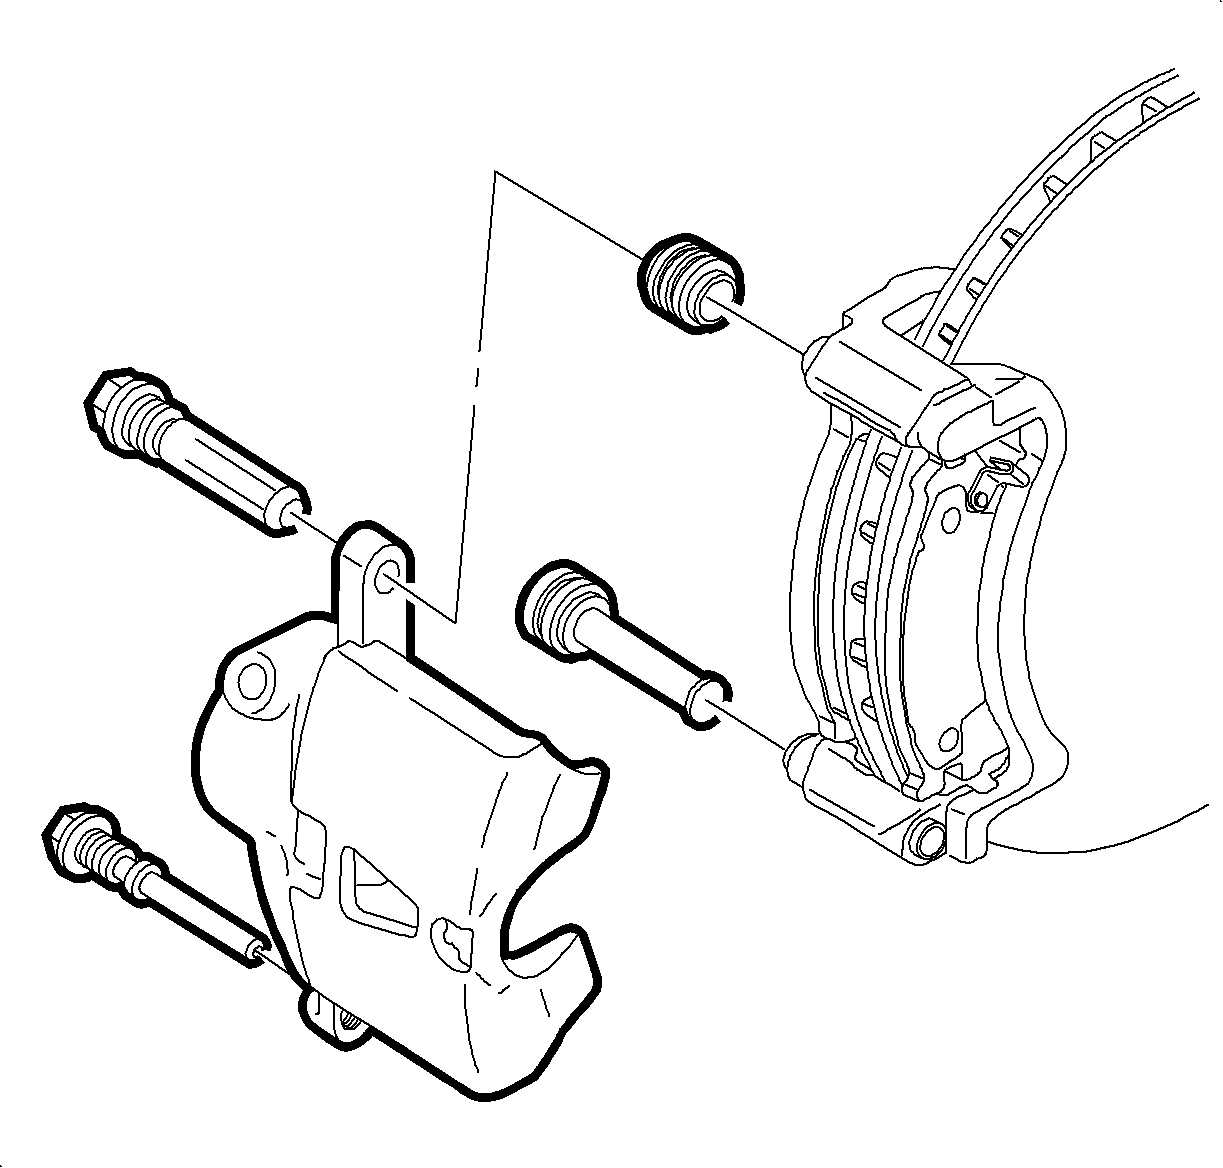
Important
Make sure the lock pin boot passes all the way through the caliper support.
Important
Use the lock pin as a tool to assist installation.
- Install the guide pin boot onto the caliper body.
- Install the caliper body onto the caliper support.
Notice
Be careful not to damage piston, bore, or retainer groove.
Important
Compress the pin boots by hand as the caliper moves into position.
- Lubricate the straight section (not threads) of the lock pin and the guide pin
with silicone grease.
Notice
Refer to Fastener Notice in Cautions and Notices.
Notice
Make sure guide and lock pin boots are properly aligned prior to pin installation,
or boot damage may occur.
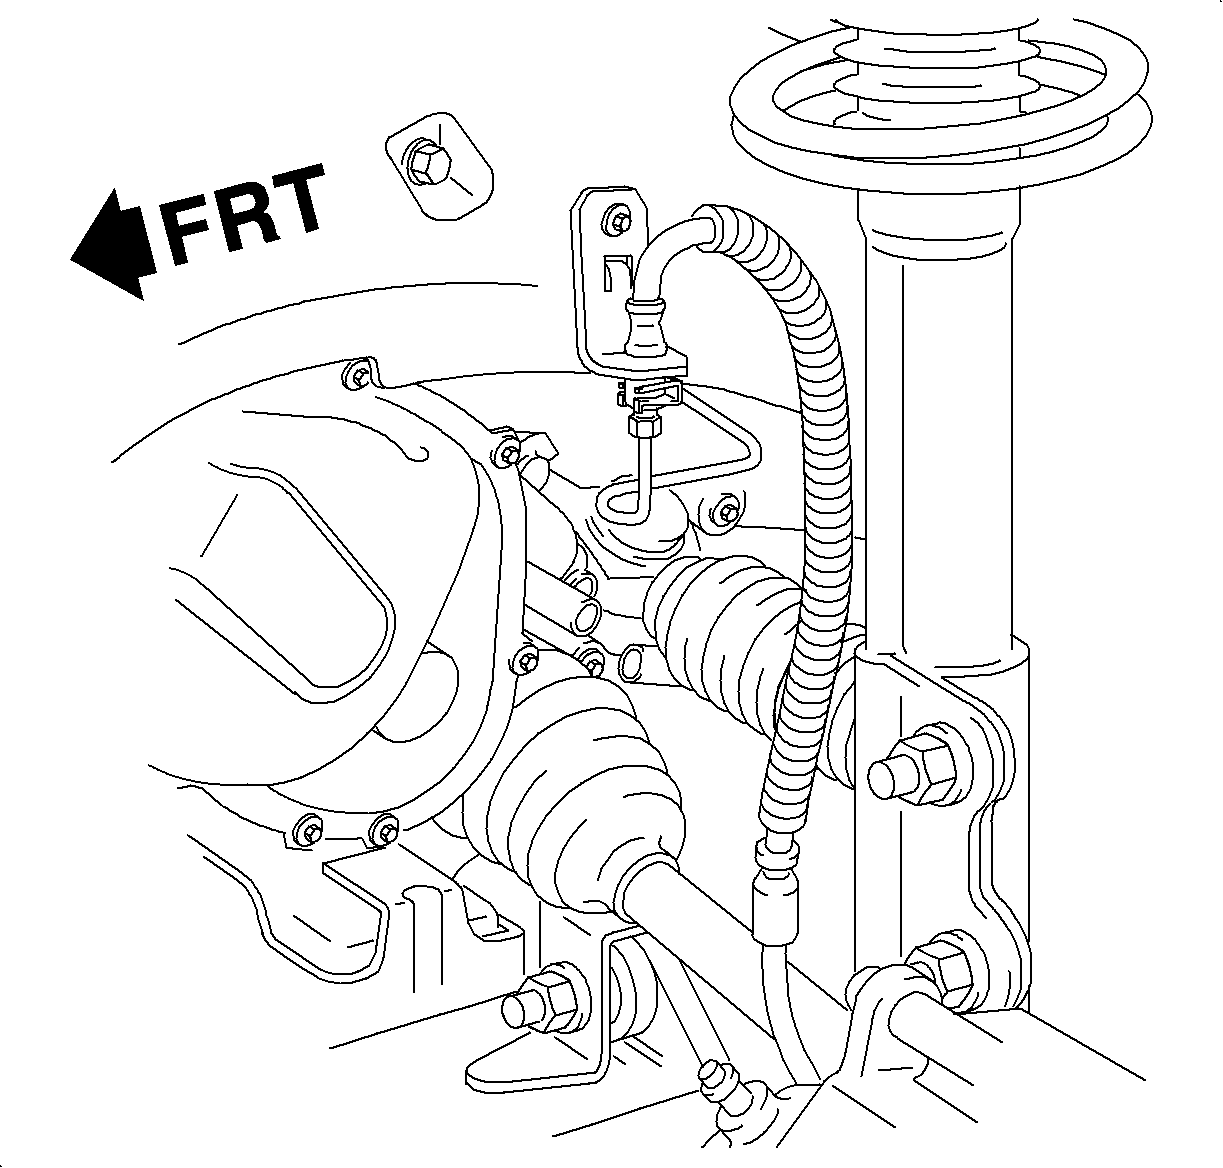
Notice
Make sure front brake hose is routed as shown with loop to the rear. Be careful
not to install front brake hose with a twist. Incorrect front brake hose installation
could bring hose into contact with wheel. Brake failure could result.
- Install the lock and guide pins.
TightenTighten the lock/guide pin-to-brake caliper to 36 N·m (27 lb ft).
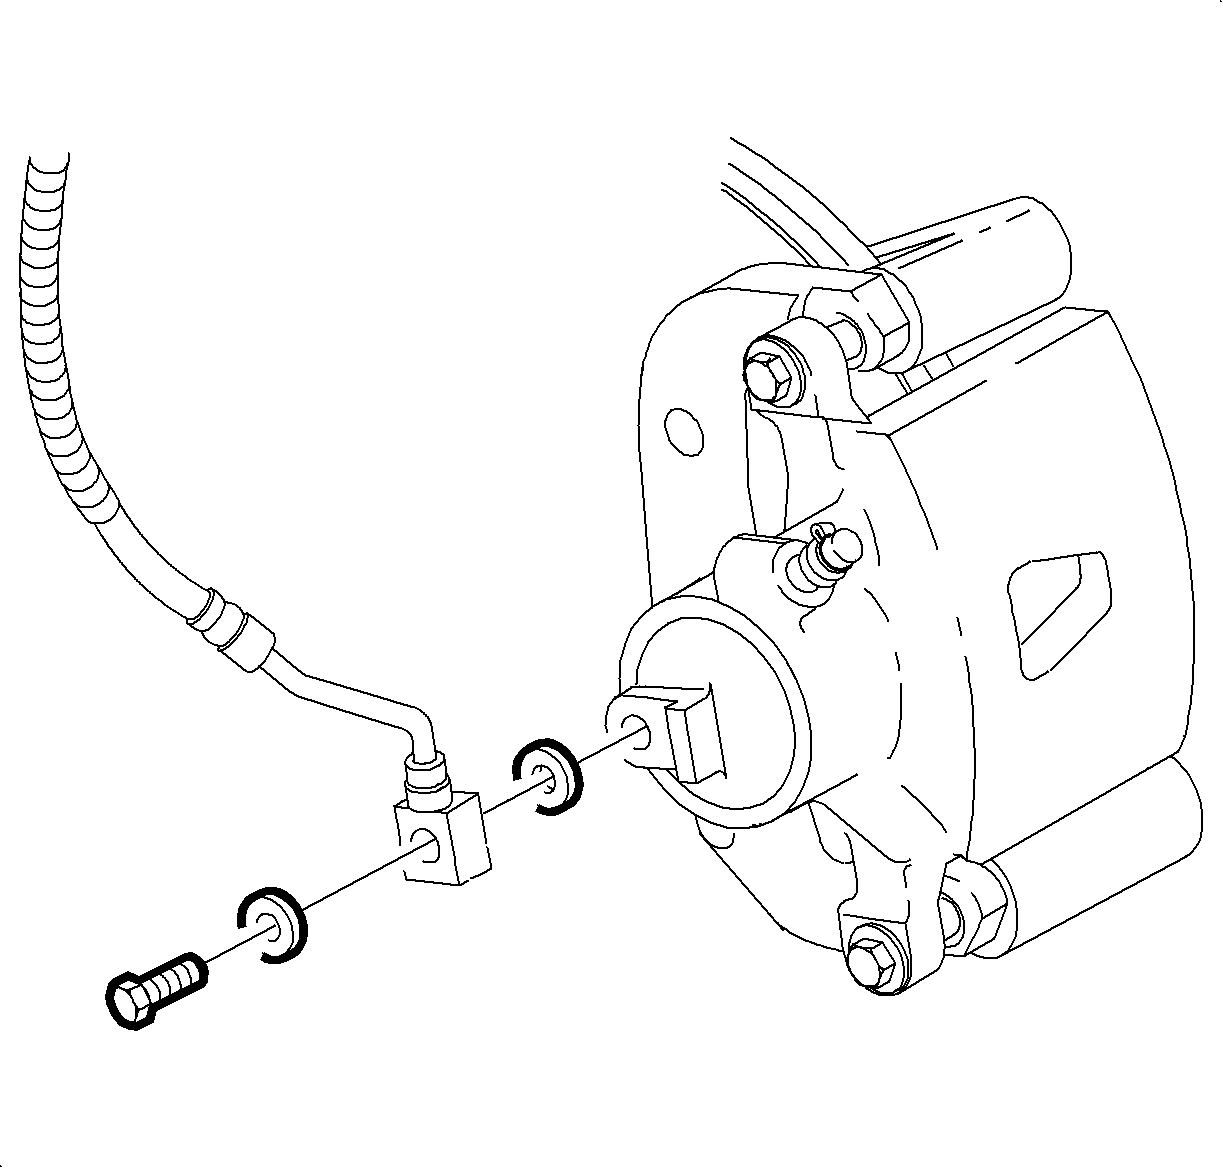
- Rotate the brake hose so that it loops to the rear and connect the brake hose
to the caliper with NEW washers.
TightenTighten the brake hose-to-brake caliper to 49 N·m (36 lb ft).
- Bleed the brakes. Refer to appropriate brake bleeding procedure.
Notice
Before installing wheels, remove rust or corrosion from wheel mounting surfaces
and brake rotors/drums. Failure to do so can cause wheel nuts to loosen in service.
- Position the wheel and tire assembly onto the hub.
- Install the wheel nuts and tighten in a crisscross pattern. Repeat the
tightening pattern to be sure the torque is correct.
TightenTighten the wheel nut to 140 N·m (103 lb ft).
- Lower the vehicle from the hoist.