
Caution
Ensure that the vehicle is properly supported and squarely positioned.
To help avoid personal injury when a vehicle is on a hoist, provide additional support
for the vehicle on the opposite end from which the components are being removed.
- Raise the vehicle on a hoist.
- Remove both rear road wheels.
Important
Plug the brake pipe to avoid excessive brake fluid loss or contamination.
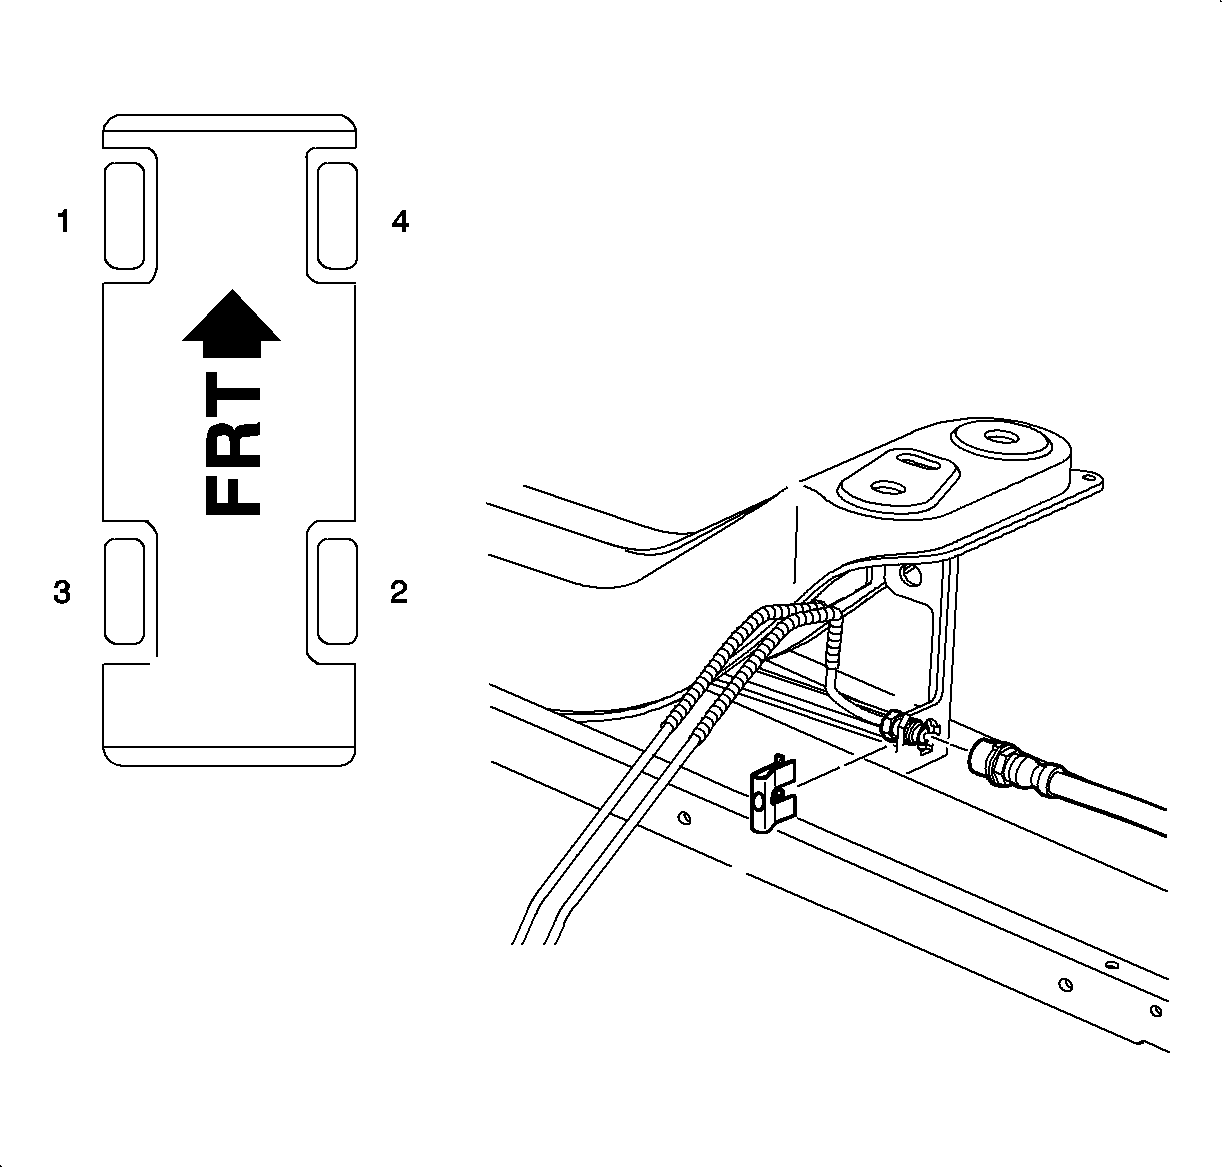
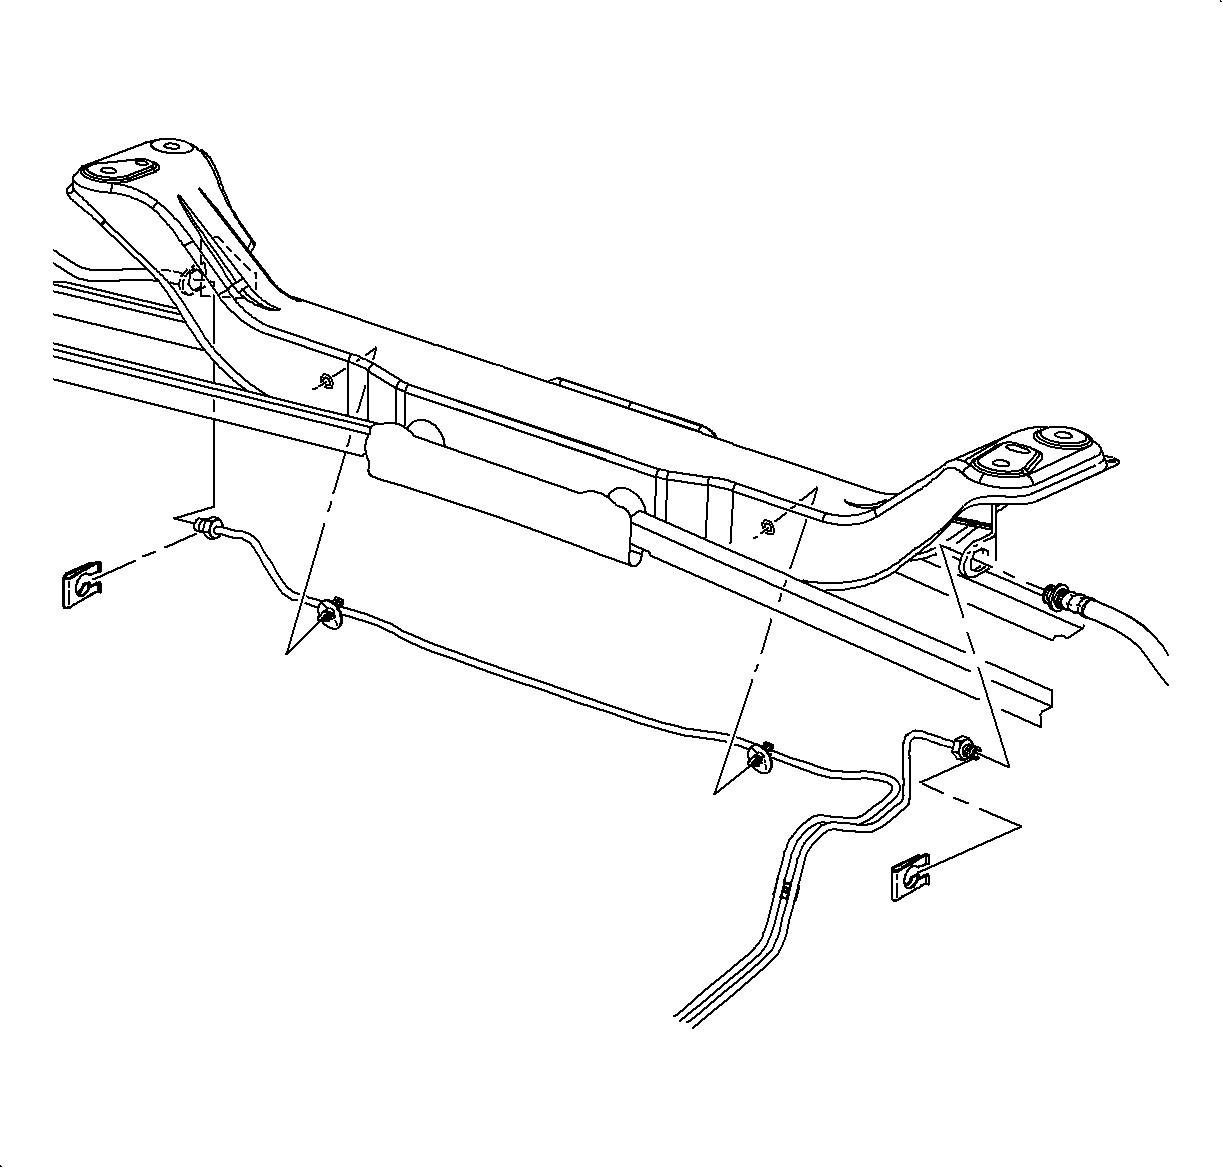
- Place an approved container under the left rear brake pipe, at the brake pipe/brake
hose junction and disconnect the left brake pipe from the brake hose.
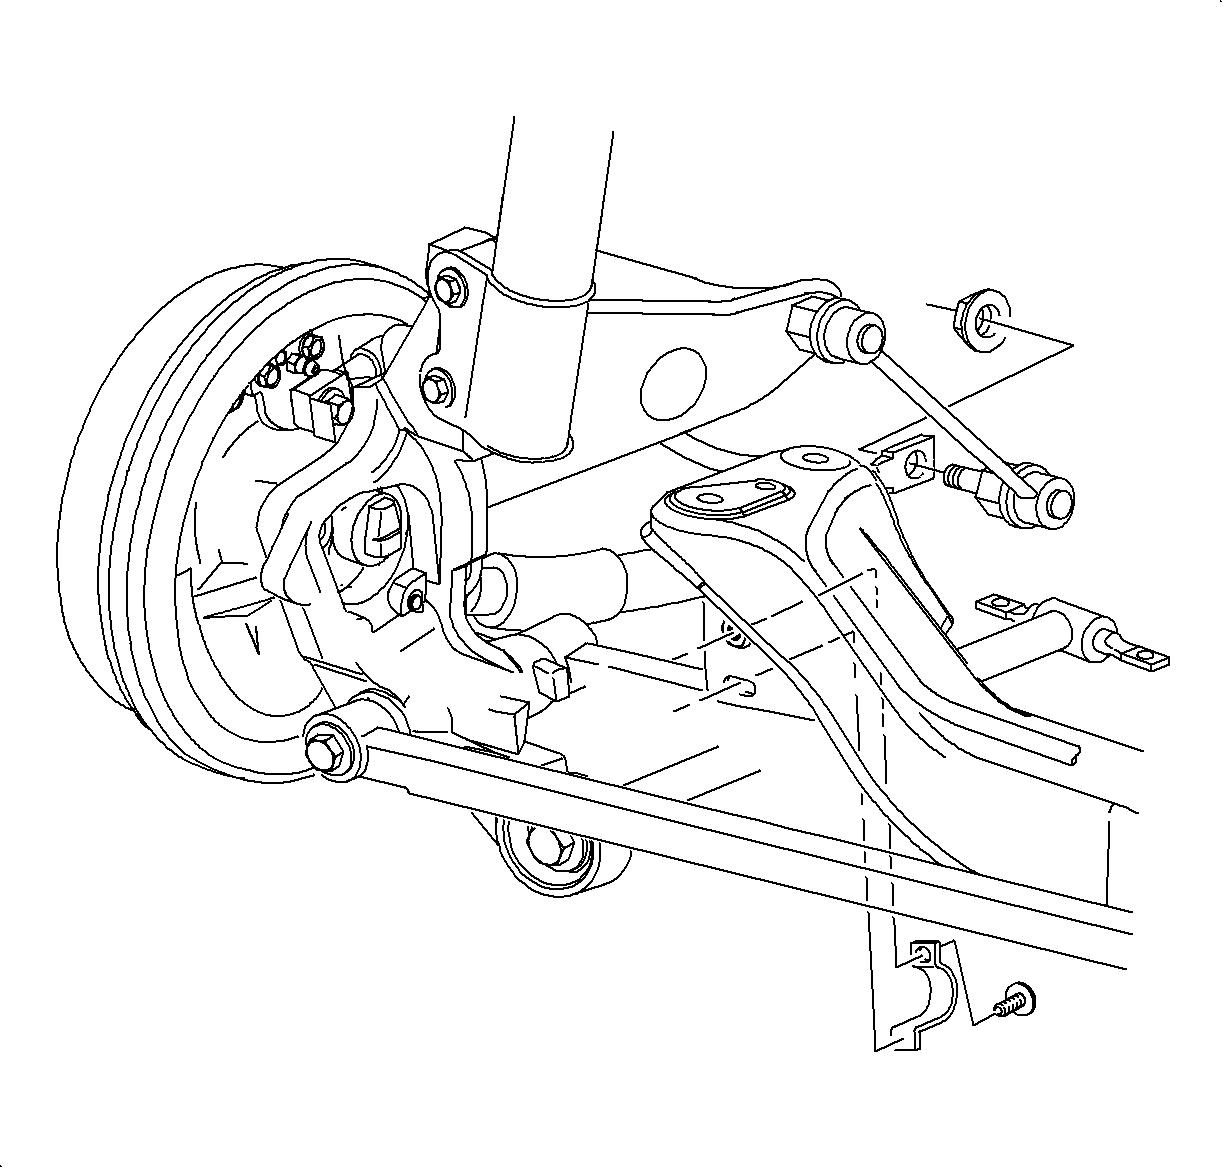
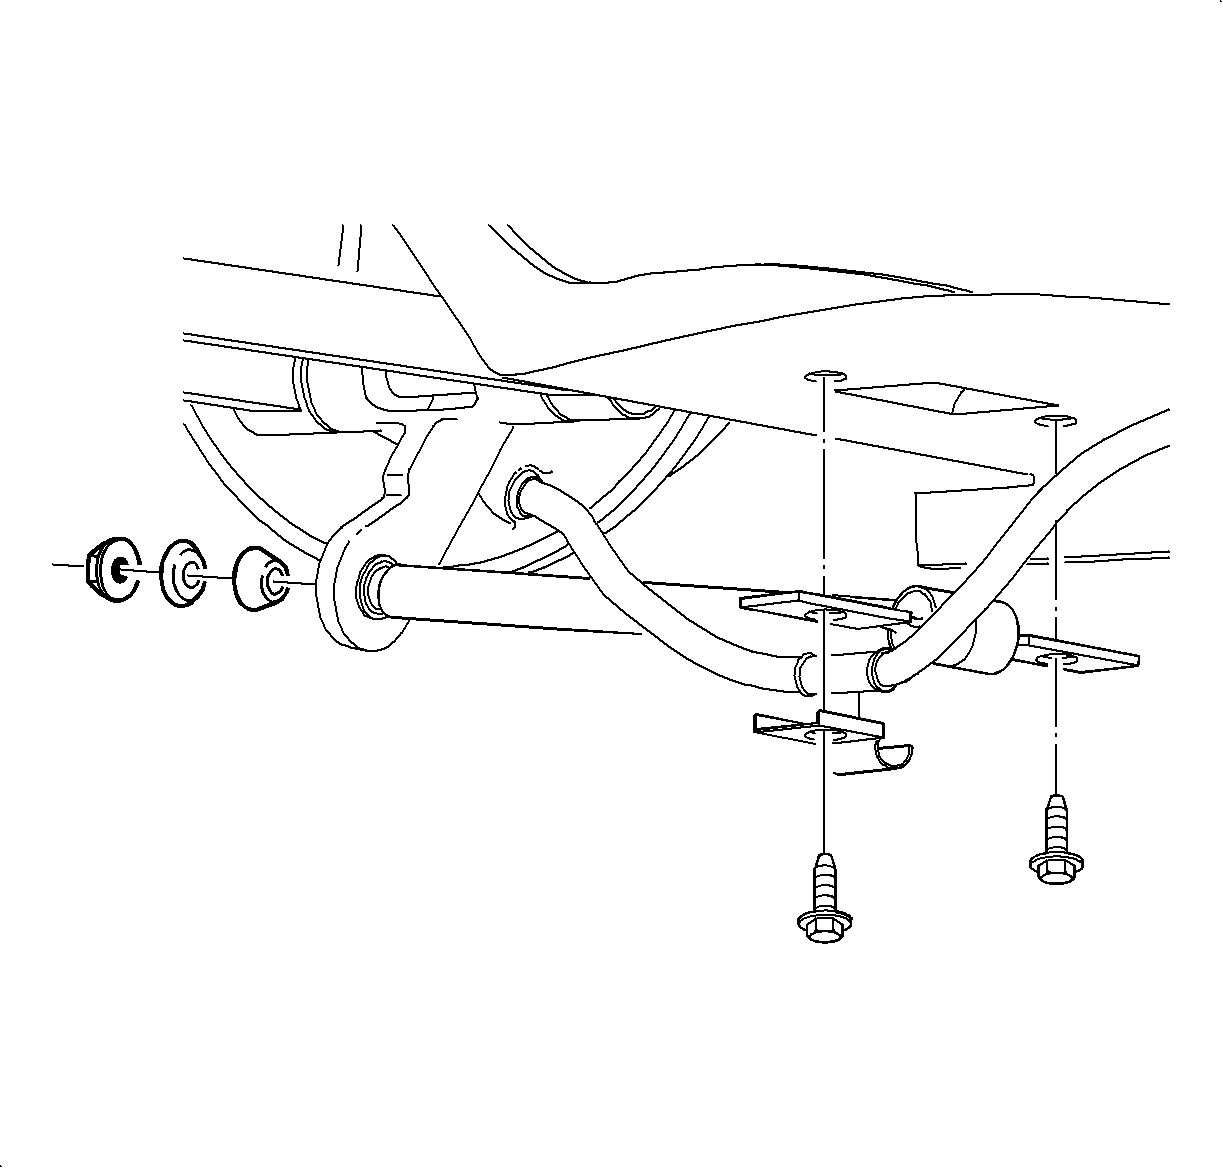
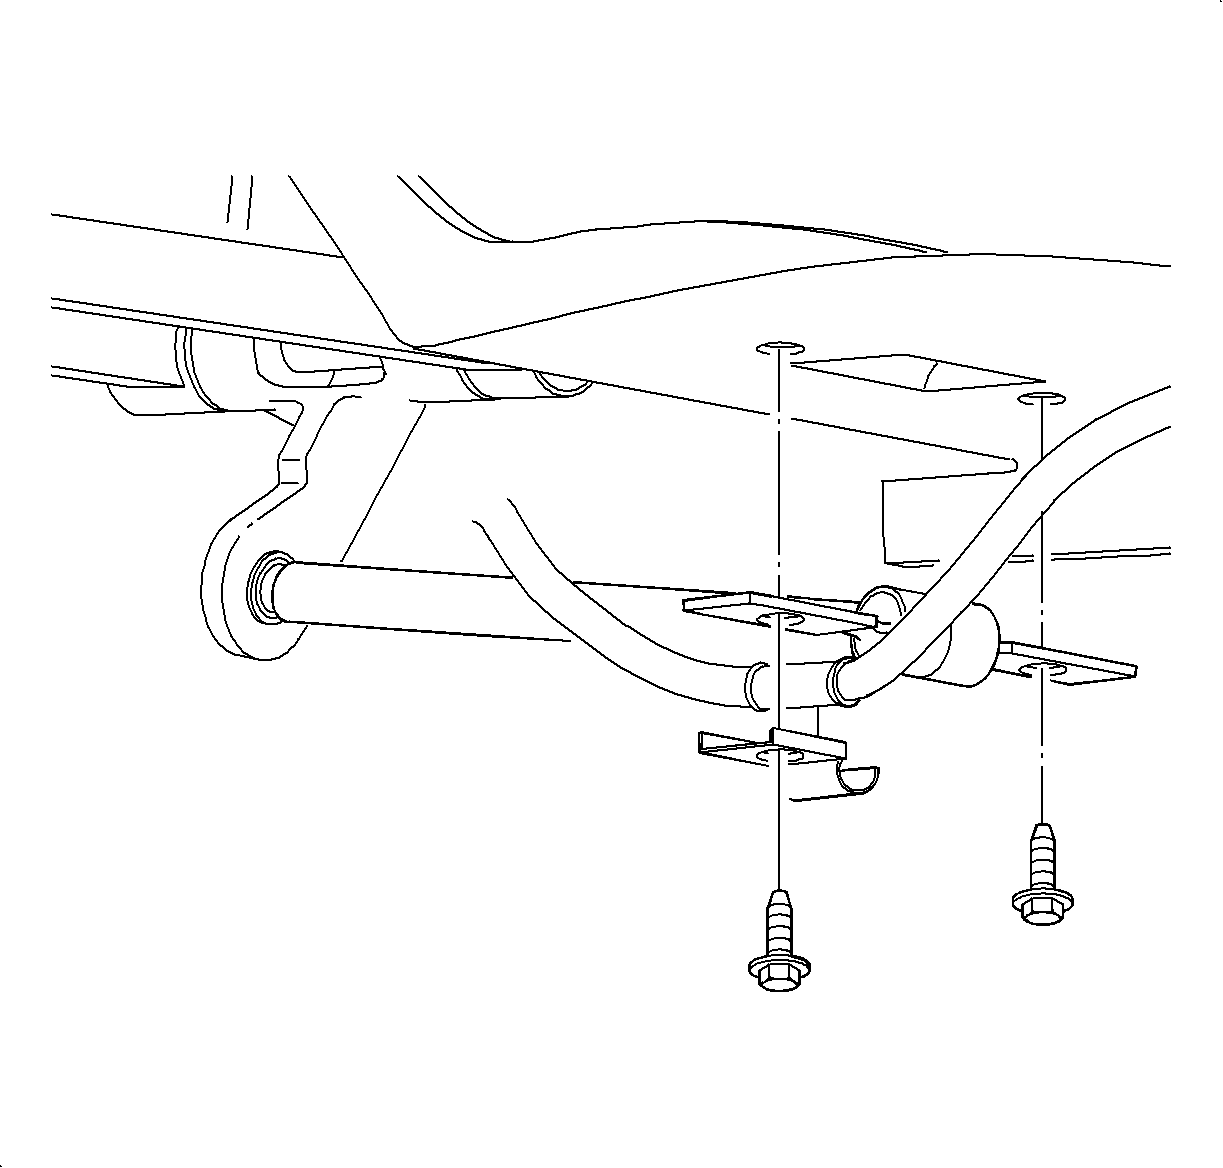
- Remove the right and left rear stabilizer shaft link-to-bracket fasteners.
- Remove the rear stabilizer shaft to crossmember fasteners.
- Loosen the lateral link to left knuckle fastener.
Important
Do not remove fastener at this time.
- Remove the trailing arm-to-left knuckle nut.
- Remove the 2 left trailing arm-to-body fasteners.
- Slide the left trailing arm out of the knuckle.
- Remove the left lateral link-to-knuckle fastener. Swing the left lateral links
downward, away from the knuckle.
Notice
Attempting to remove rear stabilizer shaft without loosening brake pipes from
crossmember could result in a bent brake pipe. Note location and position of brake
pipes prior to loosening and be sure to install pipes to same position.
- Unfasten the crossbody brake pipe from the crossmember by unsnapping
the brake pipe fasteners from the crossmember.
- Remove the rear stabilizer shaft.
Caution
Refer to Fastener Notice in Cautions and Notices.
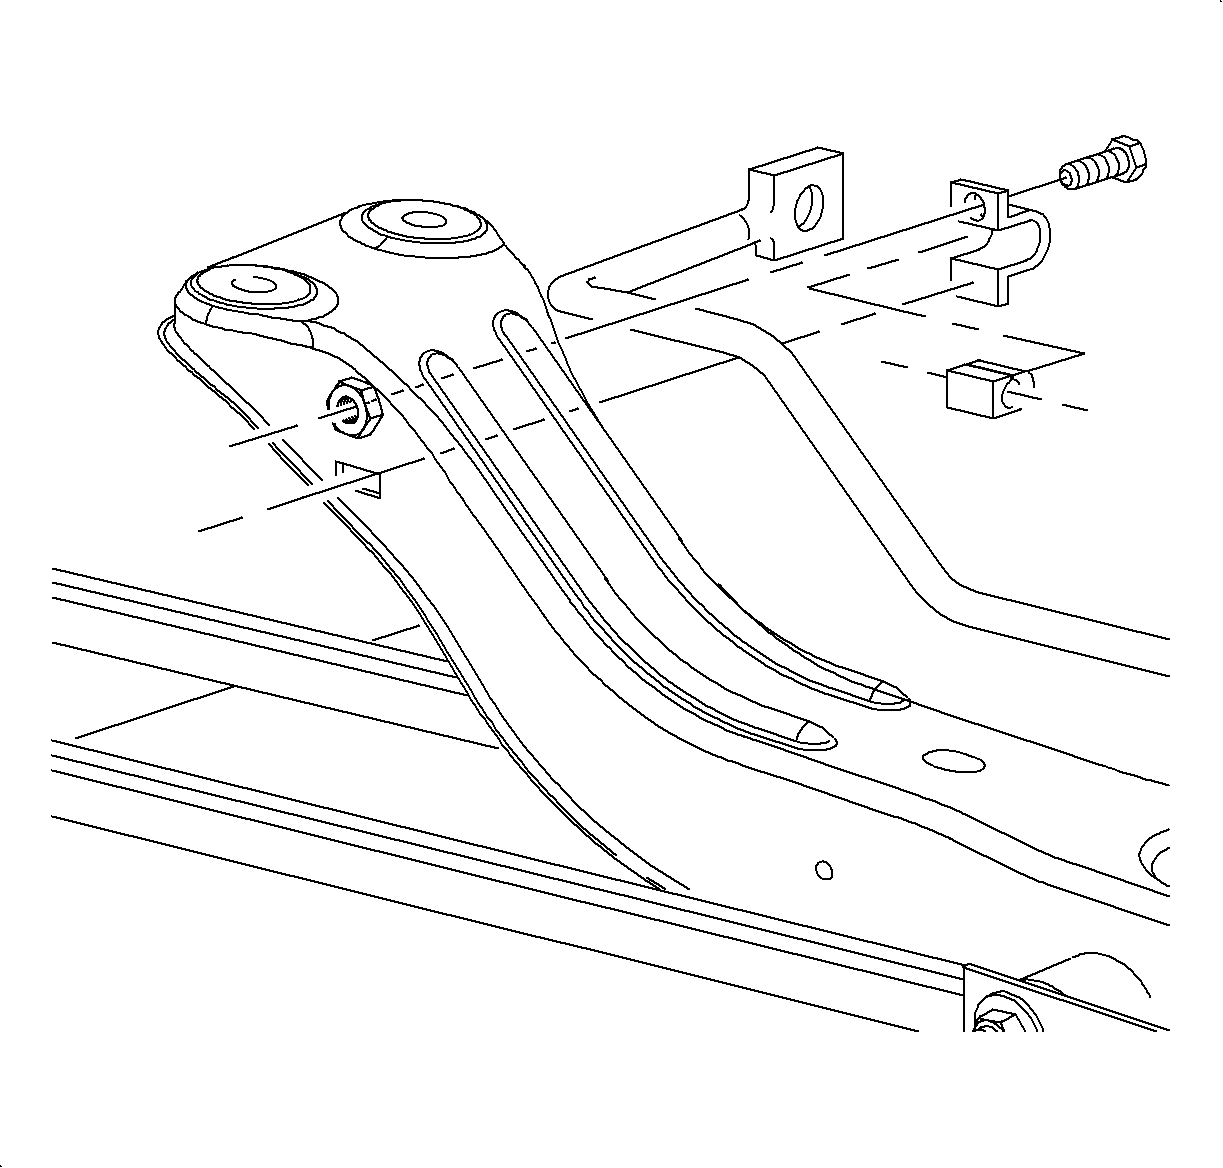
- Install the rear stabilizer shaft into the crossmember and secure
the rear stabilizer shaft with fasteners.
TightenTighten the rear stabilizer shaft-to-crossmember to 55 N·m (41 lb ft).
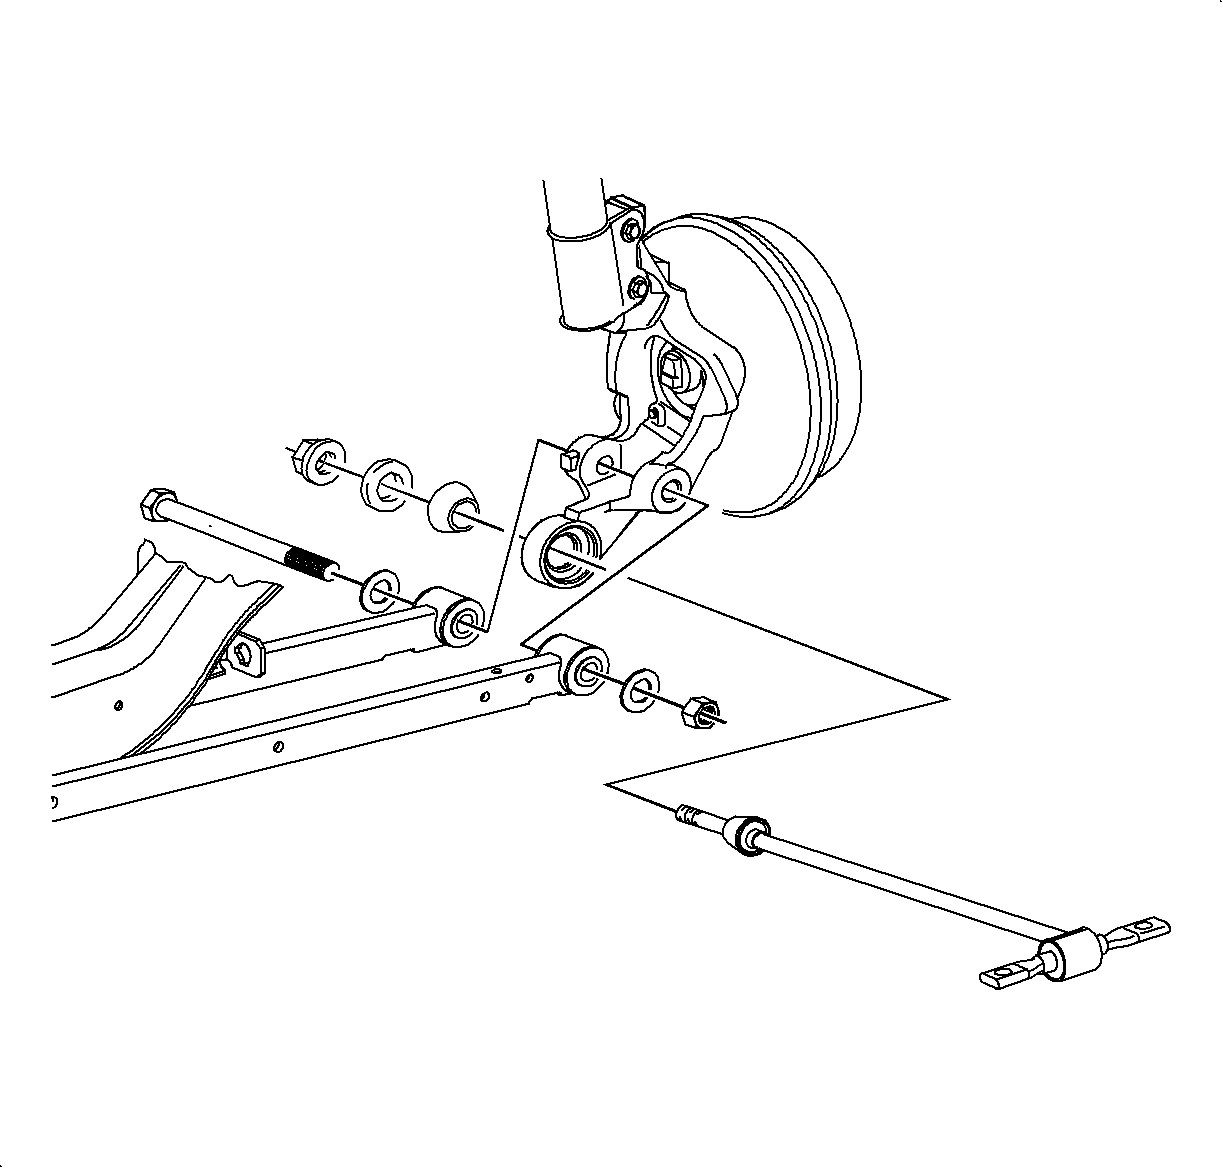
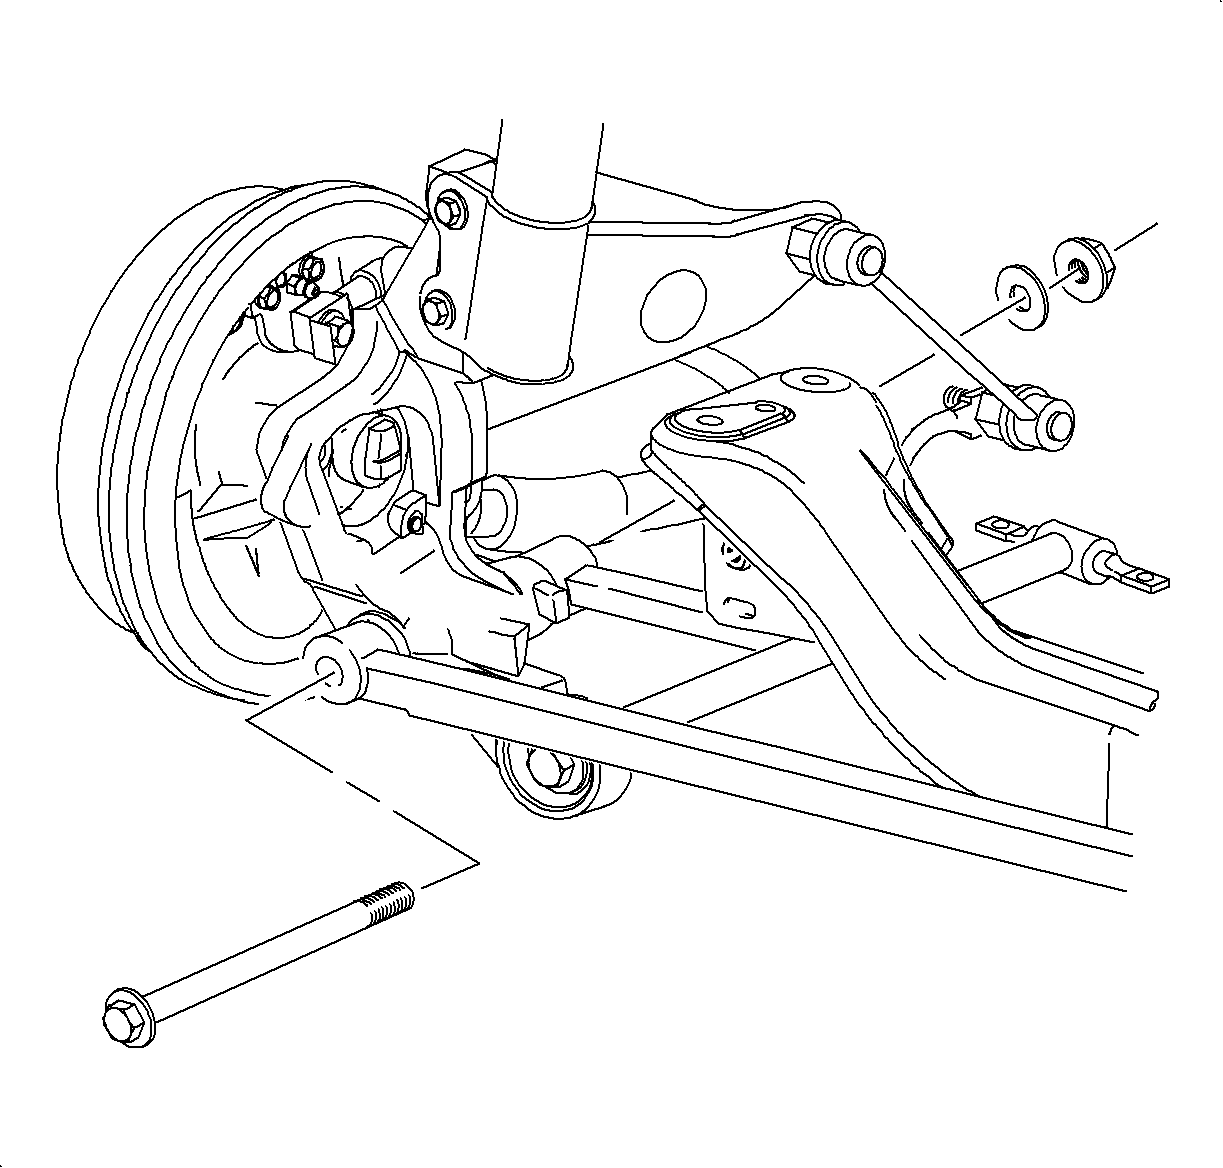
- Install the lateral link onto the knuckle with fasteners.
Important
Do not torque fasteners at this time.
- Place the trailing arm, with bushings, into the knuckle and install the fastener
nut, but do not torque the fastener at this time.
- Install the trailing arm into the body and secure with the fasteners.
TightenTighten the trailing arm-to-body fasteners to 120 N·m (89 lb ft).
- Torque the trailing arm-to-knuckle fastener nut.
TightenTighten the trailing arm-to-knuckle fasteners to 100 N·m (74 lb ft).
- Torque the lateral link-to-knuckle fasteners.
TightenTighten the lateral link-to-knuckle fastener to 165 N·m (122 lb ft).
- Connect the left brake pipe-to-brake hose. Tighten to specification.
TightenTighten the left brake pipe-to-brake hose to 19 N·m (14 lb ft).
- Fasten the crossbody brake pipe to the crossmember by snapping the brake pipe
fasteners onto the crossmember.
- Install the rear stabilizer shaft links to the brackets with fasteners.
TightenTighten the rear stabilizer shaft link-to-bracket to 40 N·m (30 lb ft).
- Bleed the brakes. Refer to the appropriate Brake Bleed procedure in Brakes.
Notice
Before installing wheels, remove rust or corrosion from wheel mounting surfaces
and brake rotors/drums. Failure to do so can cause wheel nuts to loosen in service.
- Position the wheel onto the hub.
- Install the wheel nuts and tighten the wheel nuts in a crisscross pattern.
Repeat the tightening pattern to ensure the torque is correct.
TightenTighten the wheel nuts to 140 N·m (103 lb ft).