Caution
Refer to Battery Disconnect Caution in Cautions and Notices.

- Disconnect the negative battery cable.
- Drain the cooling system.
Caution
Refer to Vehicle Lifting Caution in Cautions and Notices.
- Raise the vehicle. Refer to
Lifting and Jacking the Vehicle
in General Information.
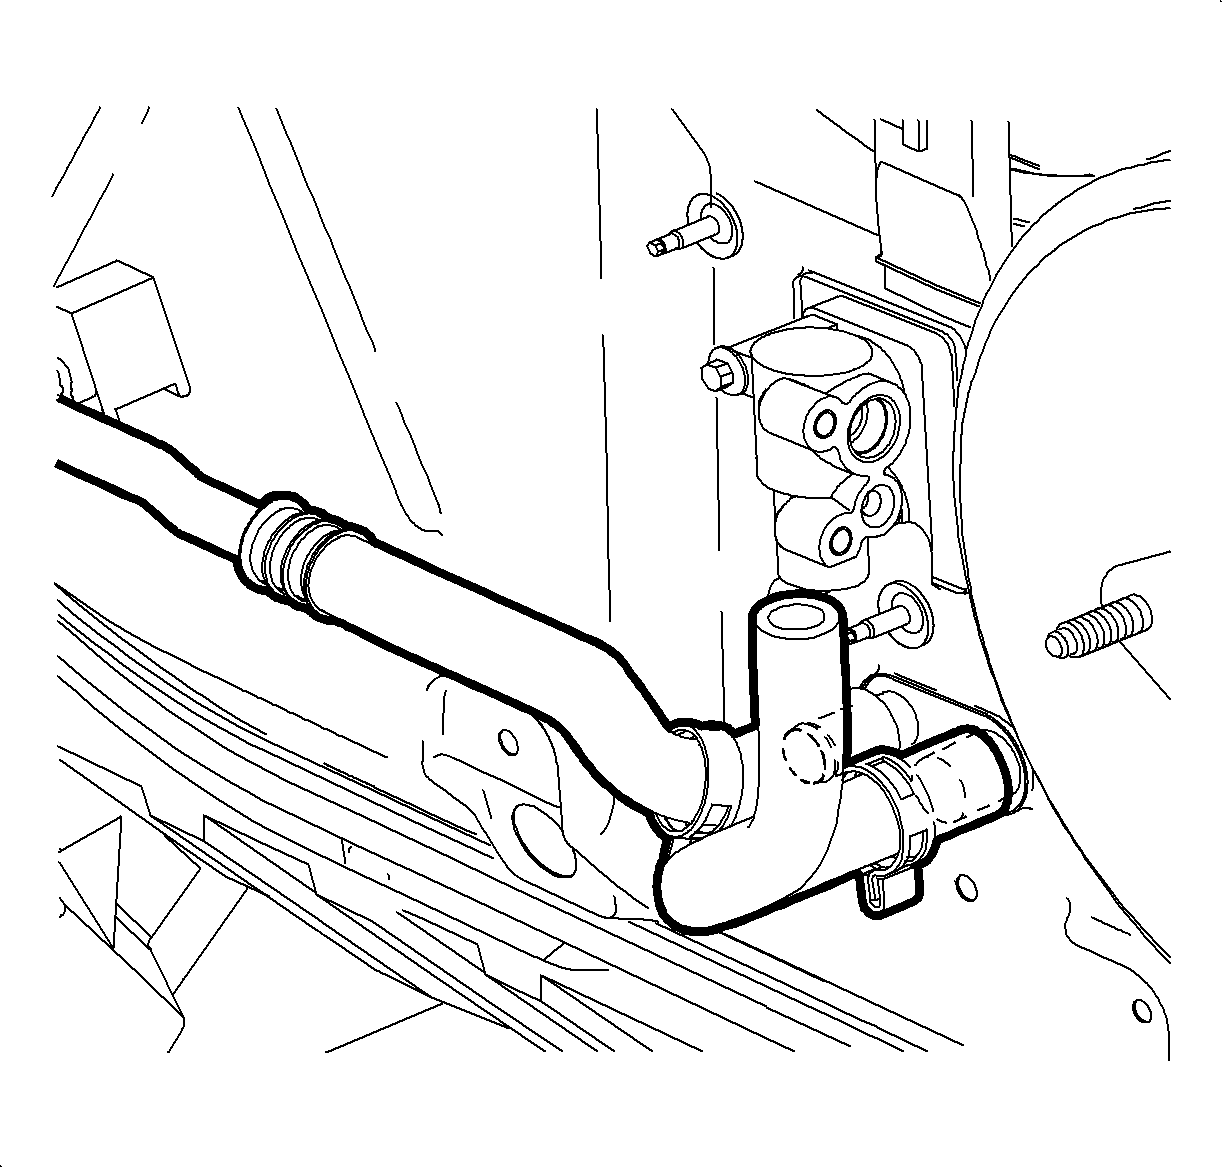
- Move the clamps up the heater core hoses.
Notice
Blow remainder of coolant out of heater core with an air hose to prevent spilling
coolant on vehicle interior when removing heater core.
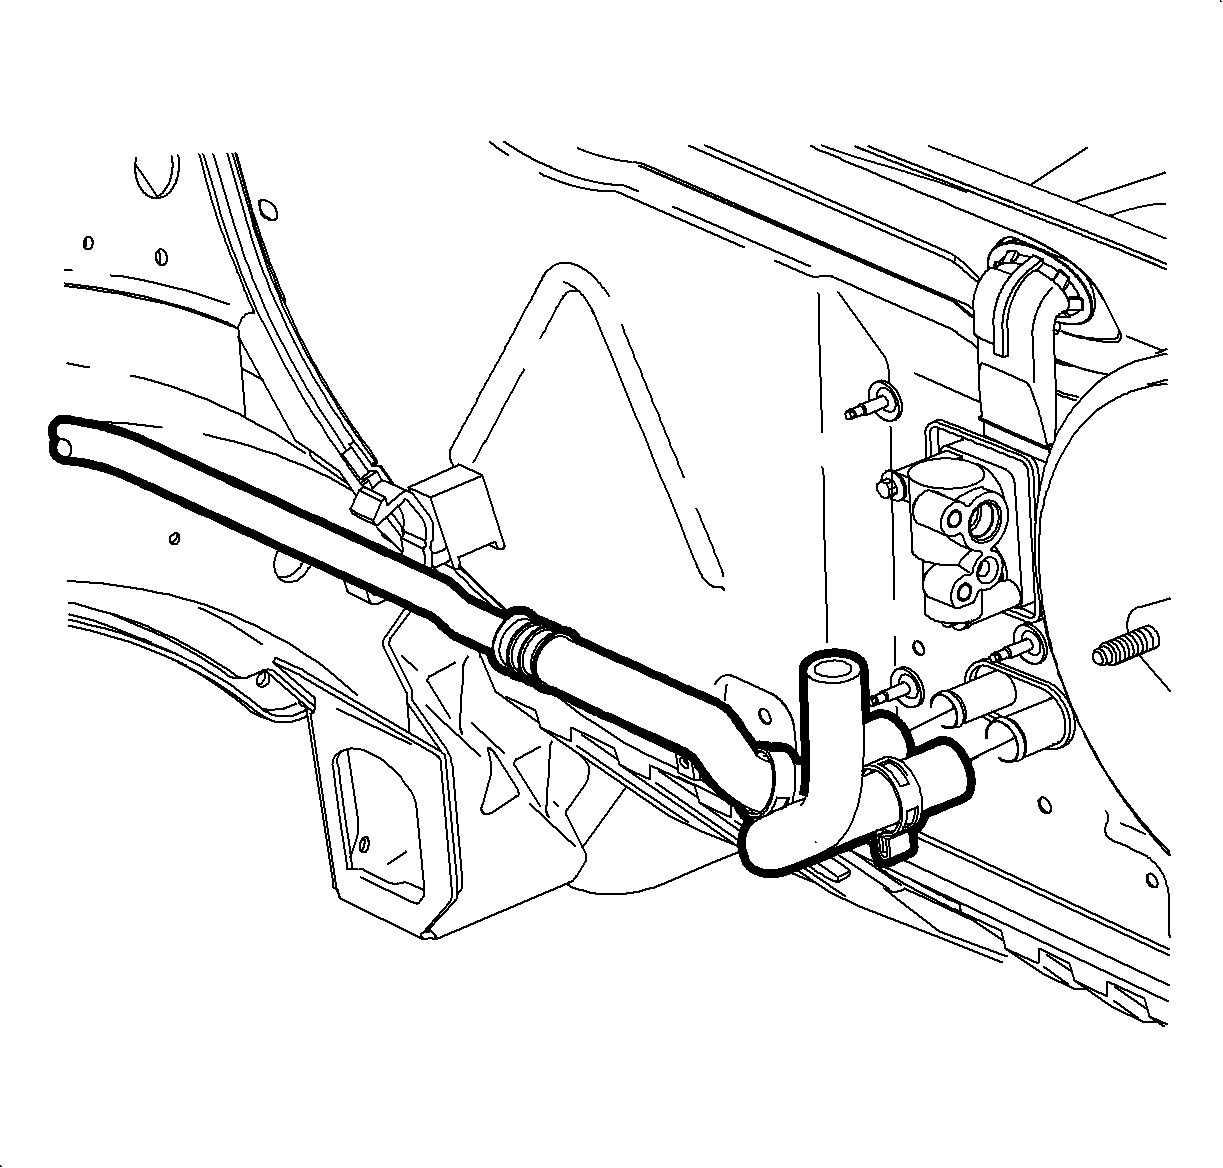
- Remove the hoses from the heater core.

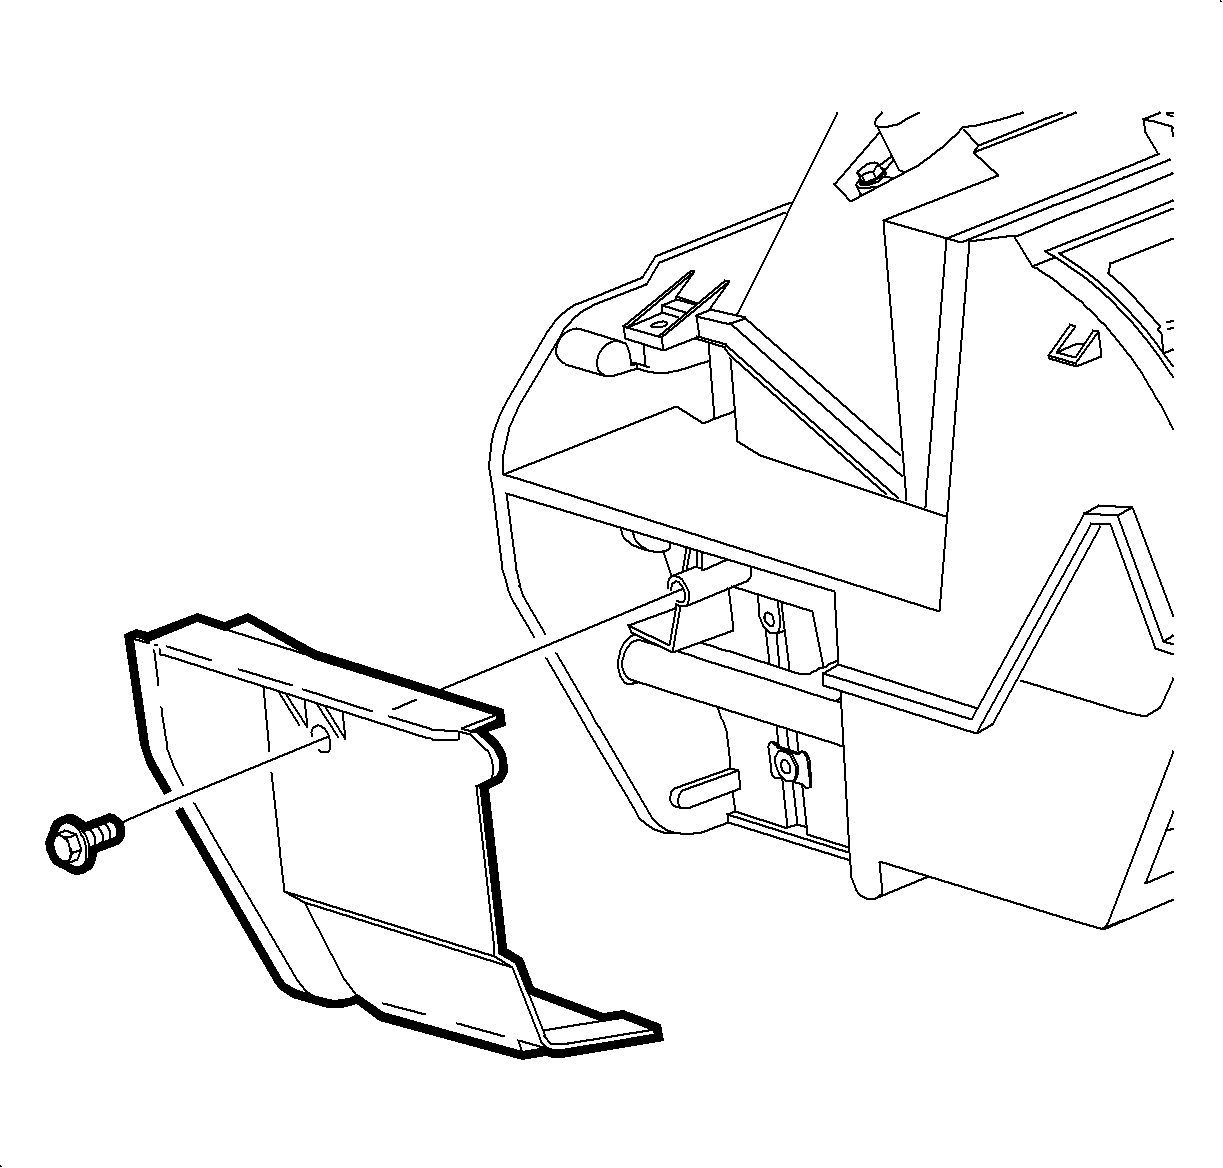
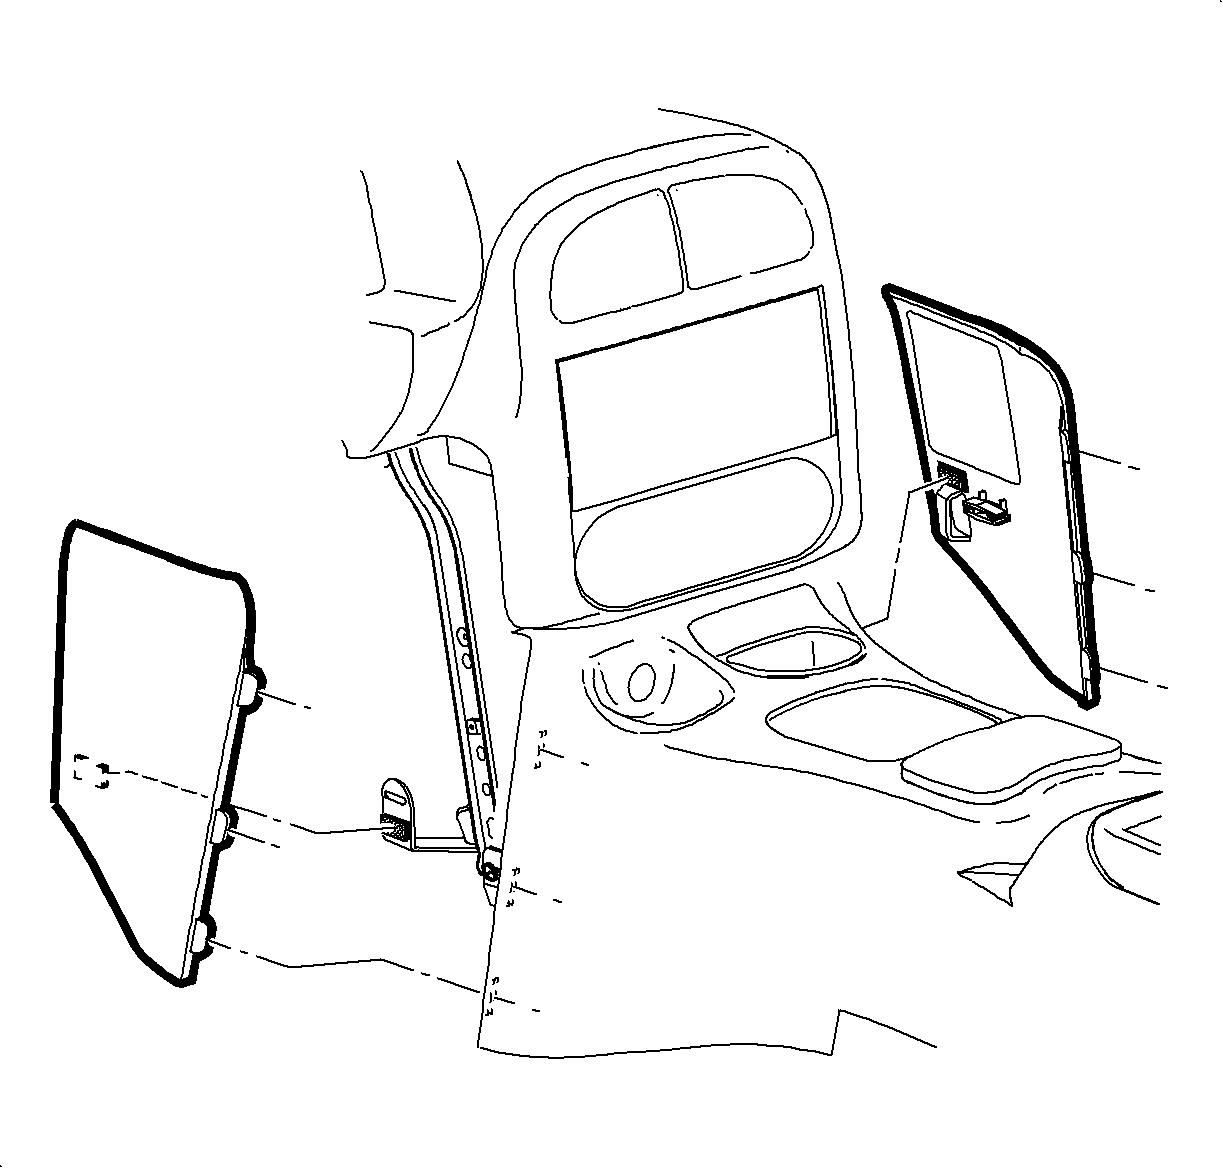
- Remove the left and right lower trim panel extensions by pulling outward at
the dual lock locations. Then rotate the panels outward to disengage the hinges from
the console.
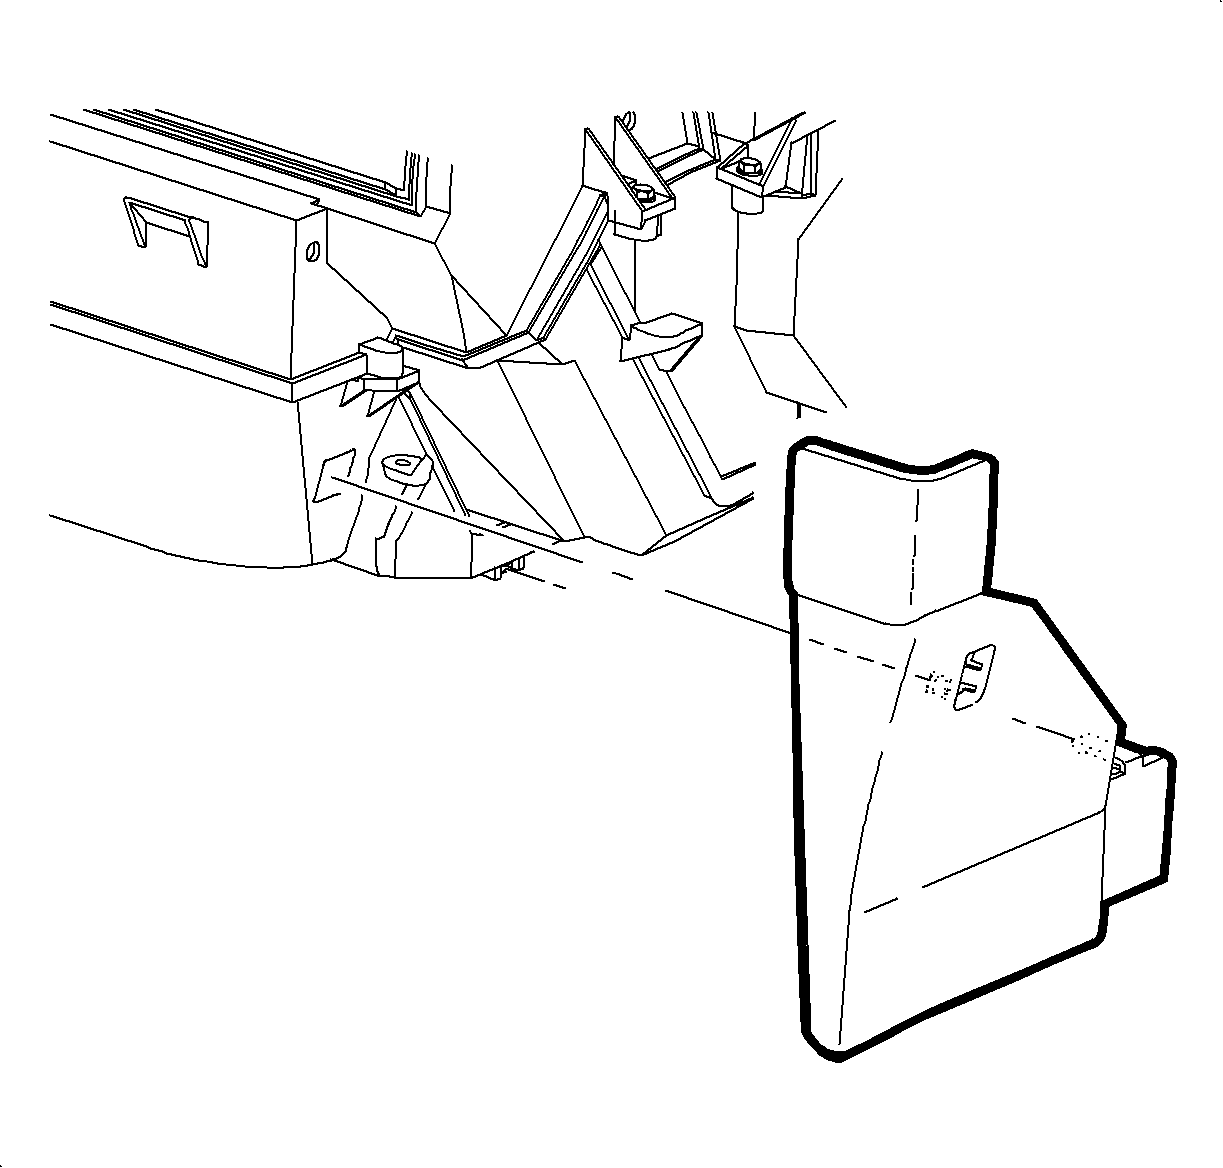
- Remove the I/P lower closeout panel by pulling out at the top edge and then
rotating the top downward.

- Remove the screws and the clips on the lower heater duct.
Notice
Take care not to damage heater duct-to-rear floor heater duct seal.
- Drop the heater duct straight down and carefully slide out sideways.
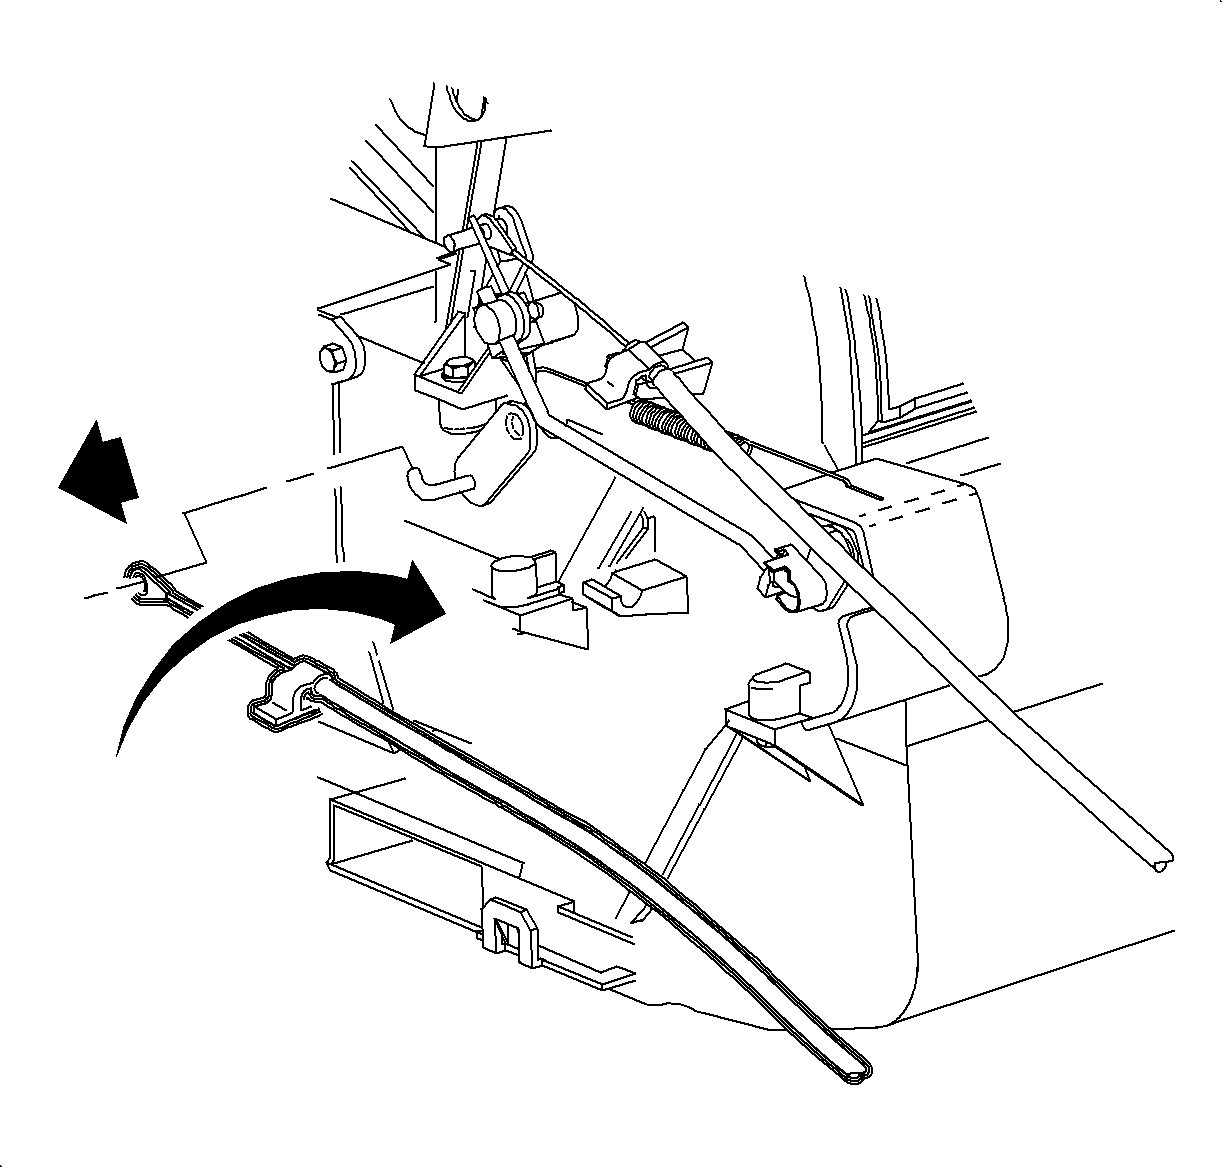
- Release the temperature cable hold down clip from the lower heater core cover
by carefully lifting up on the plastic tab while pushing down on the top of the cable.
- Slide the cable off of the temperature door hook.
- Remove the temperature cable. Service linkage shown in illustration.
- Remove the screw and the heater core side cover.
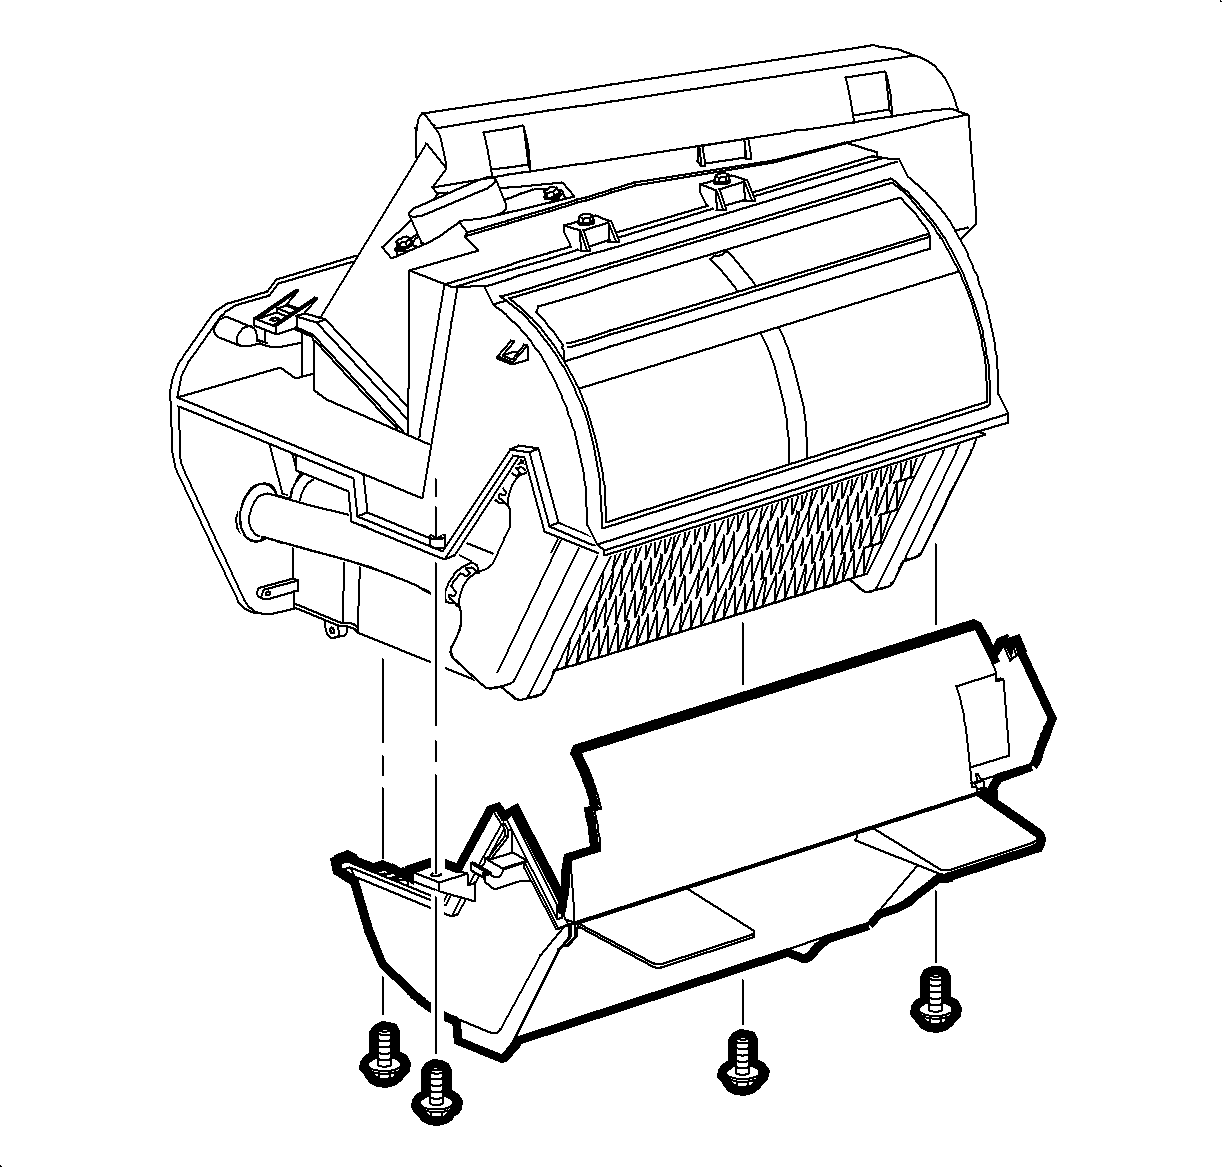
- Remove the screws and the lower heater core cover.
- Remove the screw and the lower heater core retainer.
Notice
Place absorbent towels under heater core pipe to heater core joints to prevent
spilling any residual coolant on carpeting.
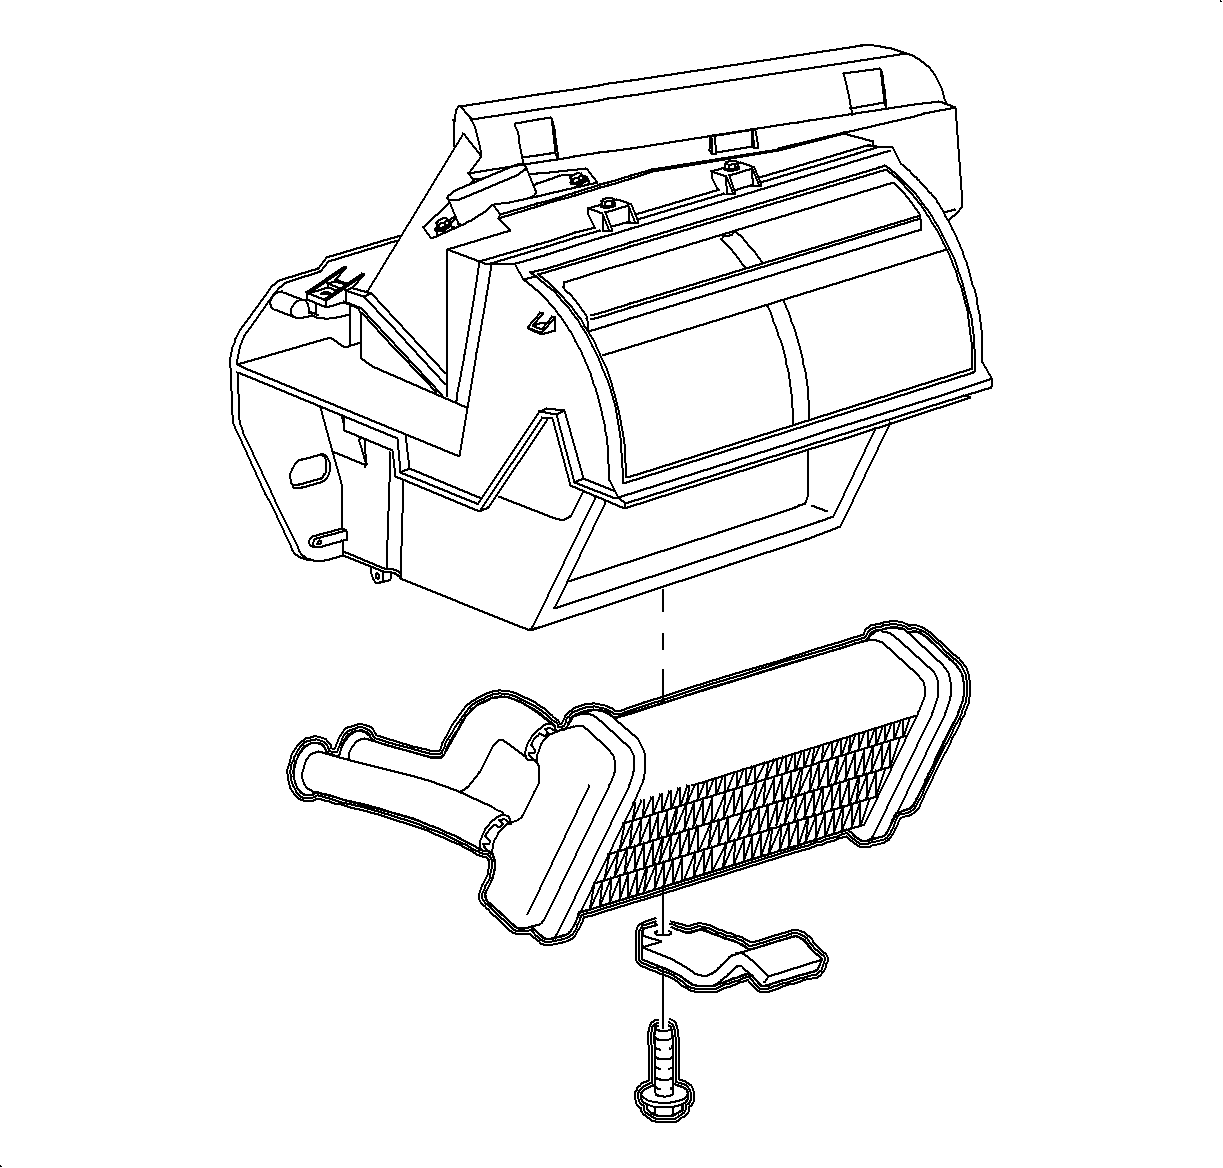
- Remove the heater core.
Notice
Be careful not to damage heater core pipe seal when installing pipes through
cowl. Lubricate pipes with petroleum jelly.
- Install the heater core.
- Install the lower heater core retainer and screw.
Notice
Refer to Fastener Notice in Cautions and Notices.
- Install the lower heater core cover and screws.
TightenTighten the lower heater core cover screws to 1.7 N·m (15 lb in).
- Install the heater core side cover and screw.
TightenTighten the side heater core cover screws to 1.7 N·m (15 lb in).
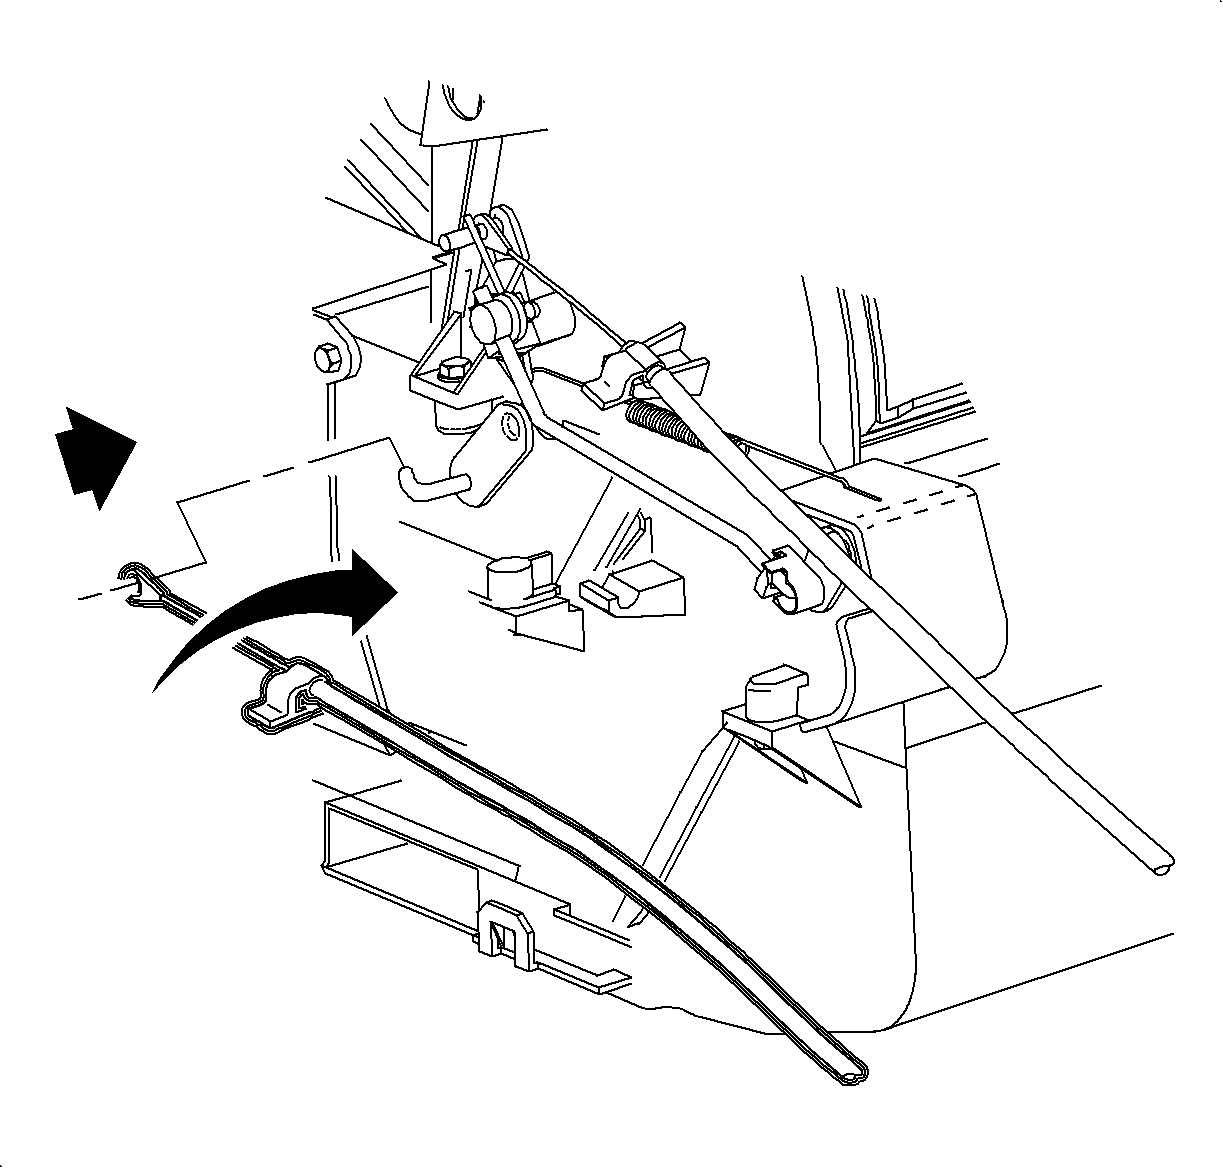
- Push the temperature cable over the pin and snap the temperature cable hold
down clip over the temperature cable holder.
Notice
Take care not to damage heater duct-to-rear floor heater duct seal.
- Install the heater duct by carefully sliding in sideways and up into position.
- Install the screws and clips on the lower heater duct.
TightenTighten the lower heater duct to 1.7 N·m (15 lb in).
- Install the left and the right lower trim panel extensions by inserting the
hinges into the console openings. Then rotate the closed and push in at the dual lock
locations.
- Install the I/P lower closeout panel by inserting the bottom clip into the module
heater duct and rotating upward to snap in the top clip.
Caution
Refer to Vehicle Lifting Caution in Cautions and Notices.

- Raise the vehicle. Refer to
Lifting and Jacking the Vehicle
in General Information.
Important
Be careful not to push the hoses onto the heater core so far that the foam seal
is unseated.
- Install the hose and the clamp on the heater core outlet. Position the clamp
at a 7-8 o'clock position.
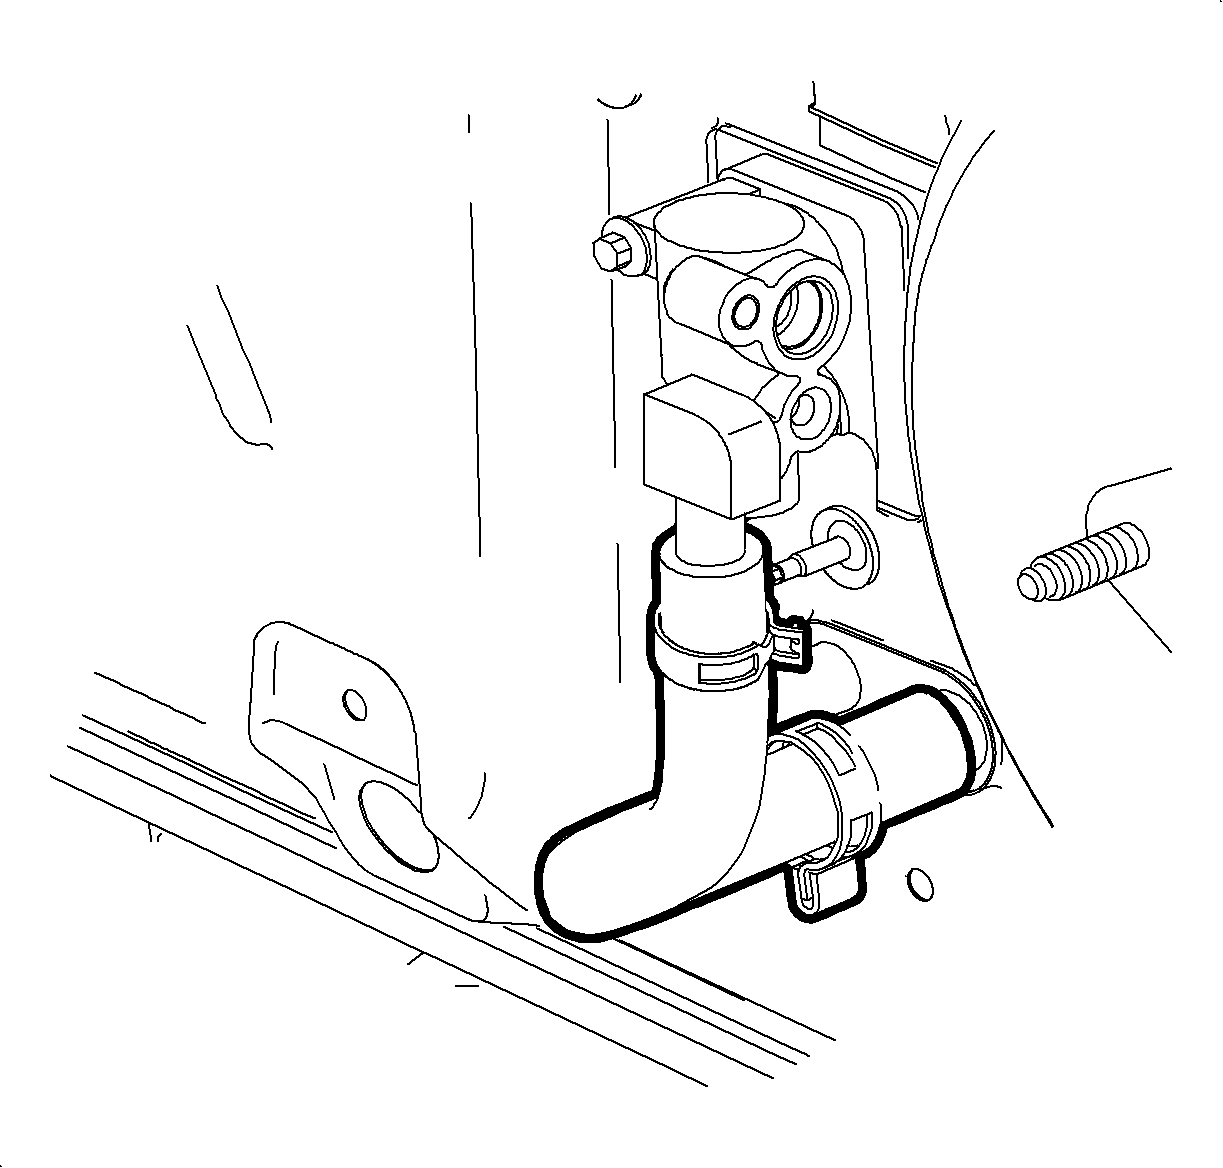
- Install the hose and clamp on the heater core inlet. Position the clamp at a
6 o'clock position.
- Fill and pressure test the cooling system.
- Connect the negative battery cable.