
Important
Be sure all parts are clean and free of lint and dirt. The valvebody should
be assembled in a clean area.
- Install the valves, new gaskets, and ball check valves according to the figures.
- Install the 2 halves of the valvebody and install the 1 bolt
holding the 2 halves together (3) .
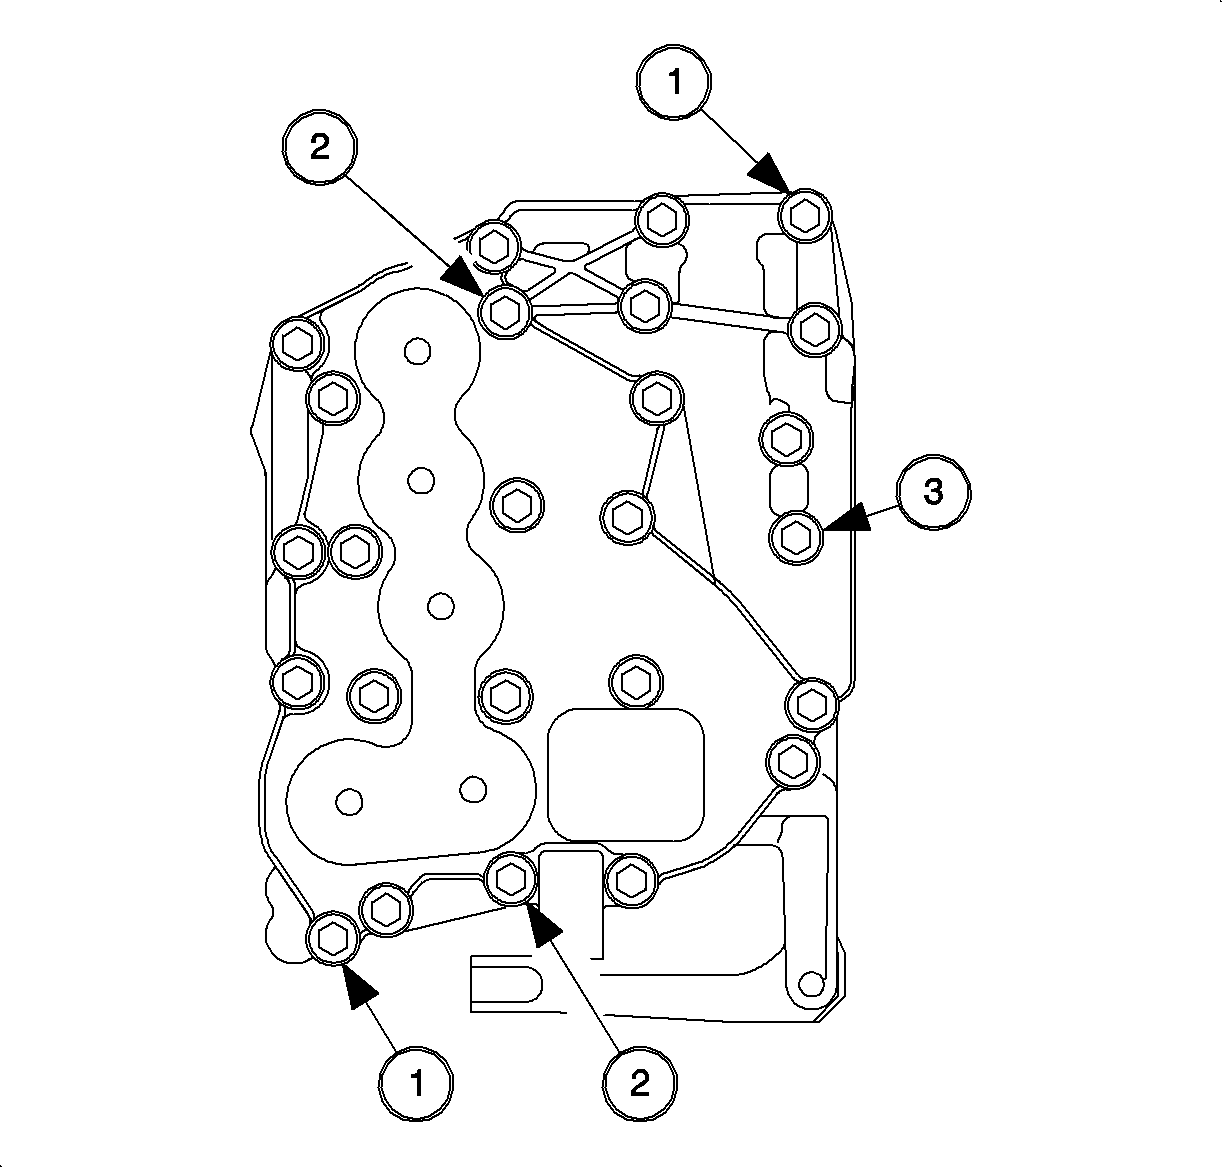
Important
The dowel bolts must be placed in the holes shown to align the upper valvebody
to the lower valvebody.
- The valvebody-to-case dowel bolts (1)
- The upper to lower valvebody dowel bolts (2)
- The bolt holding upper and lower valvebody (3)
- Lube the solenoid O-rings.
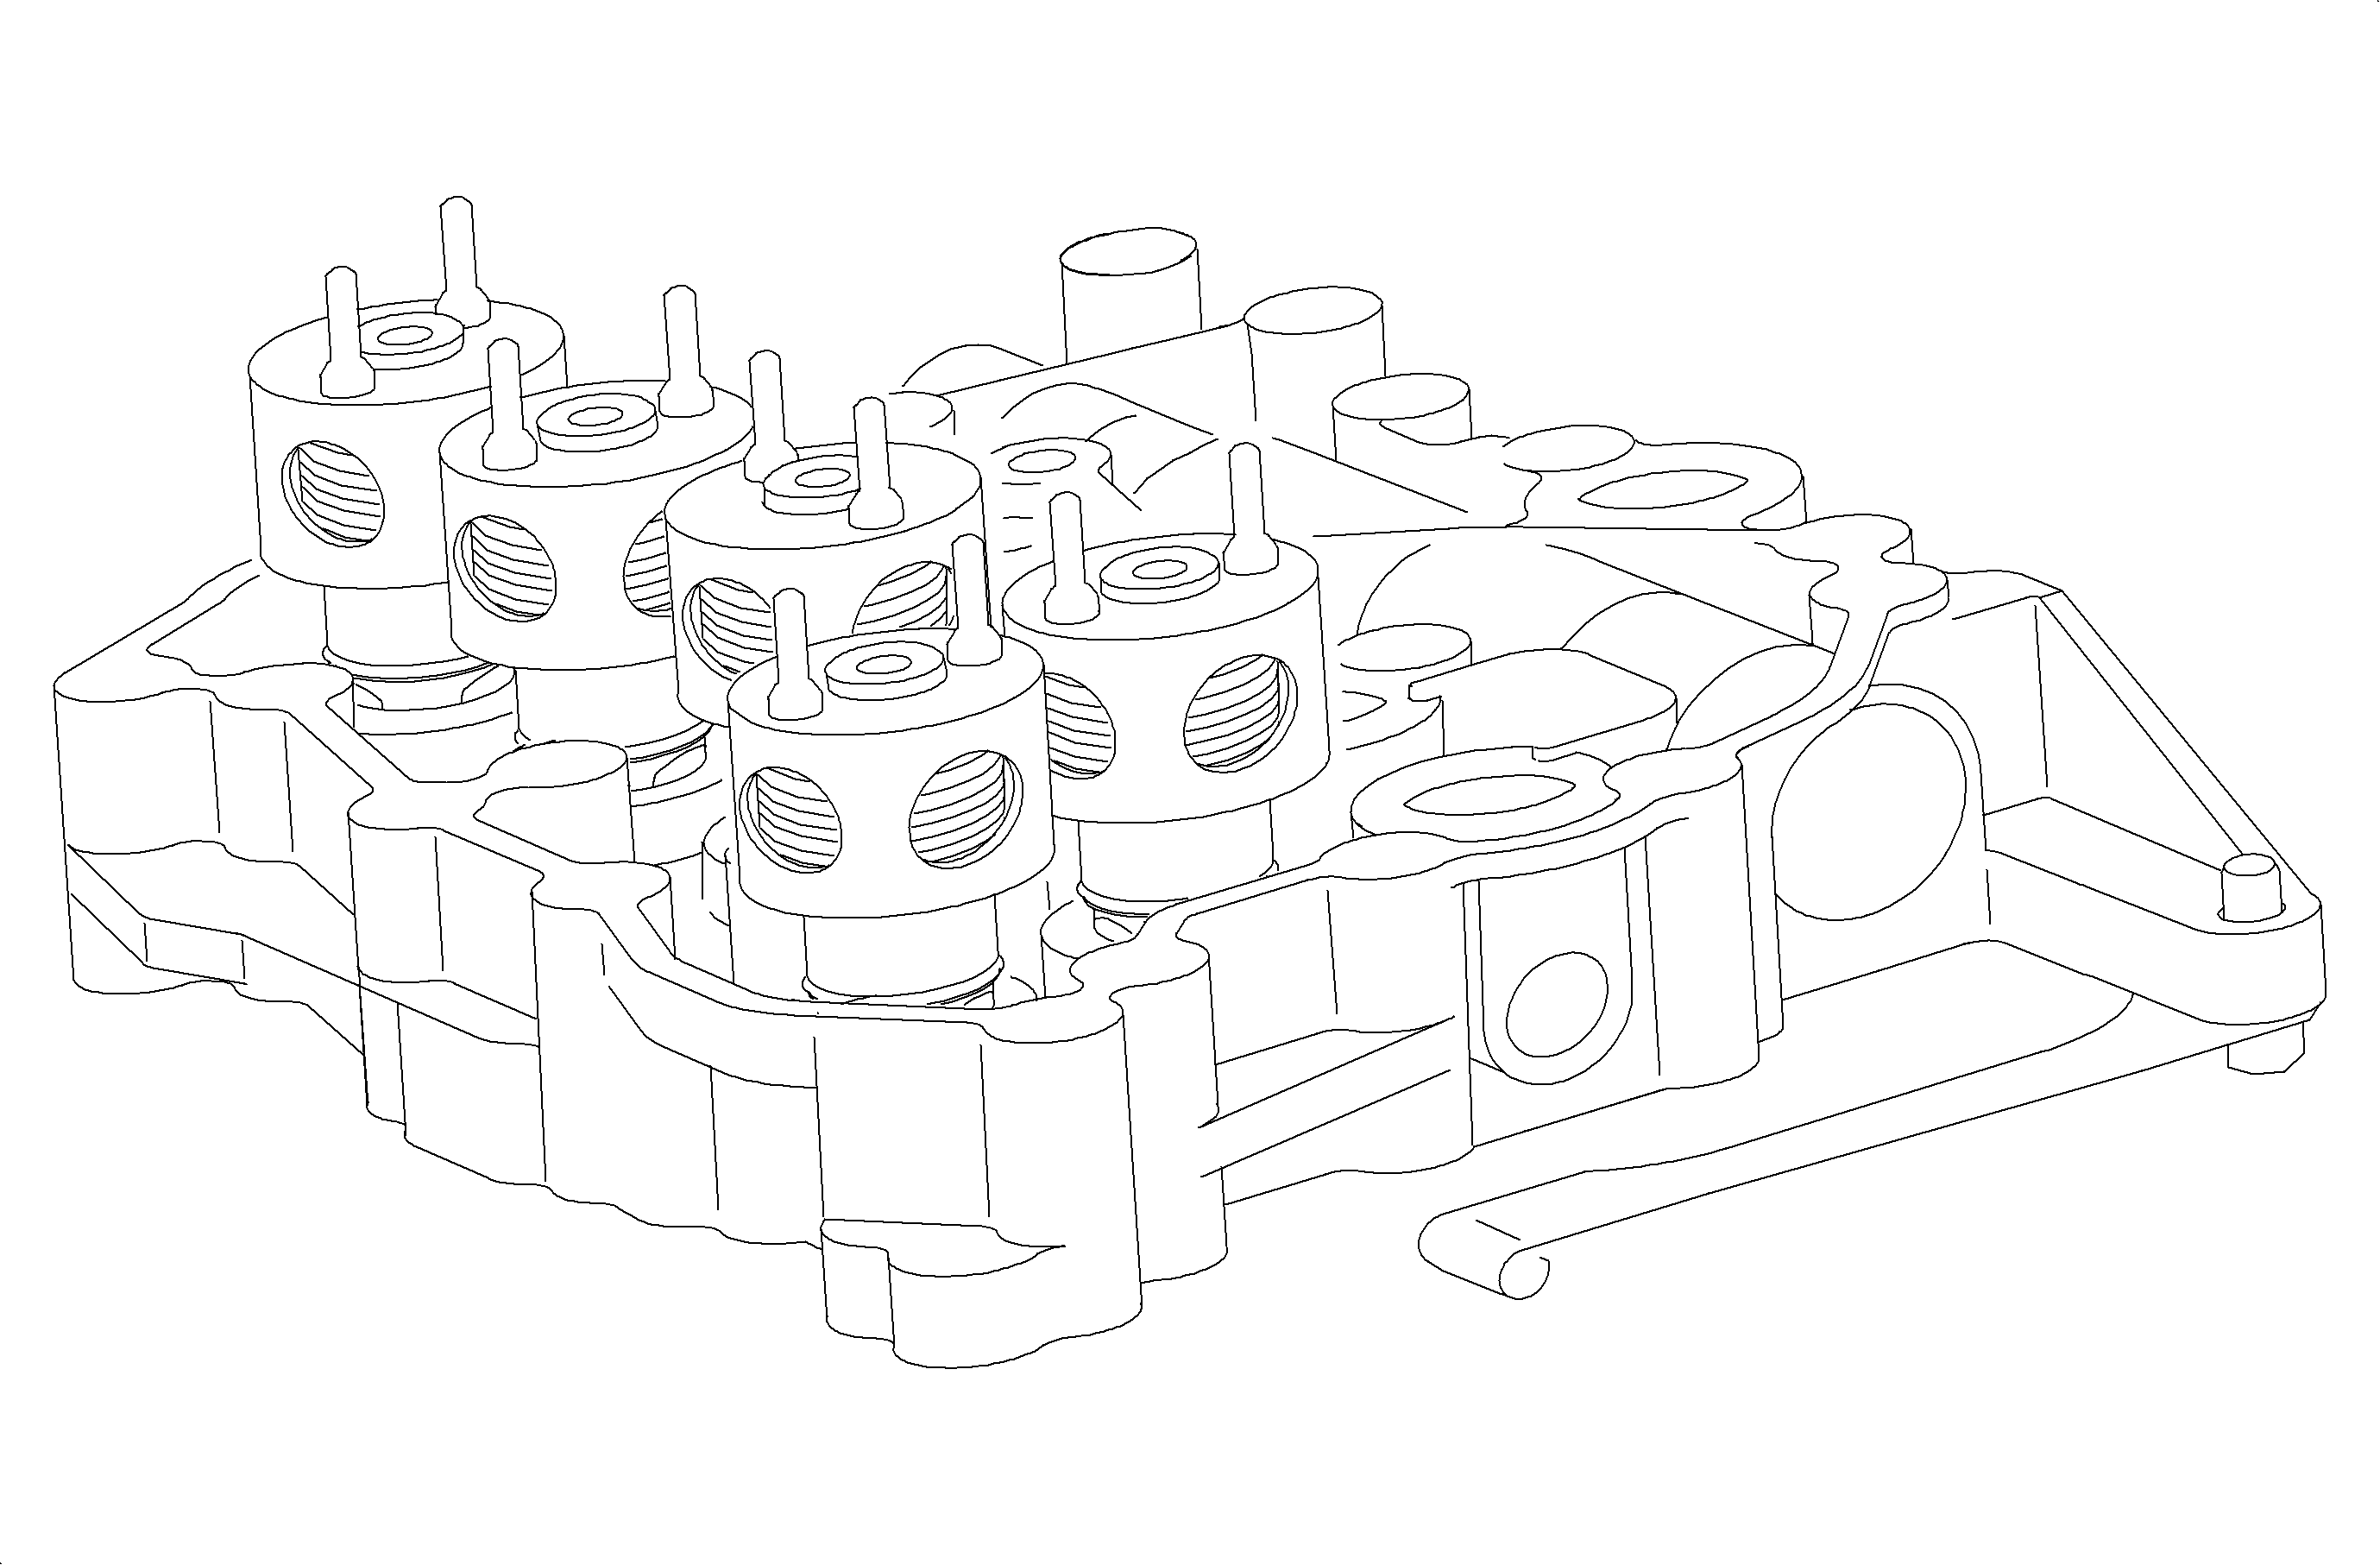
- Install the solenoids with a twisting motion.
Notice
Refer to Fastener Notice in Cautions and Notices.
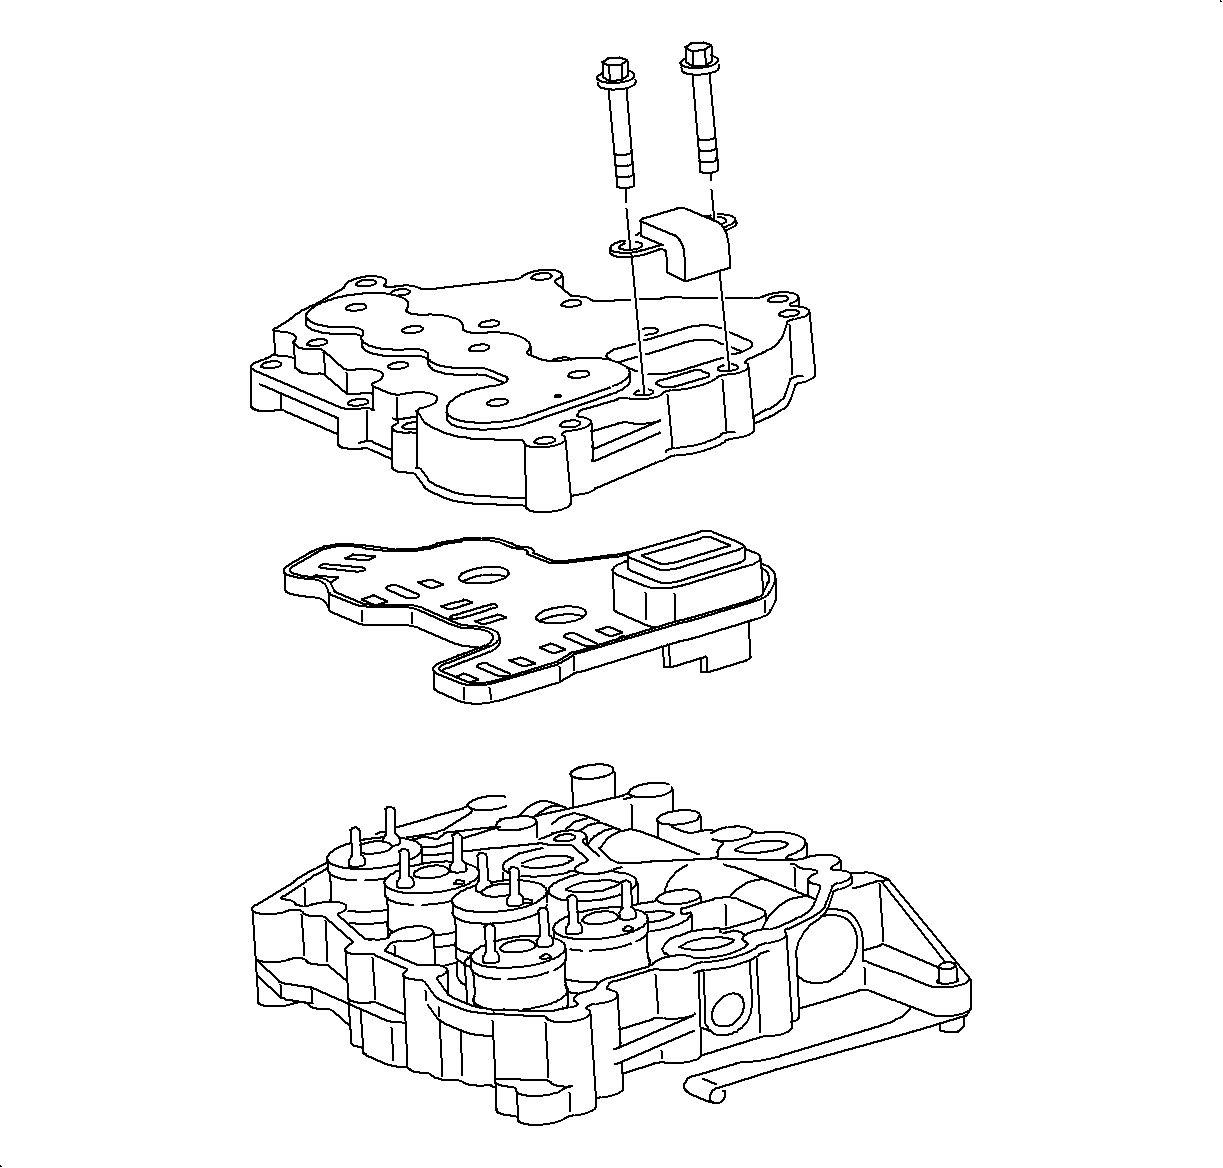
- Install the detent arm and bolt.
TightenTighten the valvebody assembly bolts to 11 N·m (8 lb ft)
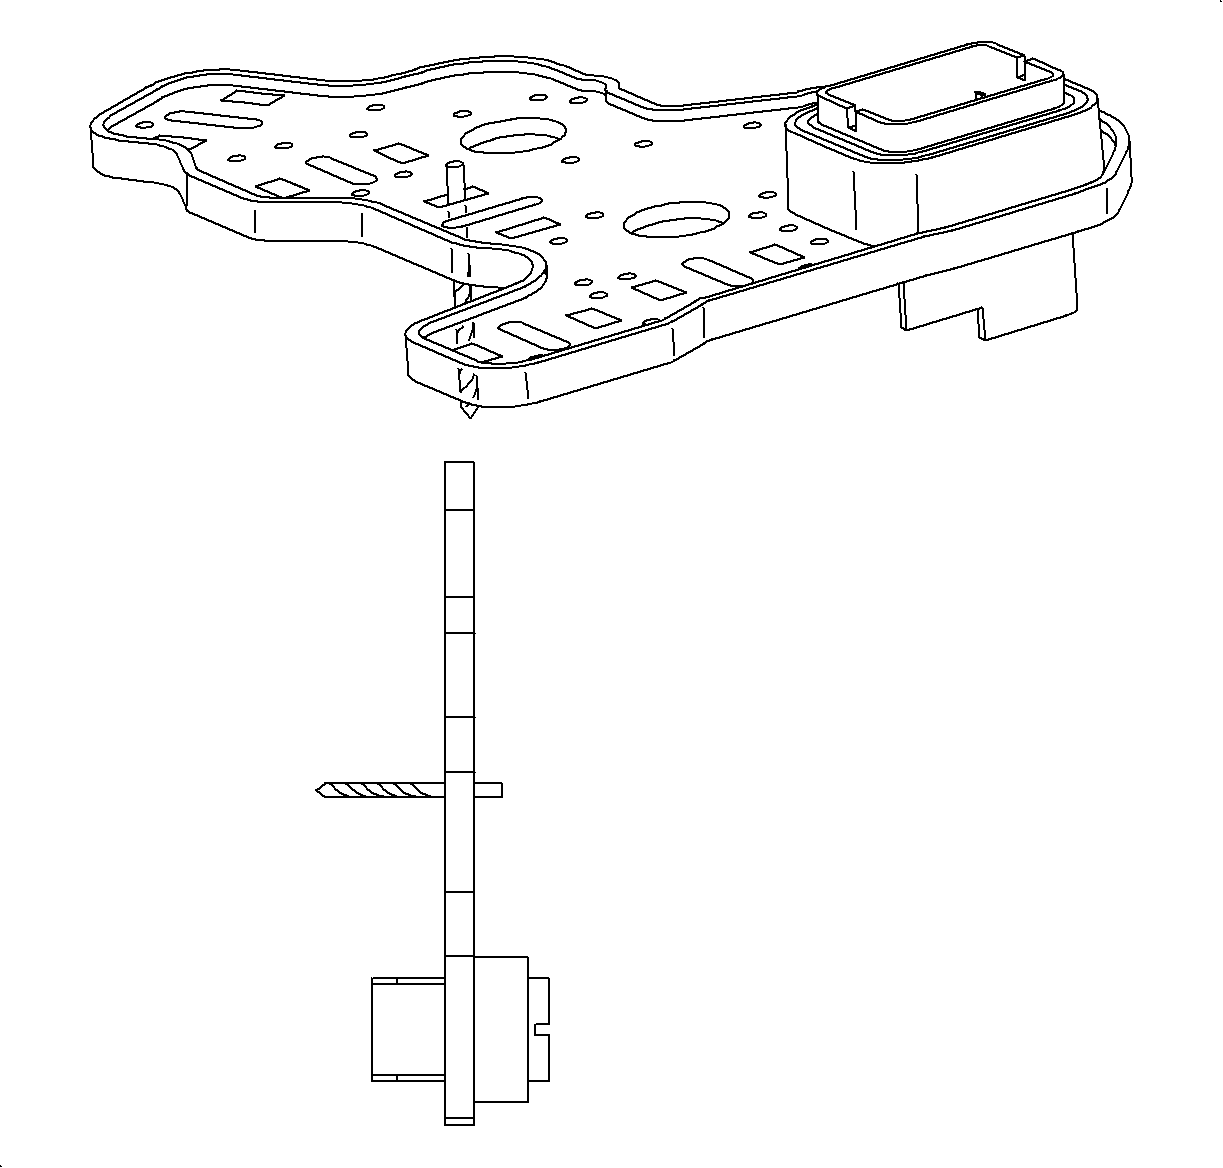
- Check the connector plate terminals with a #43 (2.25 mm) drill bit. There
should be a slight drag on the shank. If there is no drag replace the connector plate.
- Align the solenoid valve pins to the connector plate.
- Install the connector plate.
- Install the solenoid cover.
- Install the solenoid cover bolts and finger tighten. Refer to
Control Valve Body Assembly Installation
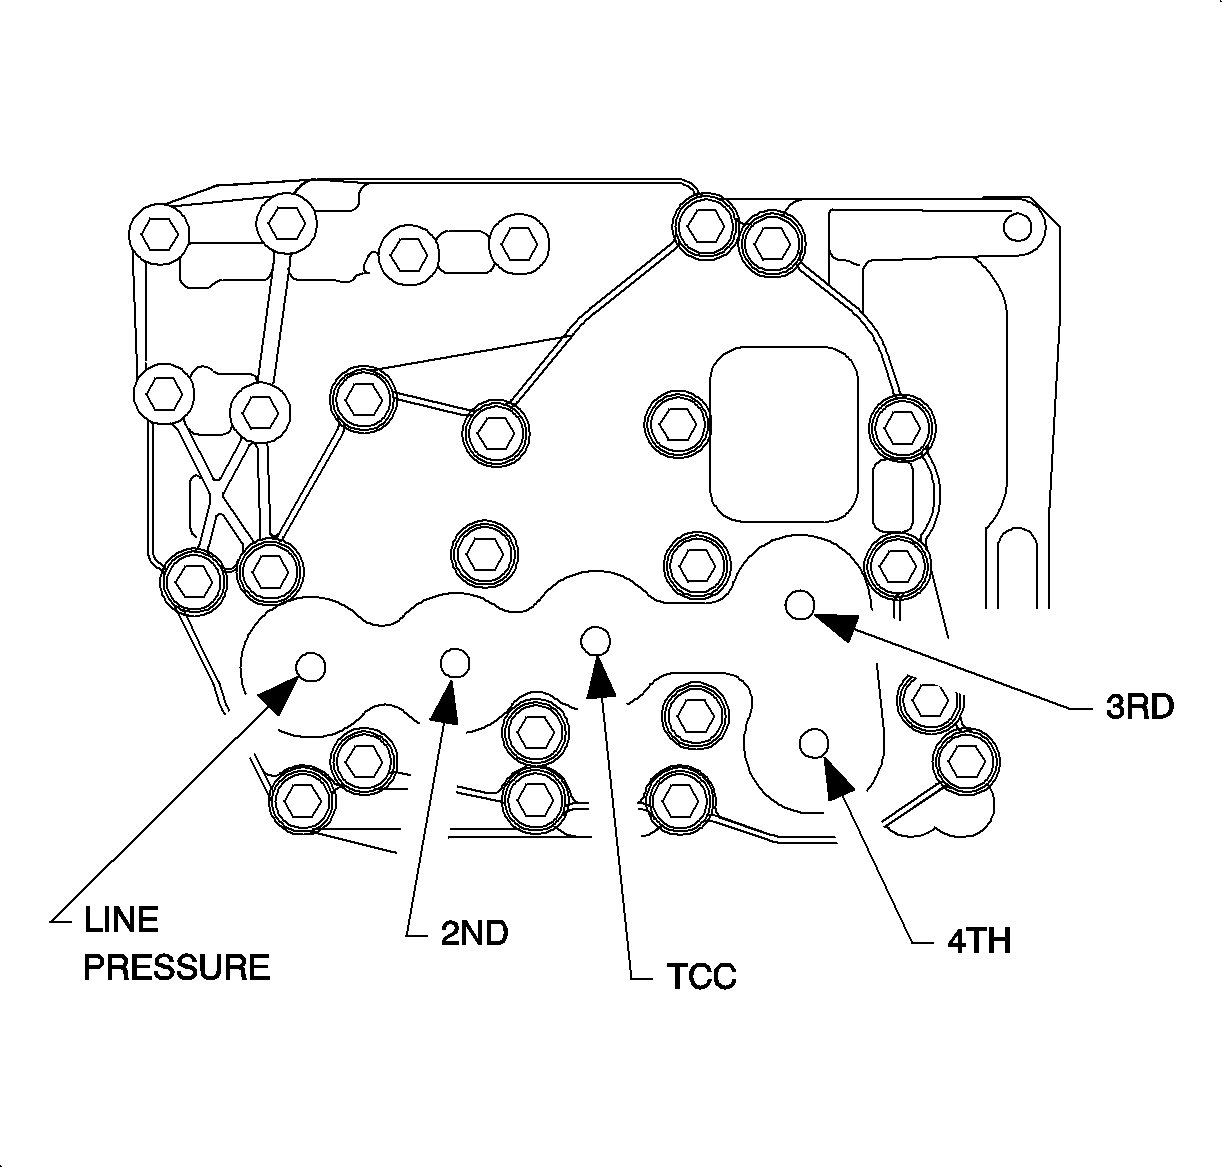
. For reference, the solenoids
are identified below:
- The pressure control solenoid
- The shift solenoid 2
- The TCC solenoid
- The shift solenoid 4
- The shift solenoid 3
- Clean and lubricate the fasteners with Saturn Transaxle Fluid. Wipe off
excess fluid and install.
- Ensure the dowel bolts are placed in the holes shown to align the upper
valvebody to the lower valvebody.
Notice
Over-torqueing bolts can cause valves to bind.
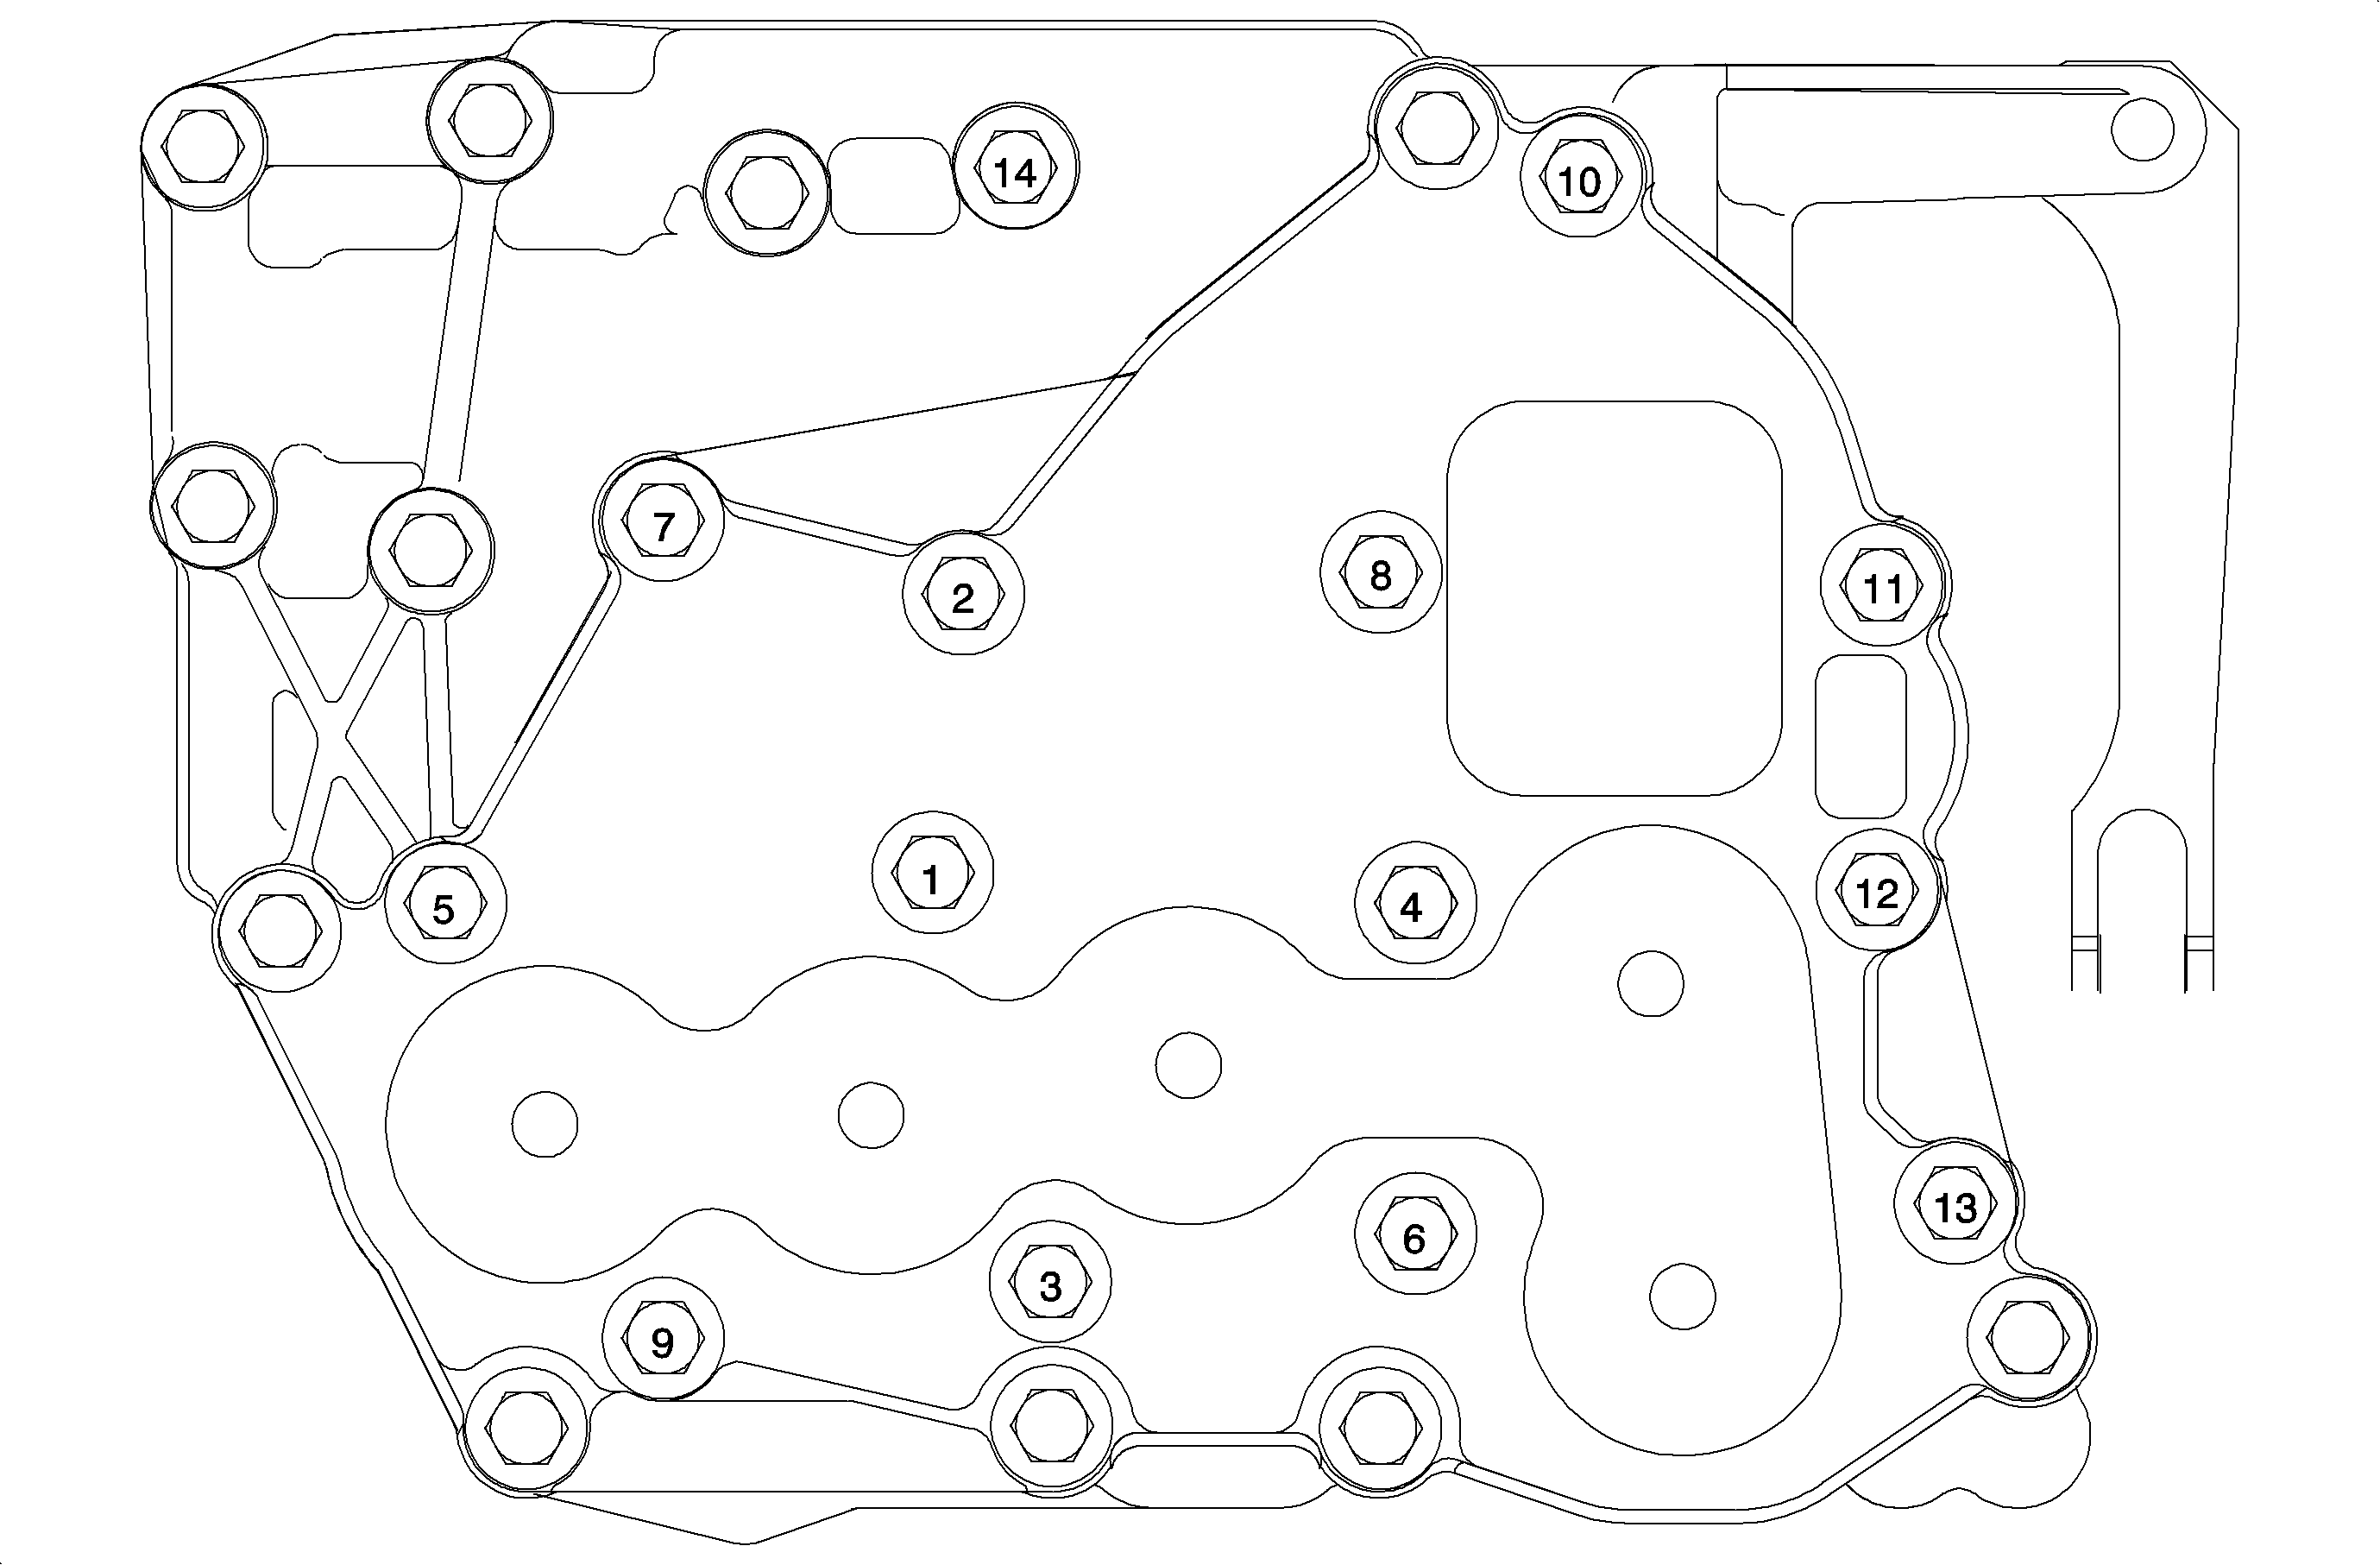
- Tighten the solenoid cover
bolts using the tightening sequence shown in illustration.
TightenTighten the valvebody assembly bolts to 11 N·m (8 lb ft).