
All equipment for testing headlamps must comply with the Society of Automotive Engineers (SAE) recommended practice for headlamps inspection equipment.
If a headlamp testing machine is used, it should give results equivalent to those obtained using the screen procedure shown. It should be in good repair and adjustment, and should be used in accordance with the manufacturer's instructions. The machine using a photoelectric cell or cells to determine aim should also have a visual screen upon which the beam pattern is projected proportional to its appearance and aim on a screen at 7.63 m (25 ft). Such a visual screen should be plainly visible to the operator and should have horizontal and vertical reference lines to permit visual appraisal of the lamp beam.
This system can only be used to adjust the factory settings and only if the
vehicle is on a level surface.Important
Headlamp aim adjustments can be accomplished on-vehicle using no external devices. If the vehicle has been in an accident and/or the vehicle's front structure has been altered, refer to Screen Method.
If the customer believes that the headlamps are misaligned, attempt to correct the alignment using this procedure first. If this procedure does not correct the alignment, refer to Screen Method.
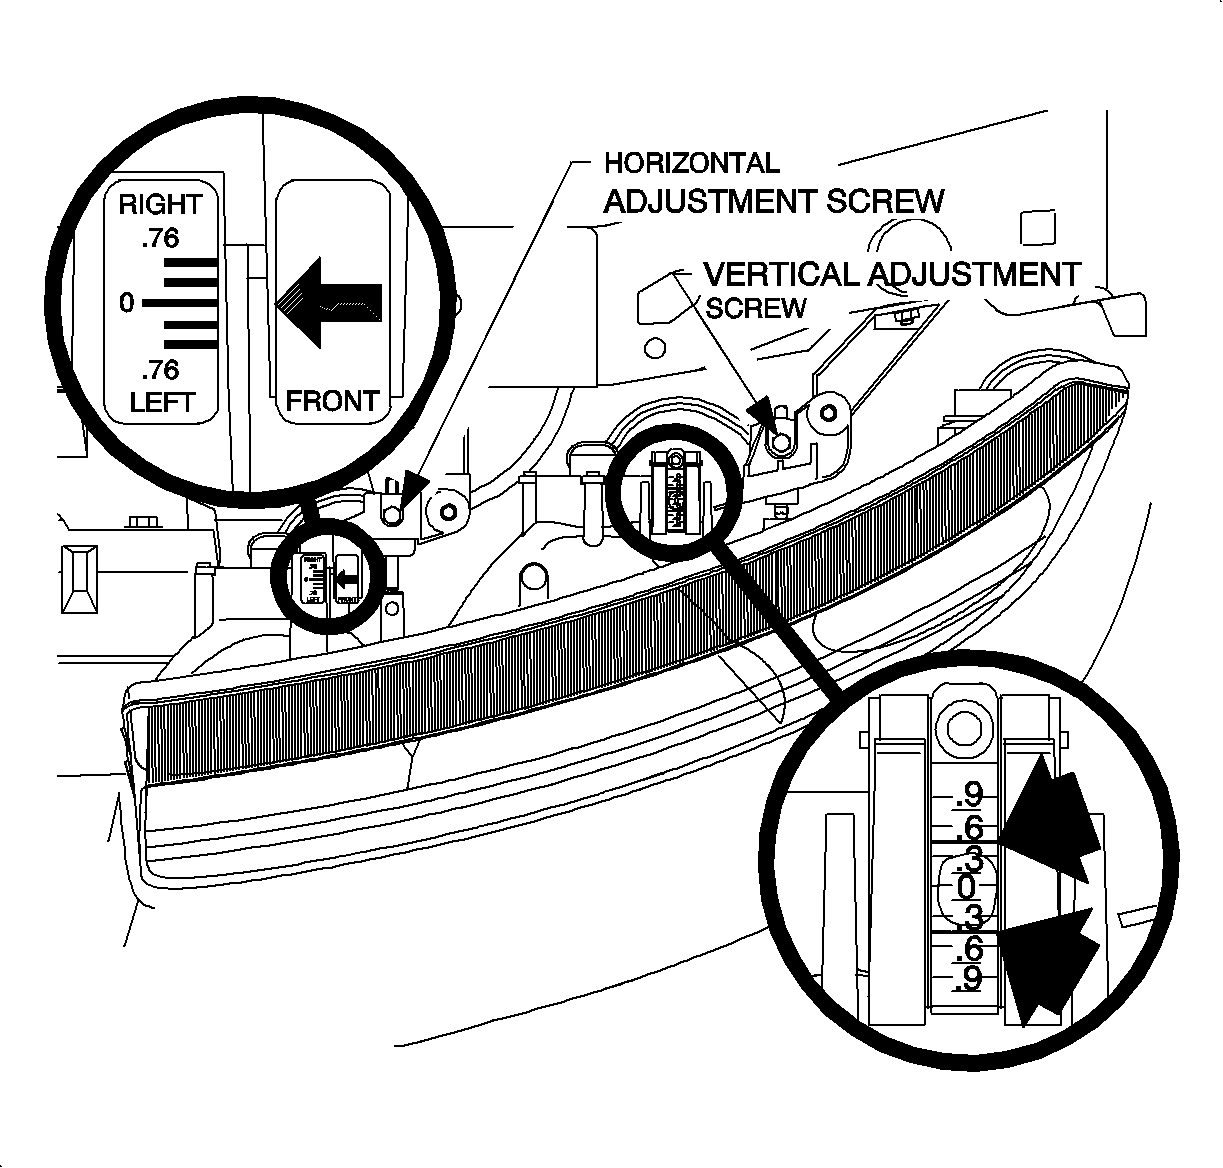
Headlamp adjustment includes vertical aim (light adjustment up and down) and horizontal aim (light adjustment left and right). Before attempting to adjust either the horizontal or the vertical aim, prepare the vehicle as follows:
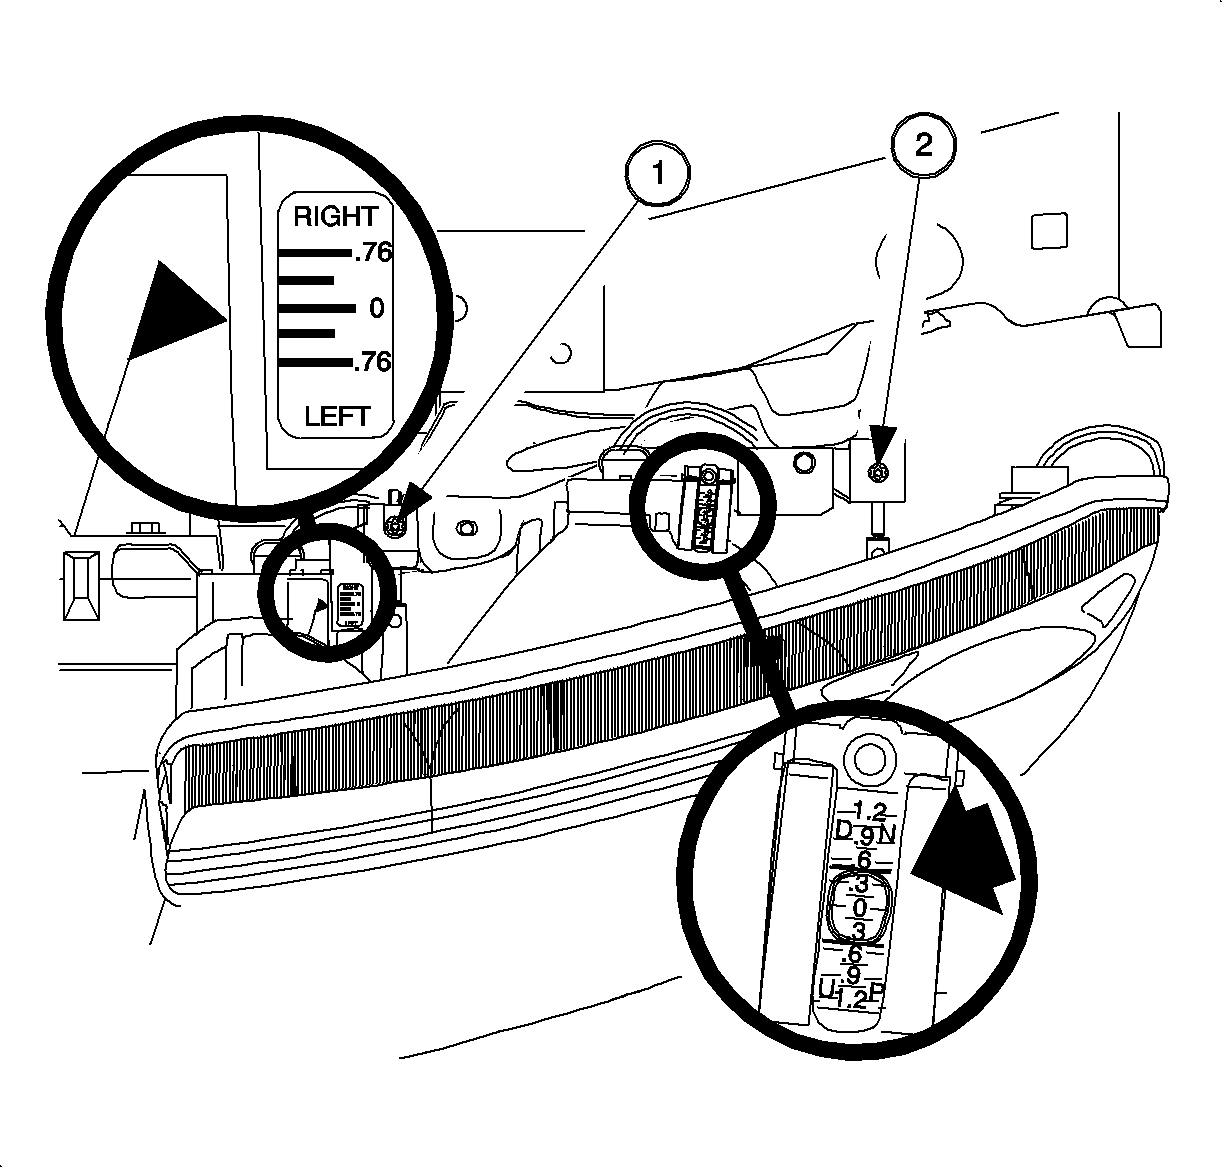
SAE recommended practice and most state inspection requirements allow a vertical aim of up to +0.76 degrees or -0.76 degrees as indicated by the vertical aim bubble position. (This is the equivalent of +/-101 mm (4 in) when the vehicle is 7.63 m (25 ft) from a light board.)
Do not tamper with the bubble level calibration screw. Movement of this screw
will destroy basic lamp aim calibration. Adjust vertical aim with the VERTICAL ADJUSTING
SCREW only.Notice
To reset the vertical adjustment to 0 degrees, rotate the VERTICAL ADJUSTMENT SCREW (as shown in the illustration) using an E8 TORX® socket until the bubble level is at zero.
If a 0 degree setting is unattainable following the repair of the front end sheet metal, reposition the structure as necessary so that the 0 degree reading can be attained.
SAE recommended practice and most state inspection requirements allow a horizontal aim of up to +0.76 degrees or -0.76 degrees as indicated by the horizontal aim decal. (This is the equivalent of +/-101 mm (4 in) when the vehicle is 7.63 m (25 ft) from a light board.)
An aim setting within this range has been preset at the factory. Readjustment is unnecessary under normal vehicle operating conditions.
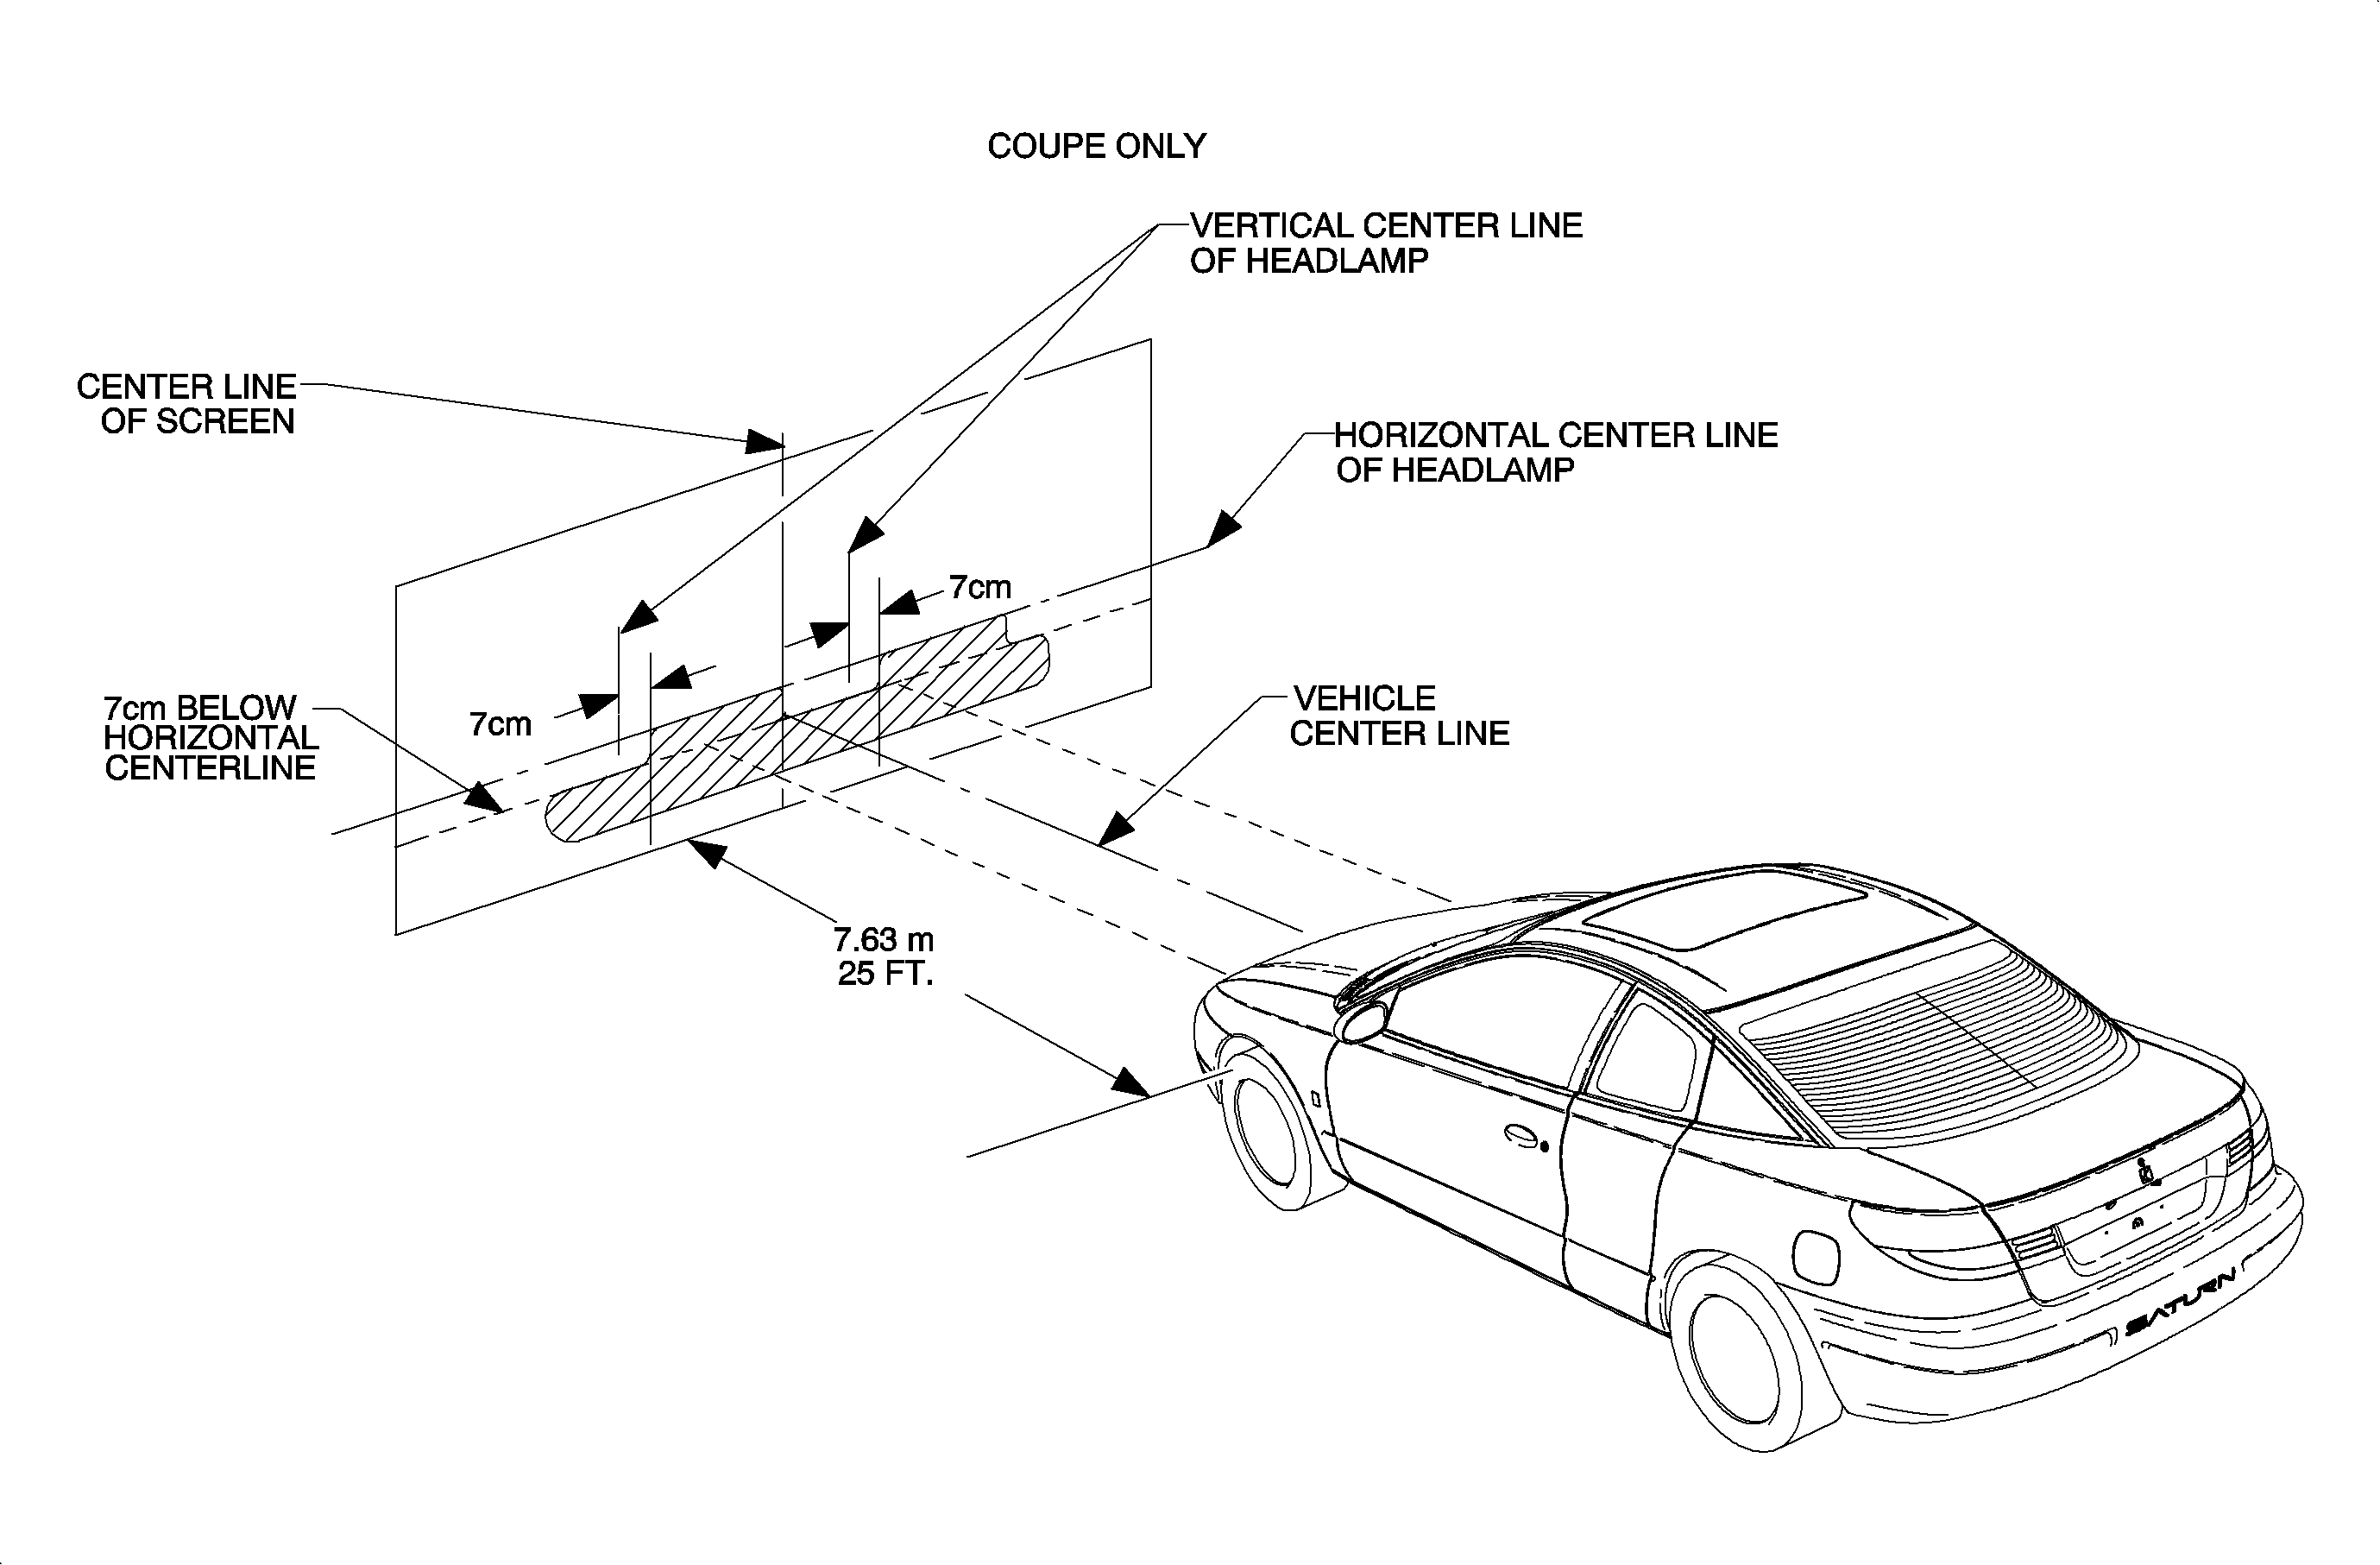
First locate the vehicle so that it is square with the screen and with the front of the headlamps, directly over a reference line which has been painted on the floor.
Locate the center line on the aiming screen so that it is in line with the center of the vehicle. This can be done by sighting through the center of the rear window of the vehicle. Mark the center of the front and rear windows with narrow strips of masking tape. Move the vehicle until it is in alignment with these 2 points. Use these "sights" to locate the centerline of the aiming screen, directly in line with the vehicle's axis.
It is required, since seeing the outer edges of the headlamp beam patterns depends greatly on the amount of darkness in the area, to have a specific aiming area in a darkened location. This should be sufficient for the vehicle and an additional 7.63 m (25 ft) measured from the face of lamps to the front of the visual screen.
The floor on which the vehicle rests must be flat, and level with the bottom of the screen. If the floor is not level, compensate.
If a screen is used, it should be 1.52 m high x 3.66 m wide (5 ft high x 12 ft wide) with a matte white surface well shaded from extraneous light, and properly adjusted to the floor on which the vehicle stands. Kent Moore P/N SA9706B is available for use to align the headlamps using the instructions in this service manual. Provisions may be made for moving the screen so that it can be aligned parallel with the rear axle and so that a horizontal line drawn perpendicularly from the centerline of the screen will pass an equal distance midway between the 2 headlamps.
The screen should be provided with a fixed vertical centerline, 2 laterally adjustable vertical tapes, and 1 vertically adjustable horizontal tape.
If a regular commercial aiming screen is not available, the screen may consist of a vertical wall having a clear uninterrupted area approximately 1.83 m high x 3.66 m wide (6 ft high x 12 ft wide).
The surface should be finished with a washable non-gloss white paint.
Aim composite headlamps on LOW BEAM only.Important
After the aiming screen has been set up in its permanent location, it is necessary to paint a reference line on the floor directly under the lens of the lamps to indicate the proper location of the headlamps when they are being aimed.

Marked screen and adequate test area.
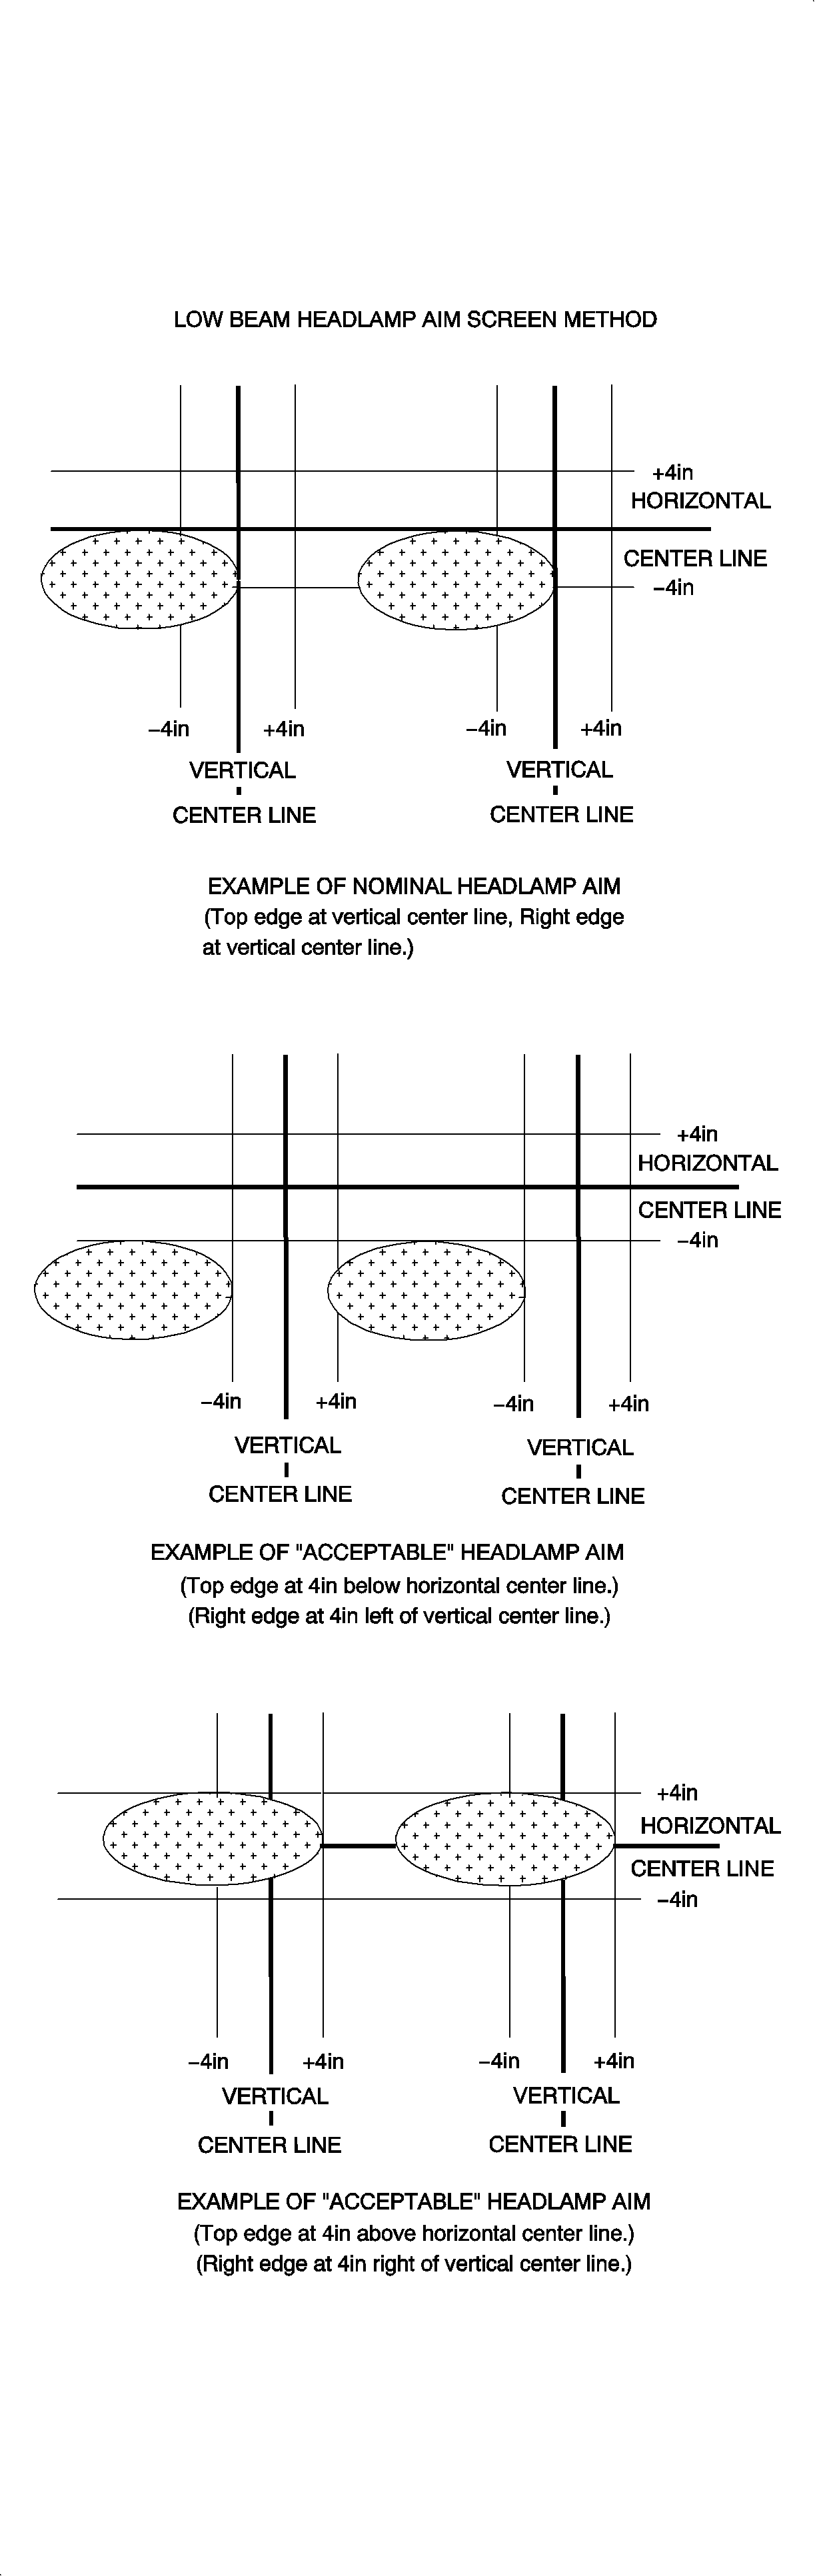
ProcedureWith the vehicle properly located and loaded, switch the headlamps to low beam and observe the left and the top edges of the high intensity zone on the screen.
HEADLAMP AIM WITHIN SPECIFICATIONS:If the left edge is horizontally more than:
If the top edge is vertically more than: