
Caution
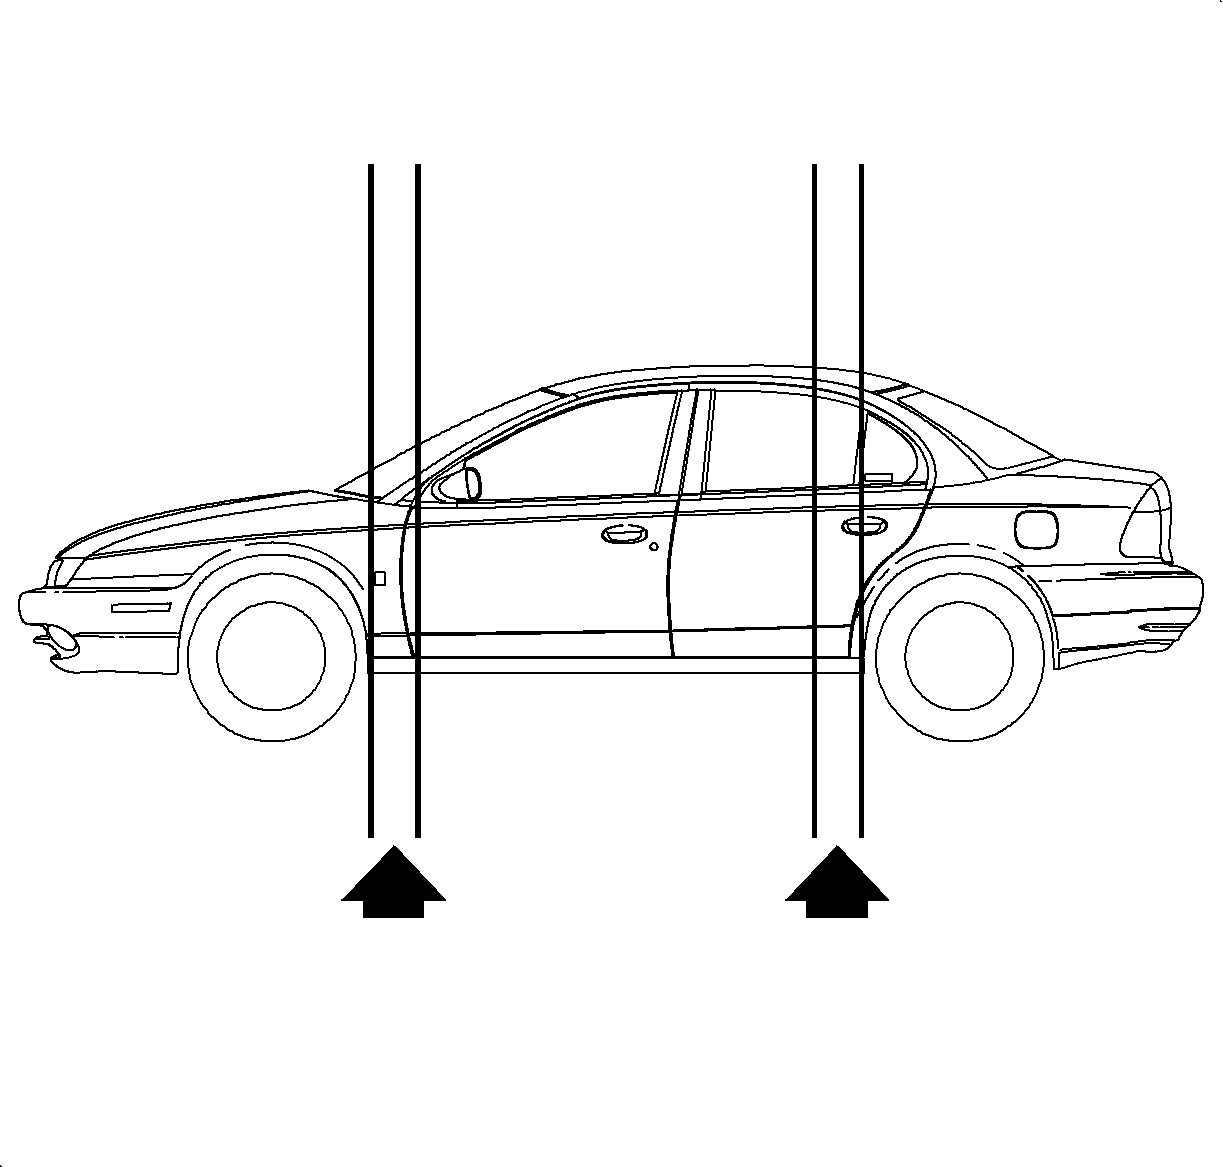
Ensure that the vehicle is properly supported and squarely positioned.
To help avoid personal injury when a vehicle is on a hoist, provide additional support
for the vehicle on the opposite end from which the components are being removed.
- Disconnect the negative battery cable.
- Jack the vehicle, or raise the vehicle on a hoist.
- Drain the engine oil.
- Remove the right wheel and splash shield.
Important
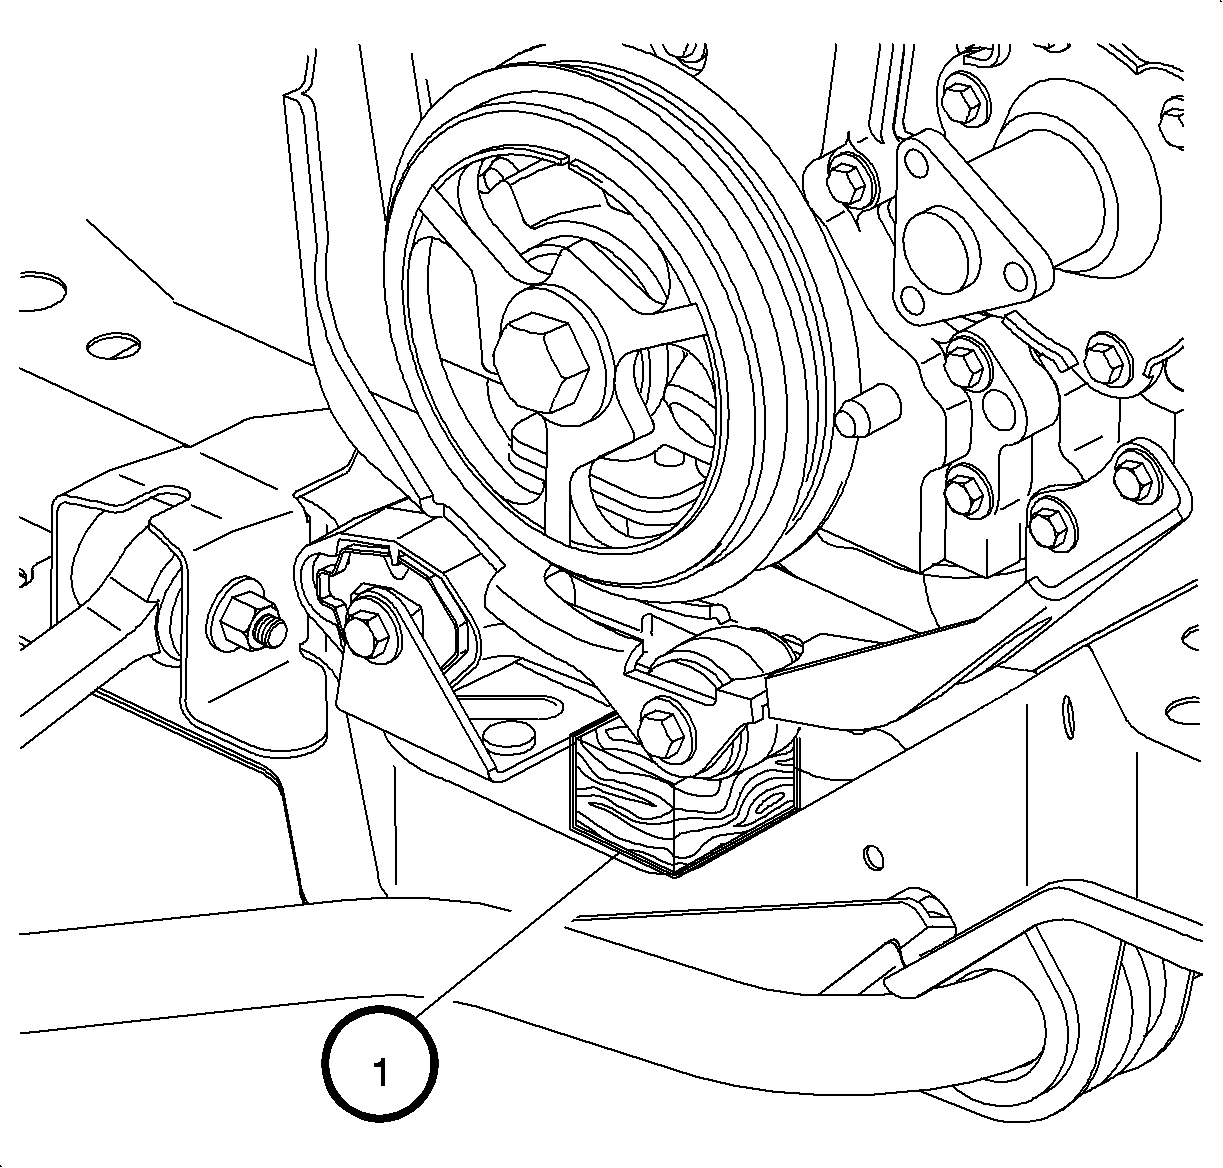
Installation of the wood block prior to upper engine torque axis mount removal
allows the mount to be easily installed without lifting or jacking the powertrain.
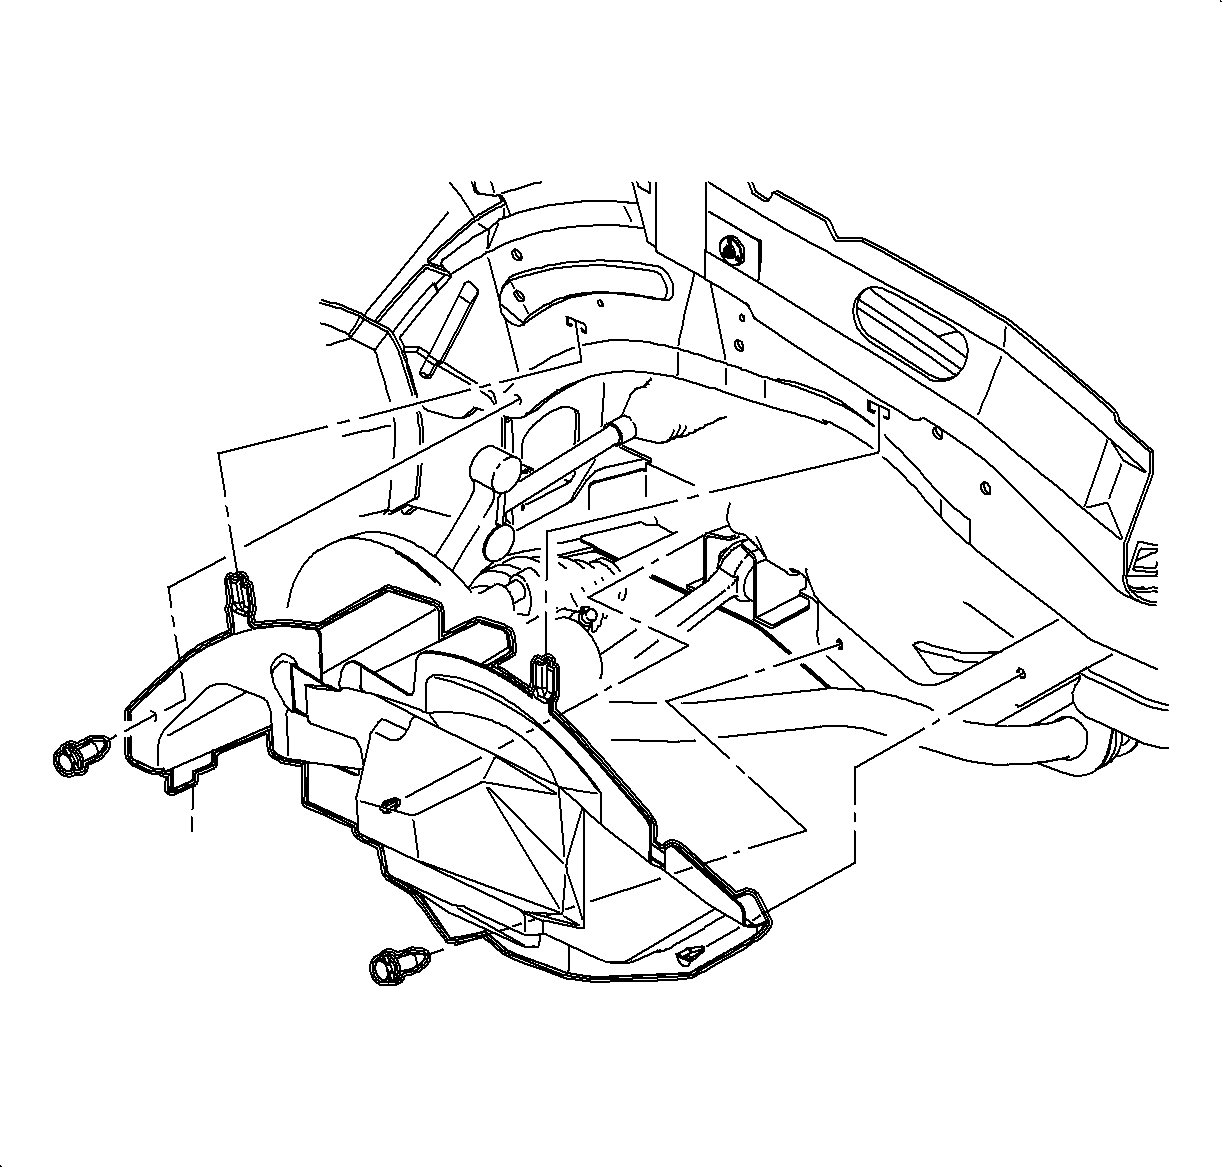
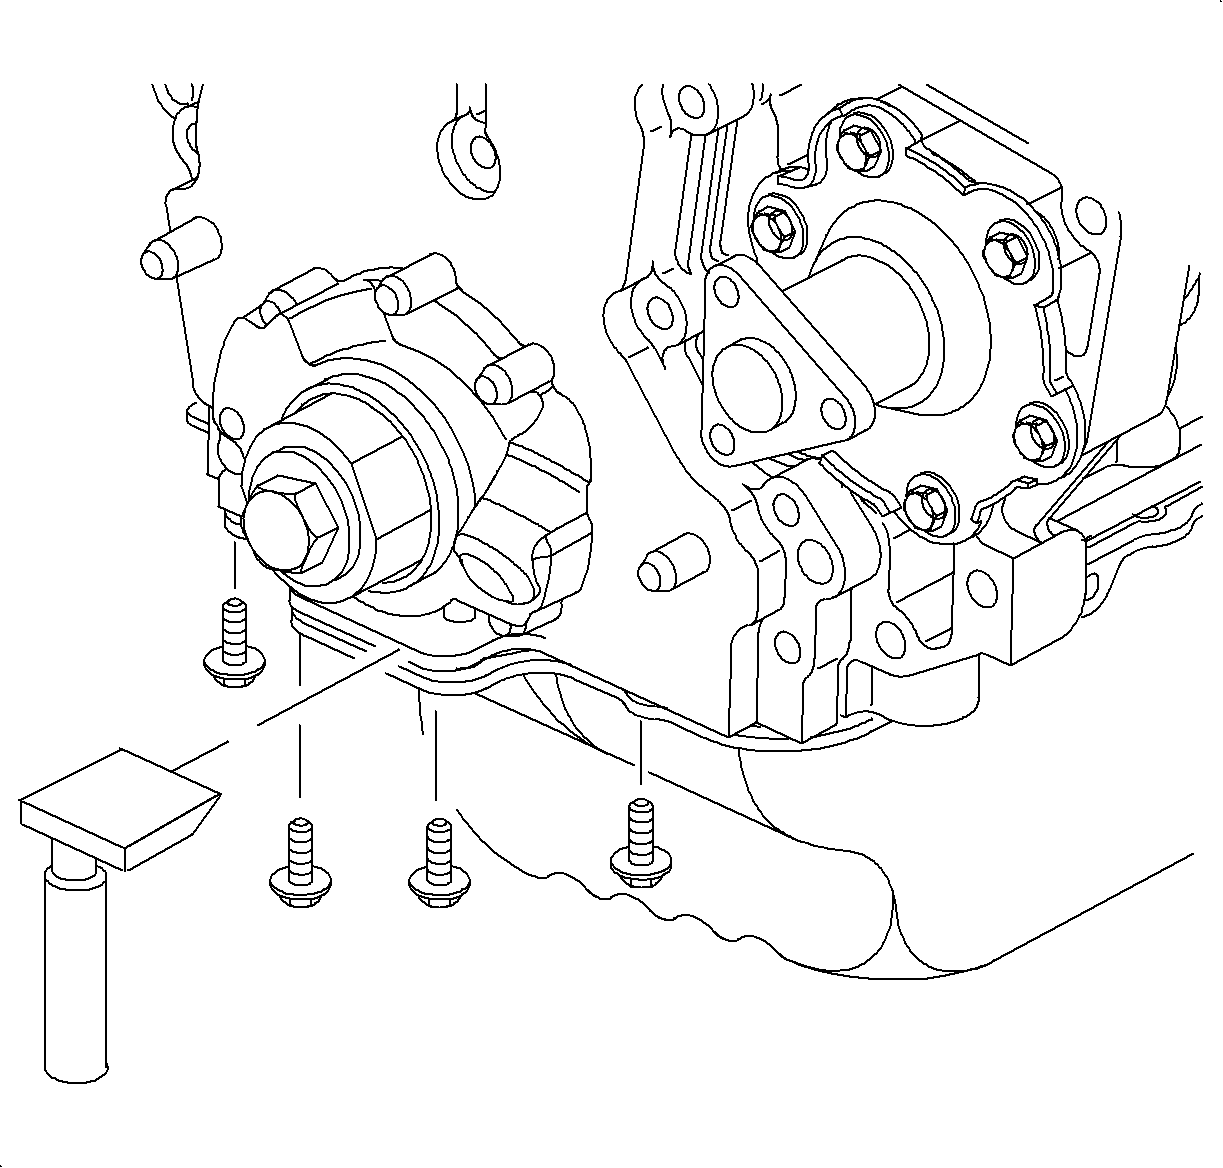
- Place a 1 in x 1 in x 2 in long block of wood between the
torque strut and cradle.
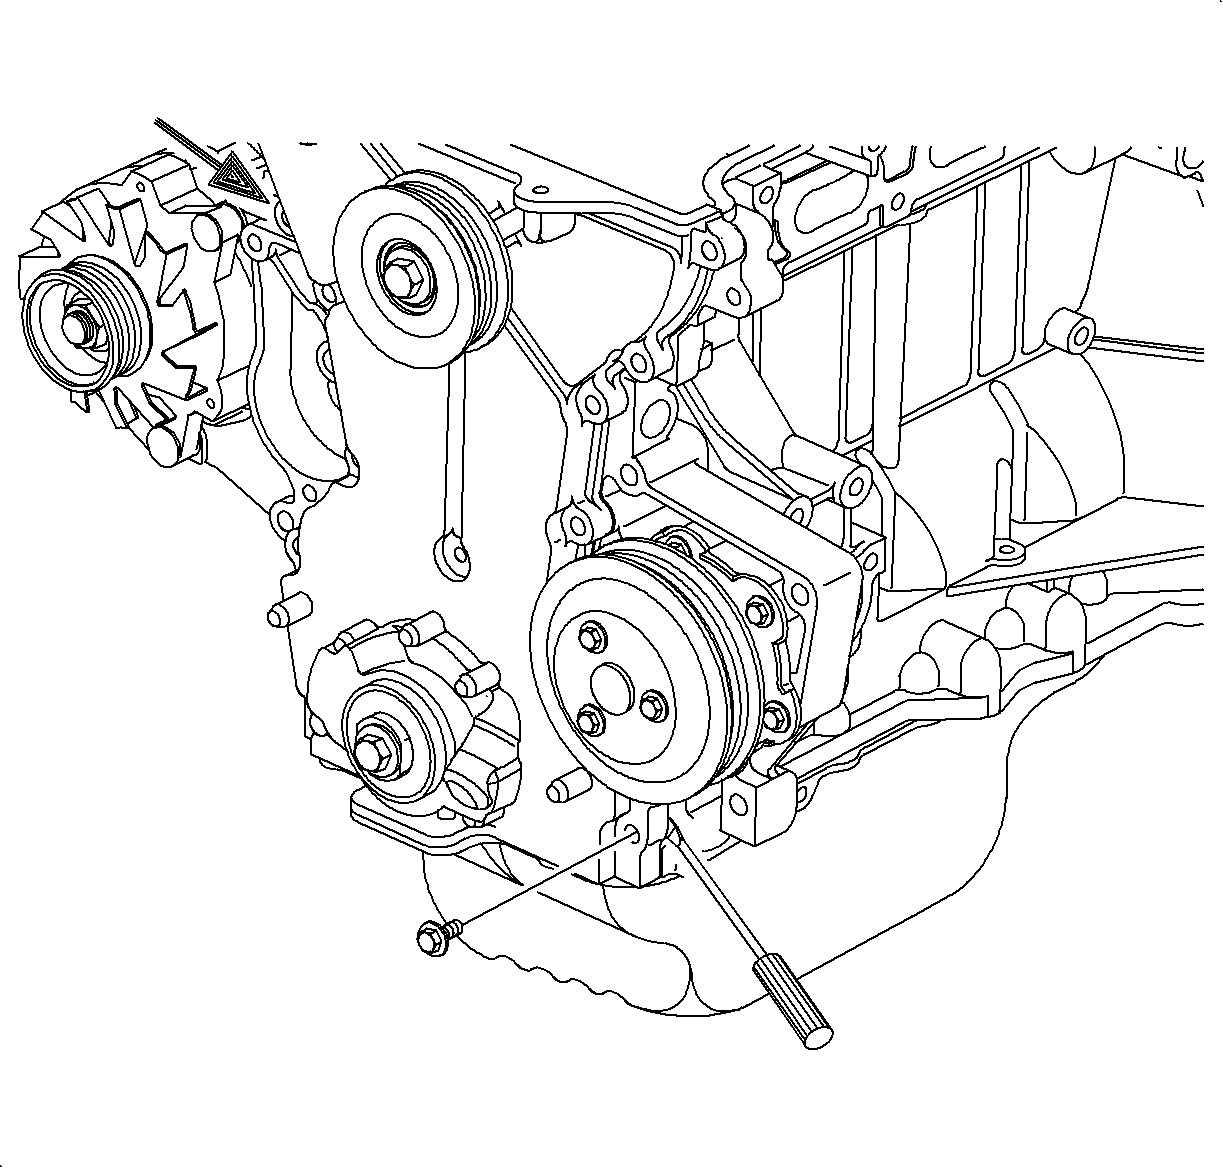
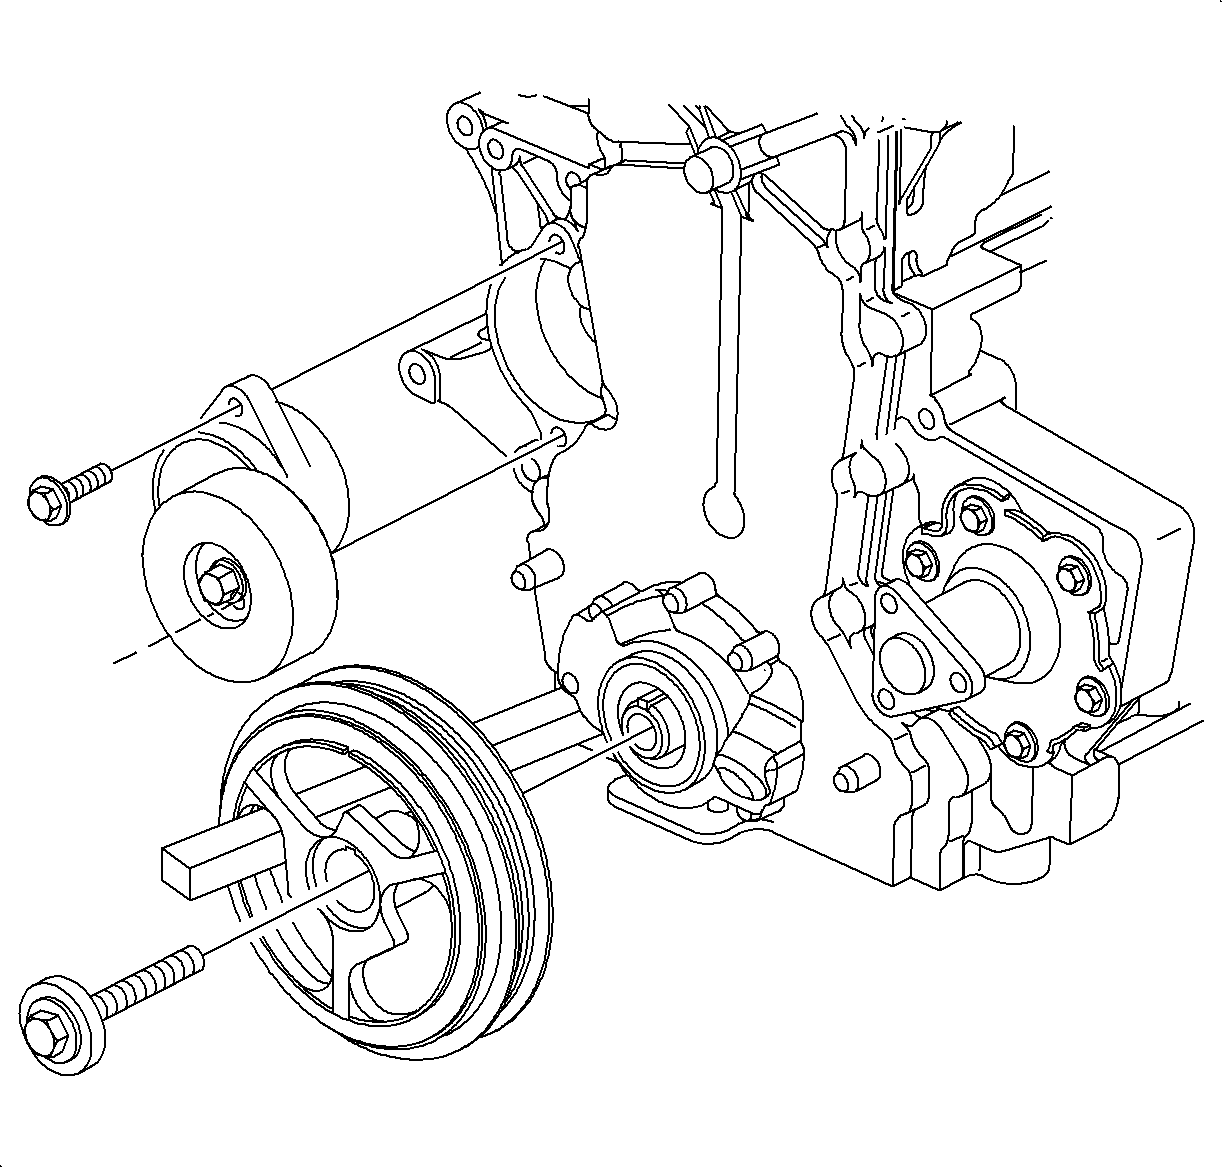
- Remove the engine accessory drive belt.
Important
- The crankshaft vibration damper/pulley bolt head and washer prevents oil
leakage from the cavity around the end of crankshaft.
- Do not pry against the cover.
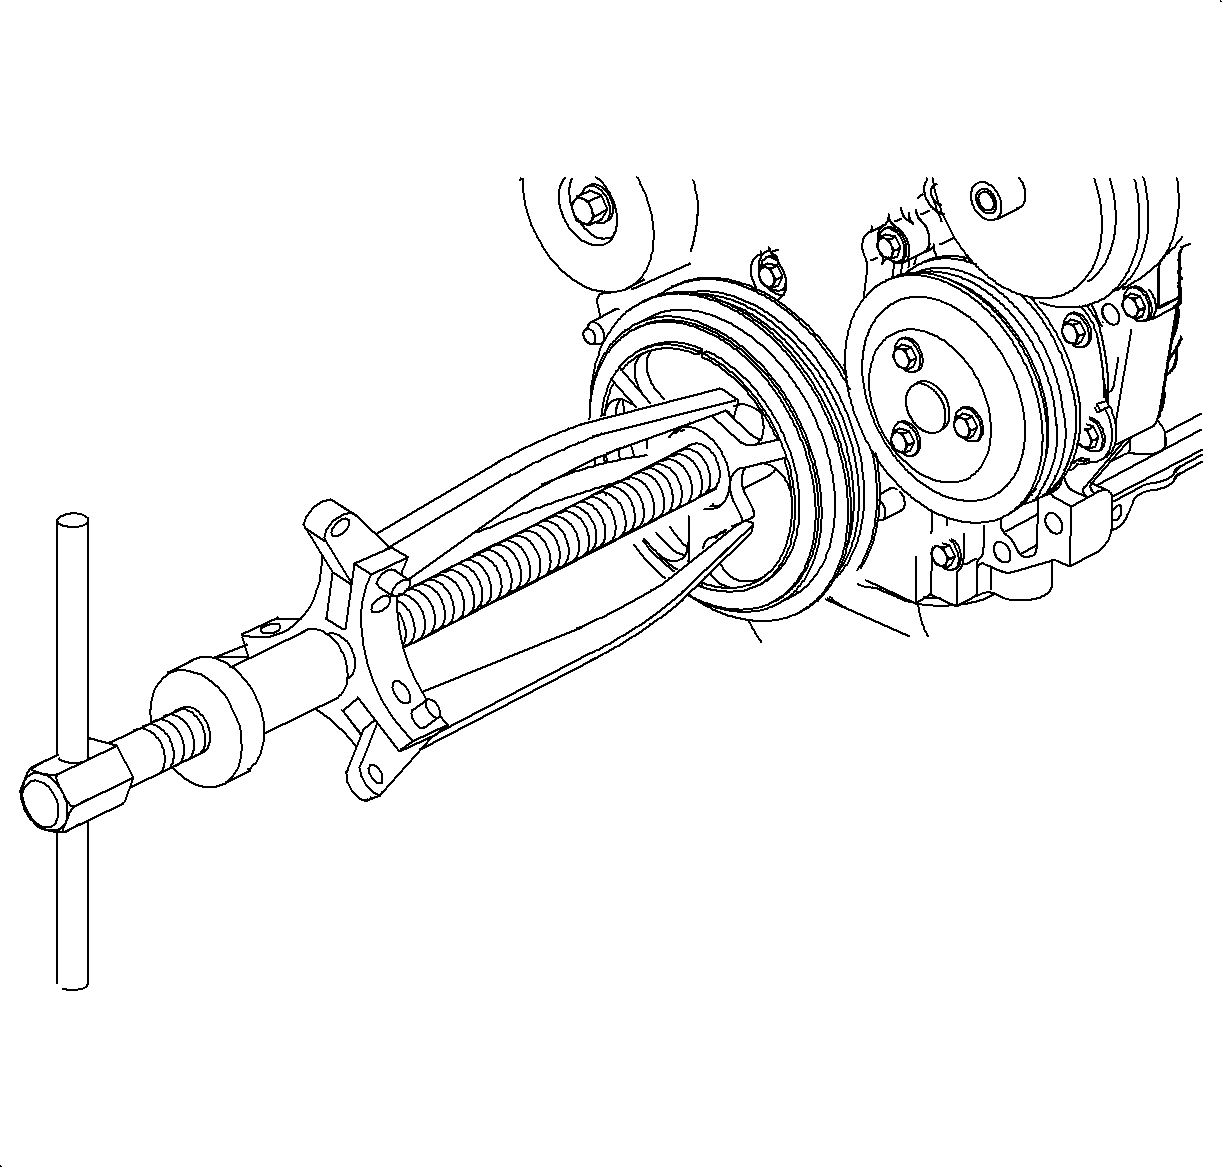
- Remove the front crankshaft vibration damper/pulley assembly. Hold the damper
with a strap wrench when removing the bolt.
Puller jaw slots are cast into the damper/pulley assembly for removal with a
small three-jaw puller, if required.
Important
- The accessory drive belt idler pulley must be removed to allow the front
cover to be removed and replaced in the vehicle.
- It is not necessary to remove the power steering pump for access to the
bracket attachment bolts. The DOHC (LL0) engine has an additional bracket located
under the pump and the attachment bolt can be accessed through an oval hole in the
pump's pulley.
- Remove the power steering pump assembly and position it on the intake manifold.
Important
Cover camshaft area whenever repairs are not
- Remove the belt tensioner.
Important
Cover the camshaft area whenever repairs are not being performed to prevent
foreign debris from entering engine.
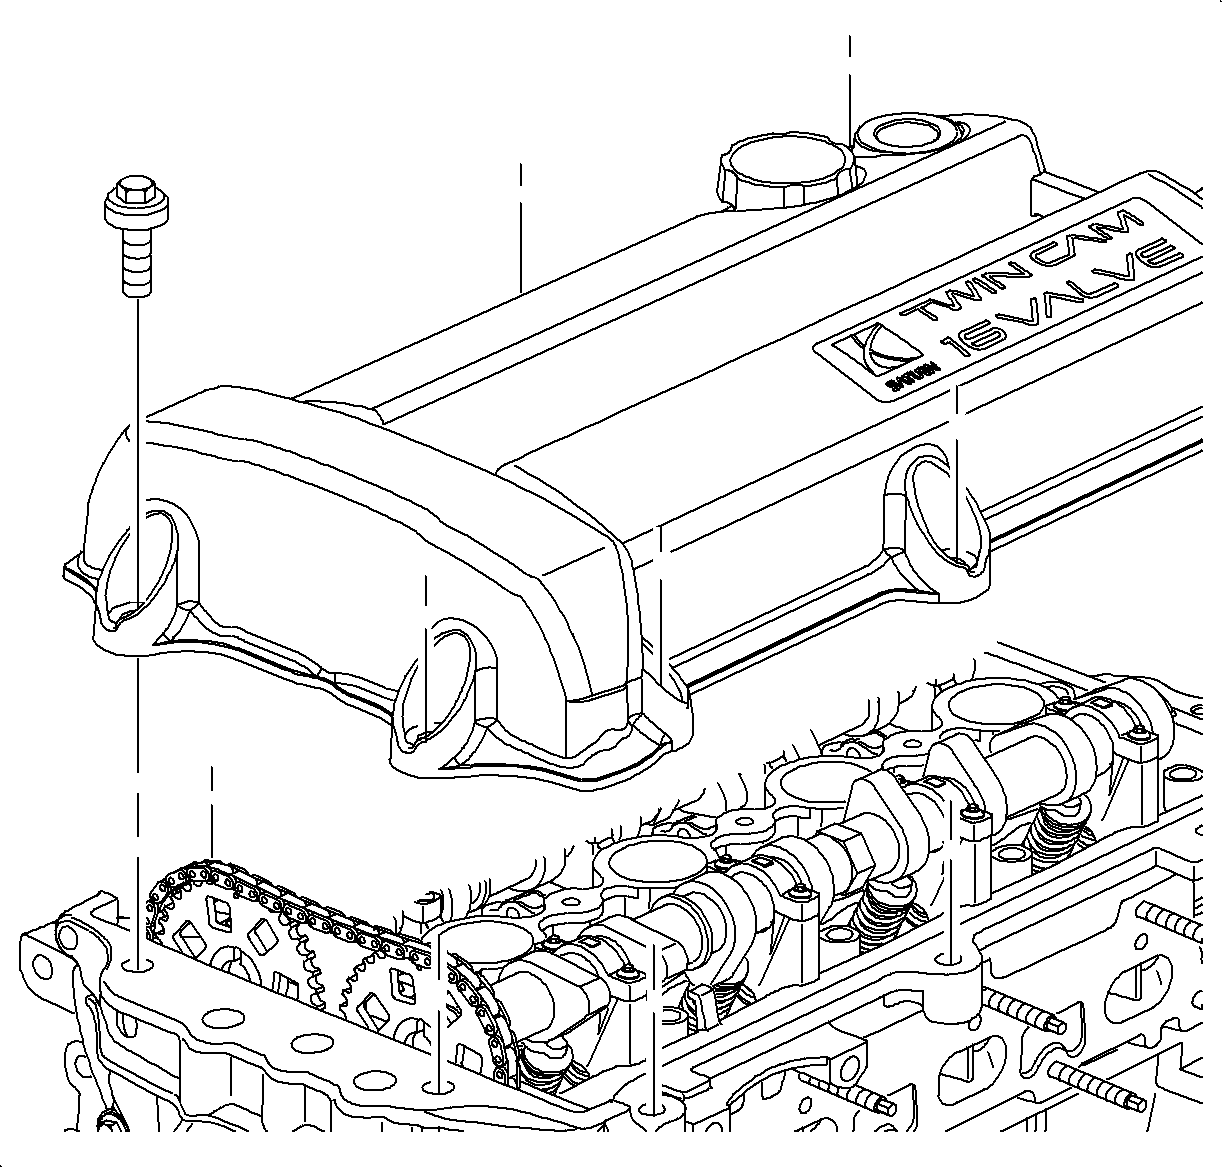
- Remove the cam cover (DOHC [LL0]) engine.
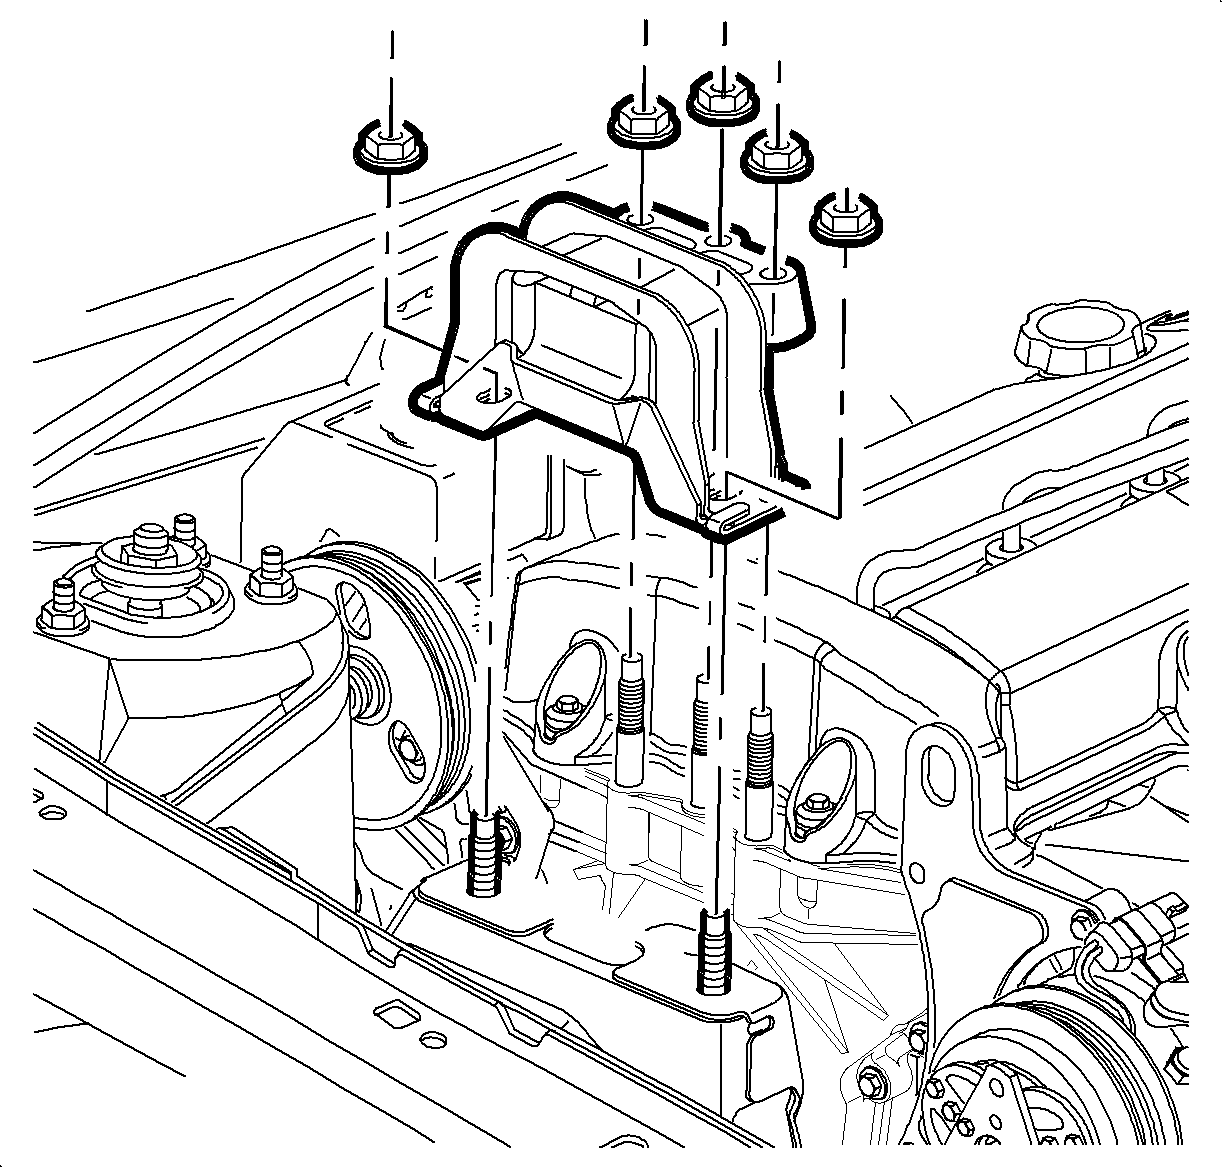
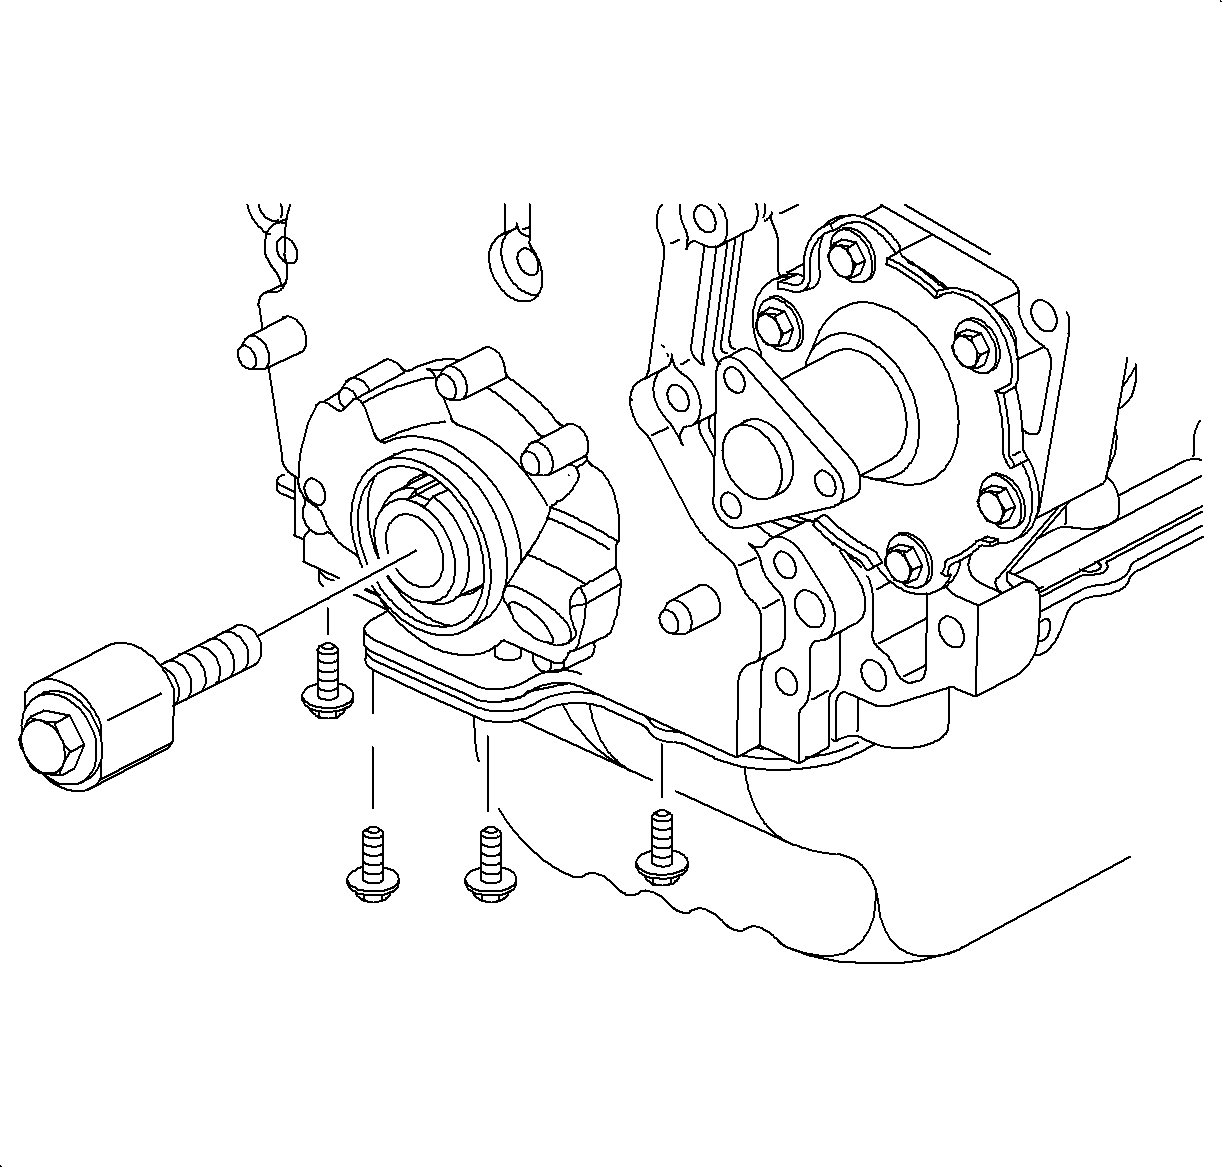
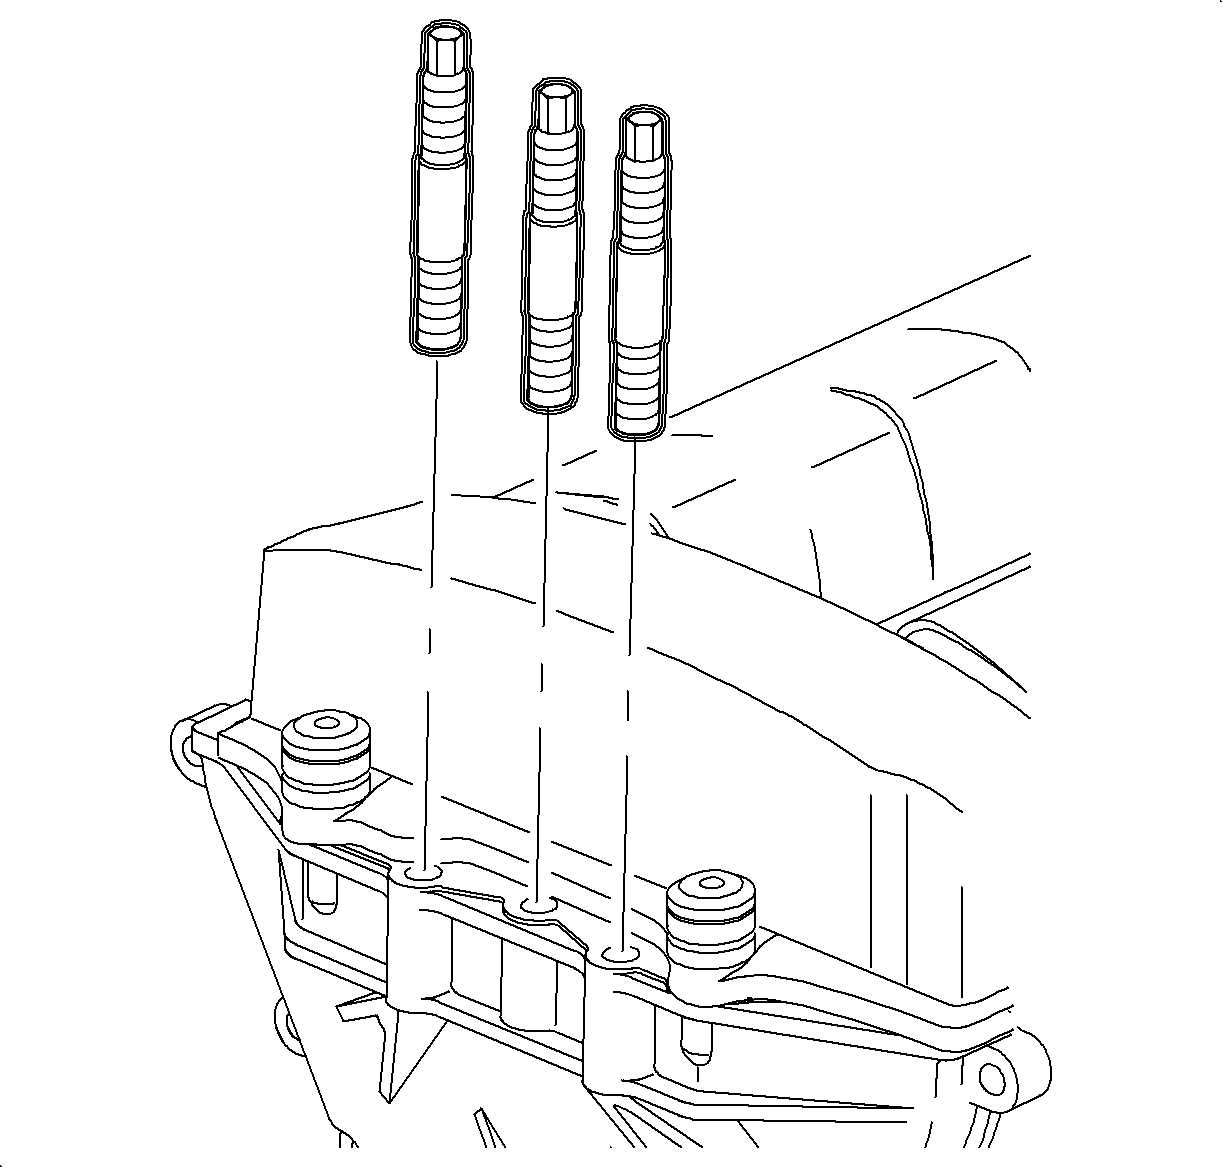
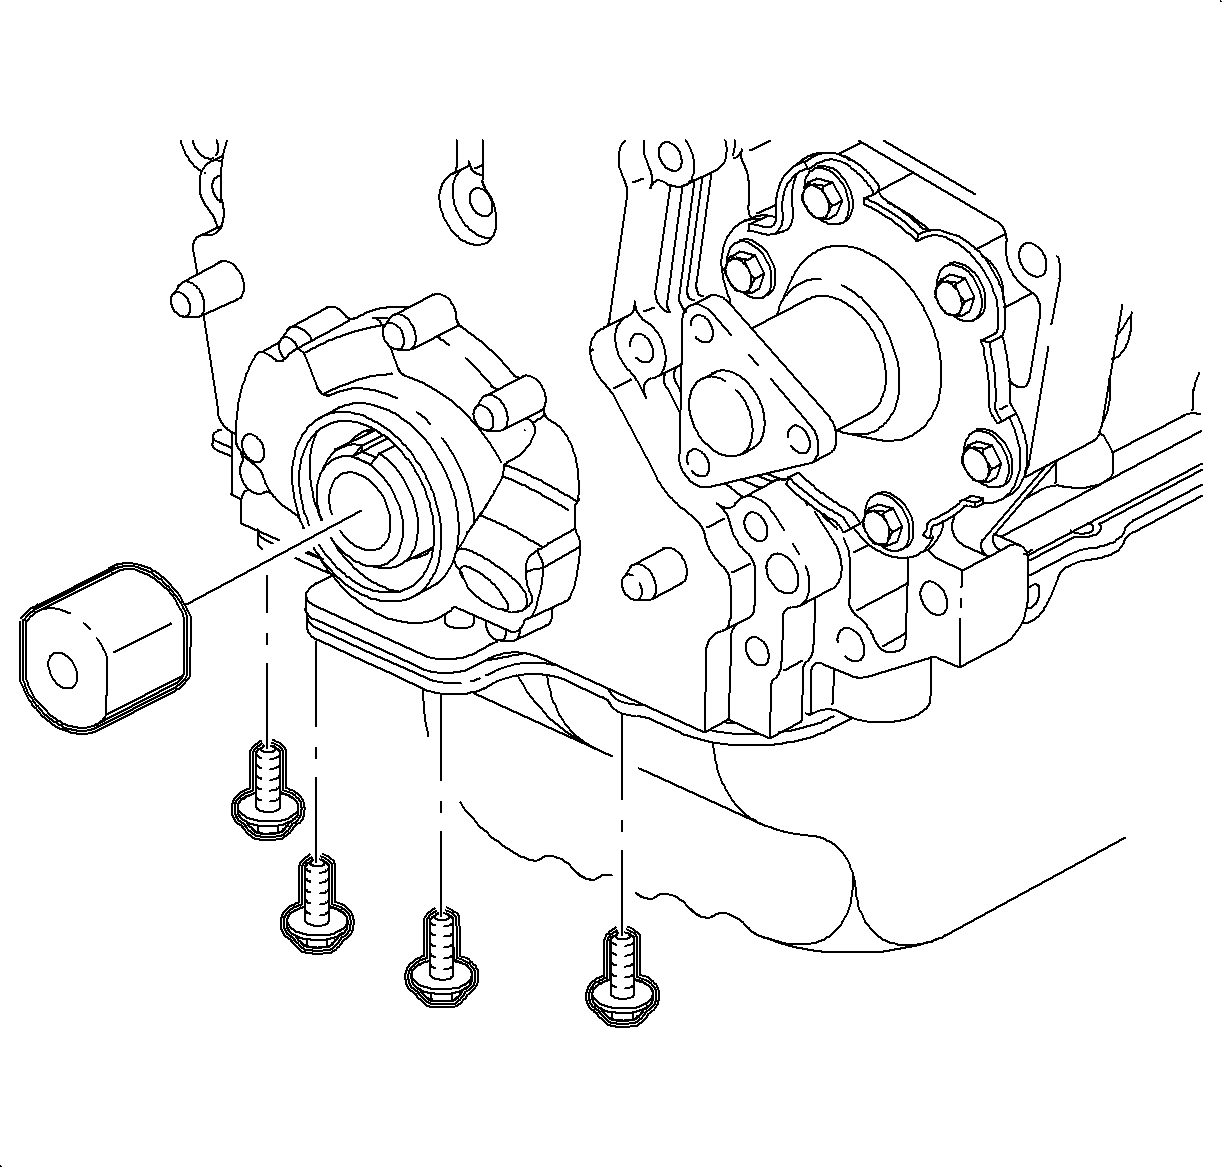
- Remove the 3 right-hand engine mount to front cover nuts and the 2 engine mount
to midrail bracket nuts, allowing the powertrain to rest on the block of wood.
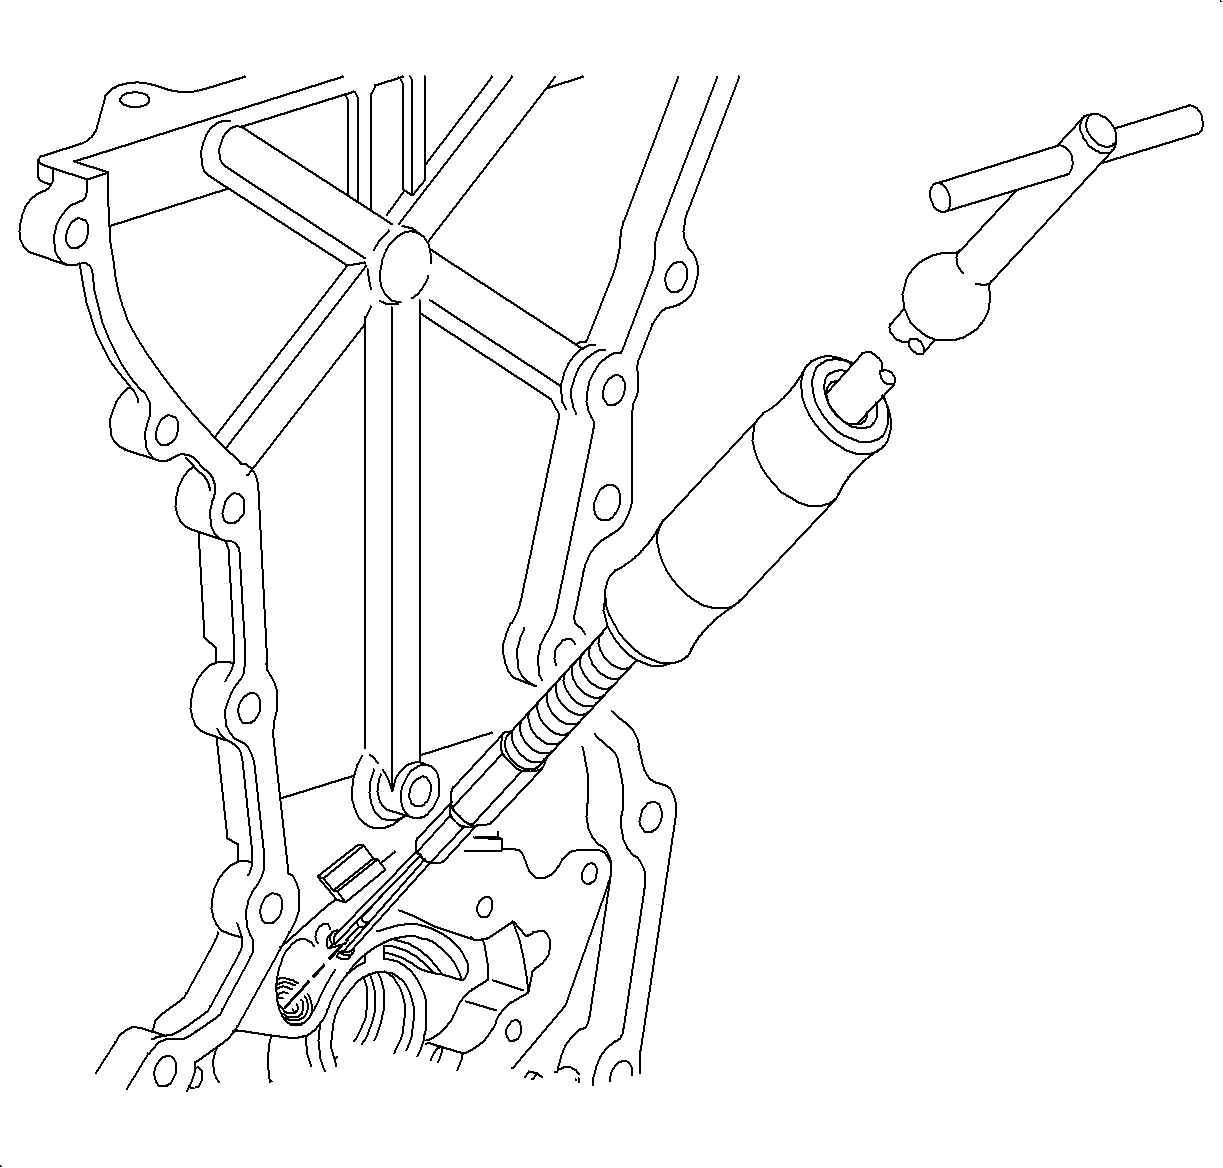
Important
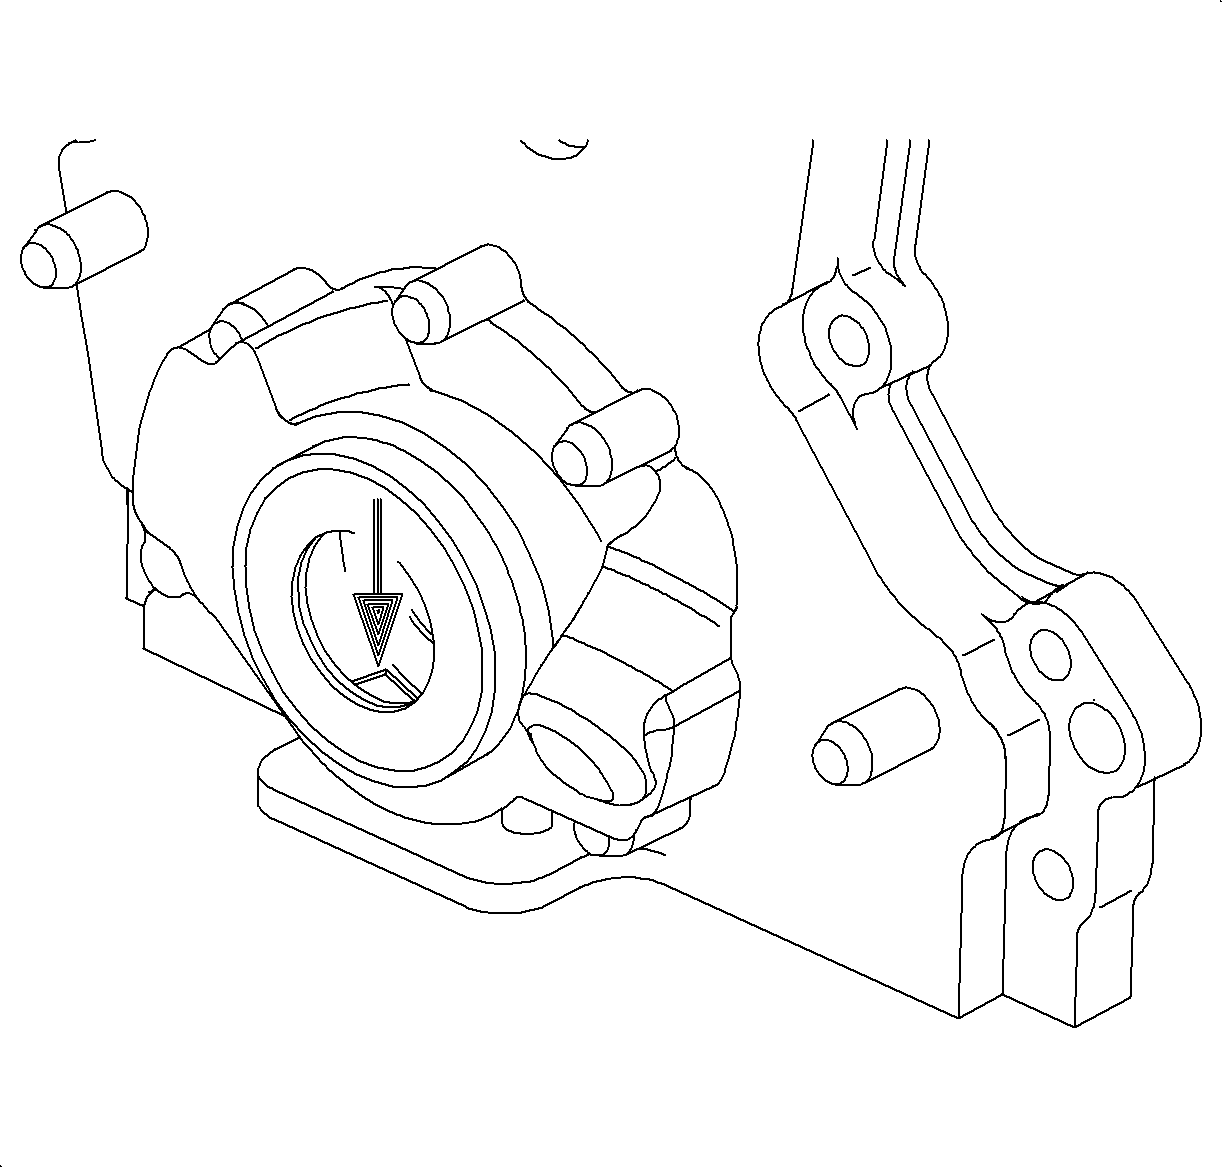
- Failure to hold the crankshaft timing sprocket in place will cause timing
chain guide damage. The tool also aligns the gerotor during front cover installation.
After the front cover assembly is loosened and moved approximately 25.4 mm (1 in.)
from the engine, the crankshaft timing gear service tool should be removed.
- Install the
SA9104E
with
the flat side towards the crankshaft sprocket.
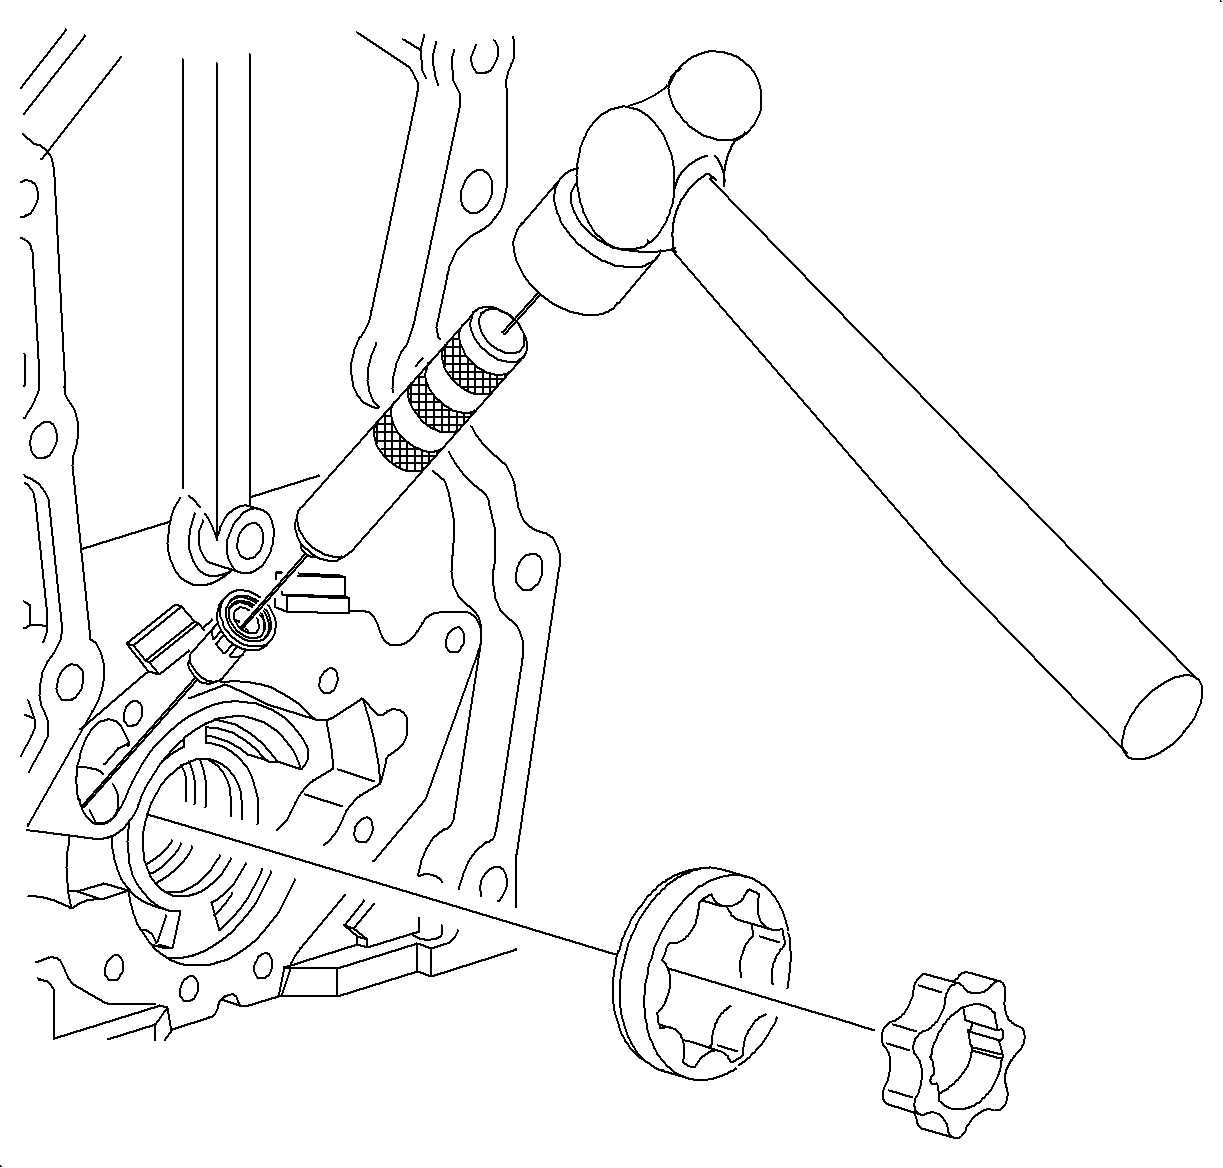
- Removal of the front cover assembly:
Install the
SA91104NE
to
ensure the front crankshaft timing sprocket is held firmly in place.
Important
- Spray the 2 dowel pin holes in the front cover with penetrating oil to
facilitate cover removal of the dowel pin.
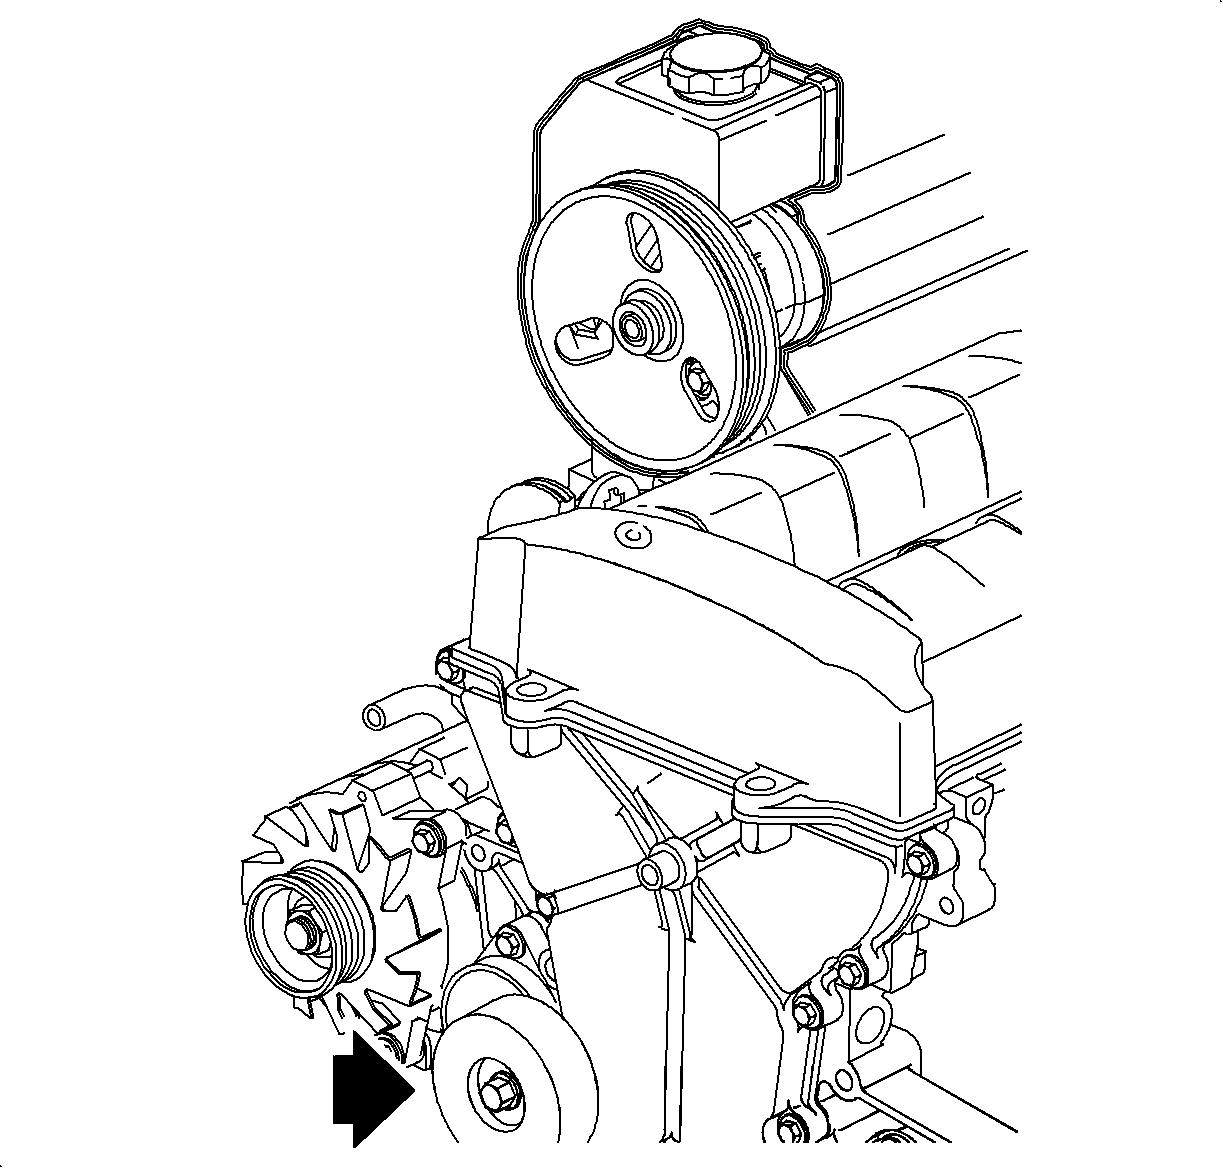
- On (DOHC [LL0]) engines, one front cover assembly attachment bolt is located
under the torque axis mount flange, above the accessory drive belt idler pulley.
- After the front cover assembly is loosened and moved approximately 25.4 mm
(1 in) from the engine, the
SA9104E
should be removed.
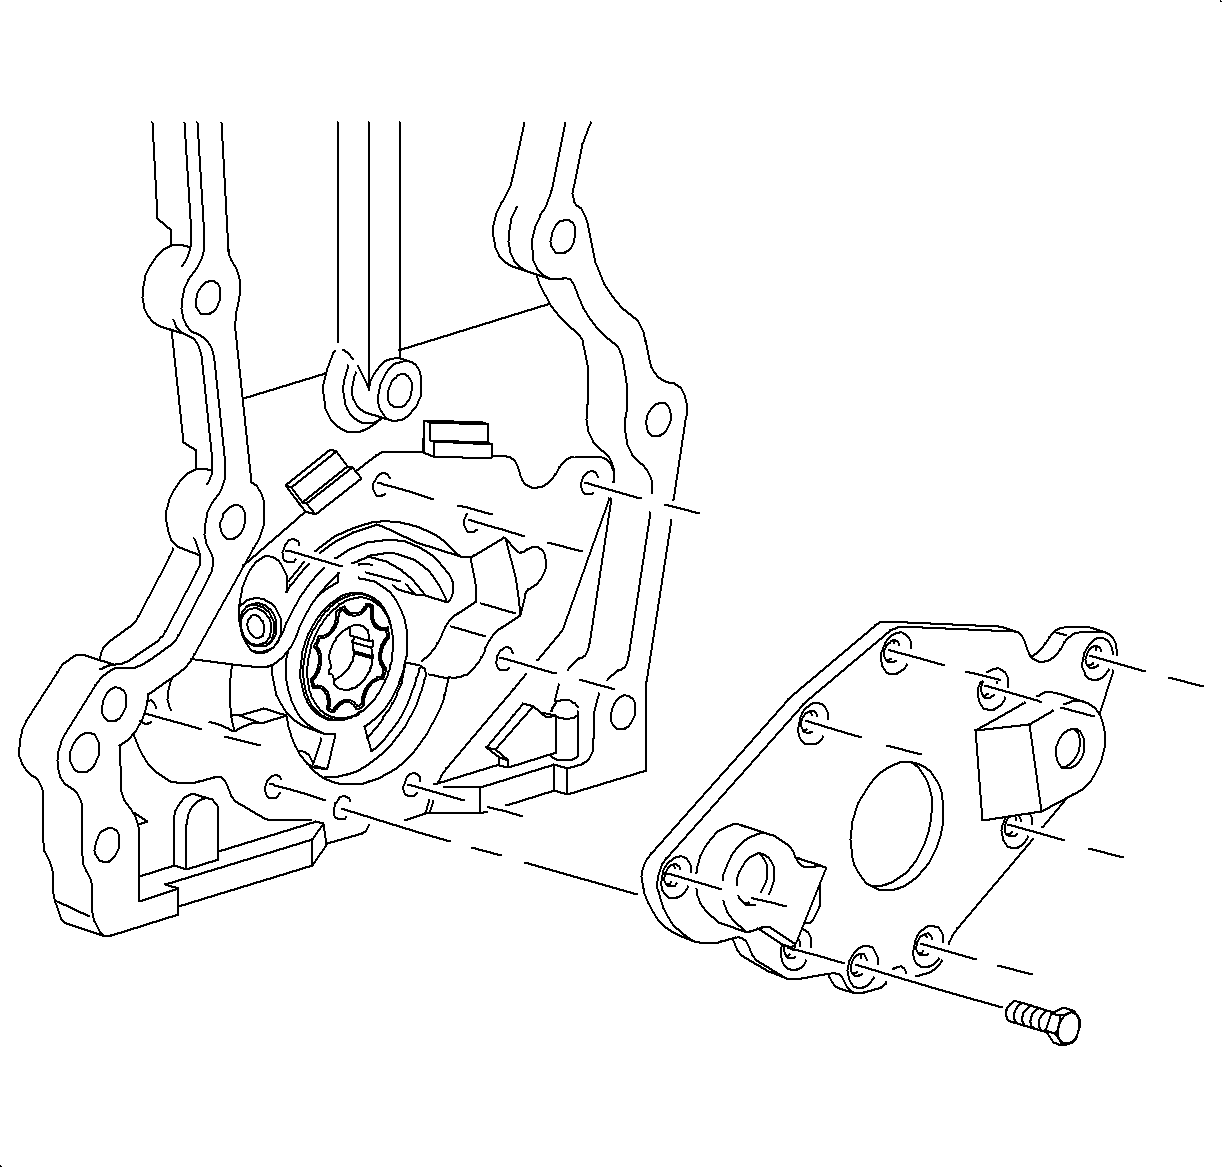
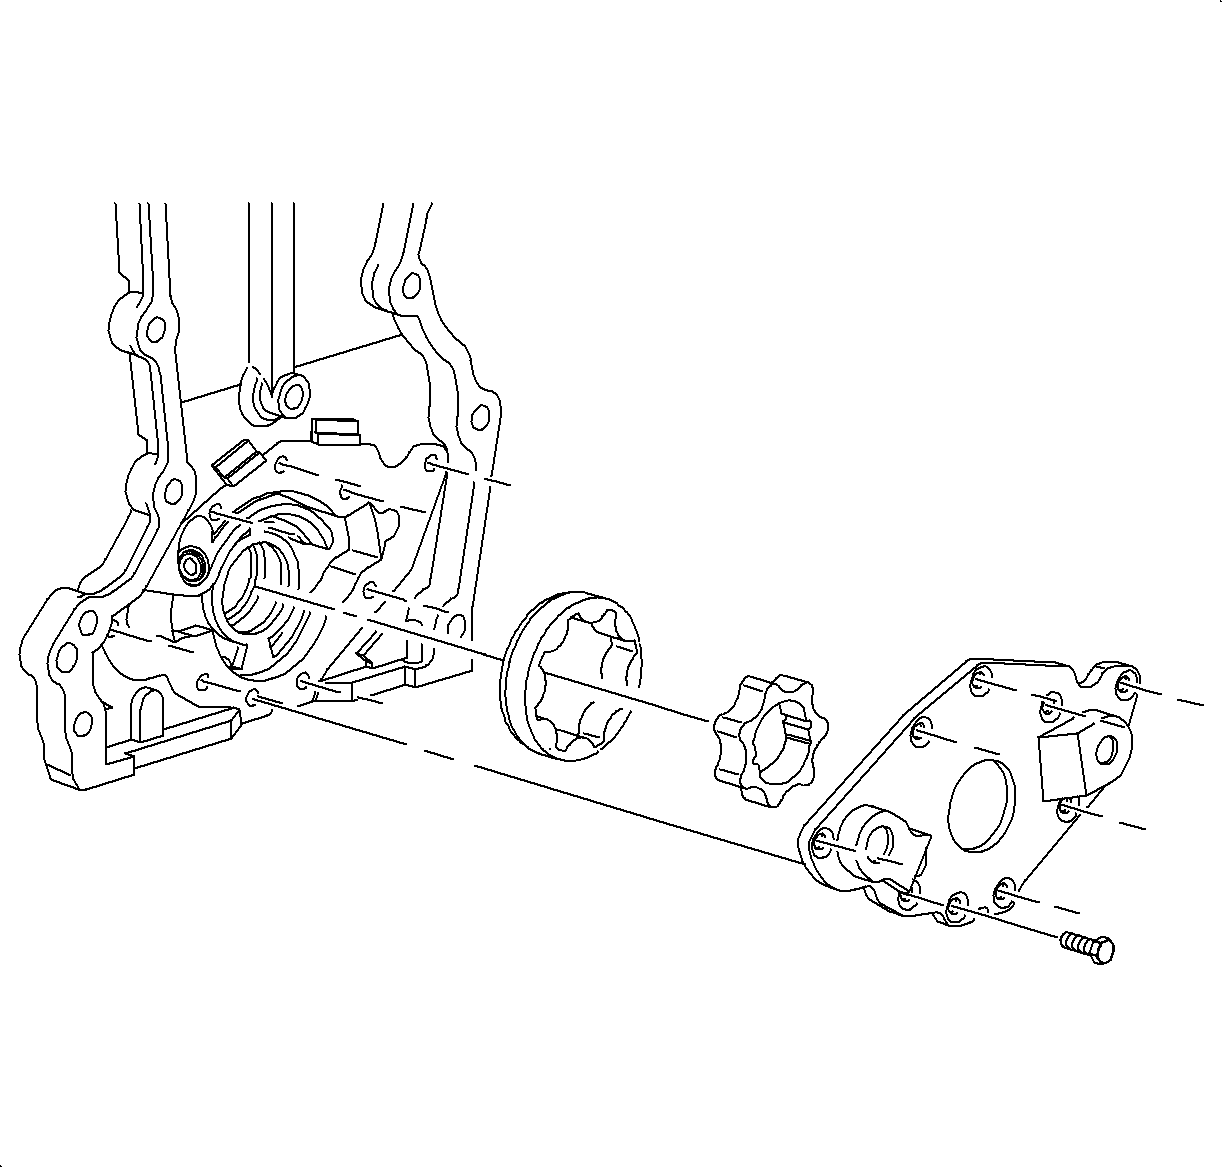
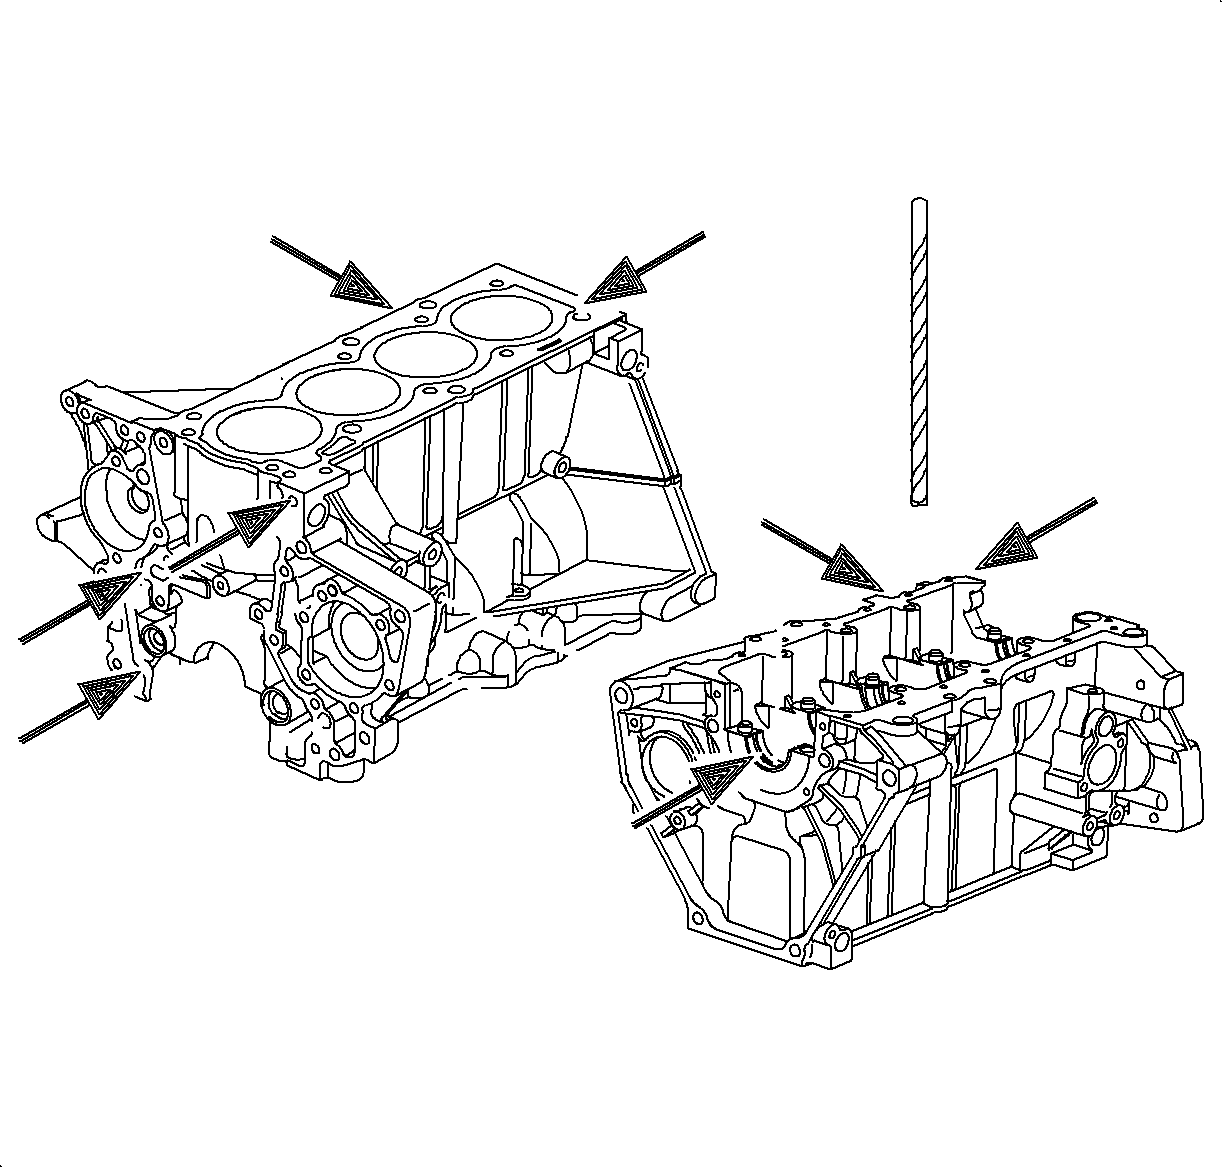
- Remove the 4 front oil pan bolts and 14 front cover bolts:
- Use the
SA9123E
to
cut the oil pan seal away from the front cover.
- Remove the front cover bolts.
- Using the front cover pry tangs, remove the front cover from the cylinder block:
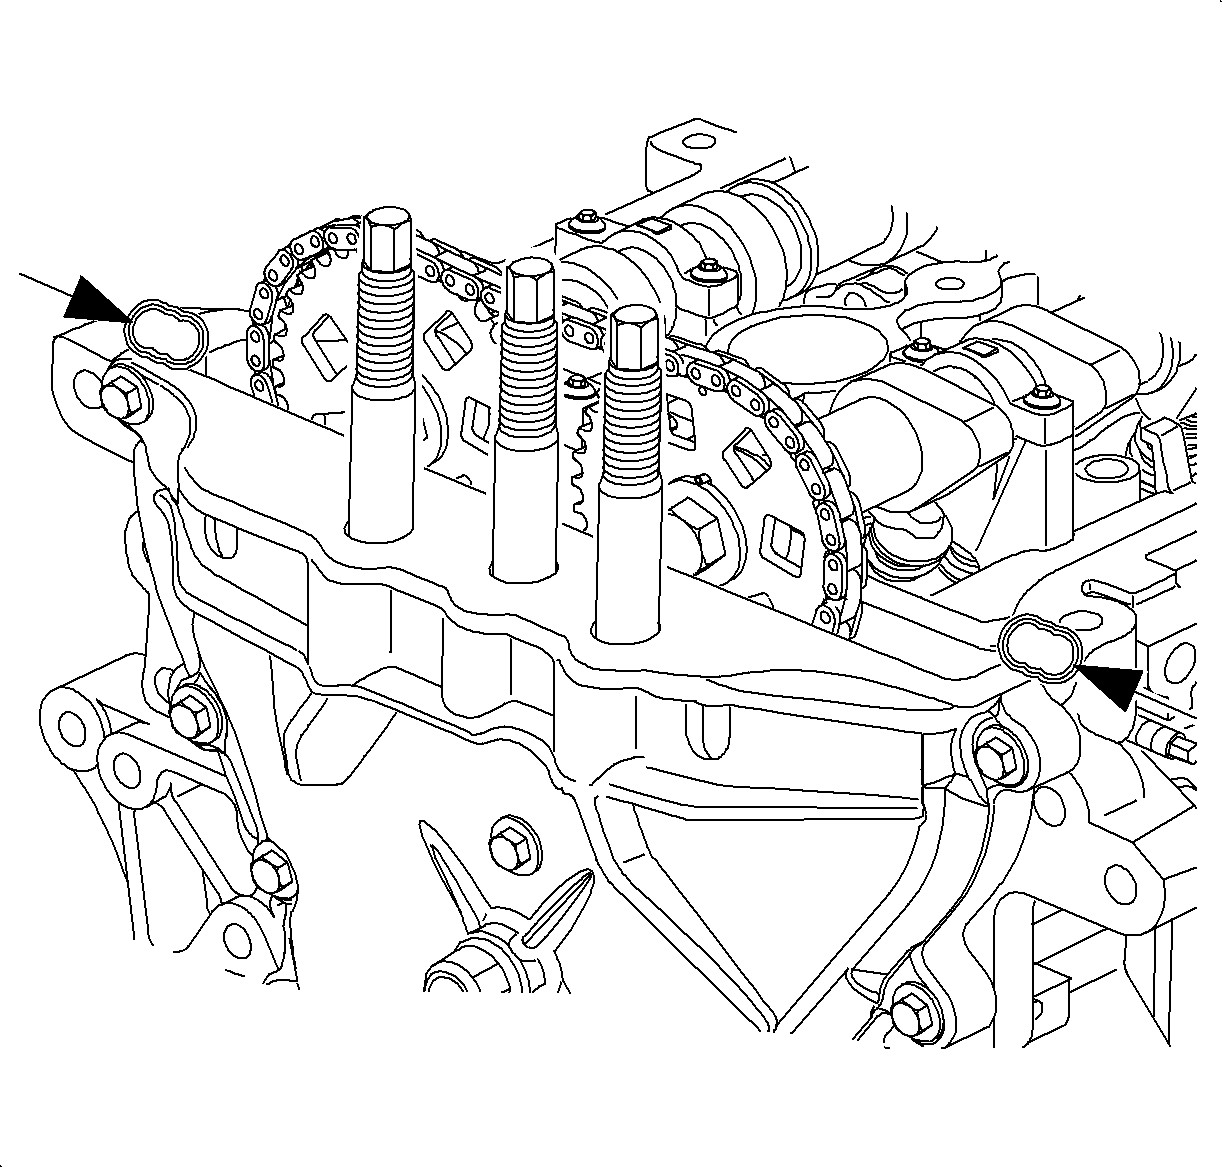
- Remove the 2 oil gallery transfer seals and discard.
Important
- The front cover assembly can be removed from under the hood or through
the wheel well.
- To facilitate front cover installation, install the front cover without
RTV applied and position into place. Then remove the cover for RTV application and
final installation. This will help prevent RTV distribance on final installation.
- Place shop towels over the front of engine and the oil pan opening to prevent
debris entry.
- If a machined front cover casting or assembly is replaced, the torque axis mount
studs must be replaced.
TightenTighten the torque axis mount studs to 10 N·m (89 lb in)
- Clean the front cover and the cylinder block mating surfaces:
Notice
If excessive wet or dry RTV and oil builds up in the blind holes, the casting
will crack when bolts are installed. Make sure all oil gallery openings and the oil
pan are covered with a shop towel to prevent debris entry.
- RTV is removed from aluminum surfaces using a scraper, plastic
or wood, Scotch-Brite® Pads, and disk (3M® Clean' N Strip 2 in D x
1/2 in W x 1/4 in center hole).
Important
Do not use petroleum cleaners such as mineral spirits, they leave a film onto
which RTV will not stick.
- The front cover cylinder head and block holes must be cleaned with a 3/16 in
drill and tap handle. The oil drain back hole must also be free of RTV. The front
cover non tapped holes can be cleaned with a 3/8 in drill.
- After all RTV is removed, clean the surfaces with a chlorinated solvent,
such as carburetor spray cleaner, brake cleaner, or alcohol Saturn P/N 21007432,
or equivalent.
Important
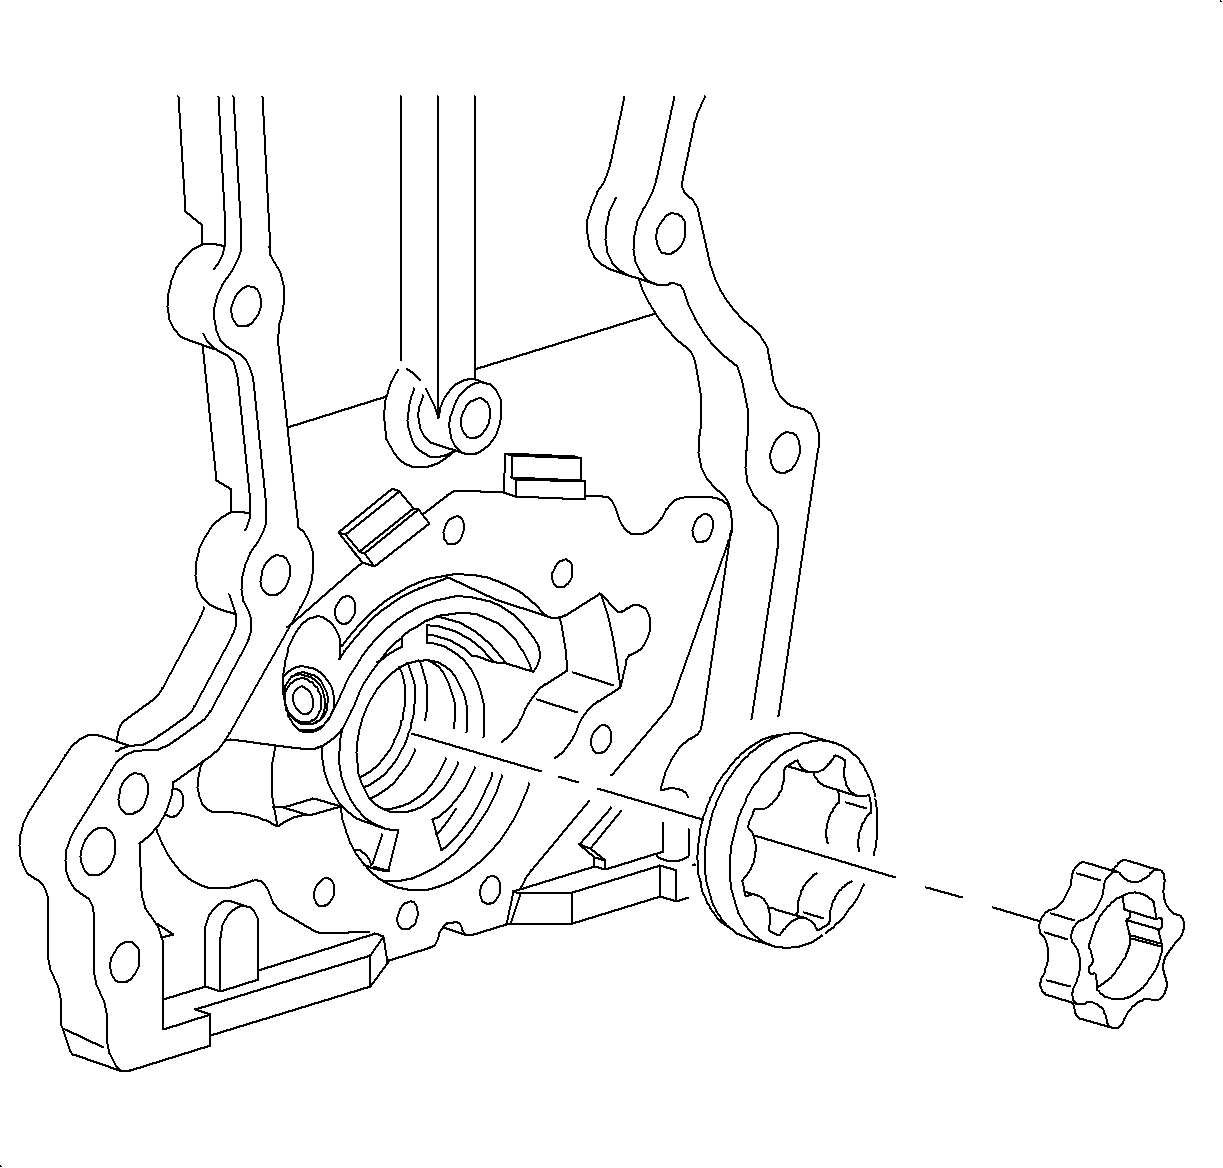
The oil pump must be packed with petroleum jelly if removed.
- Install the oil pressure regulator, oil pump and pump cover if removed. Use
Saturn P/N 21485277 (Loctite® 242 Threadlocker or equivalent) on the oil pump
cover screws.
TightenTighten the oil pump cover-to-front cover to 11 N·m (8 lb ft)
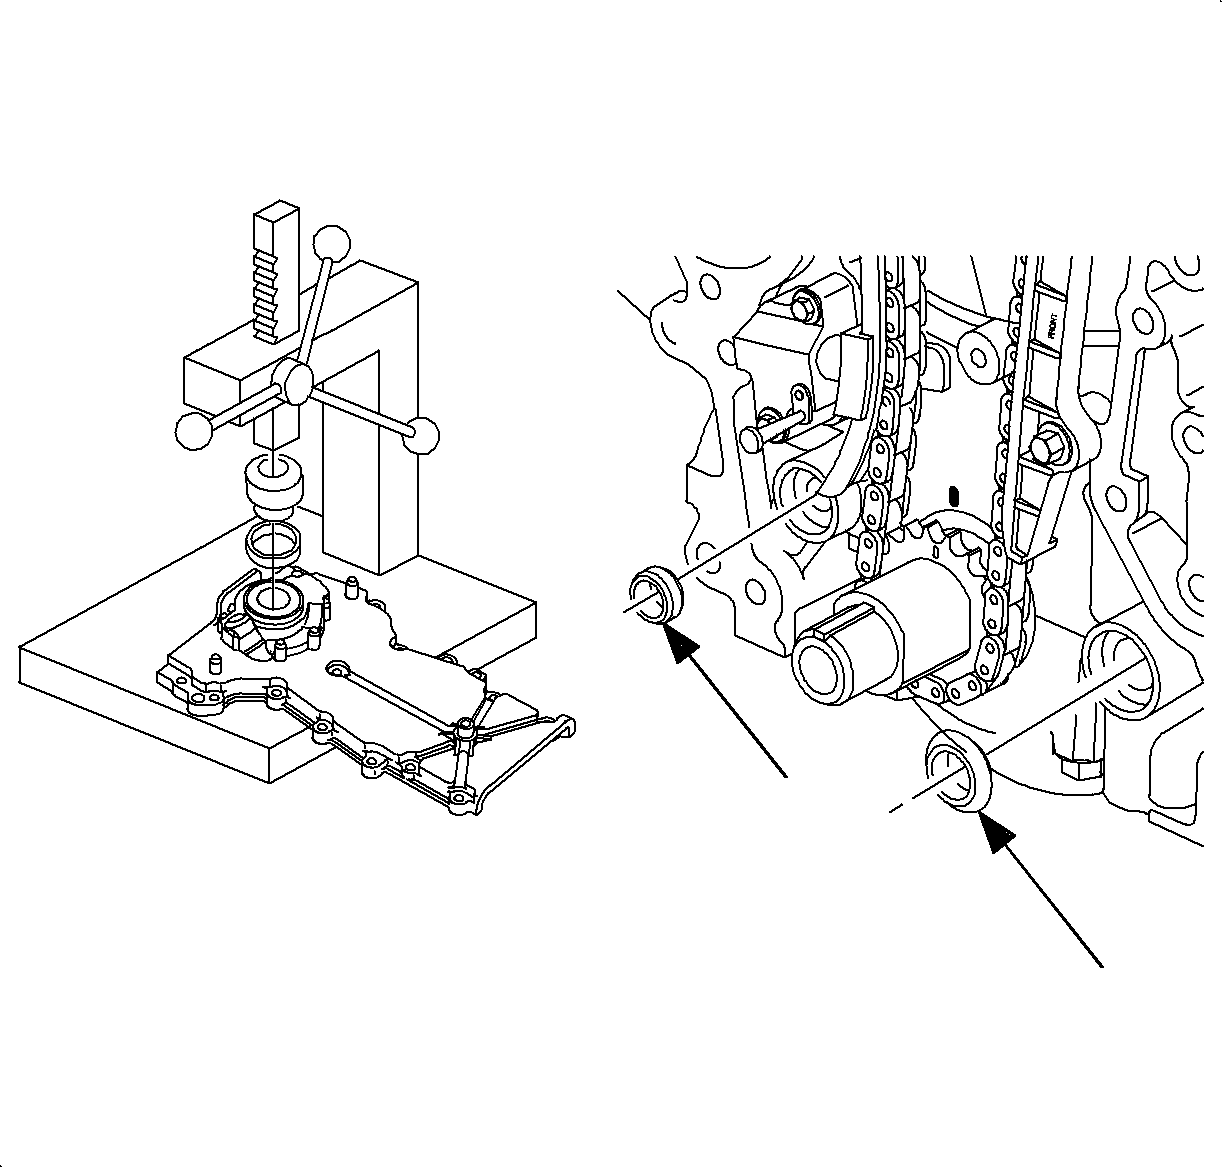
- If the front seal was removed, use
SA9104E
to install a new seal.
- Install new oil pressure and suction seals into their respective cavities
in the cylinder block.
Important
Extra RTV is required at the oil pan, cylinder head to block, cylinder head
and cam/rocker cover T-joints to ensure gaps are filled. A RTV bead around the top
center bolt hole is required.
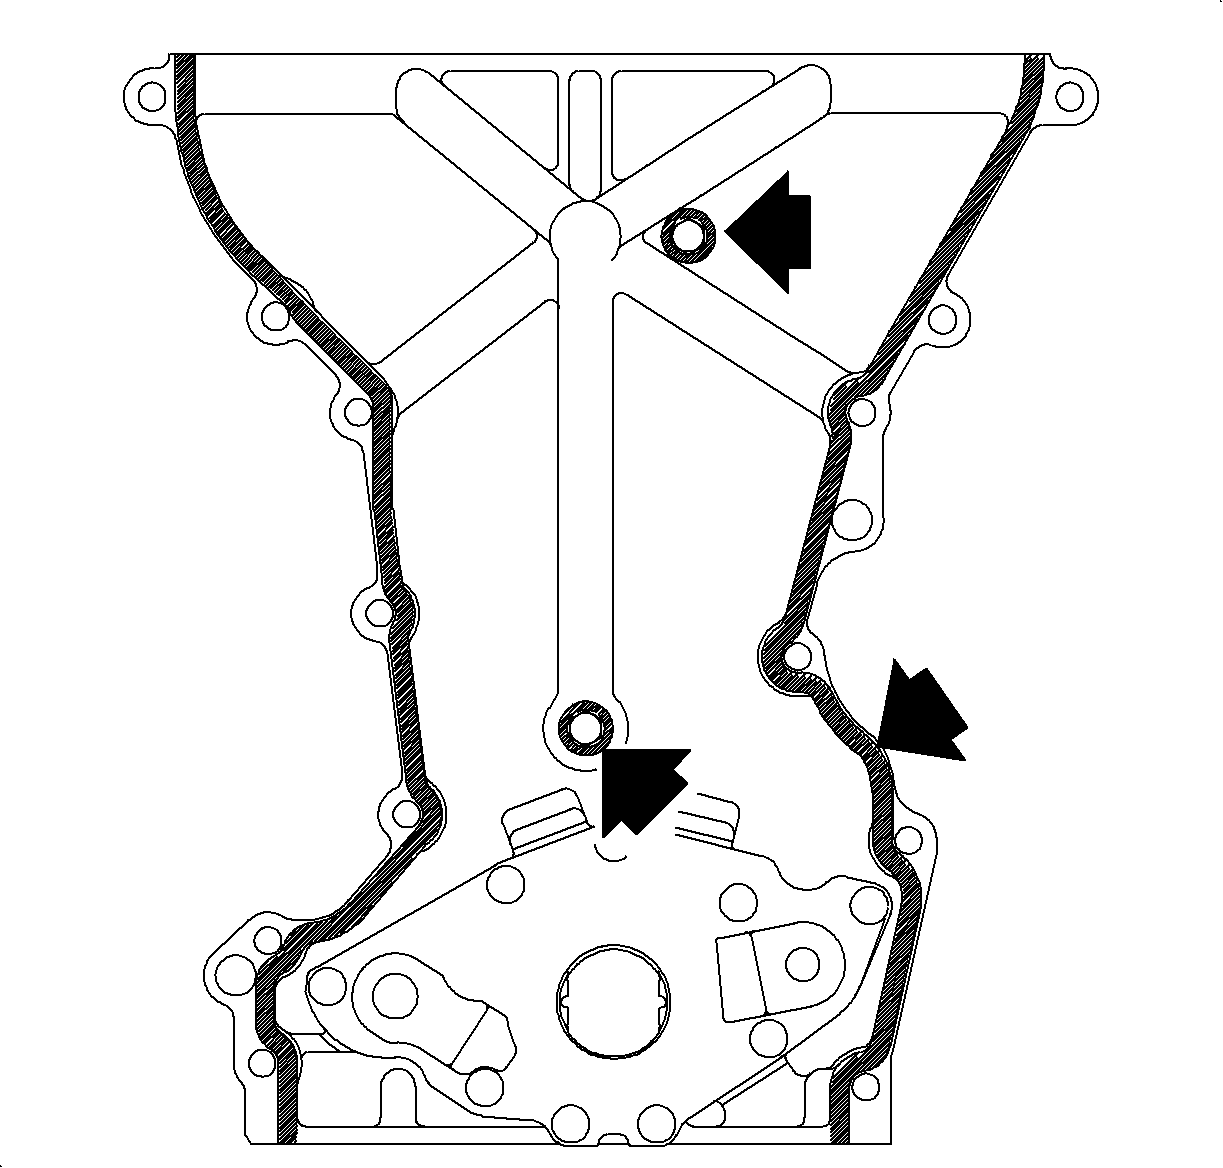
- Apply a 4.0 mm (0.157 in) bead, refer to the RTV Section on the
front of the oil pan and a 2.0 mm (0.079 in) bead on the front cover
as shown. Install the cover immediately. Parts must be assembled within 3 minutes
of application or the material must be removed and applied again.
Important
The front cover oil seal drain back hole and passage way must be kept free of
RTV.
Important
The
SA9104E
is used to align the
gerotor oil pump during front cover installation.
- Install the front cover assembly and bolts.
- Install the 4 front cover oil pan fasteners.
TightenTighten the front cover perimeter bolts to 30 N·m (22 lb ft)
TightenTighten the front cover lower center bolt (Number 14) to 10 N·m (89 lb in)
TightenTighten the oil pan-to-block to 9 N·m (80 lb in)
- After the front cover is installed, 6-12 squirts of oil can be
pumped through the front oil seal drain back hole to ensure it is not plugged.
Notice
Apply a thin film of RTV sealant P/N 21006236 between damper/pulley
assembly flange and washer only. The washer and bolt head flange are designed to prevent
oil leakage and do not require RTV sealant.
Important
Hold the damper with a strap wrench or use a 3/4 in x 12 in long
piece of wood wedged between the damper spoke and rear, lower side of cover when torquing
bolt.
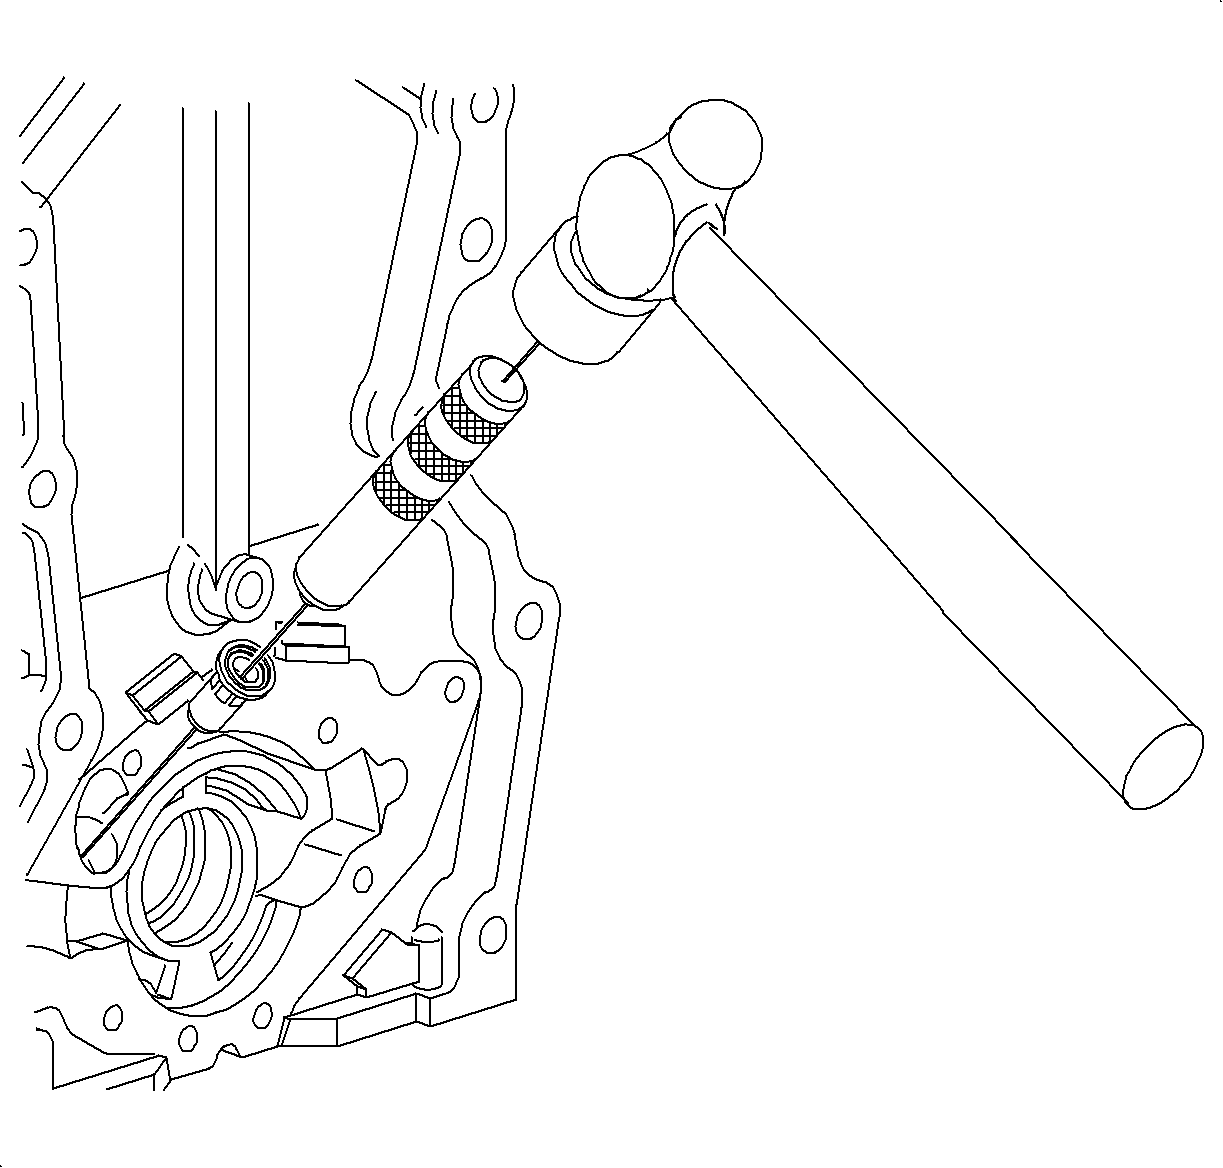
- Install a new
SA9104E
. Install
the vibration damper/pulley assembly and retaining bolt/washer. Never tap on the seal
or seal installer with a hammer.
TightenTighten the crankshaft vibration damper/pulley-to-crankshaft to 215 N·m (159 lb ft)
- Apply RTV across the cylinder head and front cover T-joints.
- Install a new cam/rocker cover gasket, if required, refer to the RTV section.
The gasket can be reused if not damaged.
- Install the cam/rocker cover.
- Install the accessory drive belt tensioner.
TightenTighten the belt tensioner-to-block to 30 N·m (22 lb ft)
- Install power steering pump, refer to the Accessory Drive section).
- Install the accessory drive belt. Ensure the belt is properly aligned
on the pulleys.
Notice
To prevent engine front cover and mount damage, the three front engine mount-to-front
cover nuts must be tightened down uniformly.
- Install the 2 engine mount to midrail bracket nuts first. Next,
install the 3 engine mount to engine front cover nuts. Remove the block of wood from
under the torque strut after the upper mount assembly is installed.
Tighten
- Tighten the engine mount-to-front cover nuts to 50 N·m (37 lb ft)
- Tighten the engine mount-to-midrail bracket nuts to 50 N·m (37 lb ft)
- Install the splash shield and the wheel.
TightenTighten the wheel nuts to 140 N·m (103 lb ft)
- Drain the engine oil and change the filter. Install the drain plug.
TightenTighten the oil pan drain plug to 37 N·m (27 lb ft)
- Install the battery cables, positive cable first.
TightenTighten the battery terminal bolts to 17 N·m (13 lb ft)
- Fill with new engine oil, API 5W30 Energy Conserving II multigrade
viscosity oil.
- Reset the CHANGE OIL SOON telltale lamp. Refer to Resetting Service Oil
Soon Telltale Lamp procedure in this section.
- Start the engine and check for leaks.
- Check the engine oil level and fill if necessary.
- Perform a road test.
- Check the coolant and oil levels. Verify there are no leaks.