Document ID# 877511
1998 Saturn SL2/SC2/SW2
 

Water Pump Replacement

For Reference

SL2 Water Pump Replacement w/PICS by SATURNFAN Sevillian273

S-Series Waterpump Replacement by SATURNFAN wolfman

richpin06a Water Pump Access

richpin06a Water Pump Pulley Removal Without Impact Tools

FiremanCV Saturn S-Series Waterpump Replacement

Removal Procedure

    Object Number: 872300  Size: SH
    Click here for detailed picture of above image.

    Caution

    Do not remove the cap from a hot system. Allow the system to cool, then slowly remove the cap.
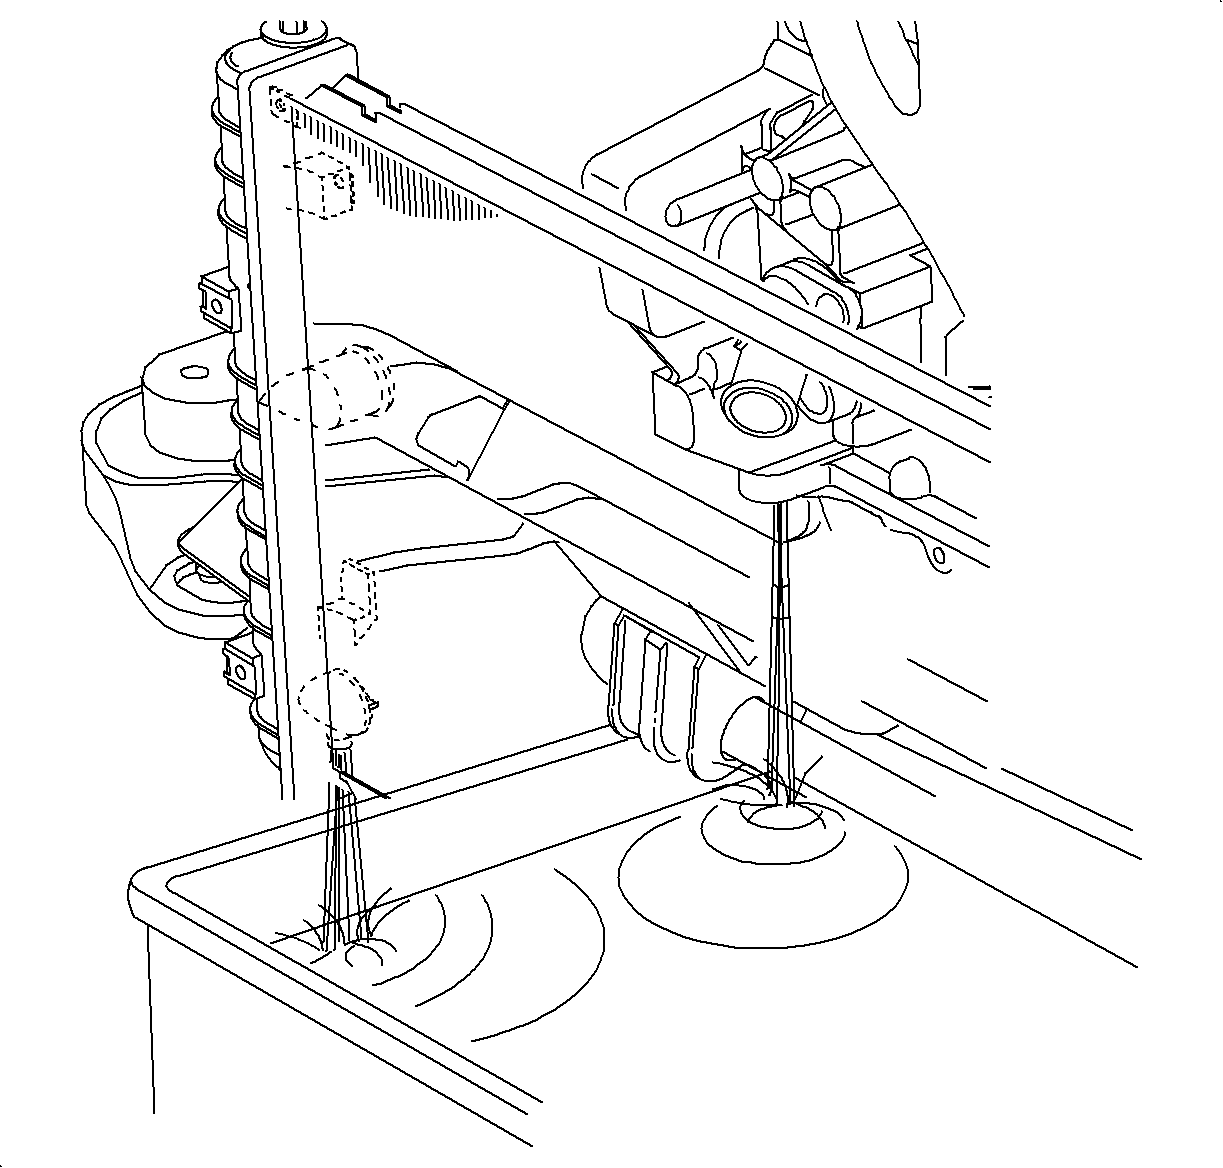
  1. Drain the coolant.
  2. Open the radiator drain plug and engine drain plug, and allow the coolant to drain into a suitable container. A two gallon container is required.
    Object Number: 876749  Size: SH
    Click here for detailed picture of above image.
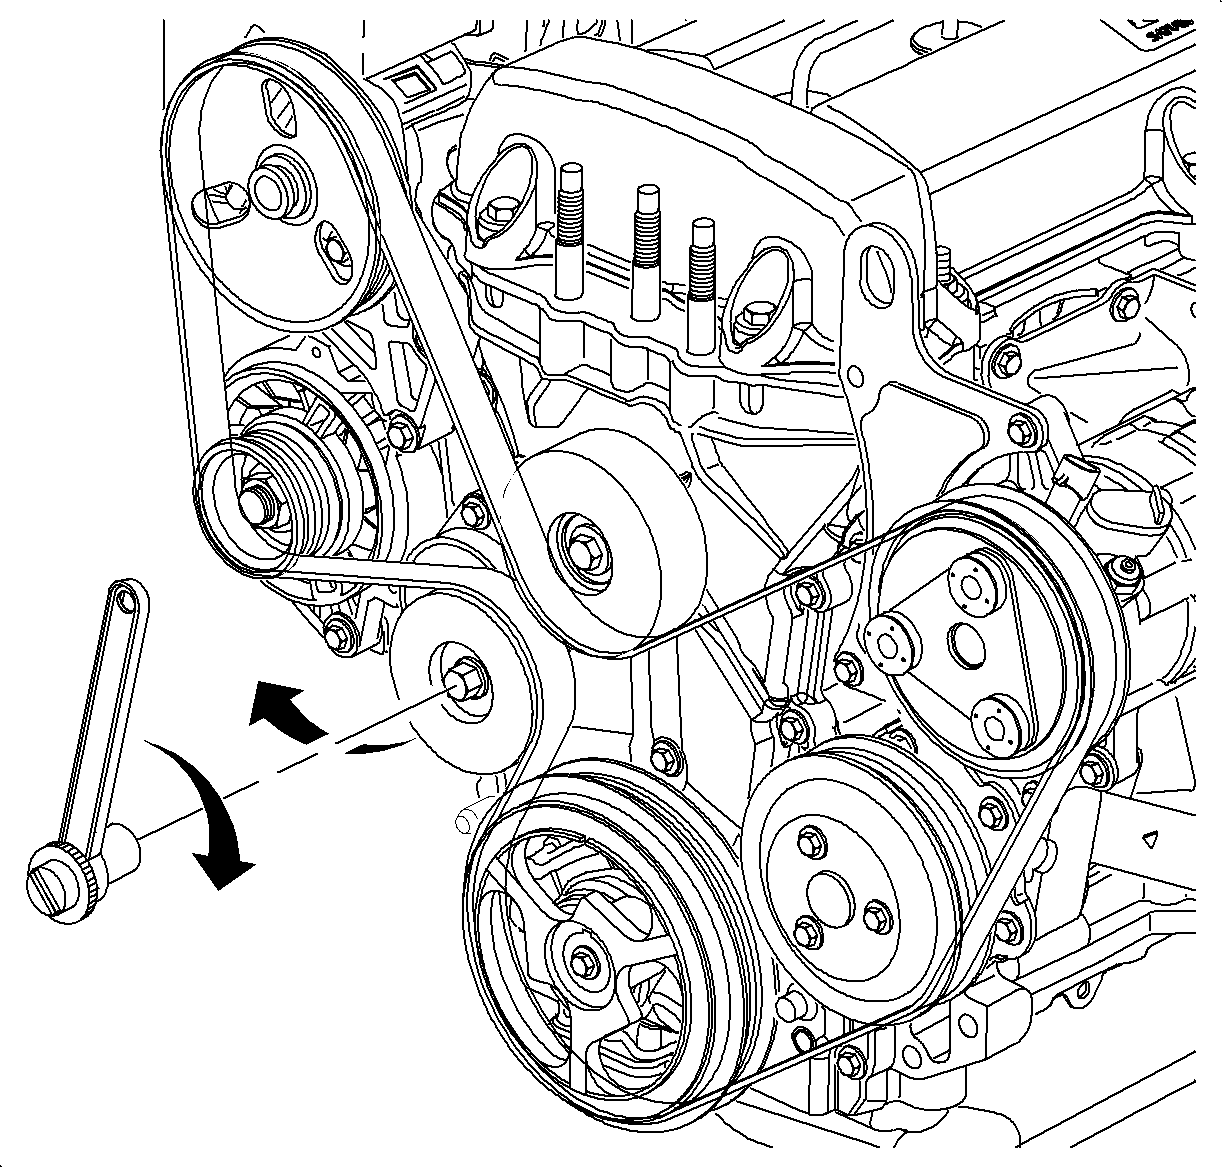
  3. Remove the accessory drive belt.
  4. Caution

    Ensure that the vehicle is properly supported and squarely positioned. To help avoid personal injury when a vehicle is on a hoist, provide additional support for the vehicle on the opposite end from which the components are being removed.

  5. Jack or raise the vehicle on a hoist.
  6. Important

    The A/C compressor mounting bolts can also be removed and the compressor laid aside to access the water pump if the pump is accessed from the top. Do not discharge the A/C system.

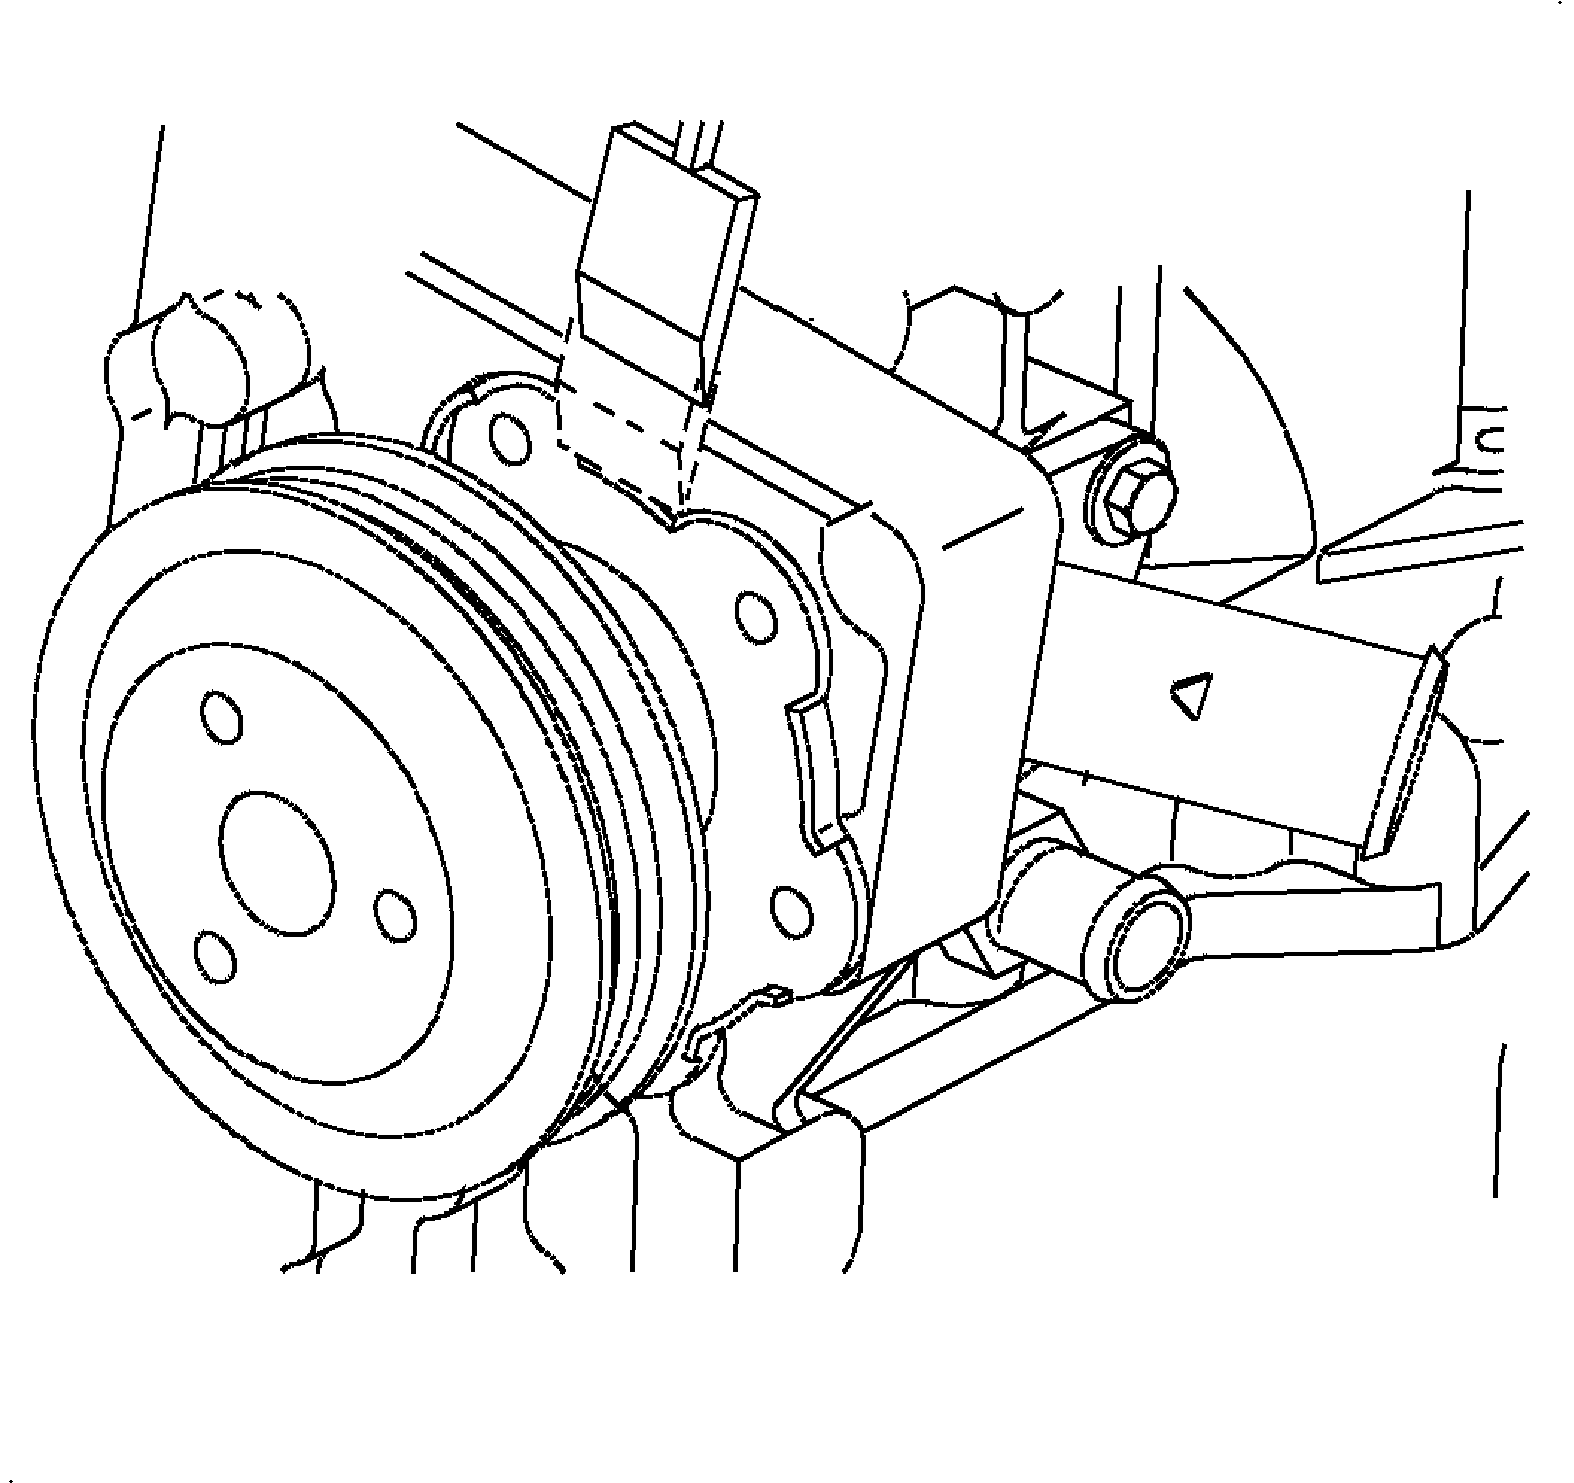
  7. Remove the right hand tire and inner wheel well splash shield.

  8. Object Number: 876677  Size: SH
    Click here for detailed picture of above image.

    Notice

    Spray the water pump hub with a penetrating oil to loosen any rust that may prevent the pulley from being easily removed. If the pulley is pried off the hub and bent, it must be replaced to prevent accessory drive belt failures.

    Important

    A 25.4 mm (1 in) block of wood or hammer handle can be used as a wedge between the crankshaft and water pump pulley to hold the water pump pulley from turning when loosening the pulley bolts.

    Important

    Pulley bolts are removed to allow the pulley to be moved outward and allow access to the water pump flange bolts. The pulley and pump are then removed as an assembly.

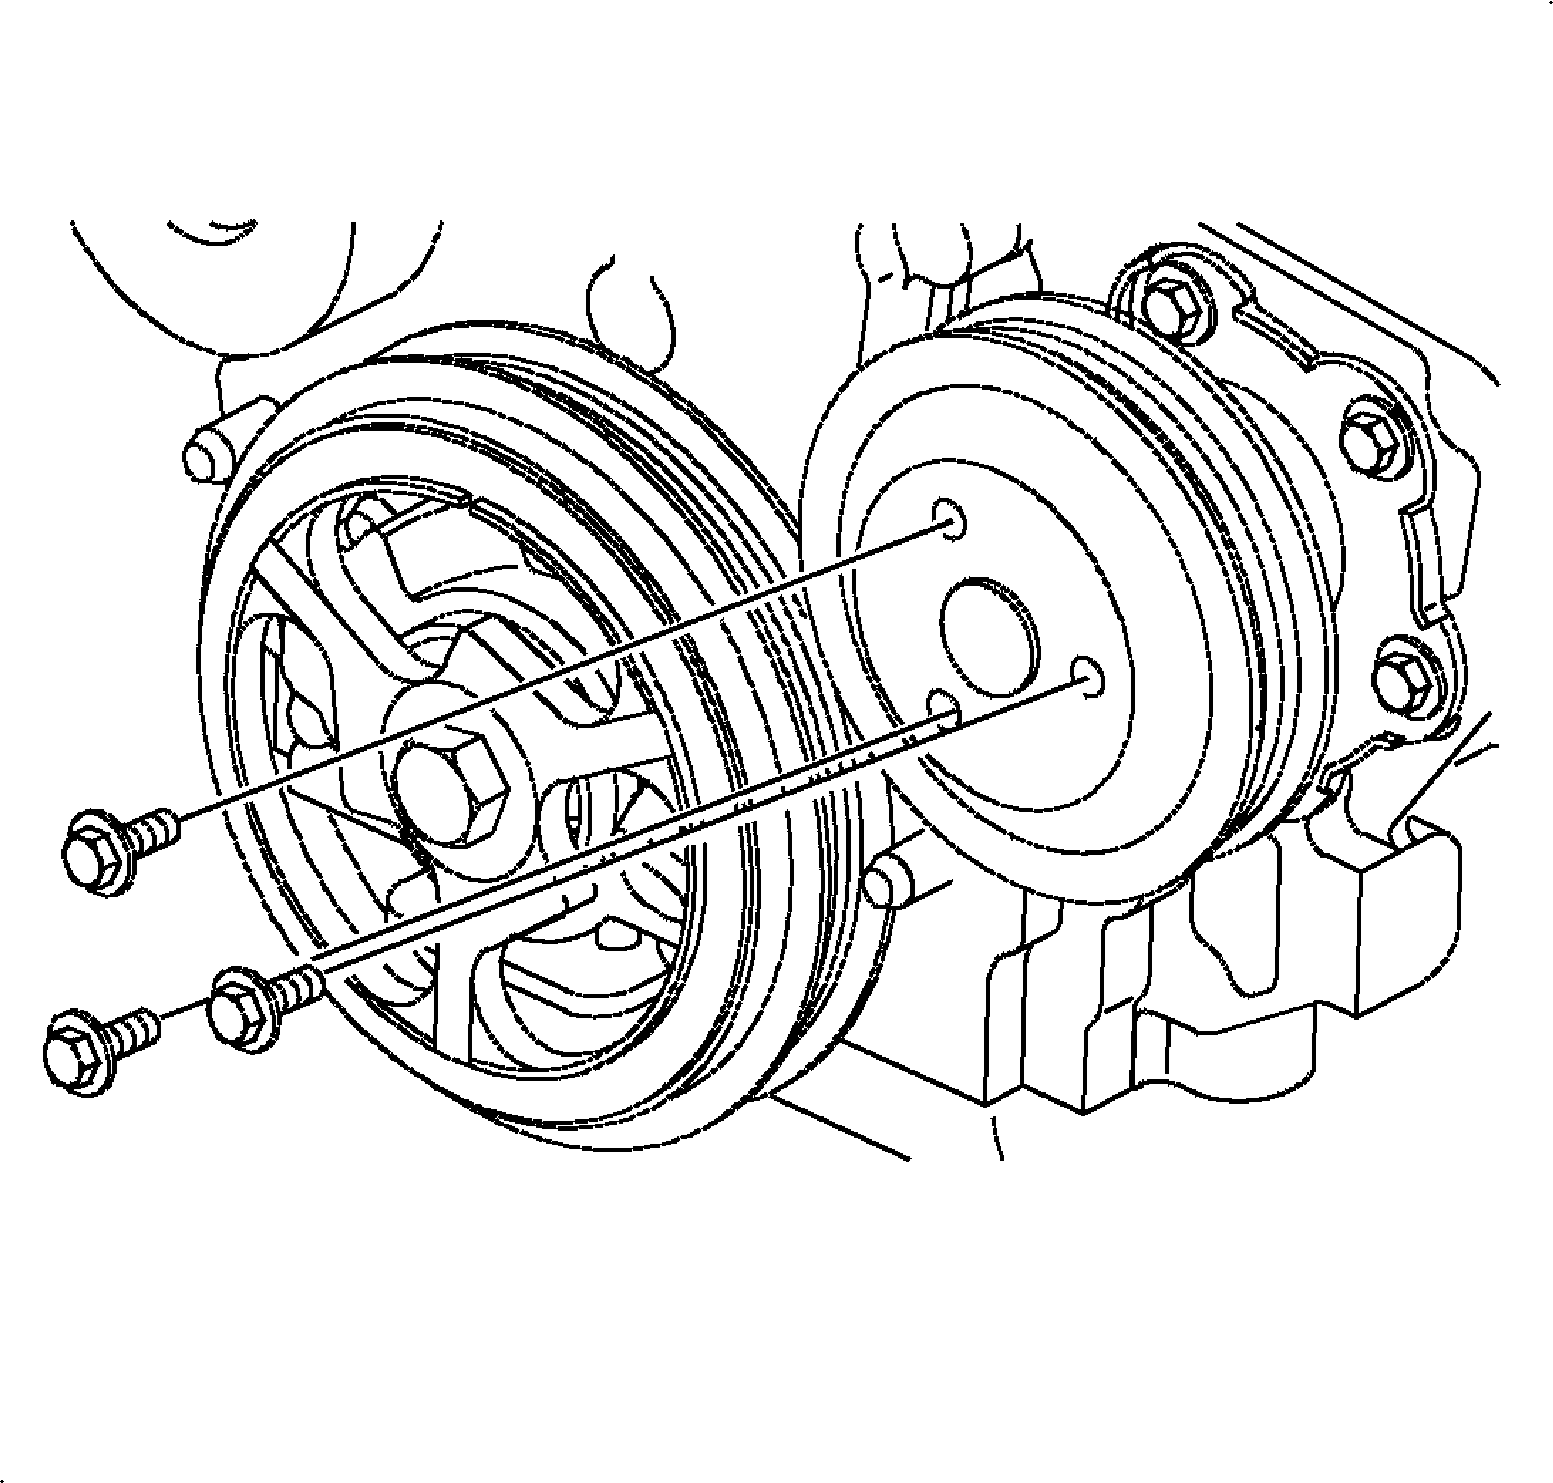
  9. Remove te water pump pulley bolts and allow the pulley to hang freely on the pump hub.

  10. Object Number: 876679  Size: SH
    Click here for detailed picture of above image.
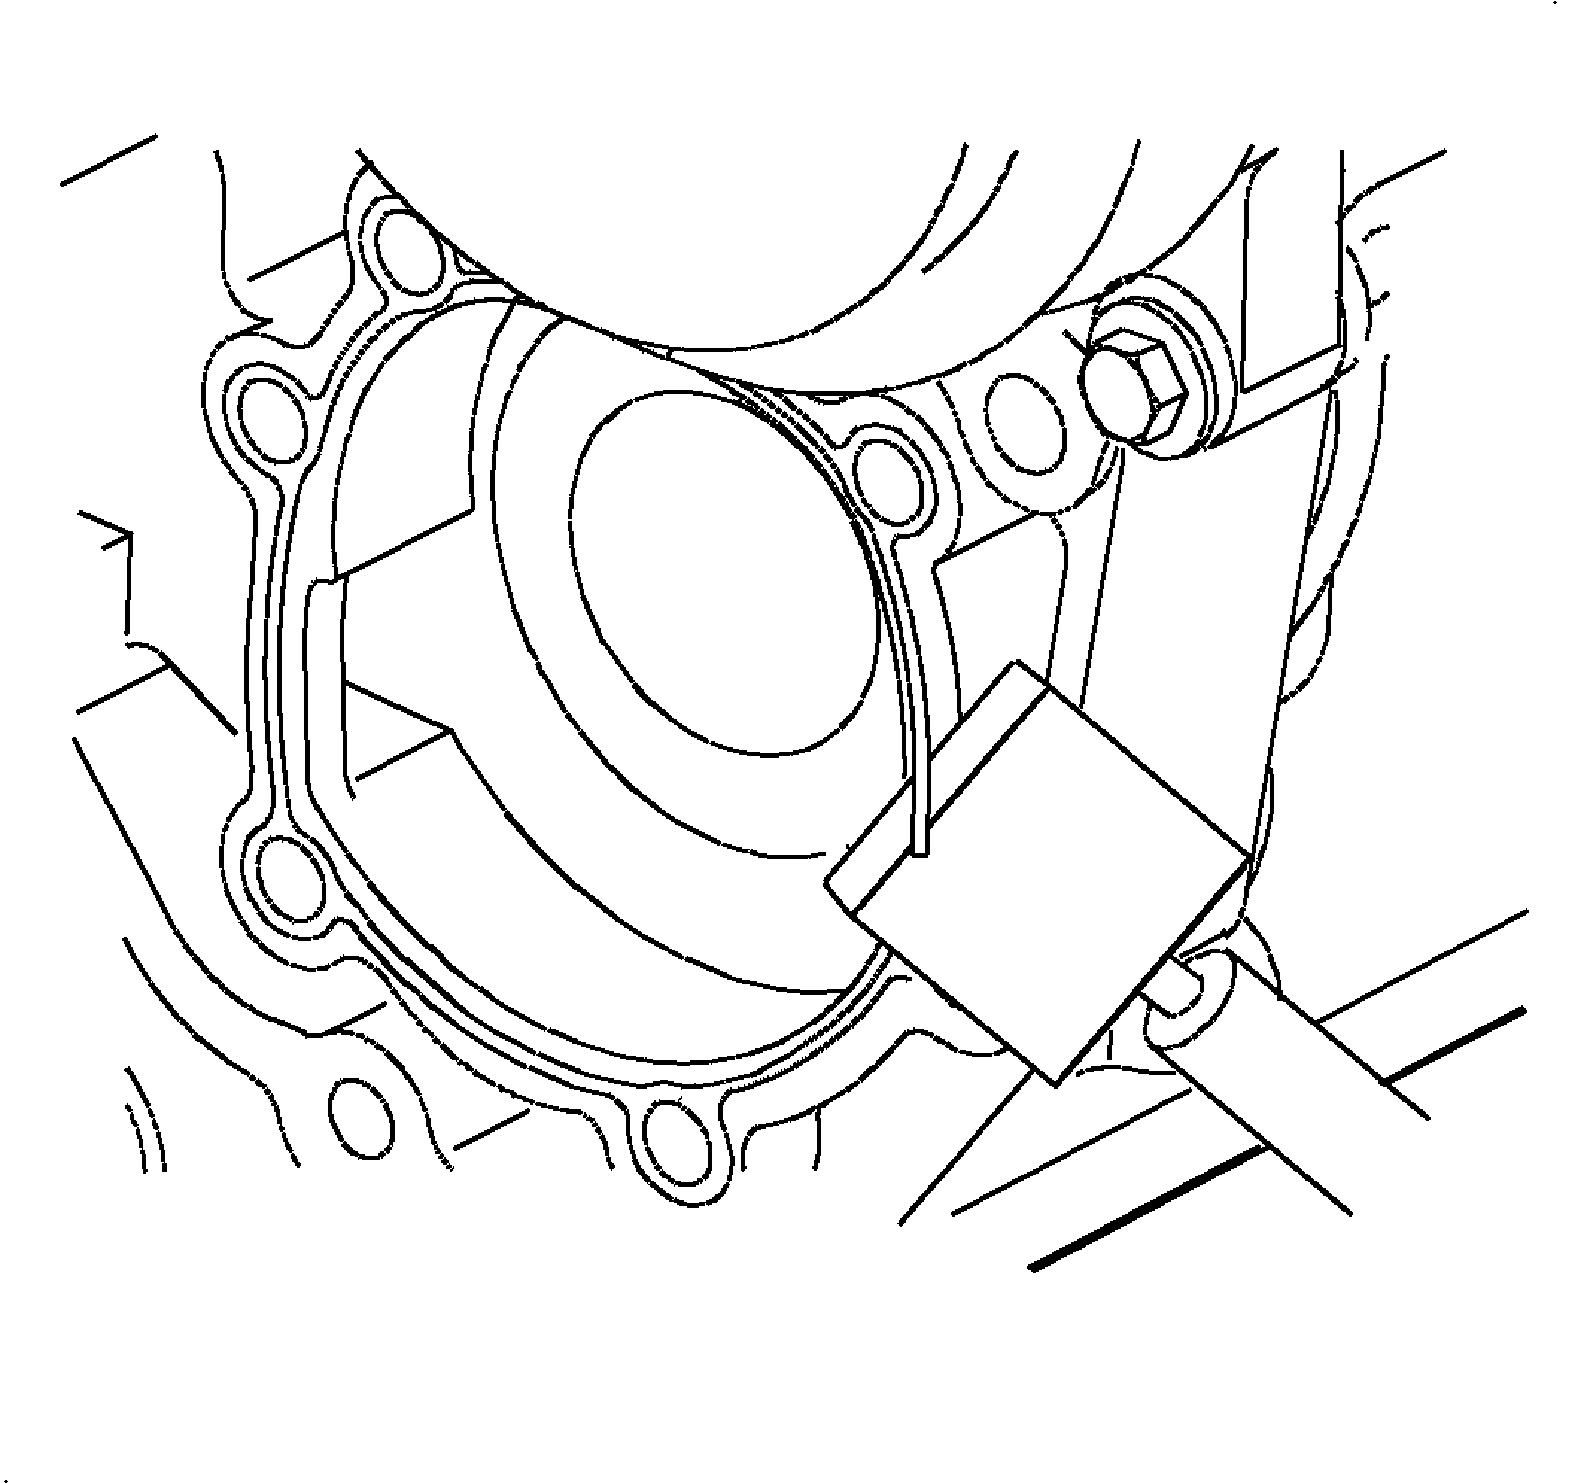
  11. Remove the six water pump flange attachment bolts.

  12. Object Number: 876680  Size: SH
    Click here for detailed picture of above image.

    Notice

    If it is difficult to remove the water pump, tap it with a gasket scraper under the flange. Use extreme care and do not damage or scratch the machined aluminum cylinder block. Surface leaks will result.

  13. Remove the water pump and pulley assembly.

  14. Object Number: 876688  Size: SH
    Click here for detailed picture of above image.
  15. Remove any gasket material from the cylinder block and water pump flange.
Inspection Procedure

    Object Number: 876692  Size: SH
    Click here for detailed picture of above image.
  1. Inspect the water pump.
  2. Check that the water pump gasket surface is not cracked or damaged.
  3. If necessary, replace the water pump.

  4. Object Number: 876702  Size: SH
    Click here for detailed picture of above image.

    Important

    If there are signs (deposit [white film/stains]) of coolant weepage on the pump flange or powertrain cradle below the weep hole, this does not mean the pump's seal has failed. Only replace the pump when there is evidence of leakage such as coolant on the pump flange, powertrain cradle, floor, or in the water pump area.

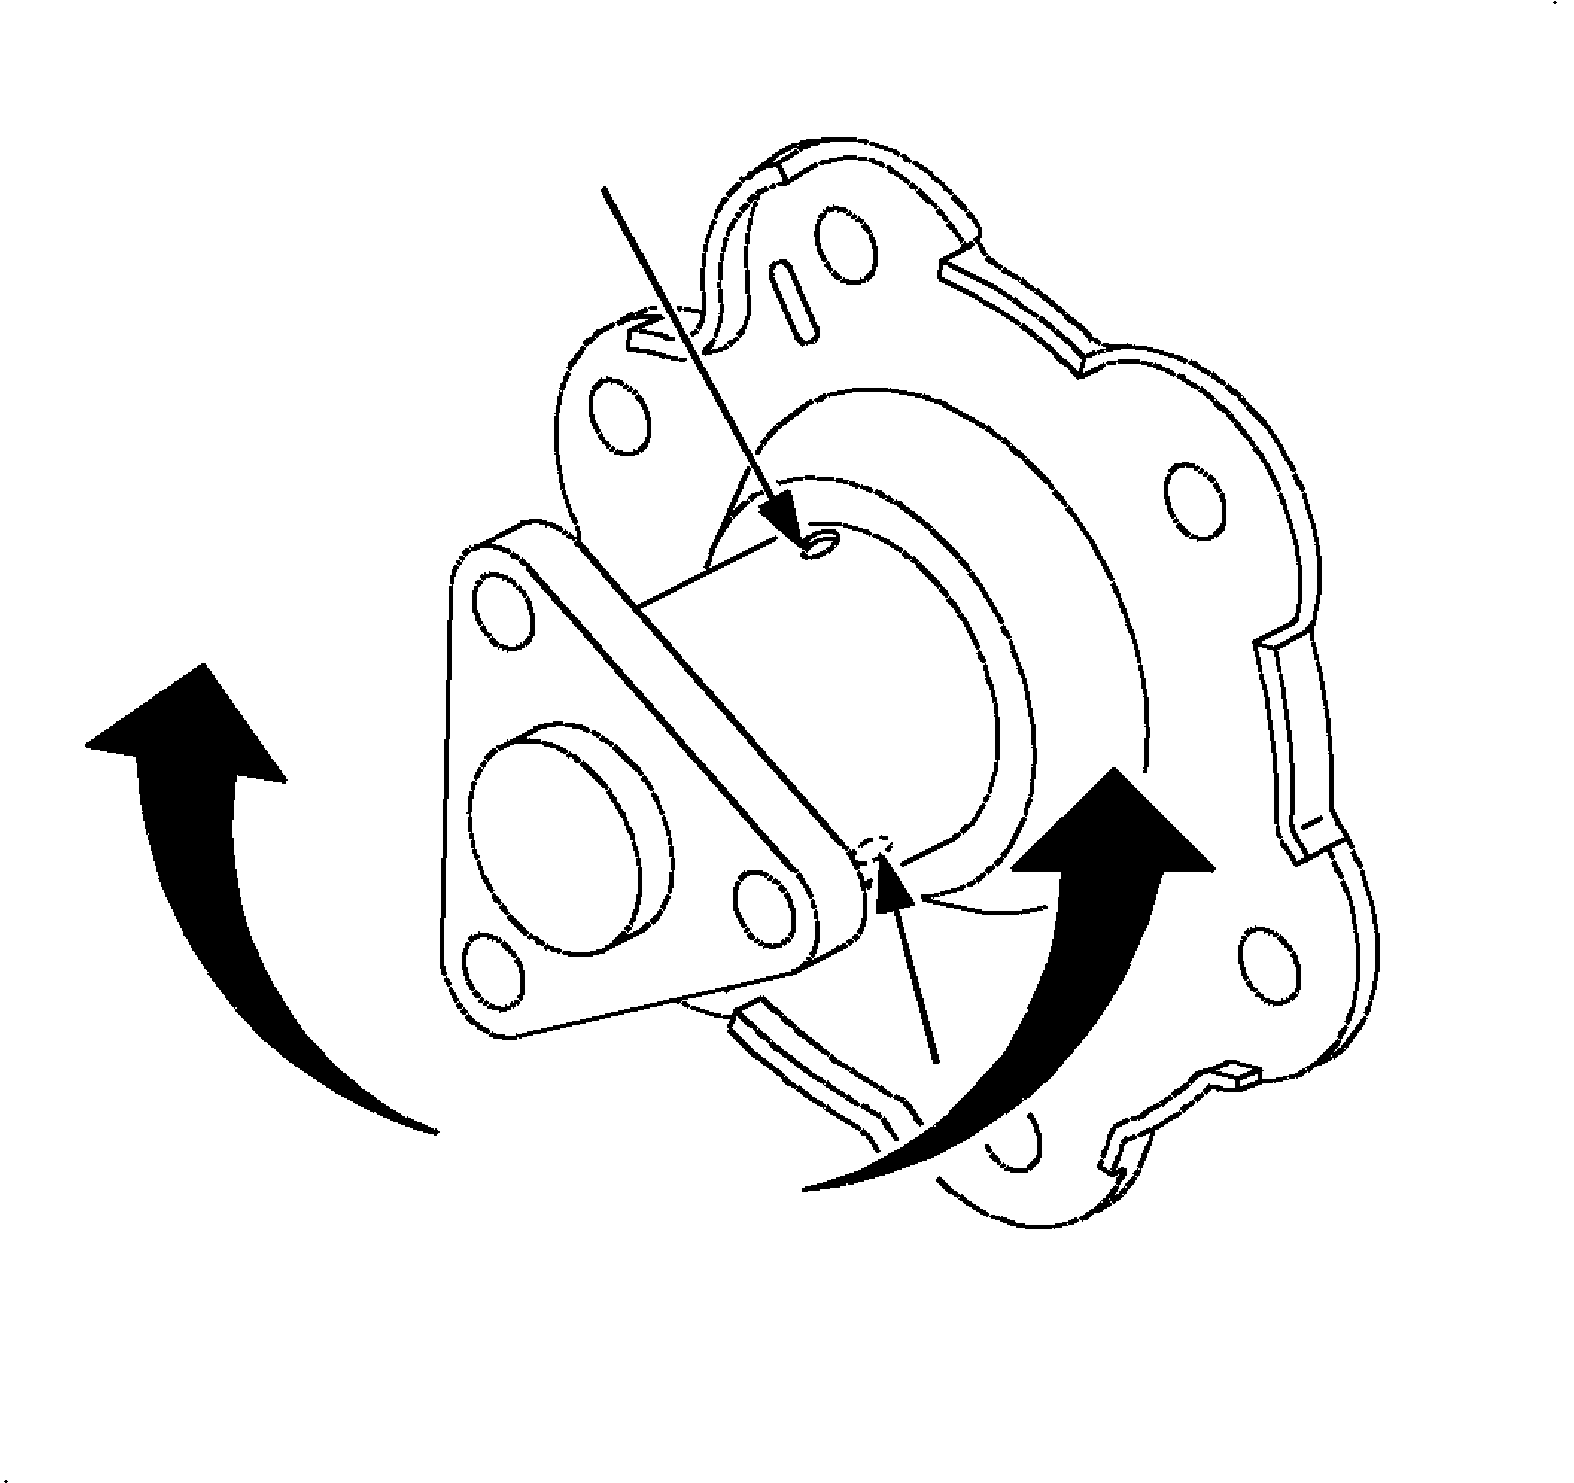
  5. Inspect the water pump bearing.
  6. Turn the pulley and check that the water pump bearing moves smoothly and quietly.
  7. If necessary, replace the water pump.
  8. Check the impeller for shaft retention and pitting.
  9. Check the water pump weep hole for signs of leakage from the water seal. Make sure the weep hole is open and not plugged with grease.
Installation Procedure

    Object Number: 876711  Size: SH
    Click here for detailed picture of above image.

    Important

    A small dab of silicone or gasket sealant will be required at the outer edges of the bolt holes to hold the gasket in place during pump installation.

  1. Install a new gasket on the pump flange.

  2. Object Number: 876718  Size: SH
    Click here for detailed picture of above image.
  3. Install the pulley loosely on the water pump hub. Do not install the pulley bolts.
  4. Important

    A small bump is located next to one attachment bolt. The mark is positioned at the 11 o'clock position during installation of the water pump.

  5. Install the water pump and pulley on the engine.

  6. Object Number: 876719  Size: SH
    Click here for detailed picture of above image.
  7. Install the water pump attachment bolts and hand tighten.
  8. Notice

    Refer to Fastener Notice in Cautions and Notices.


    Object Number: 872274  Size: SH
    Click here for detailed picture of above image.
  9. Torque the bolts in the sequence shown.
  10. Tigthen

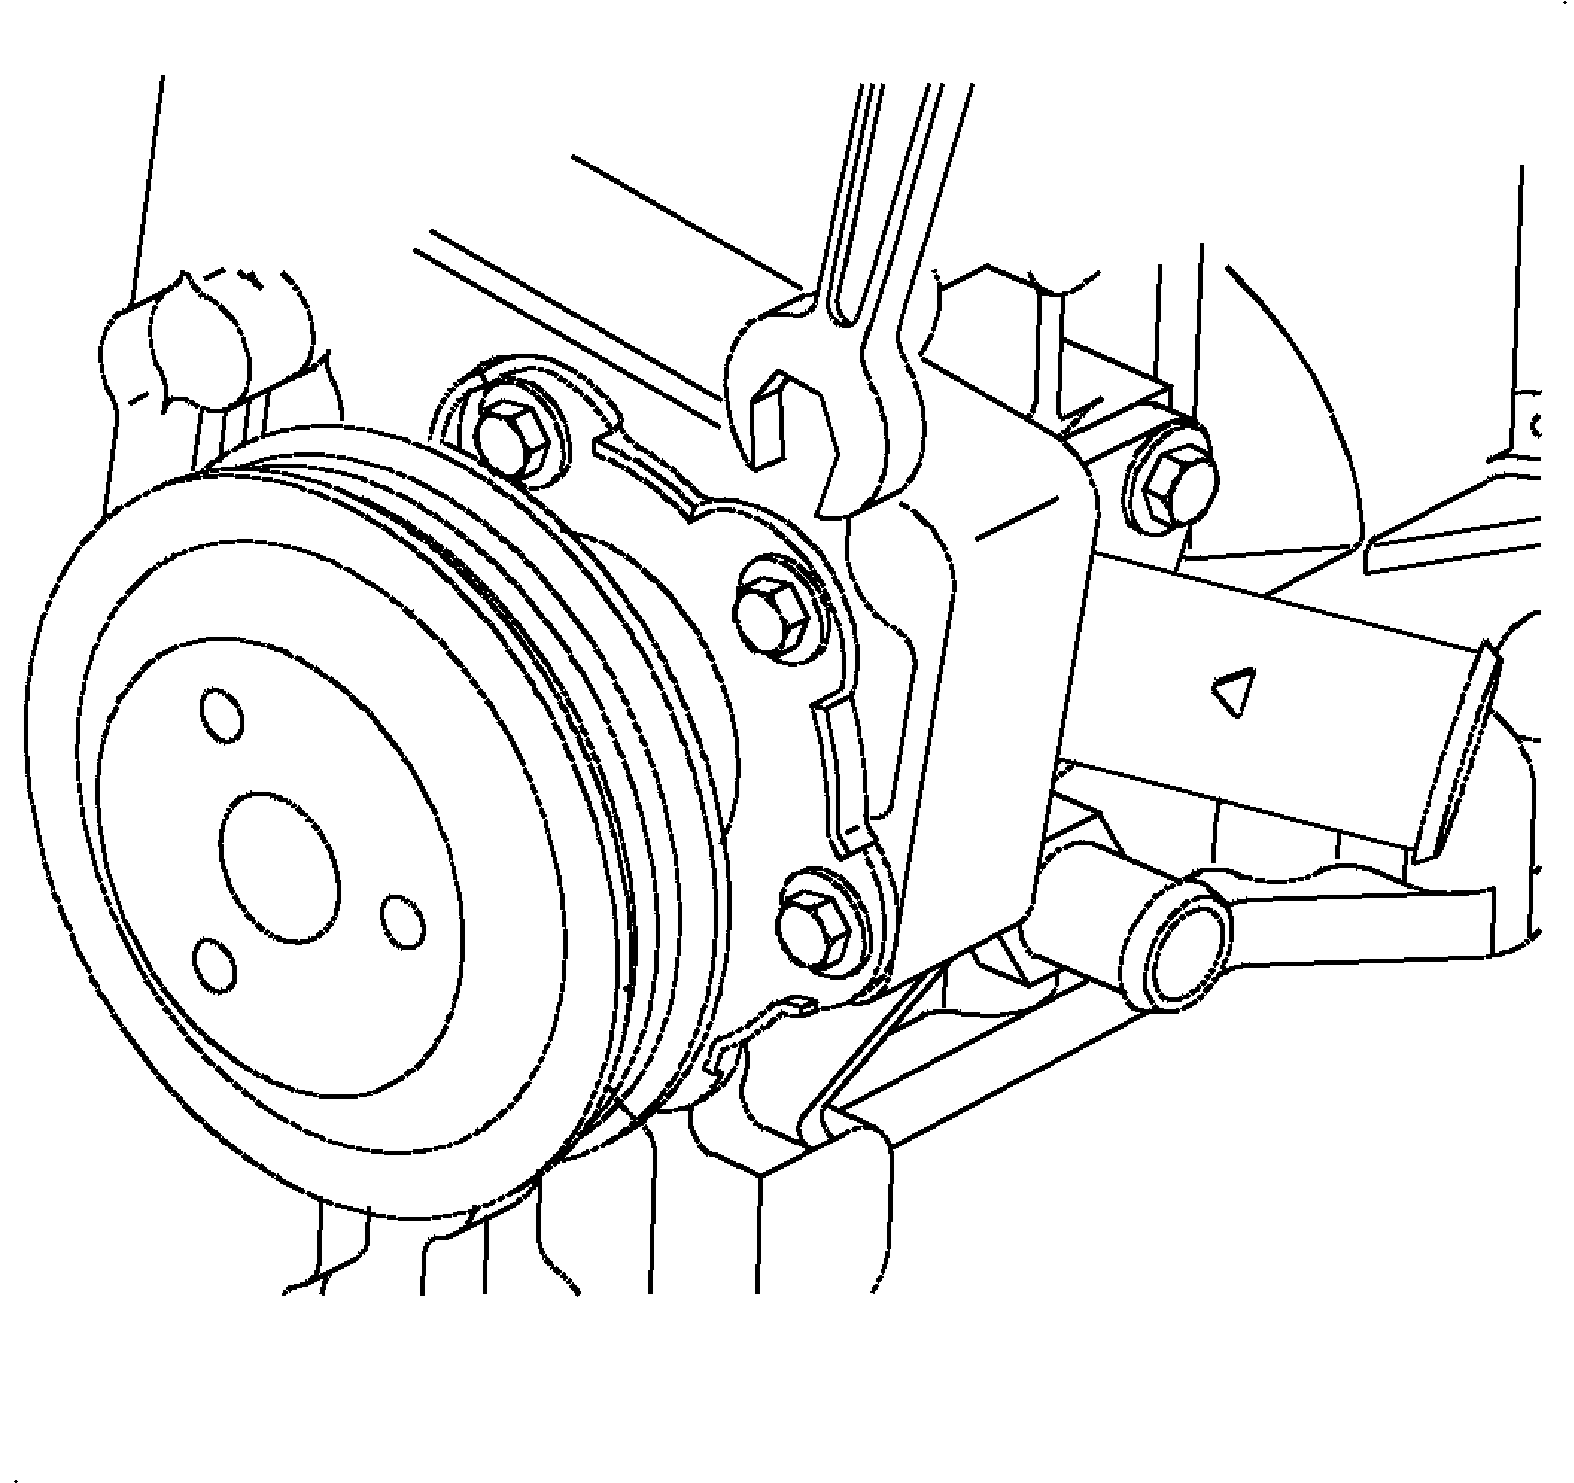
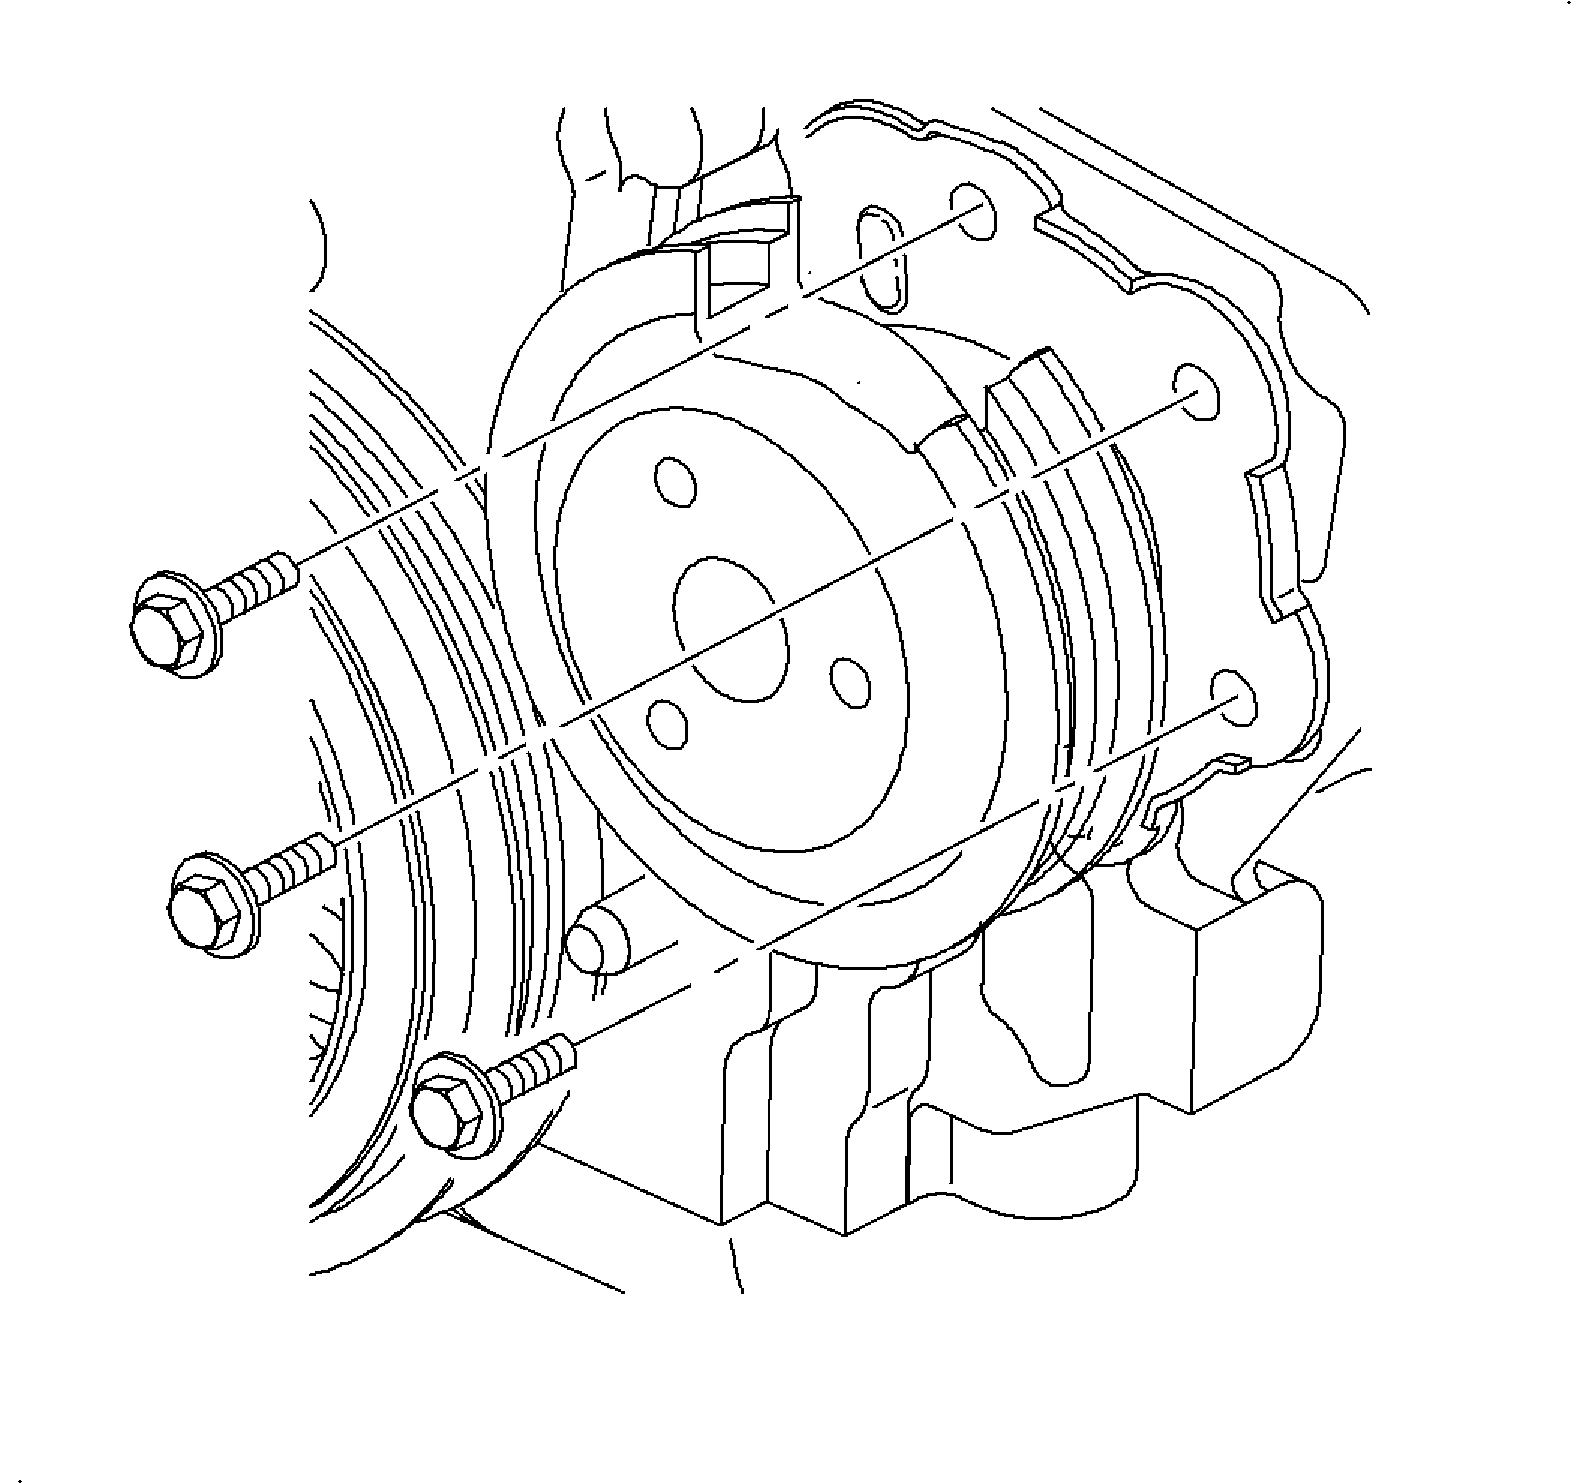
    Tighten the water pump-to-block to 30 N·m (22 lb ft).


    Object Number: 876723  Size: SH
    Click here for detailed picture of above image.

    Important

    If the pump pulley hub end extending through the pulley is rusty, clean it with a wire brush and apply a thin coat of primer paint to prevent the pulley from rusting on the hub.

  11. Install the pulley on the pump hub. The pulley can be held using a strap wrench, block of wood, or hammer handle.
  12. Tighten

    Tighten the water pump pulley-to-water pump hub to 25 N·m (19 lb ft).


    Object Number: 876749  Size: SH
    Click here for detailed picture of above image.
  13. Install the accessory drive belt. Refer to Drive Belt Replacement in Engine Mechanical.
  14. Install the right hand side wheel house splash shield and wheel and tire assembly.
  15. Close the radiator drain plug and install the cylinder block drain plug.
  16. Tighten

    Tighten the cylinder block drain plugs to 35 N·m (26 lb ft).

    Important

    The vehicle must be level when filling with coolant.

  17. Fill the cooling system to the FULL COLD range with coolant. Use a 50/50 mixture of DEX-Cool™ antifreeze and clean water.
  18. Run the engine until the upper radiator hose is hot, then add additional coolant, if needed, to bring the level to the FULL COLD range.
  19. Install the coolant recovery reservoir cap and check for leaks.

  Document ID# 877511
1998 Saturn SL2/SC2/SW2