
- Disable the SIR system. (Refer to "Disabling the SIR System" in
this service manual.)
- Record the pre-set radio stations.
- Disconnect the negative battery cable.
- Recover the refrigerant using an approved refrigerant recovery system.
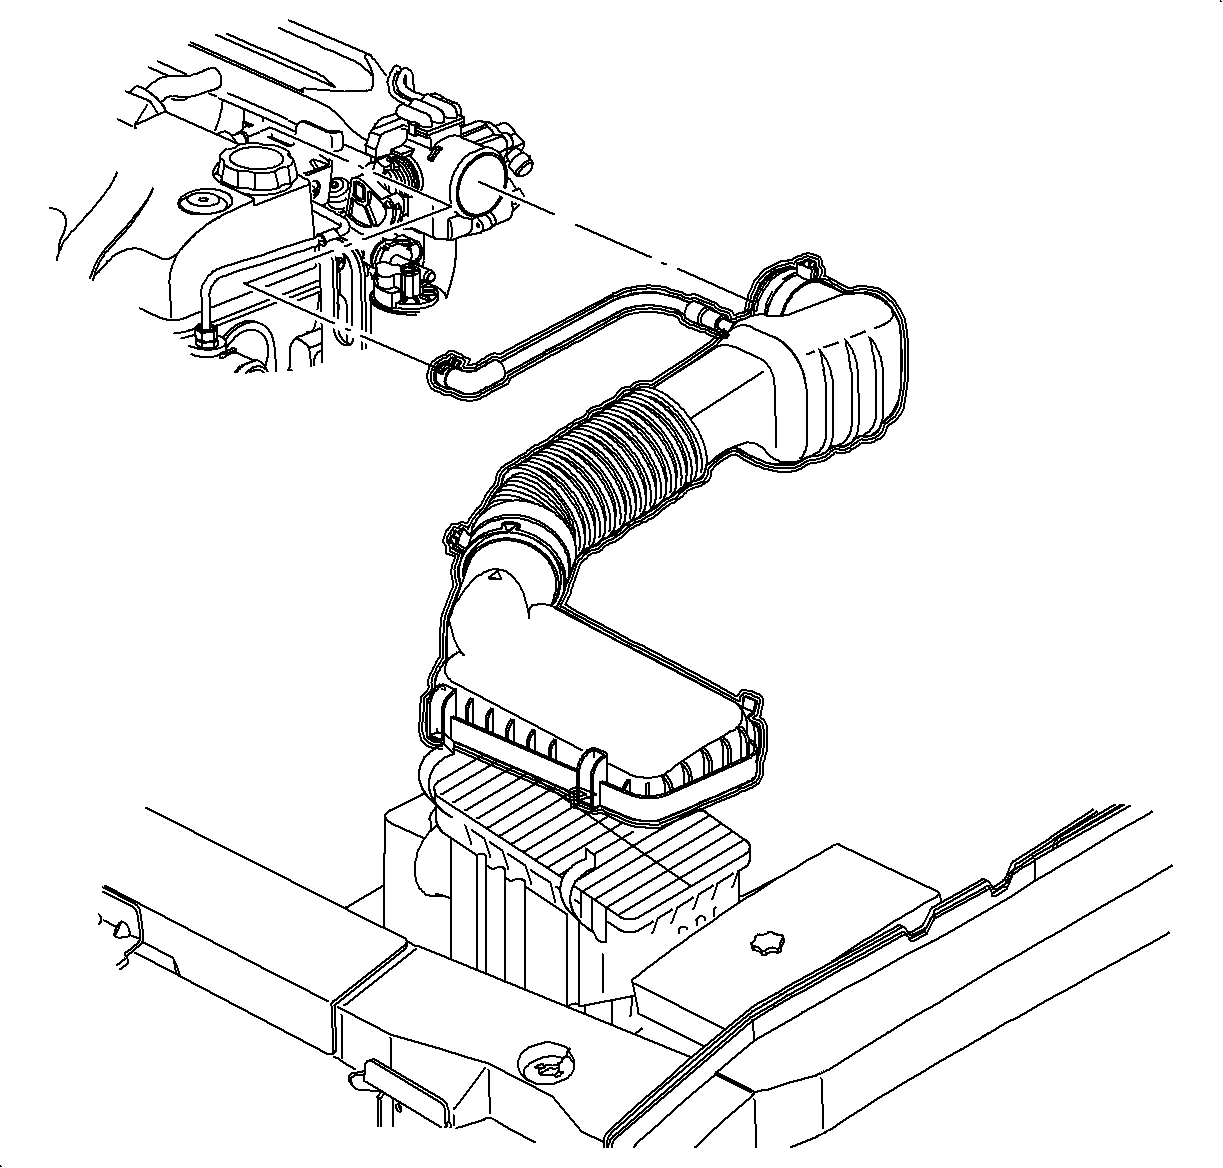
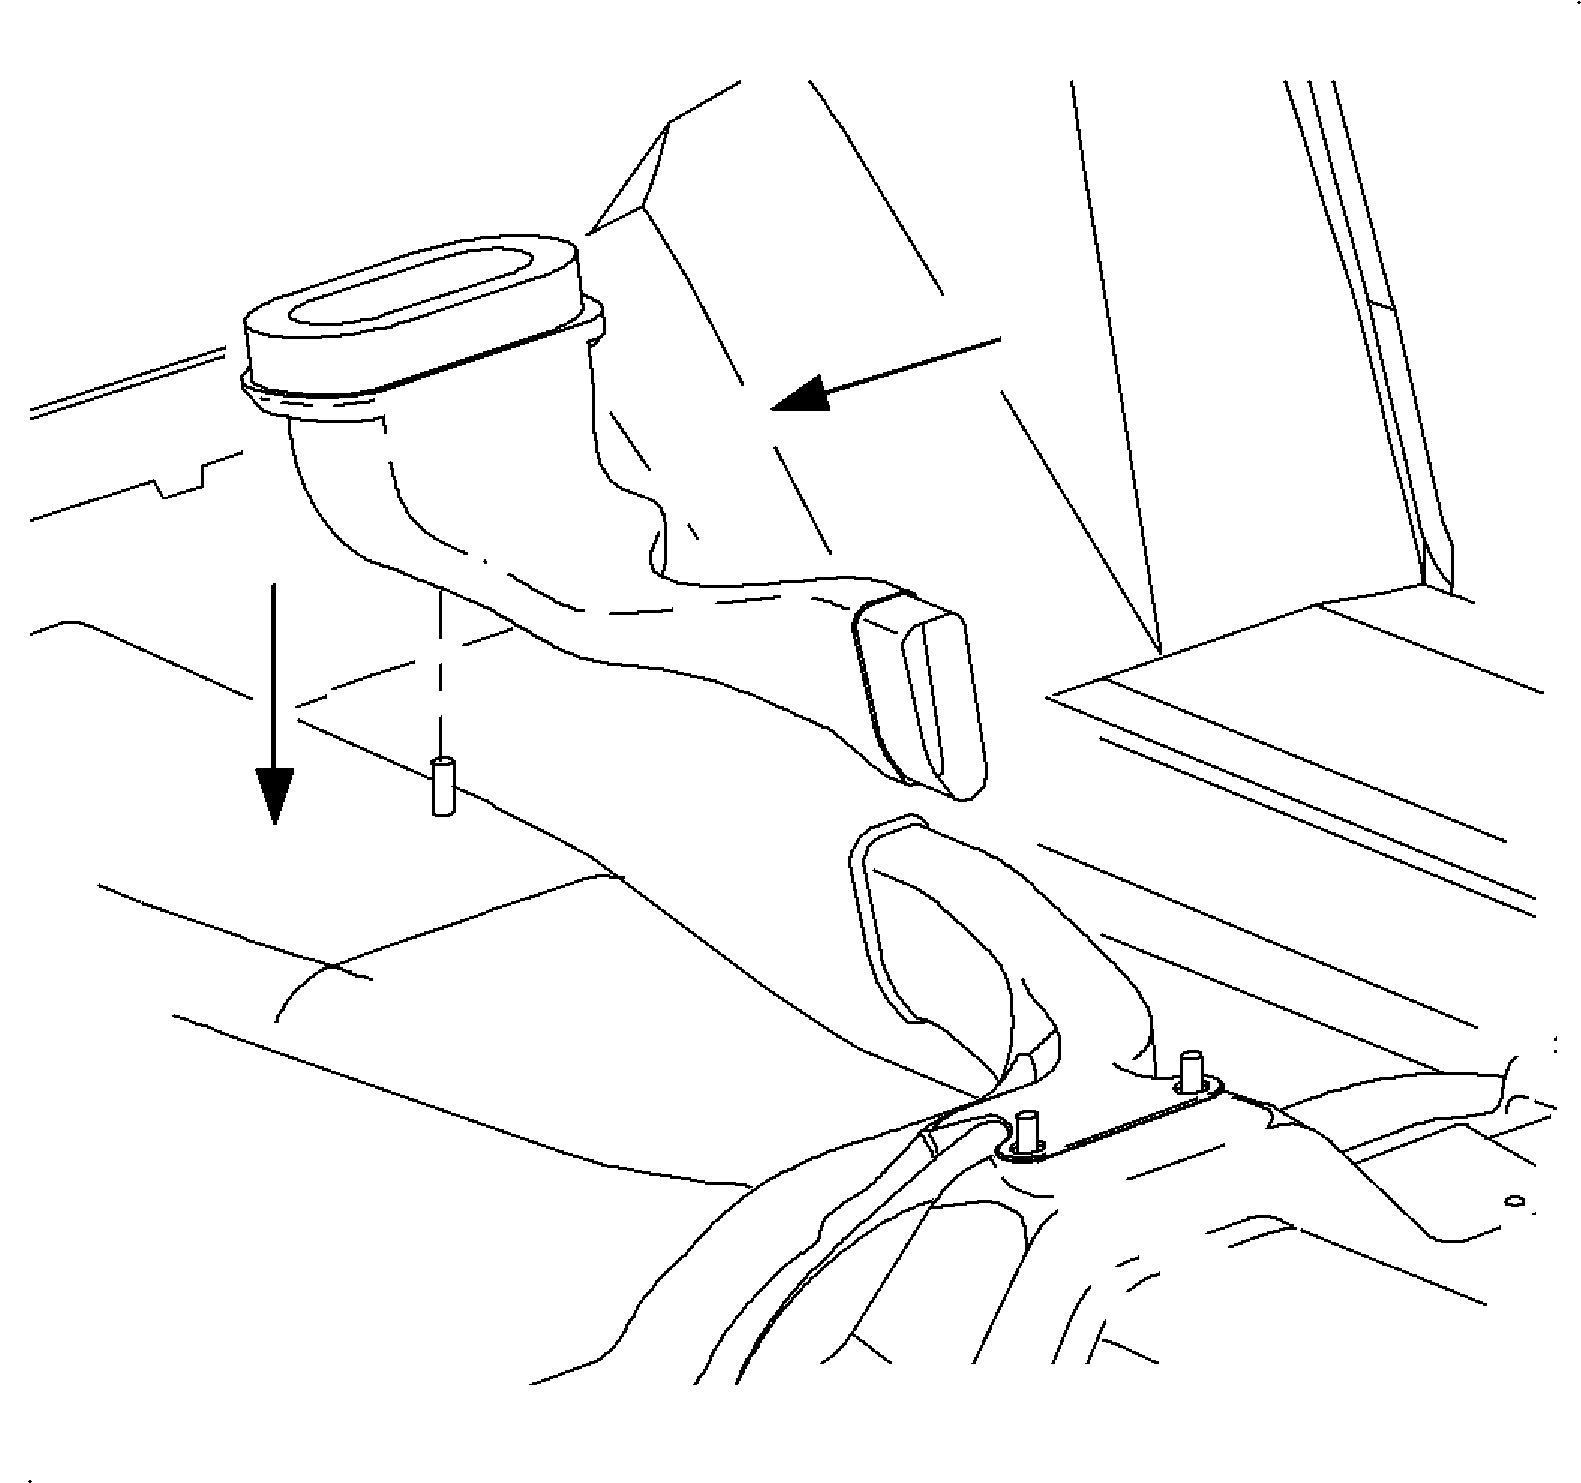
- Remove the air cleaner housing cover and air induction hose at the intake
manifold.
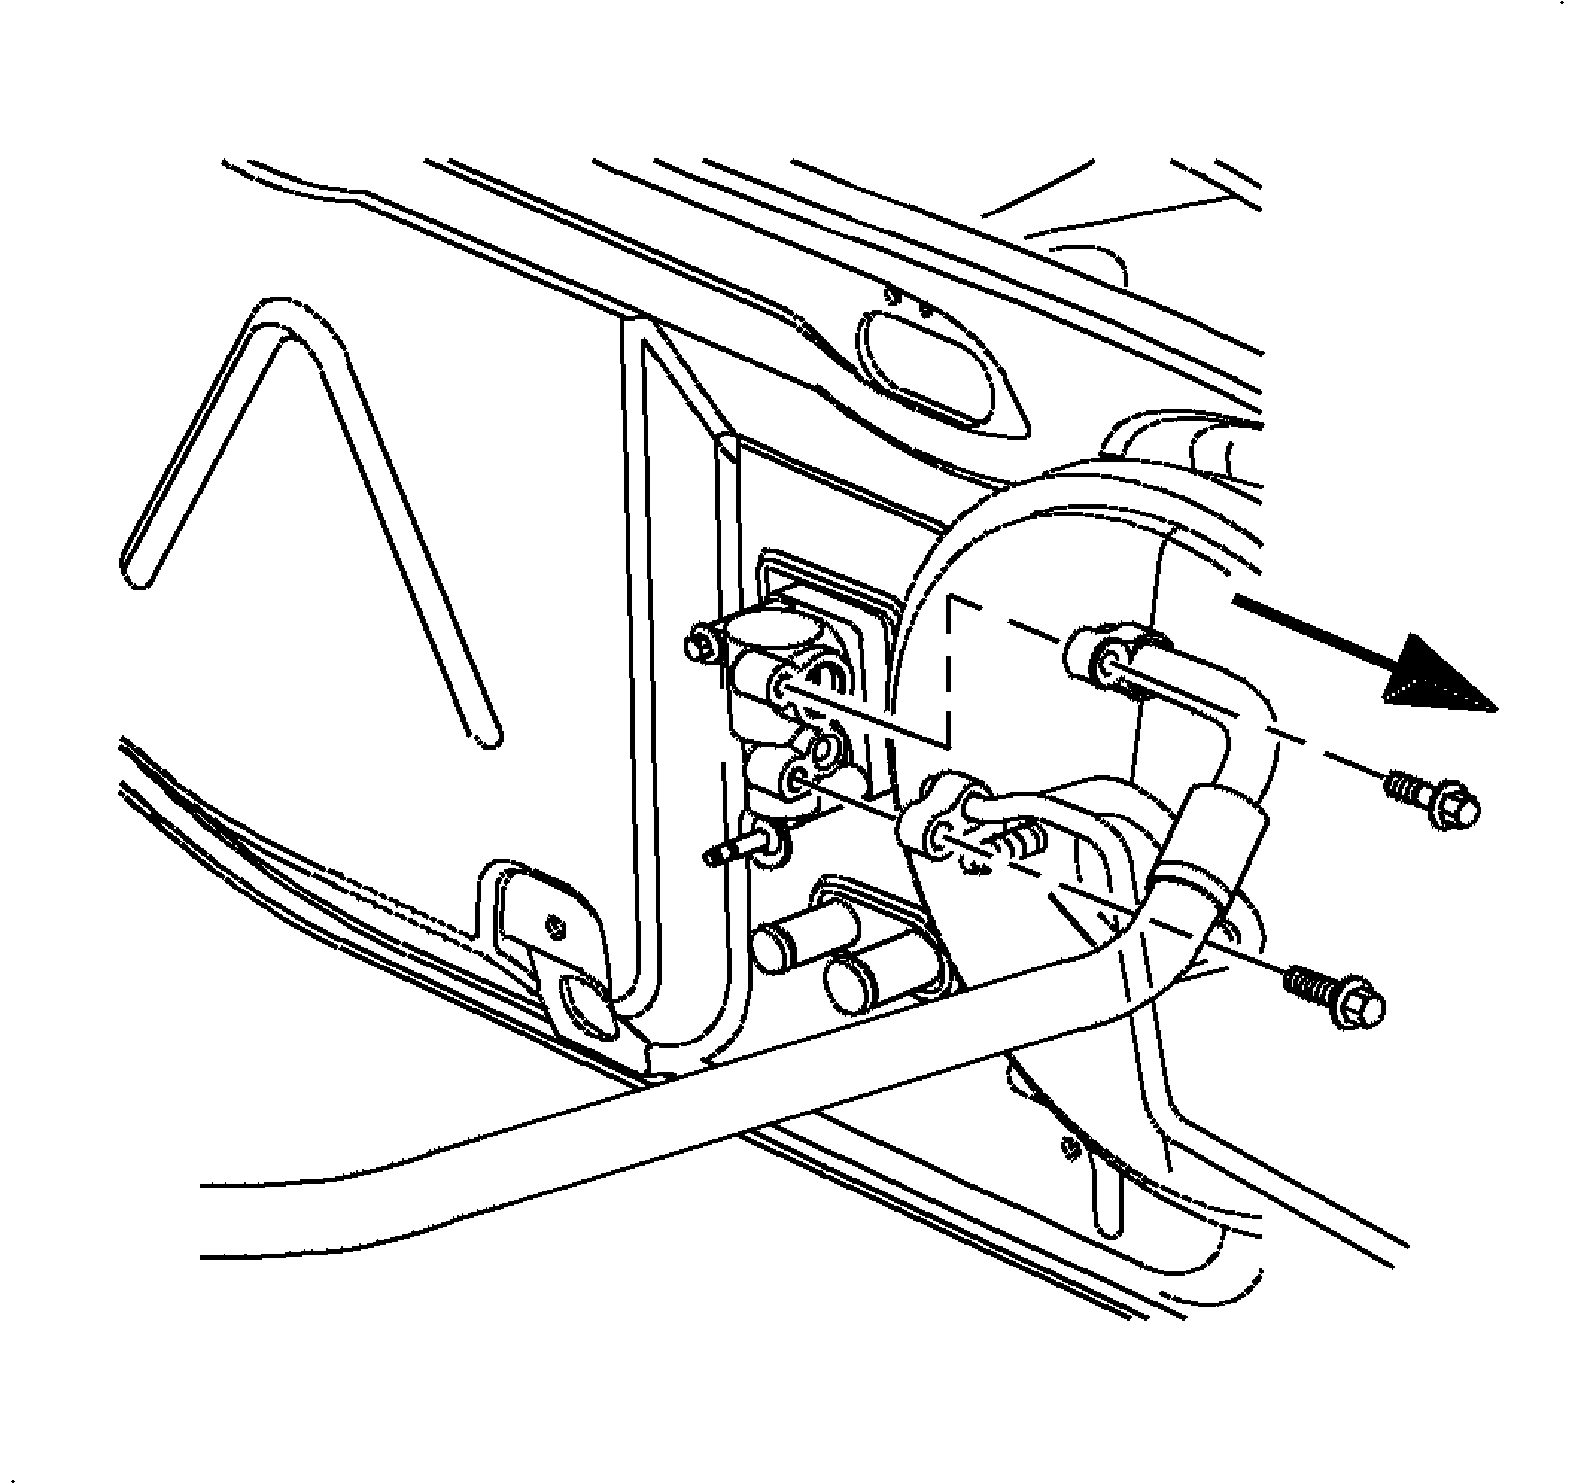
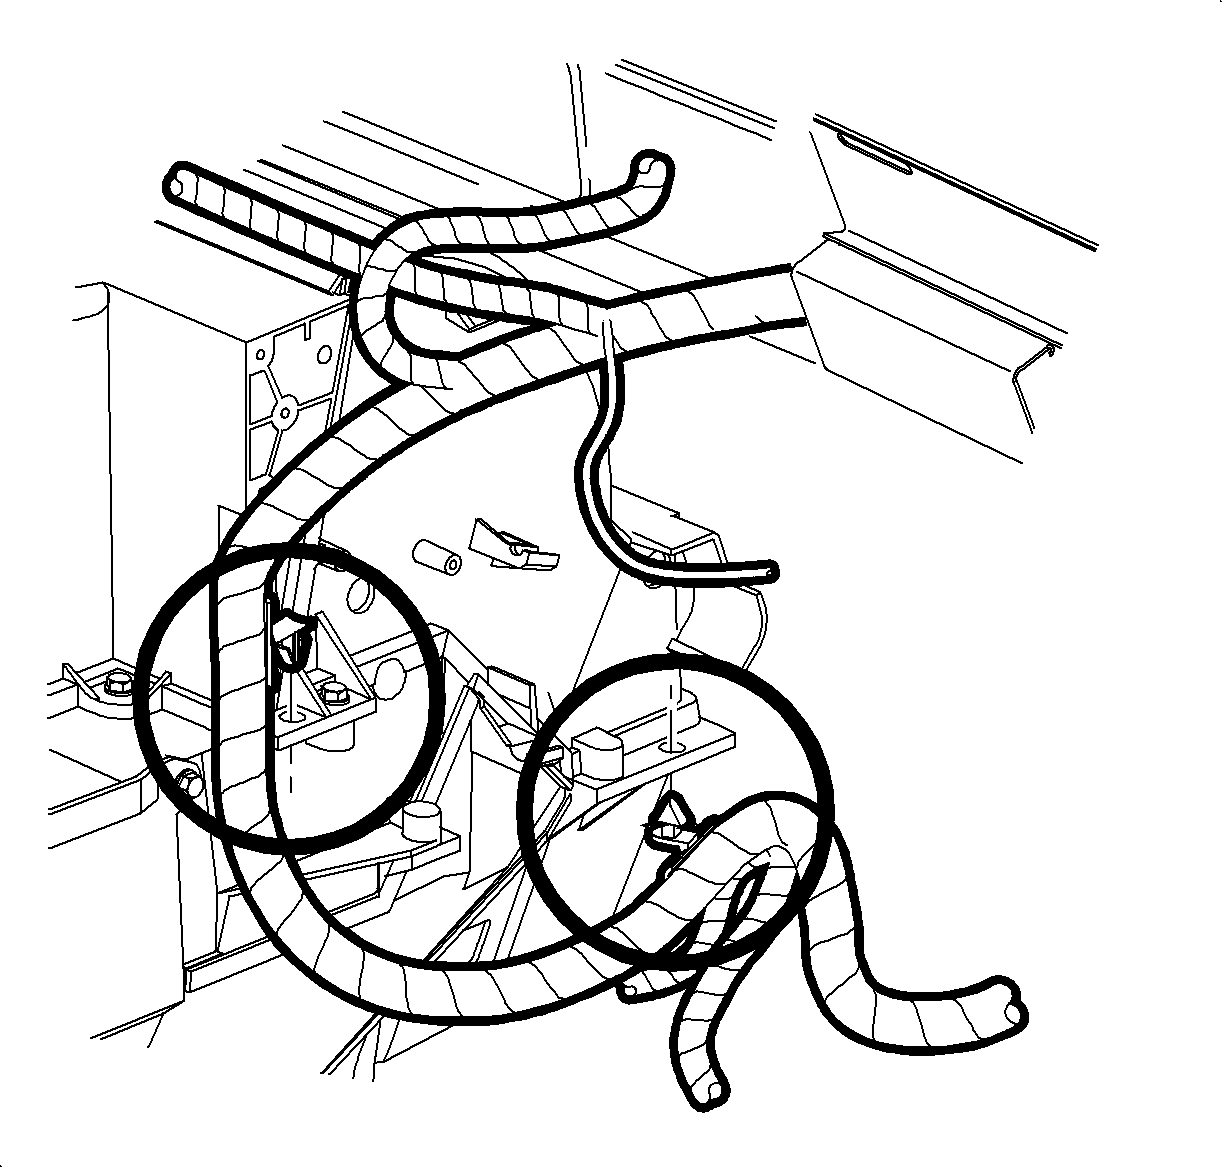
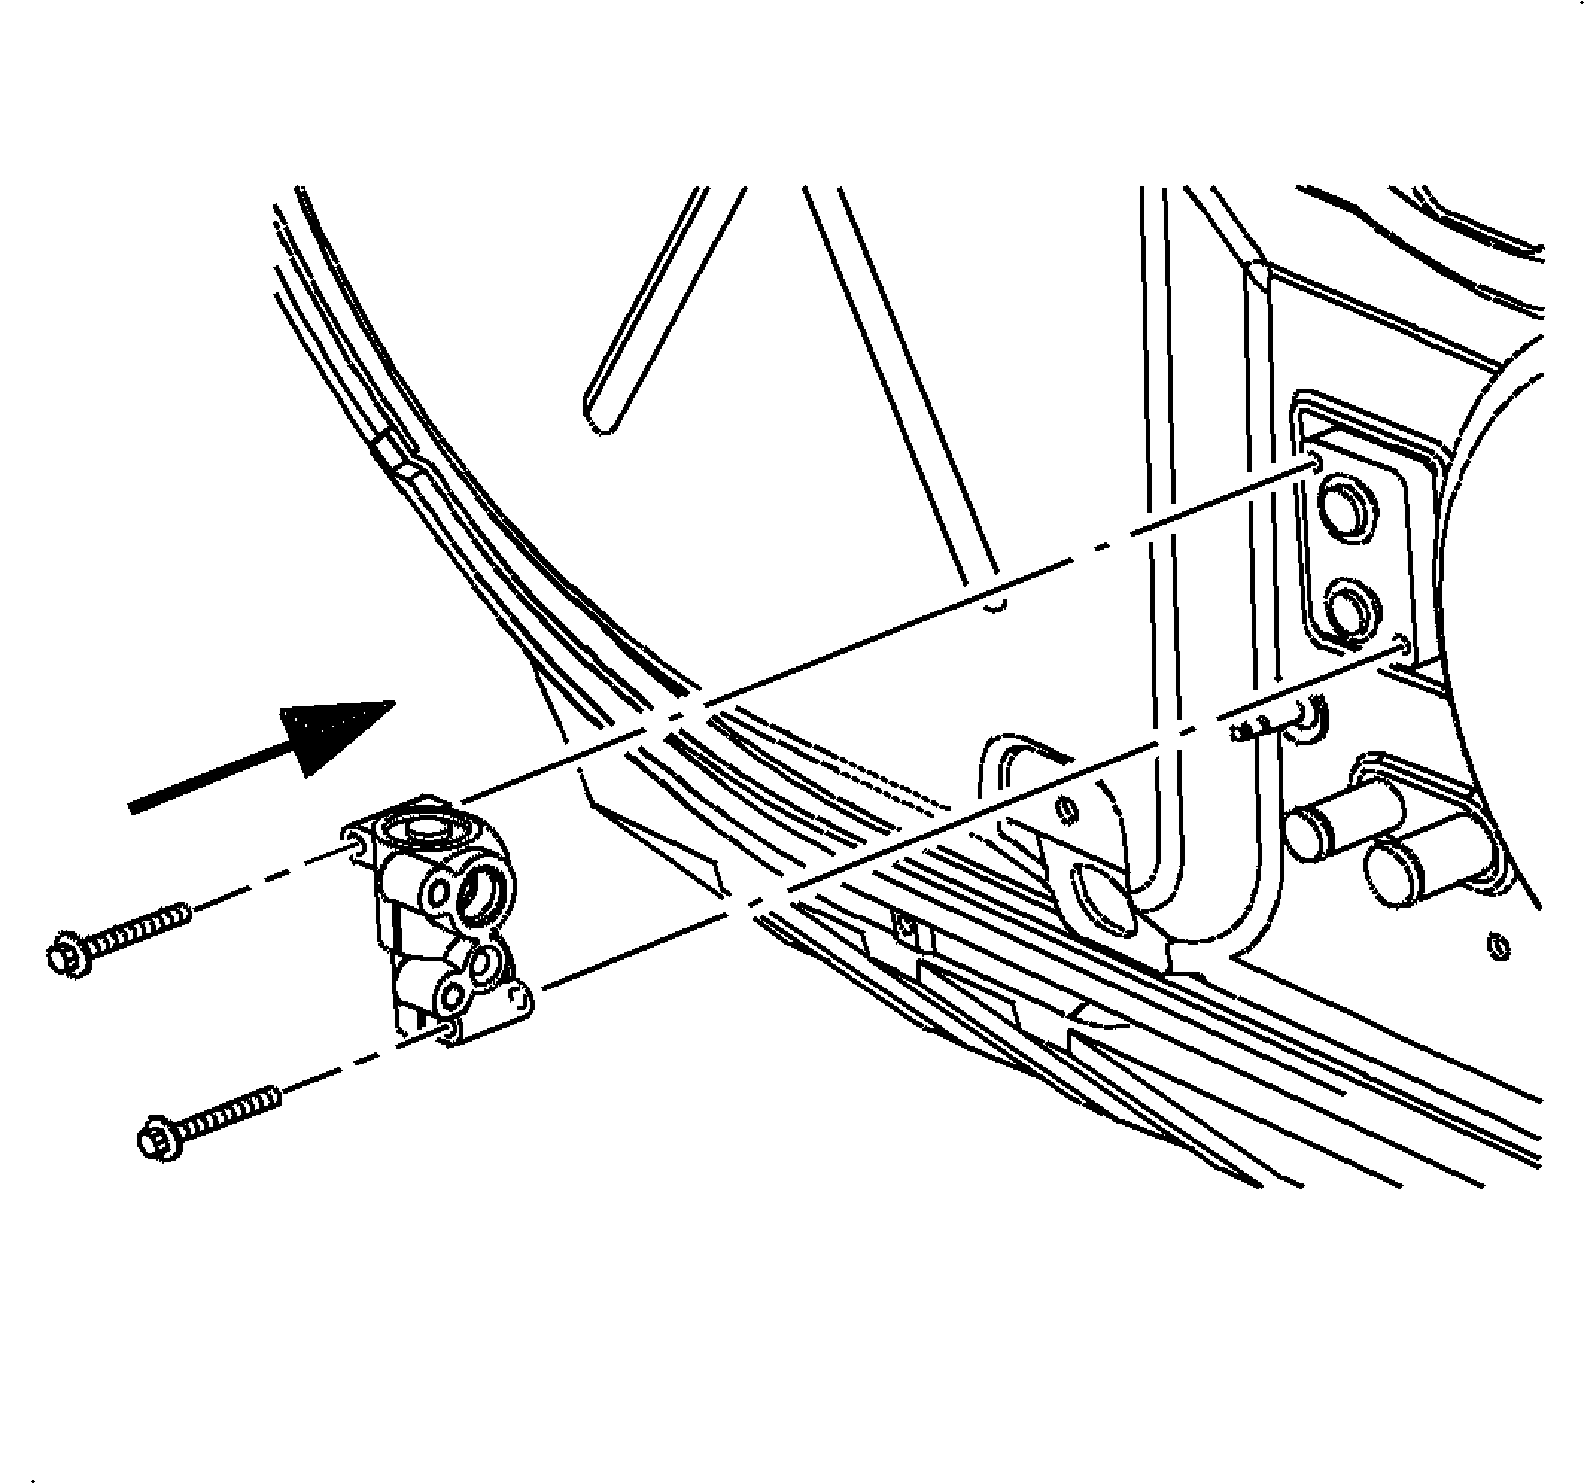
- Remove the suction hose and liquid line from the thermal expansion valve.

- Remove the thermal
expansion valve from the evaporator.
Notice
Place protective covers over A/C hoses, lines, TXV, and HVAC module to prevent
contamination of A/C system.
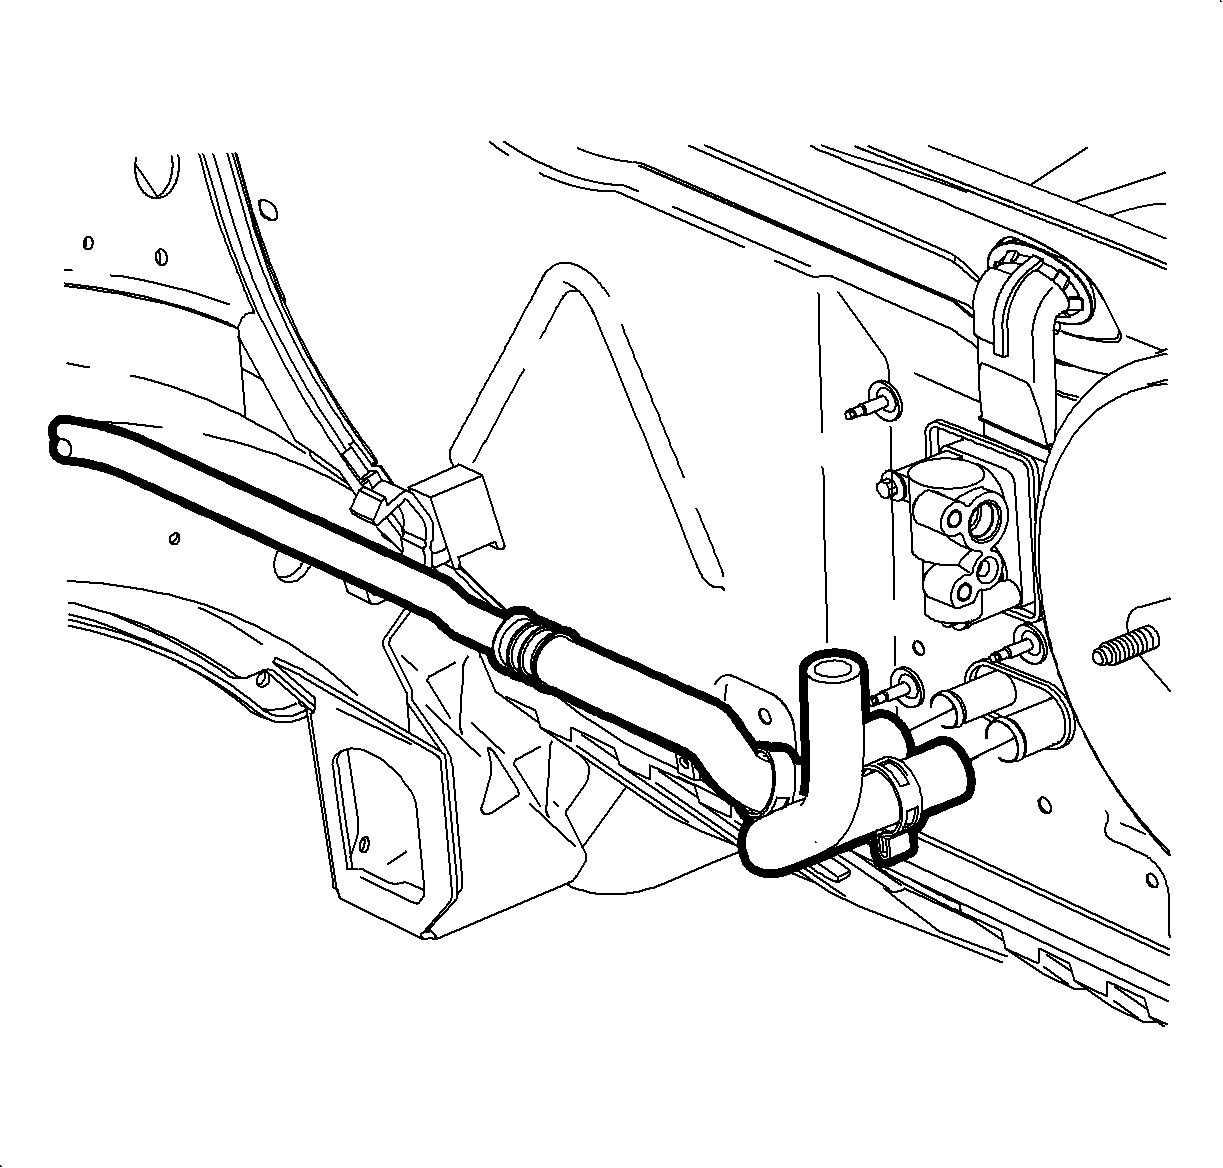
- Remove the coolant reservoir cap
- Drain the cooling system.
- Remove the heater inlet hose from the engine outlet and blow remainder
the coolant out of the heater core with an air hose in order to prevent coolant from
spilling on the vehicle interior when removing HVAC module.
- Install the heater inlet hose on the engine outlet and position clamp
at 4 o'clock position as viewed from the left side of the vehicle.
Caution
Ensure that the vehicle is properly supported and squarely positioned.
To help avoid personal injury when a vehicle is on a hoist, provide additional support
for the vehicle on the opposite end from which the components are being removed.
- Raise the vehicle.
- Move the clamps up the heater core inlet and outlet hoses.
- Remove the hoses from the heater core
- Lower the vehicle.

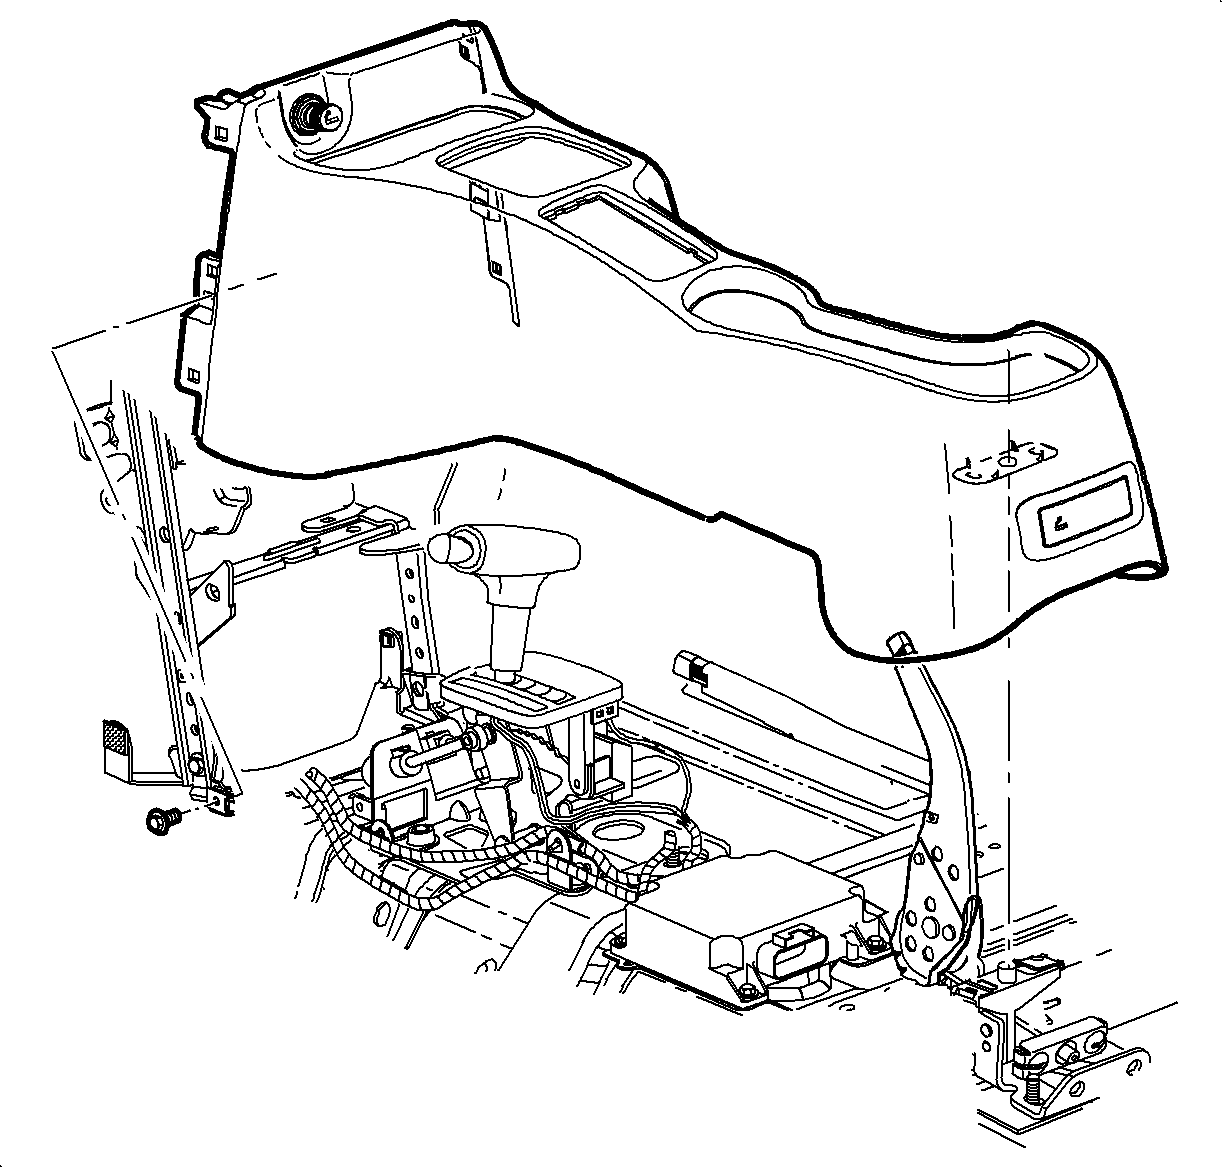
- Remove the screws
and carefully pull right and left end cap assemblies outward at clip locations.
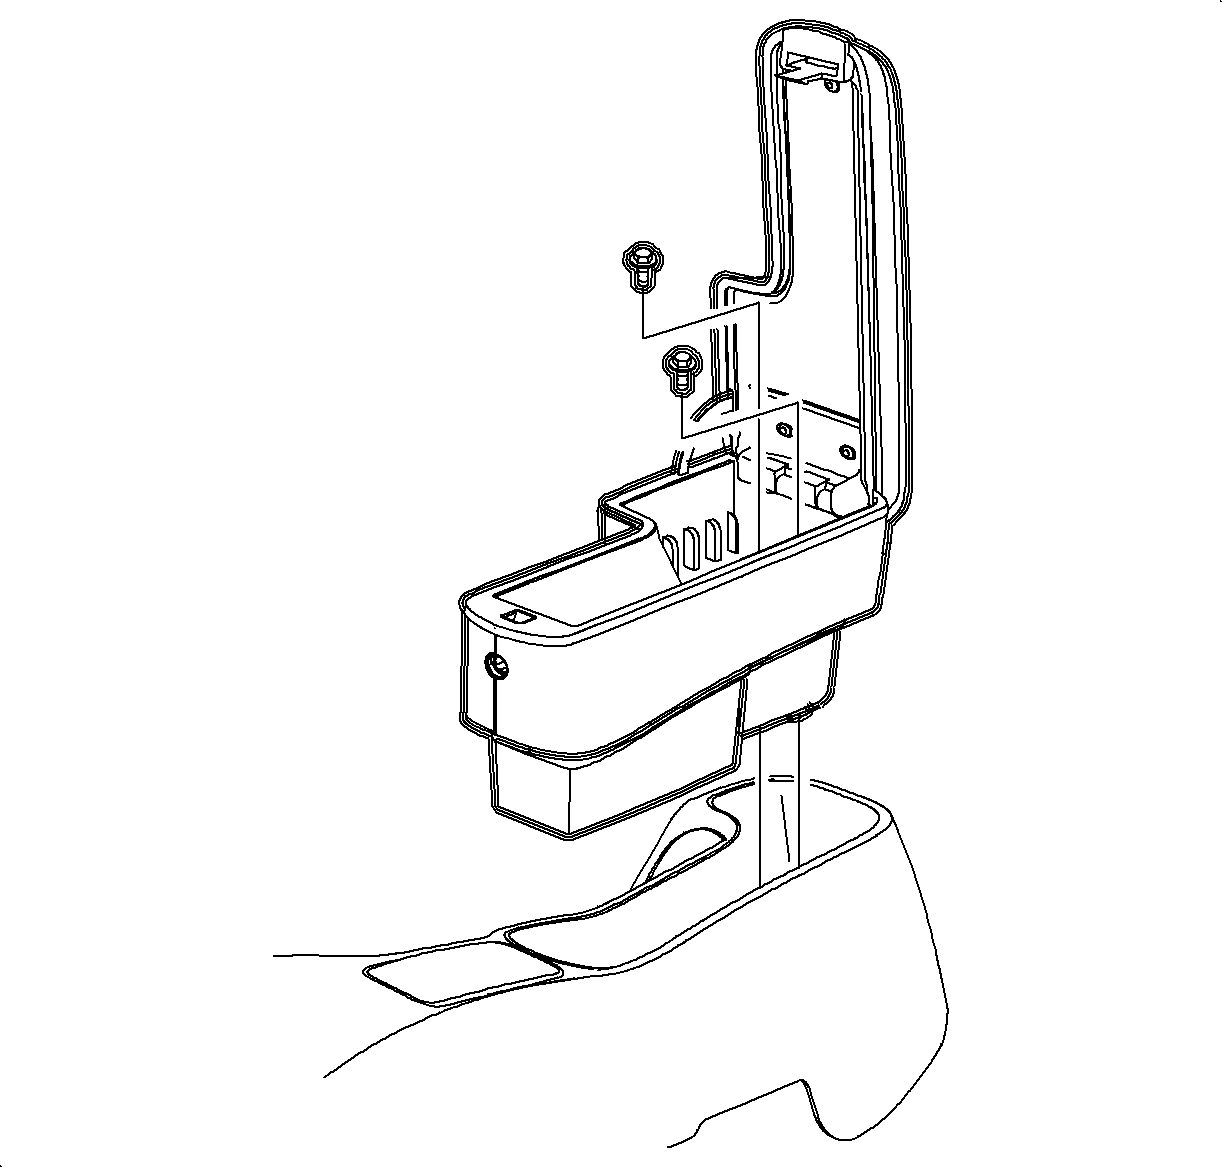
- Remove the screws
and remove the arm rest, if equipped.
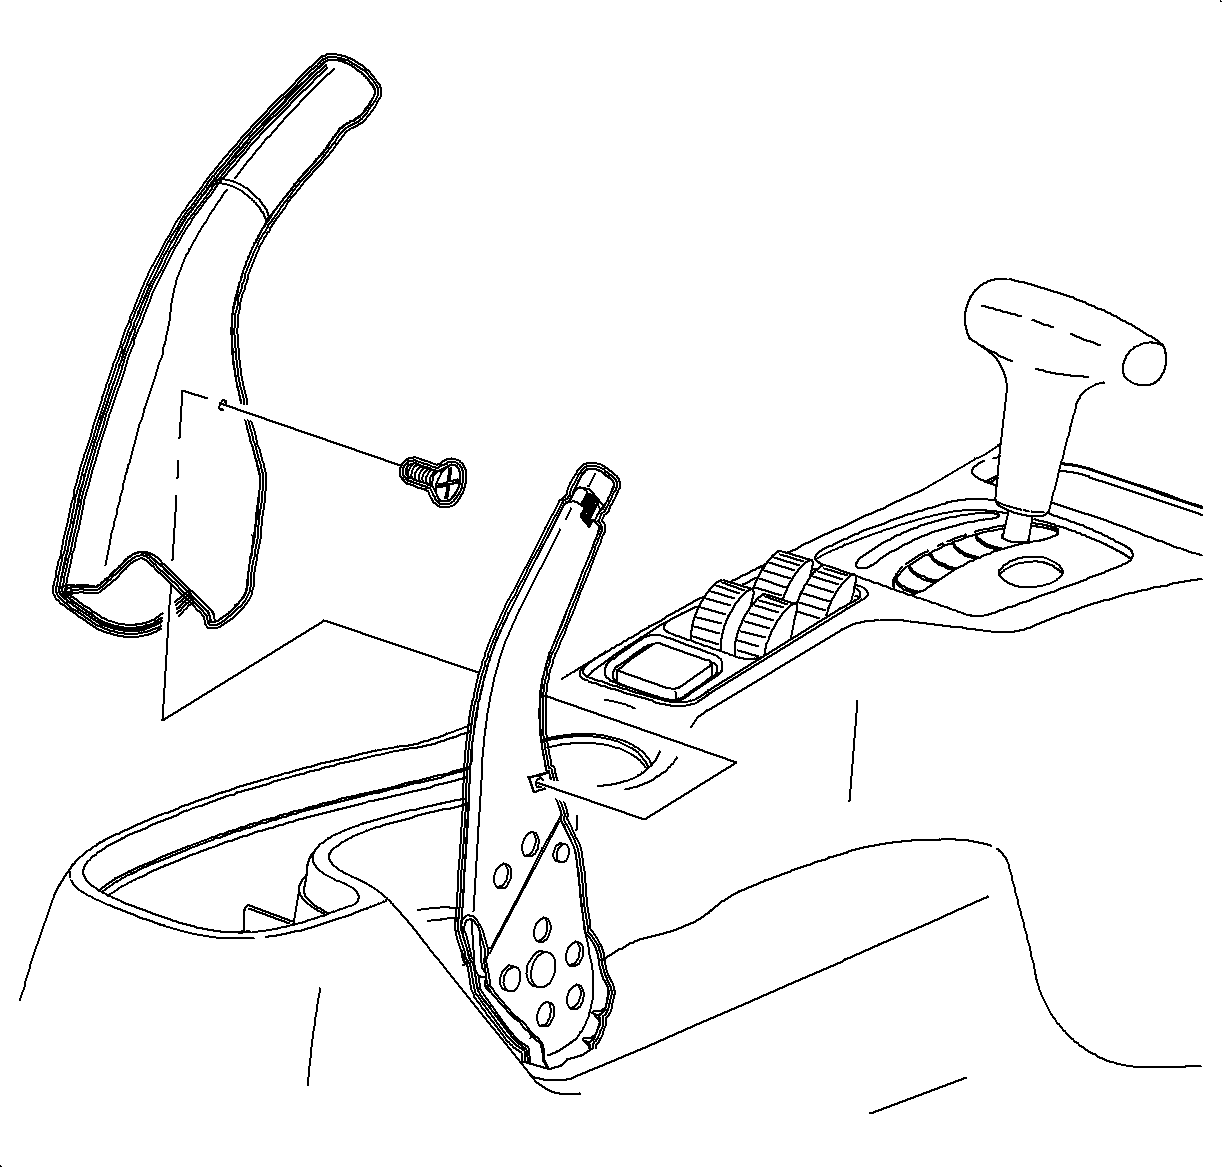
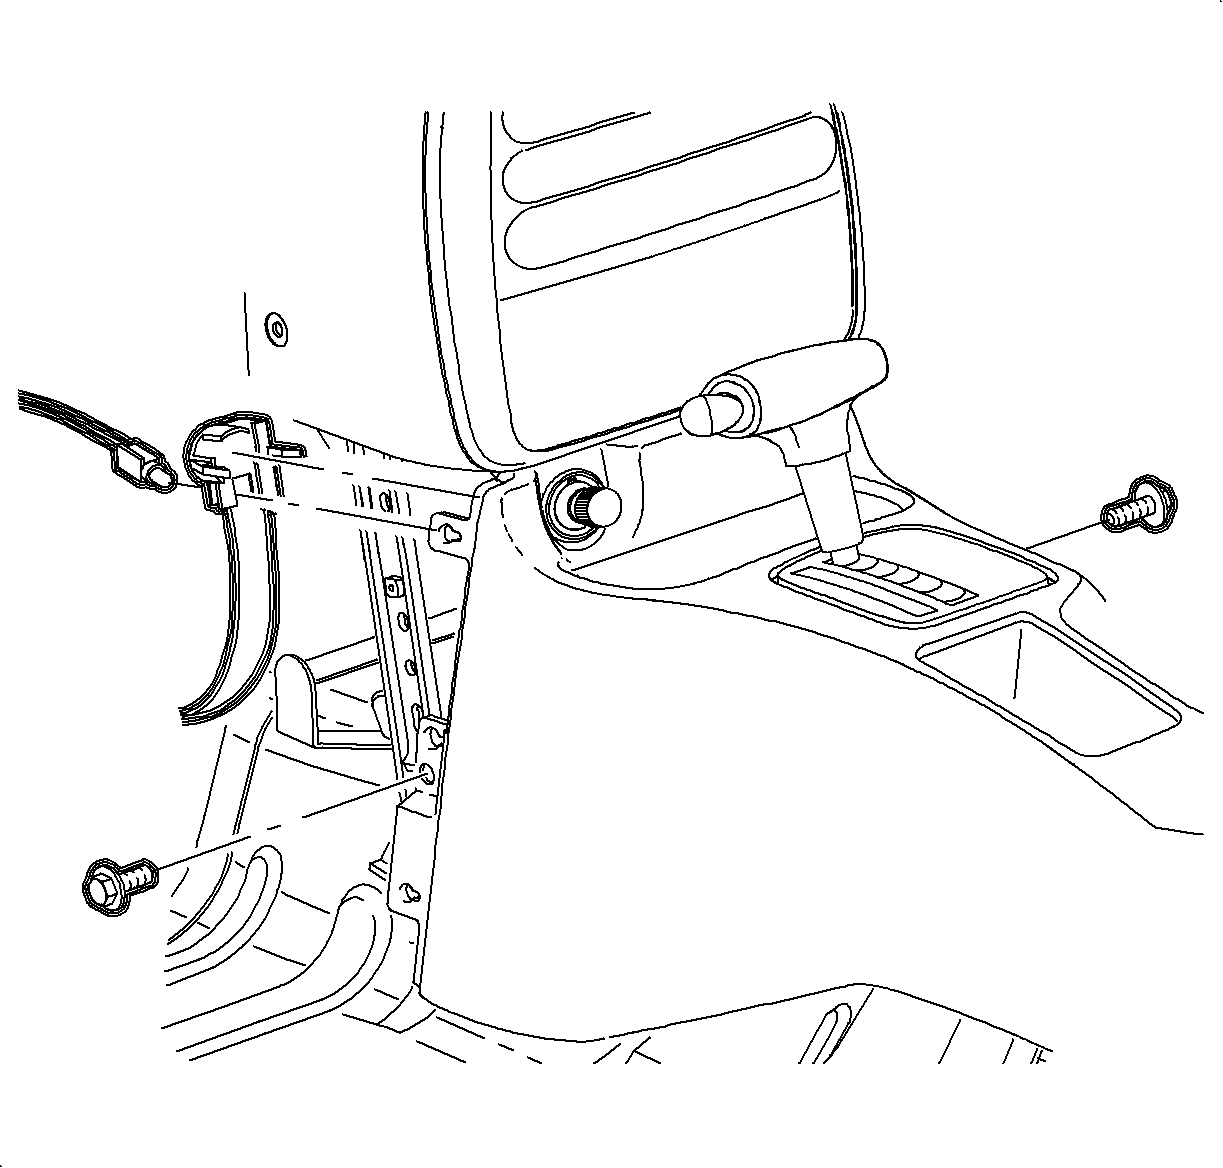
- Lift the parking brake lever.
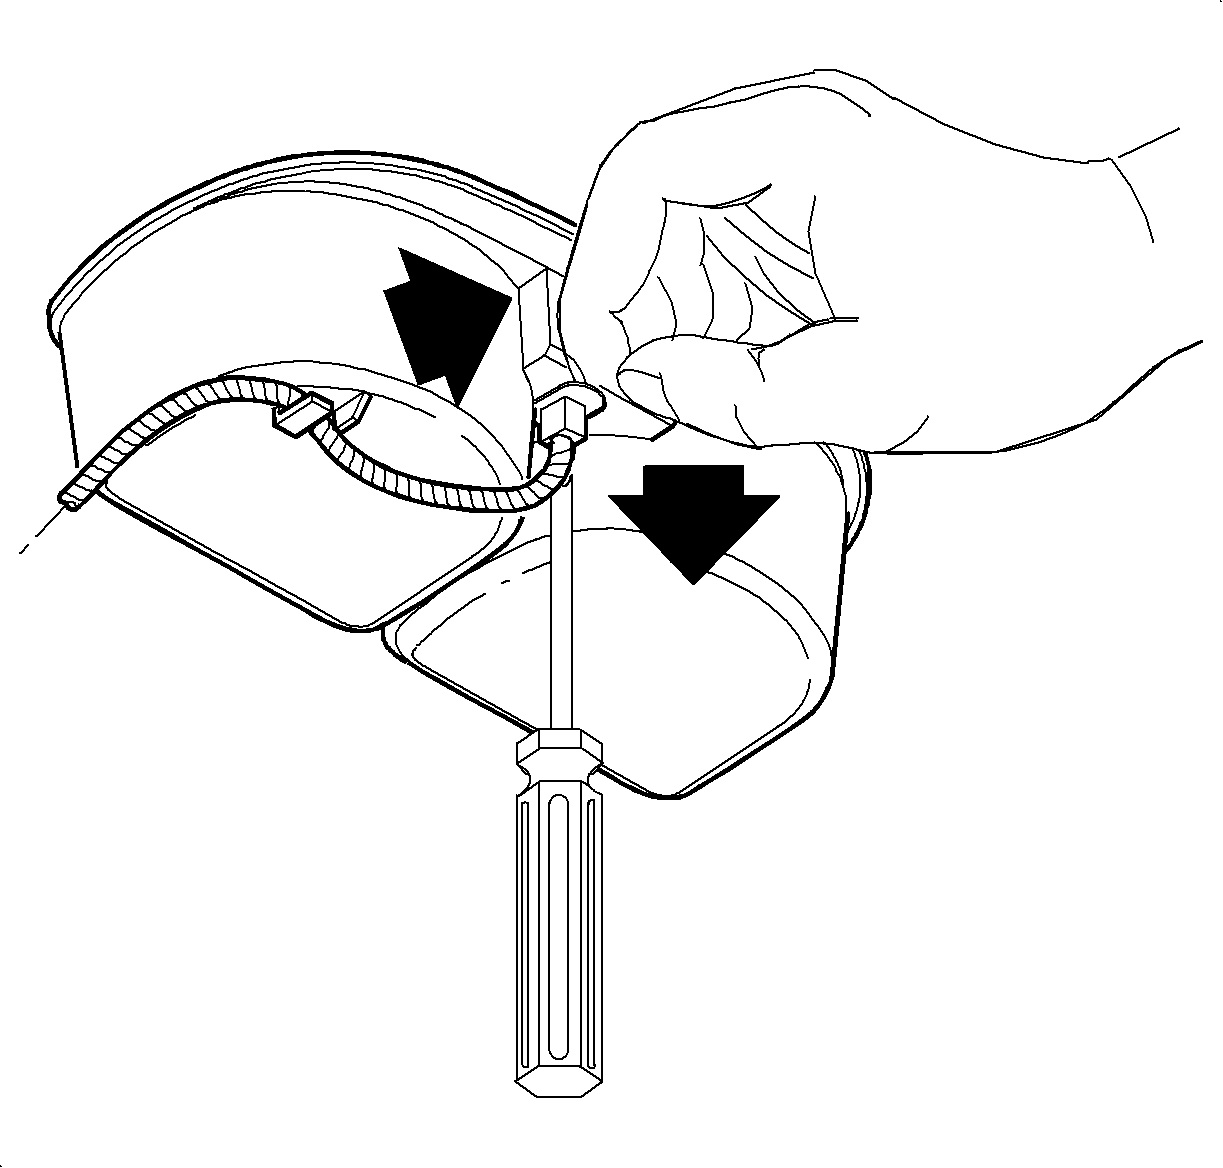
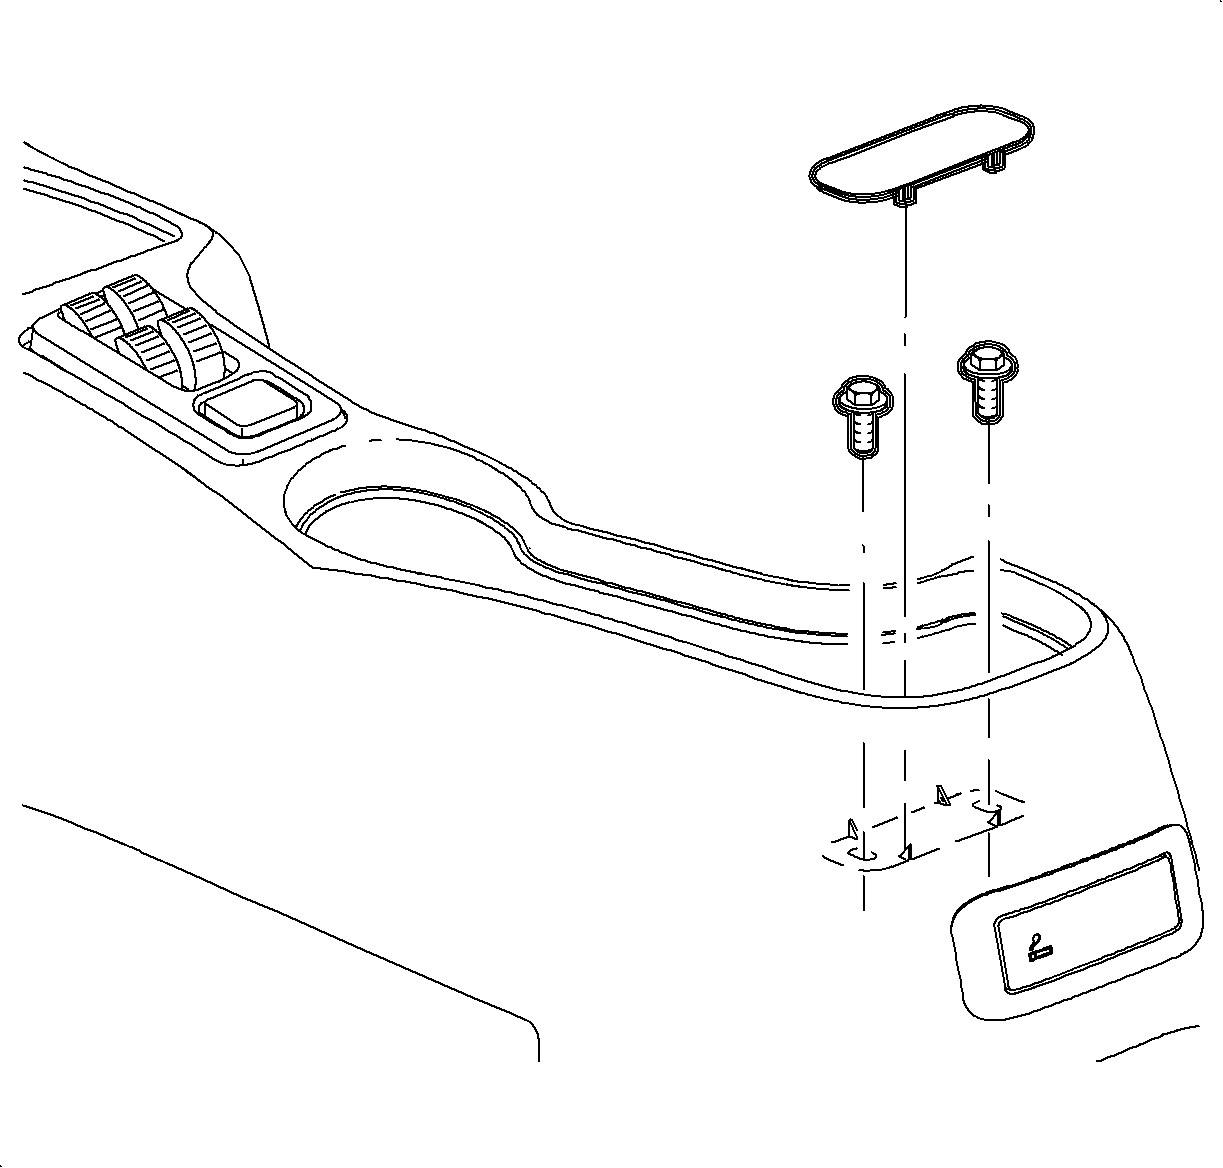
- Remove the screw.
- Remove the parking brake cover by lifting straight off lever.
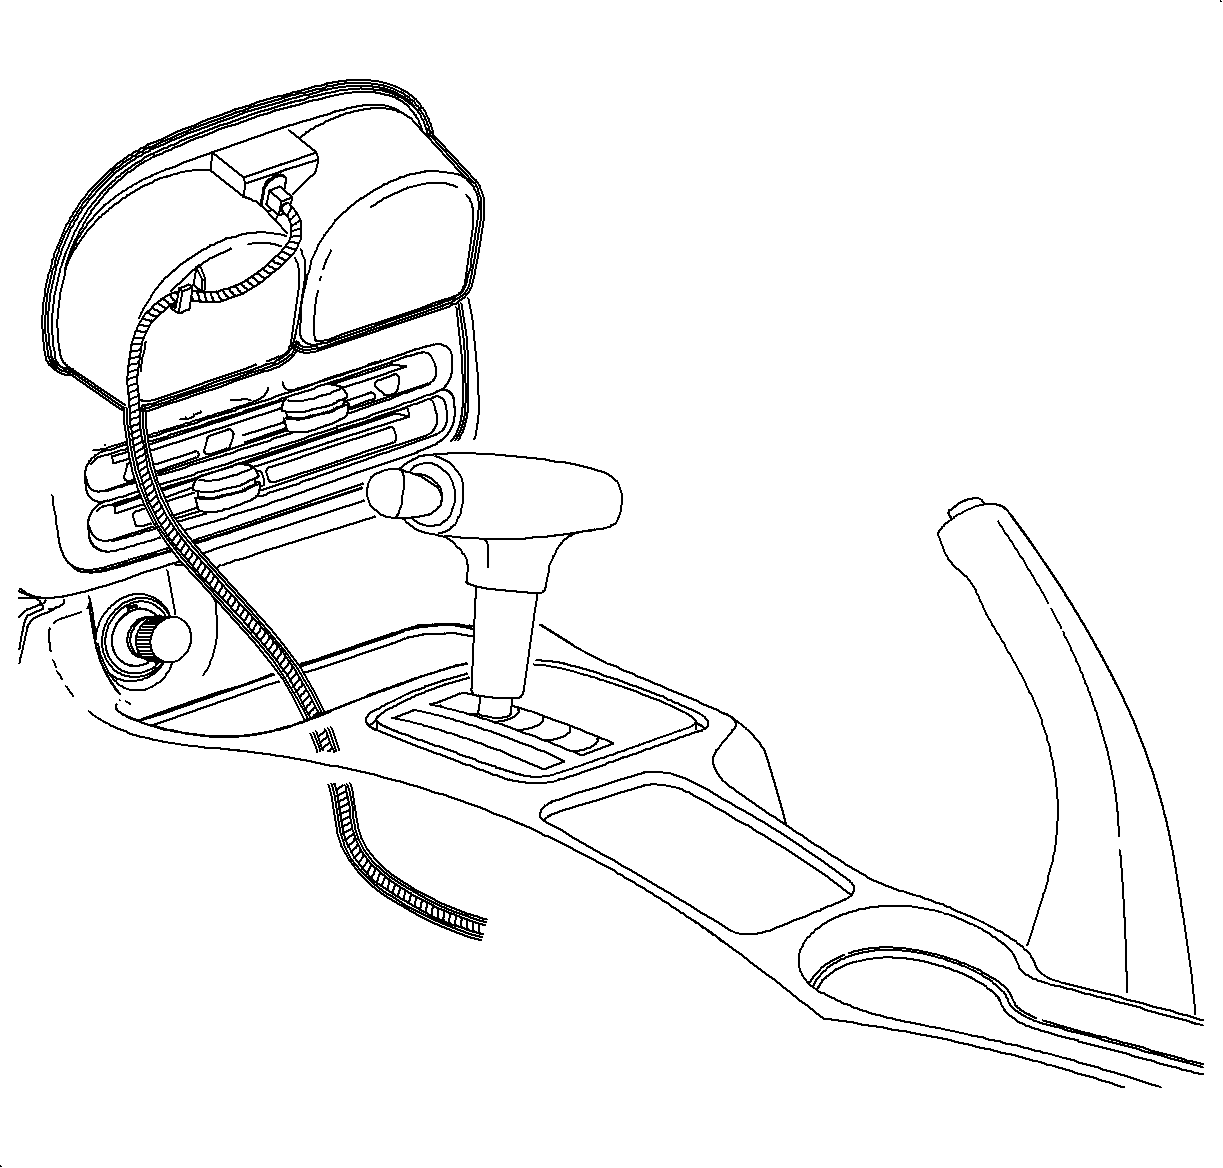
- Move the shifter
to neutral. Remove the ashtray from the cup holder by lifting straight out.
- Remove the cup holder from the console by pulling upwards starting at
the rear edge.
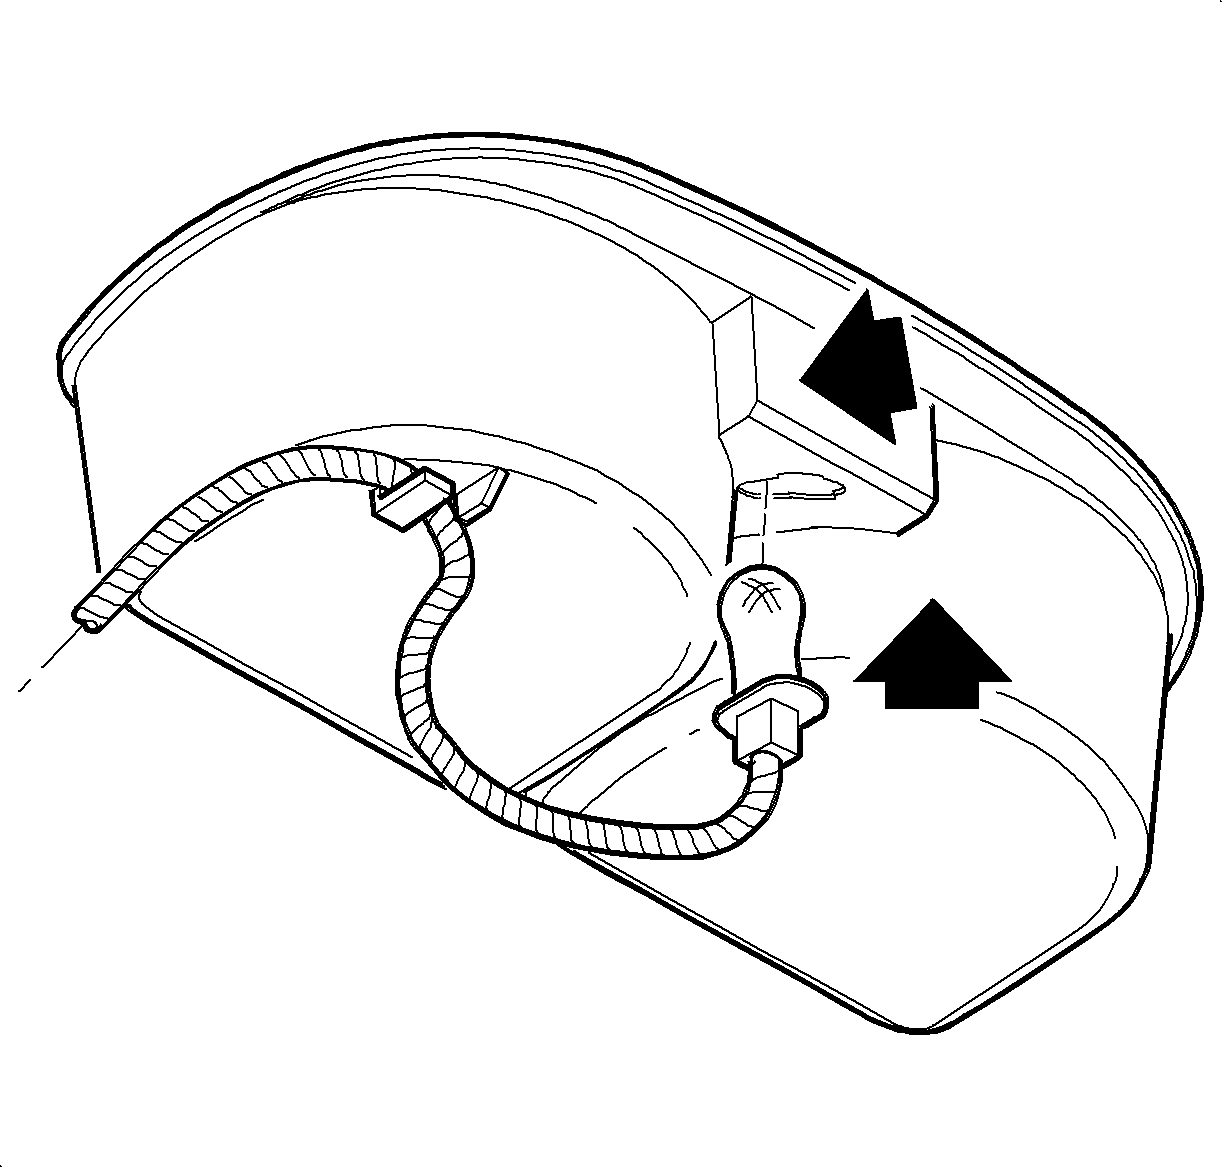
- Remove the ashtray
bulb socket by lifting tab while sliding socket forward. Then pull socket straight
out.
- Remove the wiring harness from the cup holder.
- Remove the window/mirror
switch, if equipped, by sliding switch forward then lifting at the rear edge. Disconnect
the electrical connectors.
- If the vehicle
does not have an arm rest, remove the rear screw cover by lifting at cut out.
- Remove the rear console screws.
- Remove left and right lower trim panel extensions by pulling outward at dual
lock locations. Then rotate the panels outward to disengage hinges from console.

- Remove the front console screws.
- Move console rearward.
- Disconnect the cigarette lighter electrical connector.
- Remove the bulb socket from cigarette lighter by rotating clockwise and
pulling straight out.
- On automatic transmission
equipped vehicles, tape the shifter button in to clear shifter opening.
- Lift the console at rear. Slide the console rearward and lift straight
up to remove.
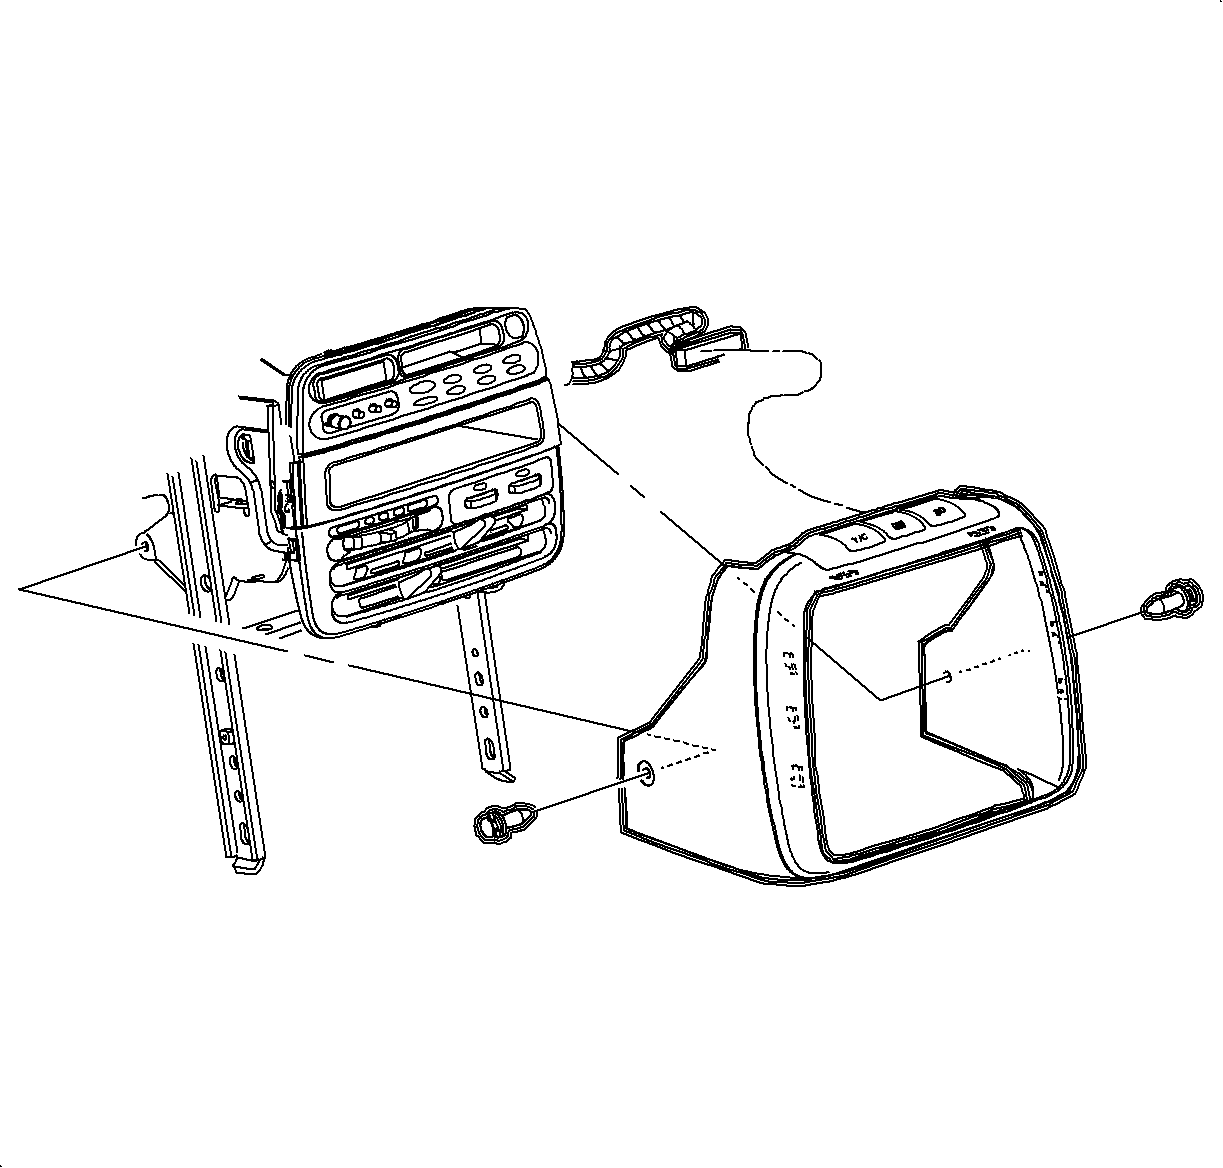
- Depress the center pins inward to release radio/HVAC controller cover push pins
fasteners.
Important
Do not push the center pins through fasteners.
- Remove the fasteners and pull radio/HVAC controller cover rearward.
- Disconnect traction control/fog lamp/rear defog electrical connector if
equipped.
- Remove
the radio screws.
- Push the spring clips in through D-holes on both sides of radio brace.
- Pull the radio out slightly to access the rear of the radio.
- Disconnect the electrical connector and
antenna.
- Remove the radio.
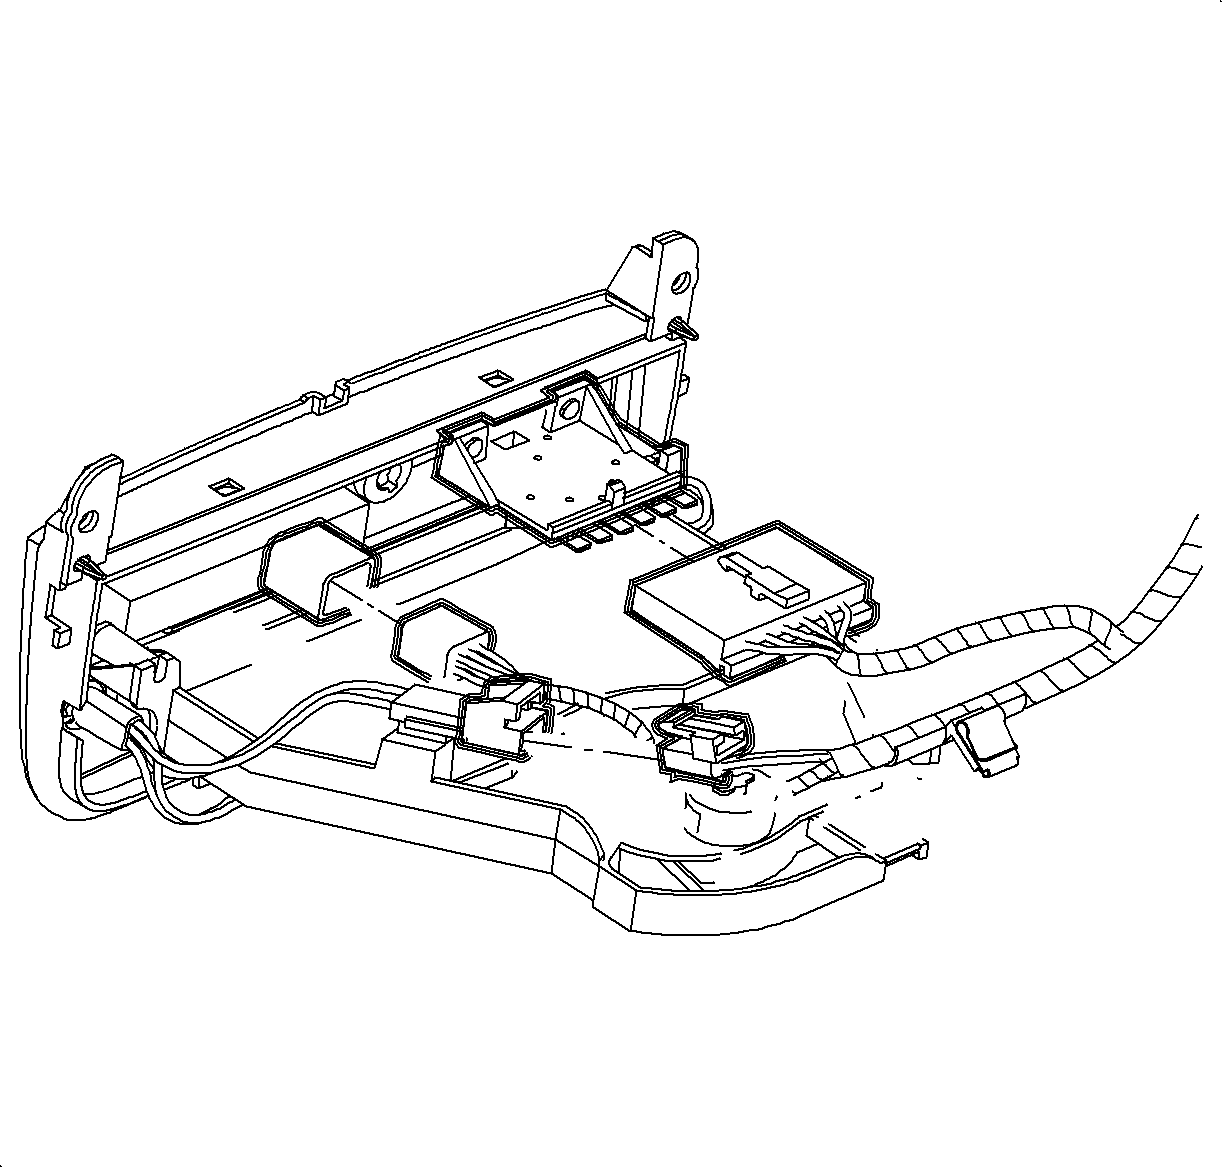
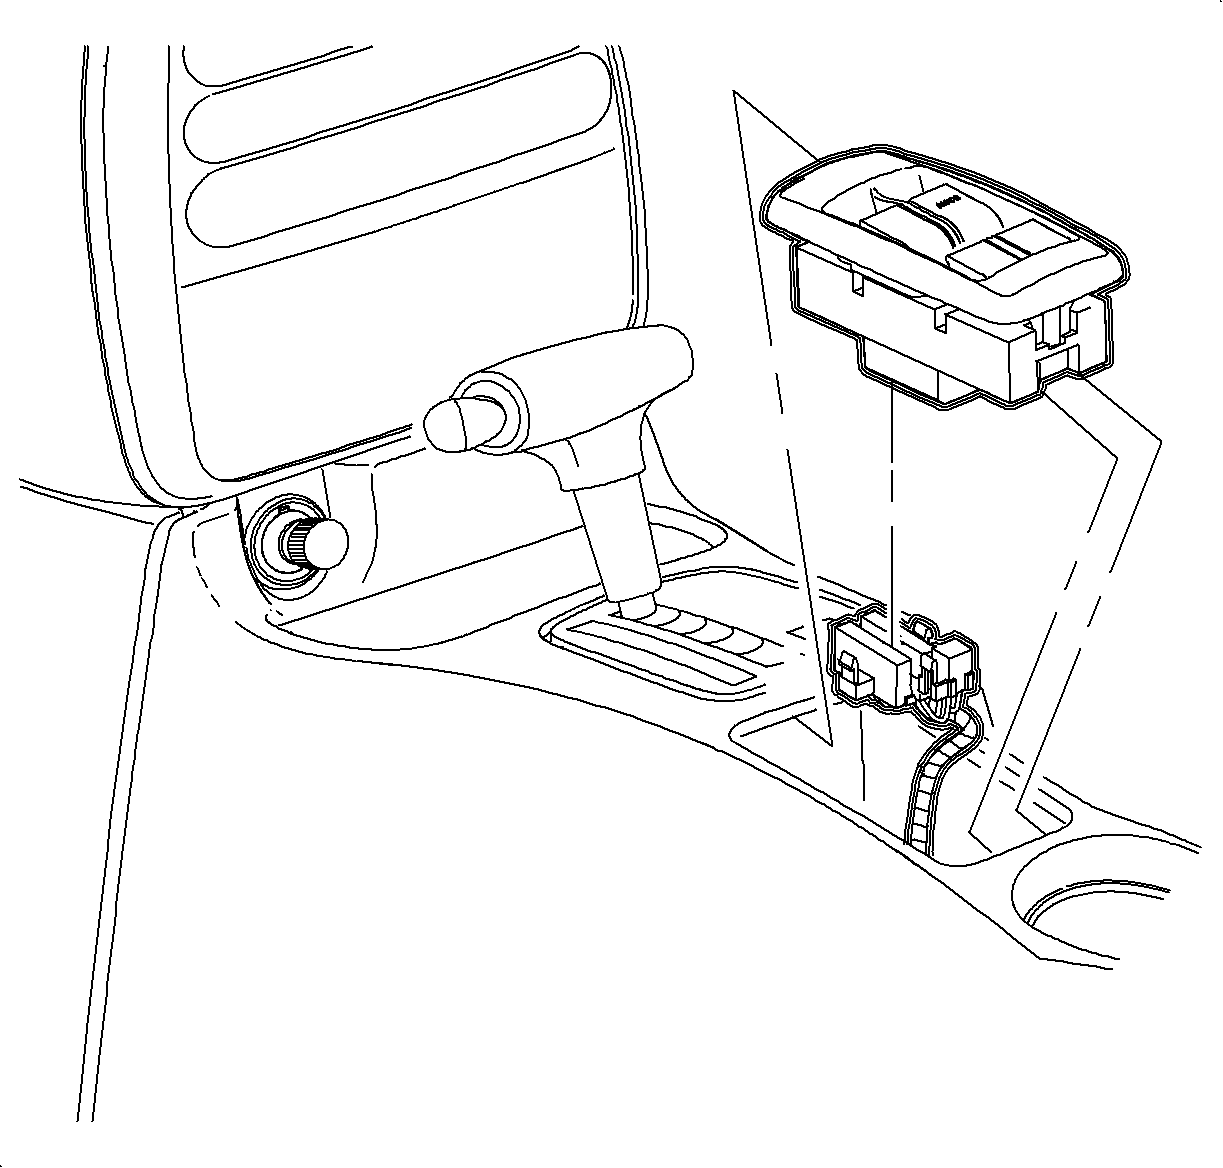
- Disconnect blower switch, A/C-Recirc
and lighting electrical connectors.
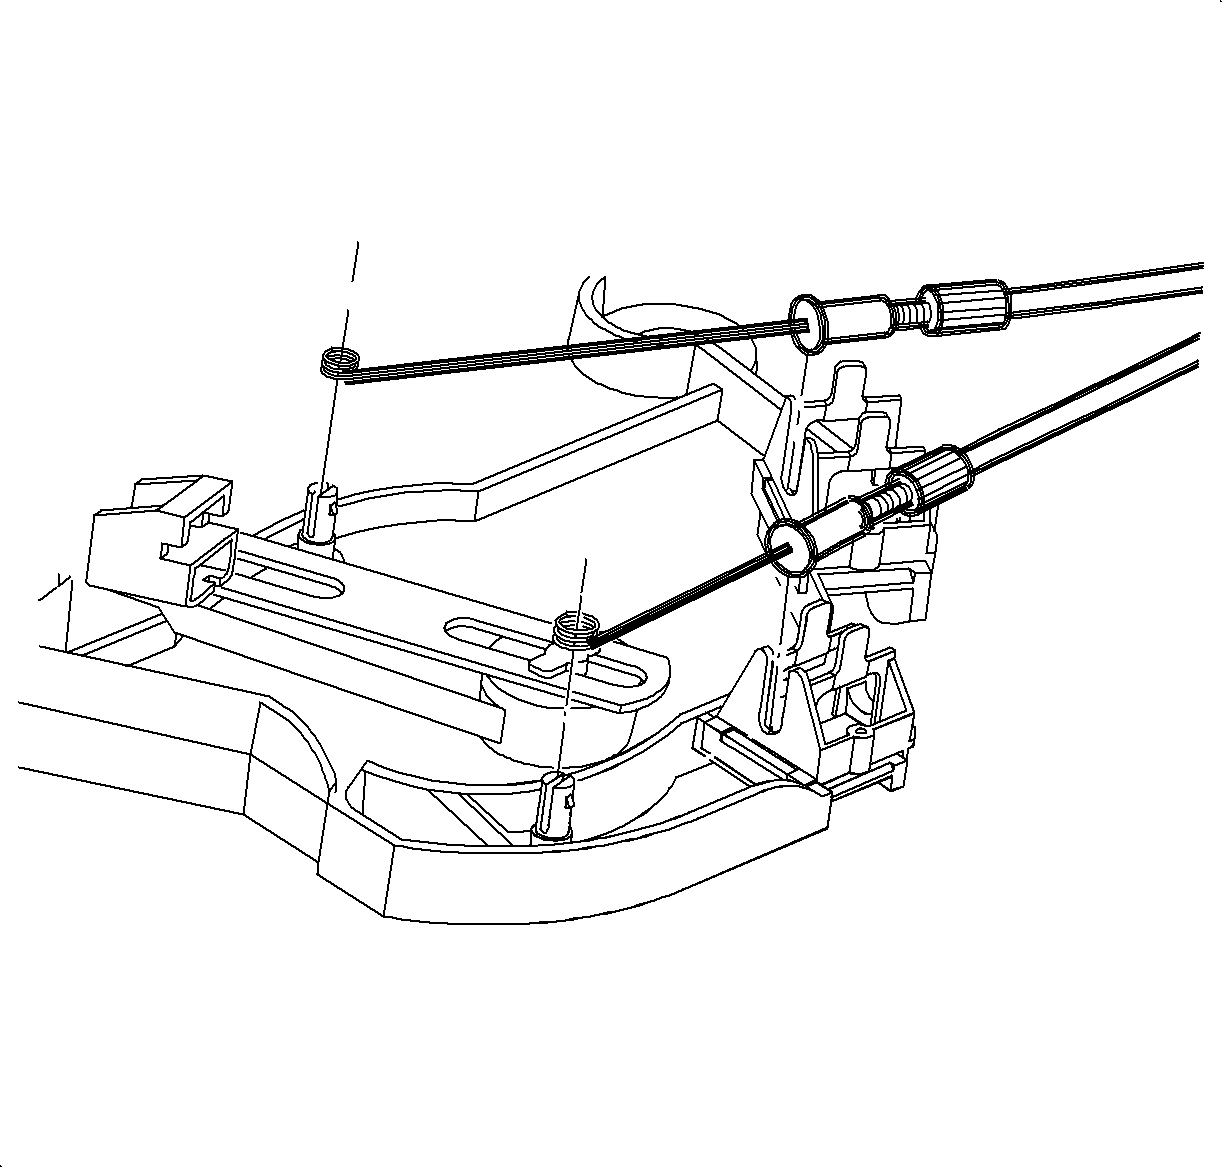
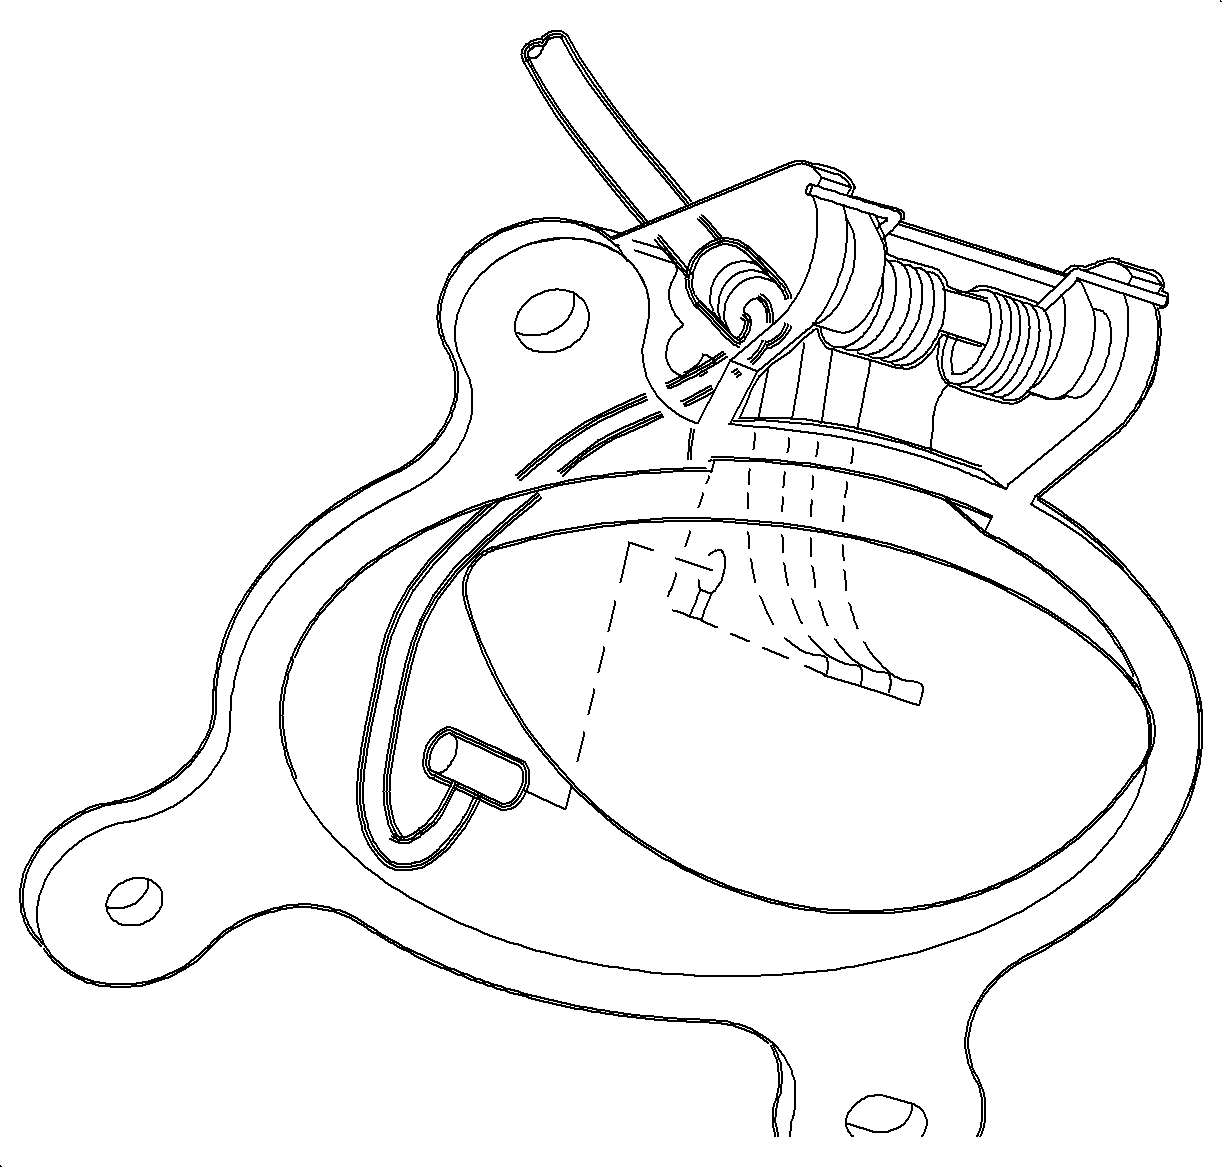
- Remove the temperature and mode cables from HVAC control by squeezing lock tabs
together while pulling cable housing straight up.
- Remove the cables from pins by pulling straight up. (Service cables shown
in illustration.
- Remove the screws and HVAC controller.
- Remove the closeout
seal by releasing from tabs.
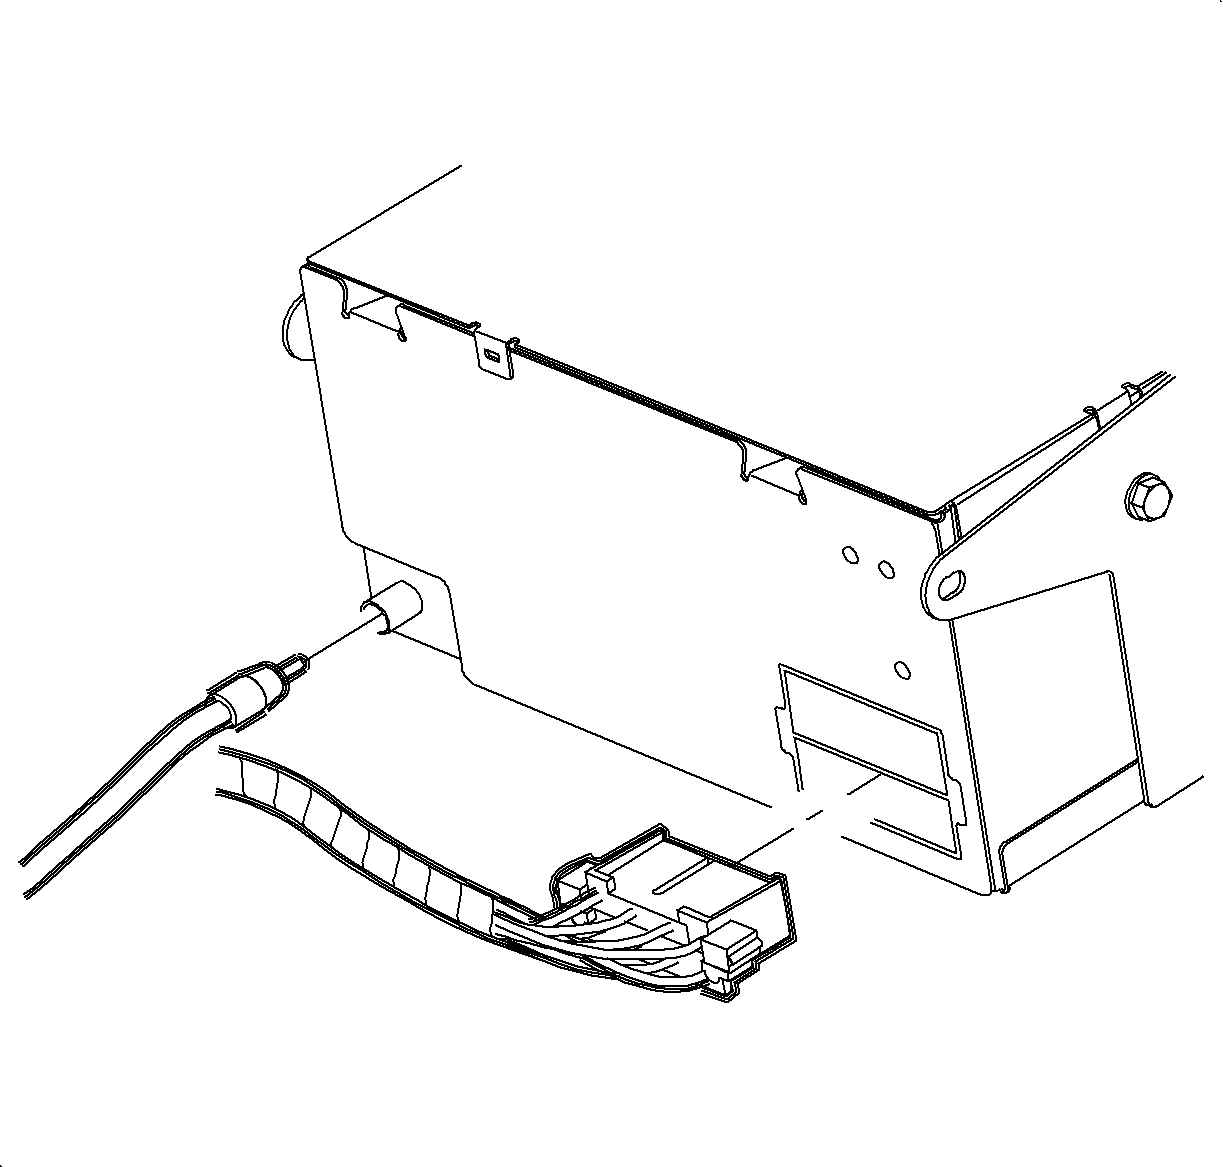
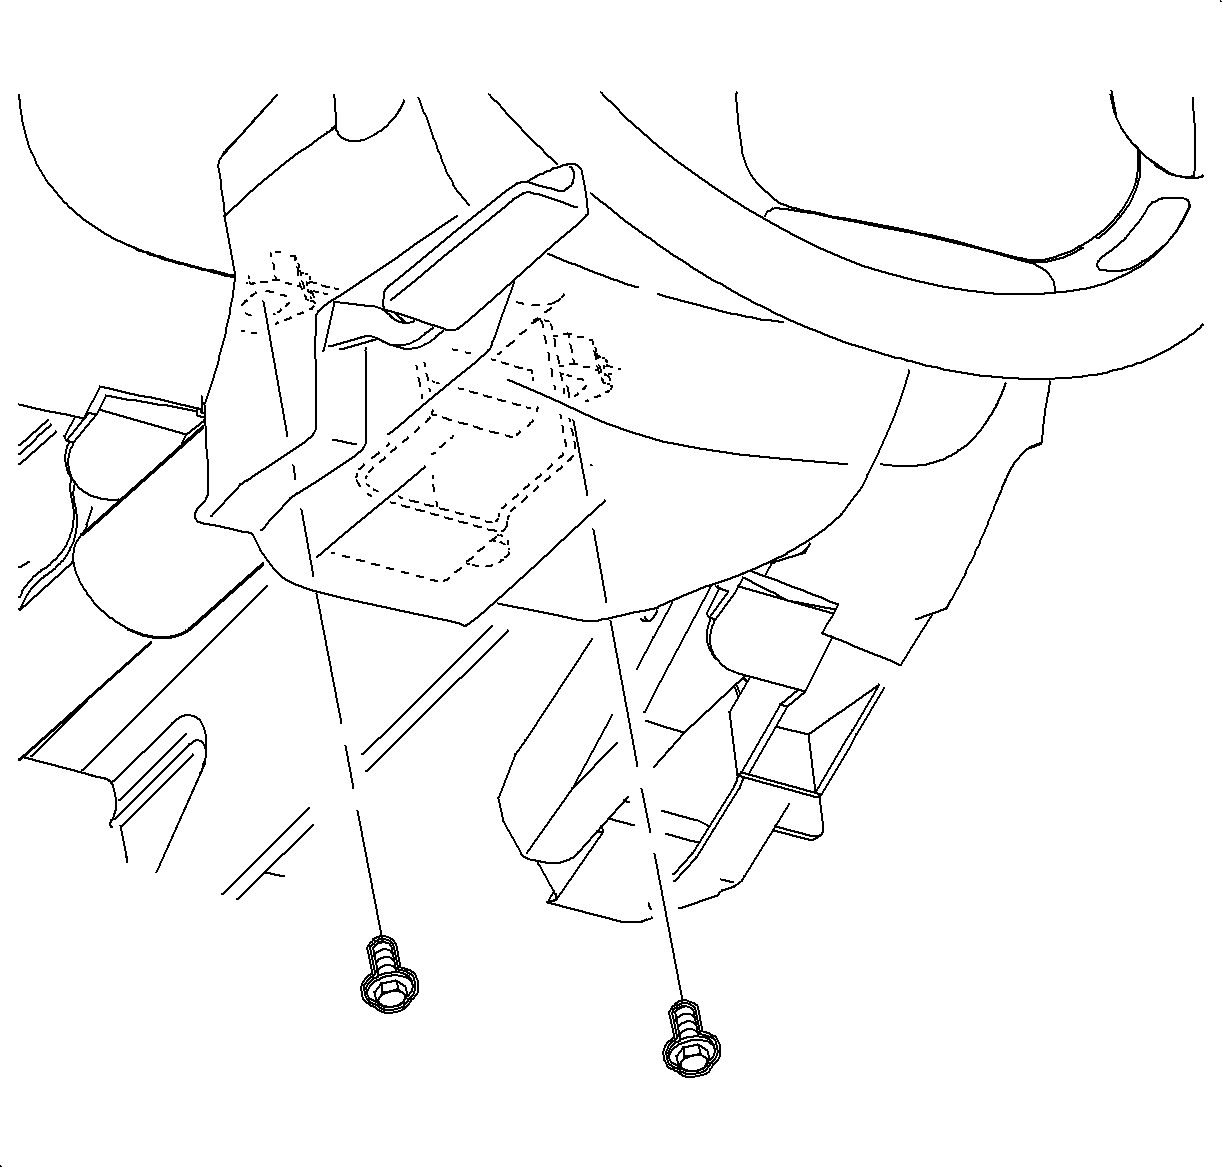
- Remove the screw and ground wire from H-bracket.
- Remove the wiring harness from H-bracket.
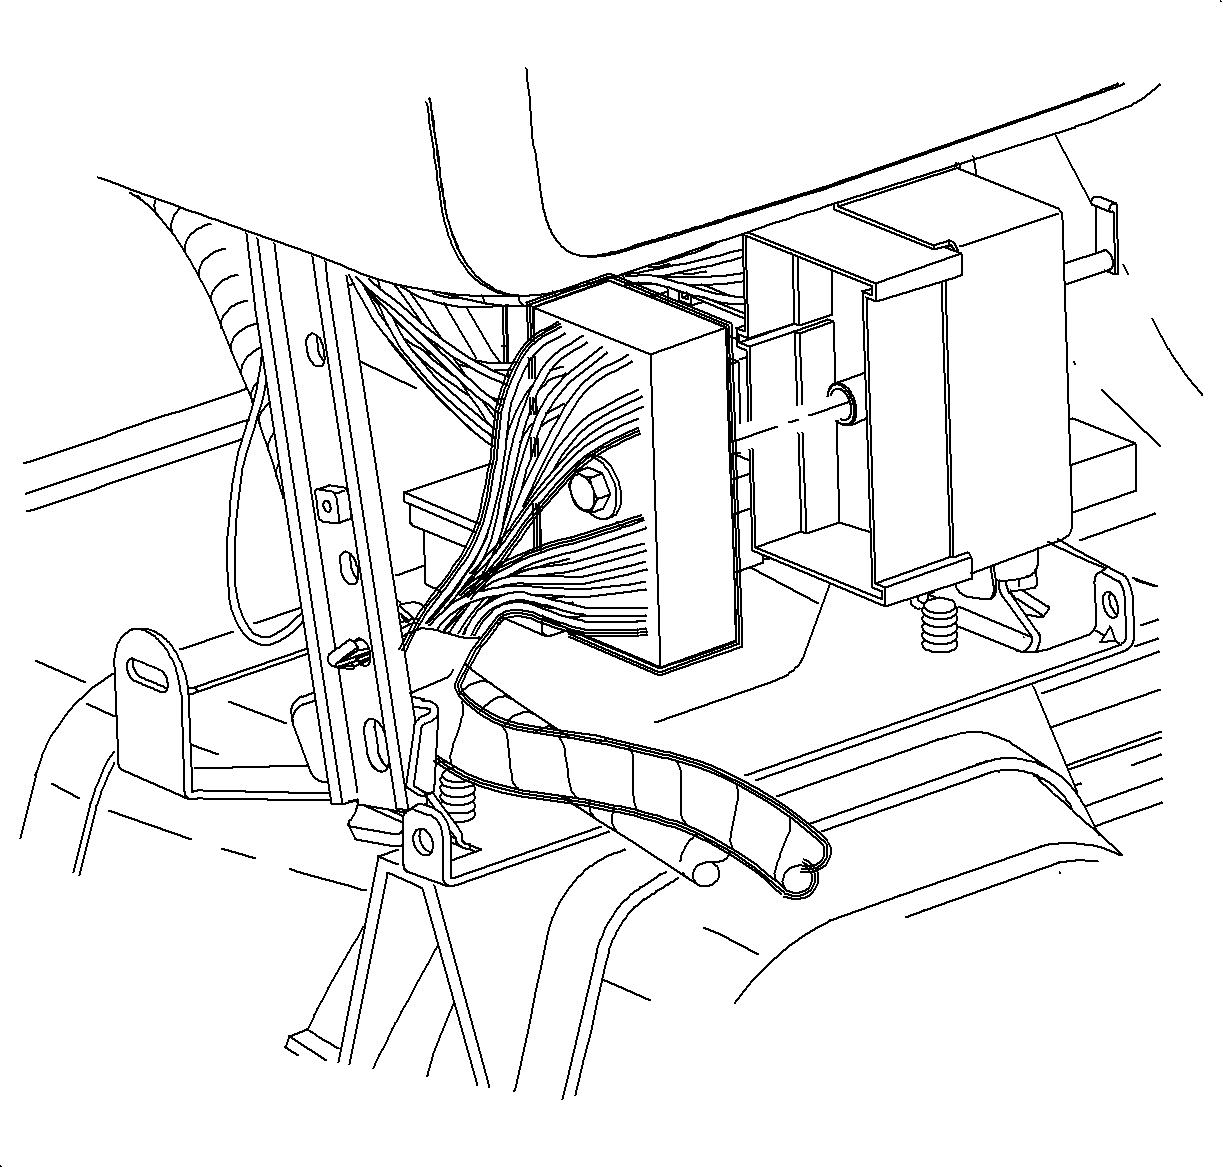
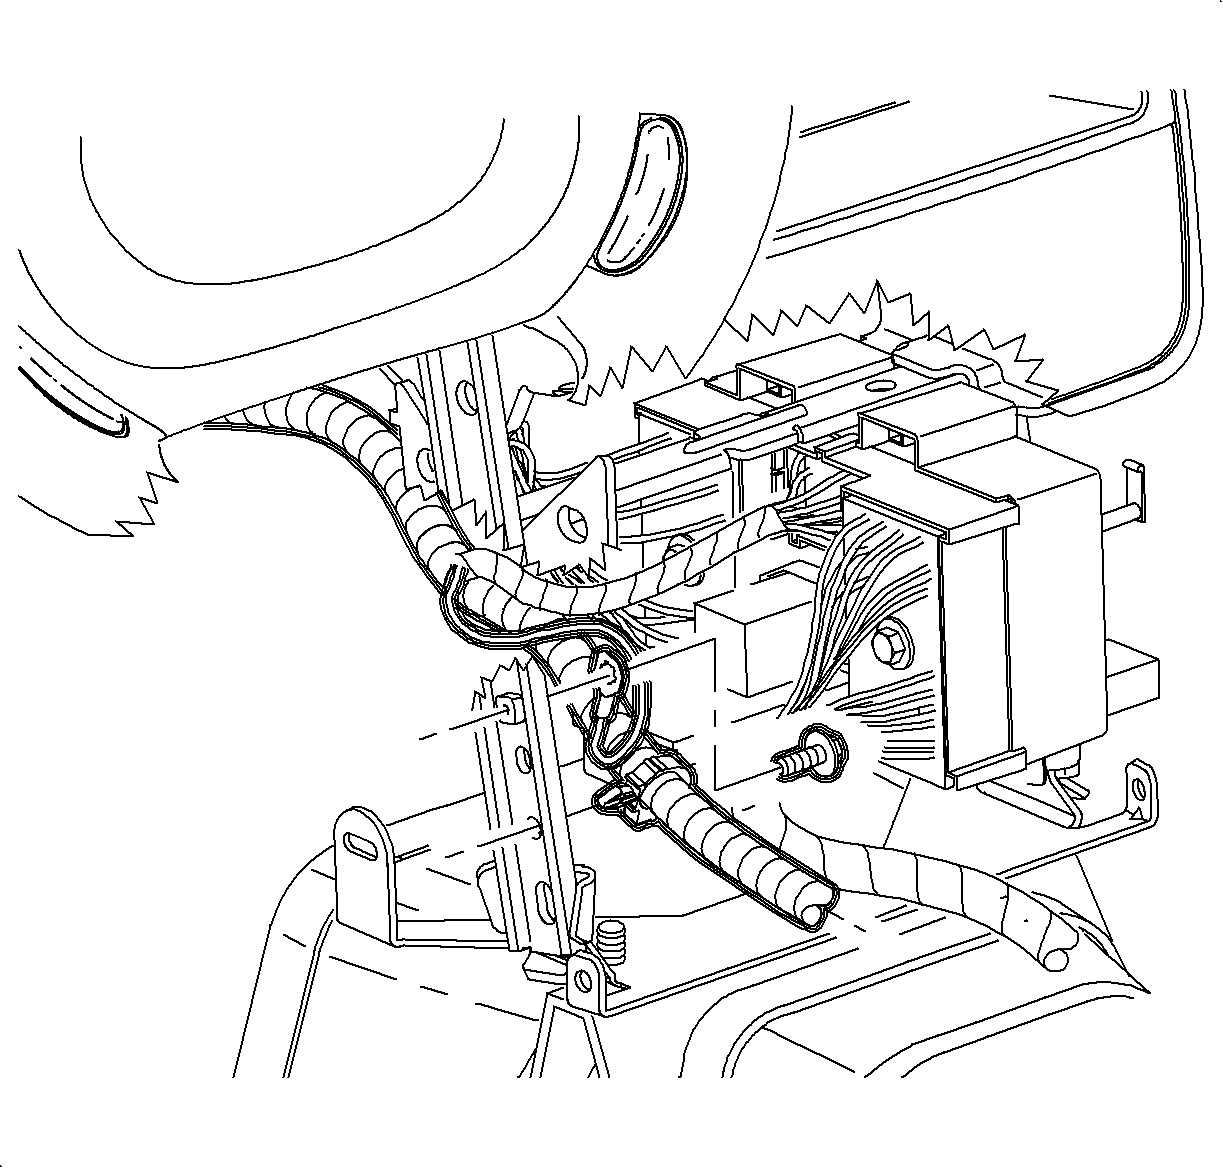
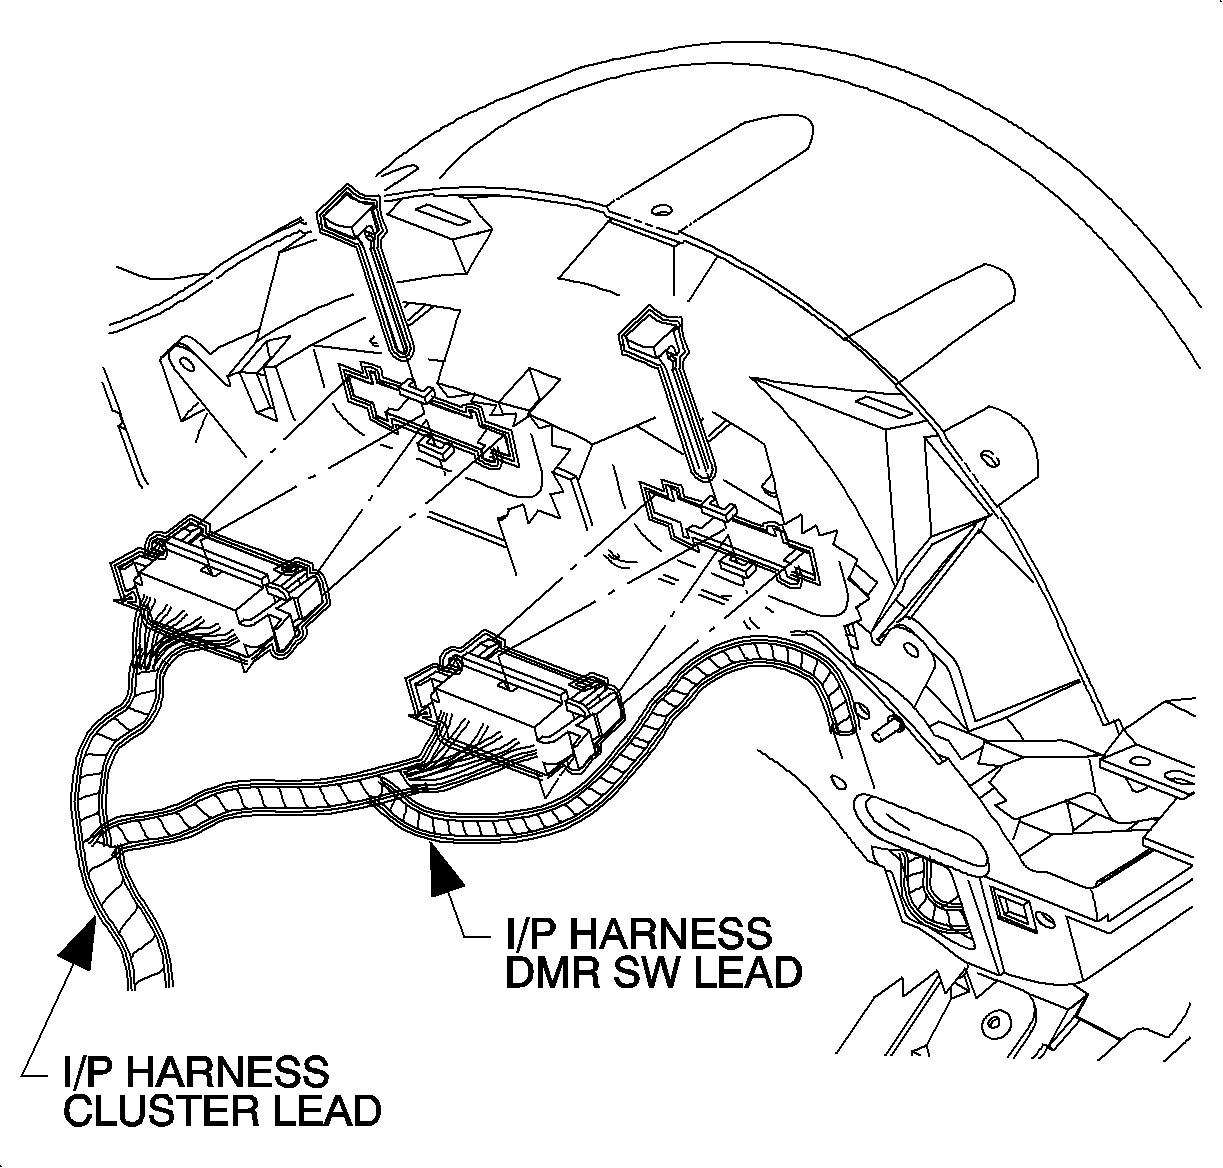
- Remove the screw and disconnect the rear
electrical connector from the instrument panel block screw.
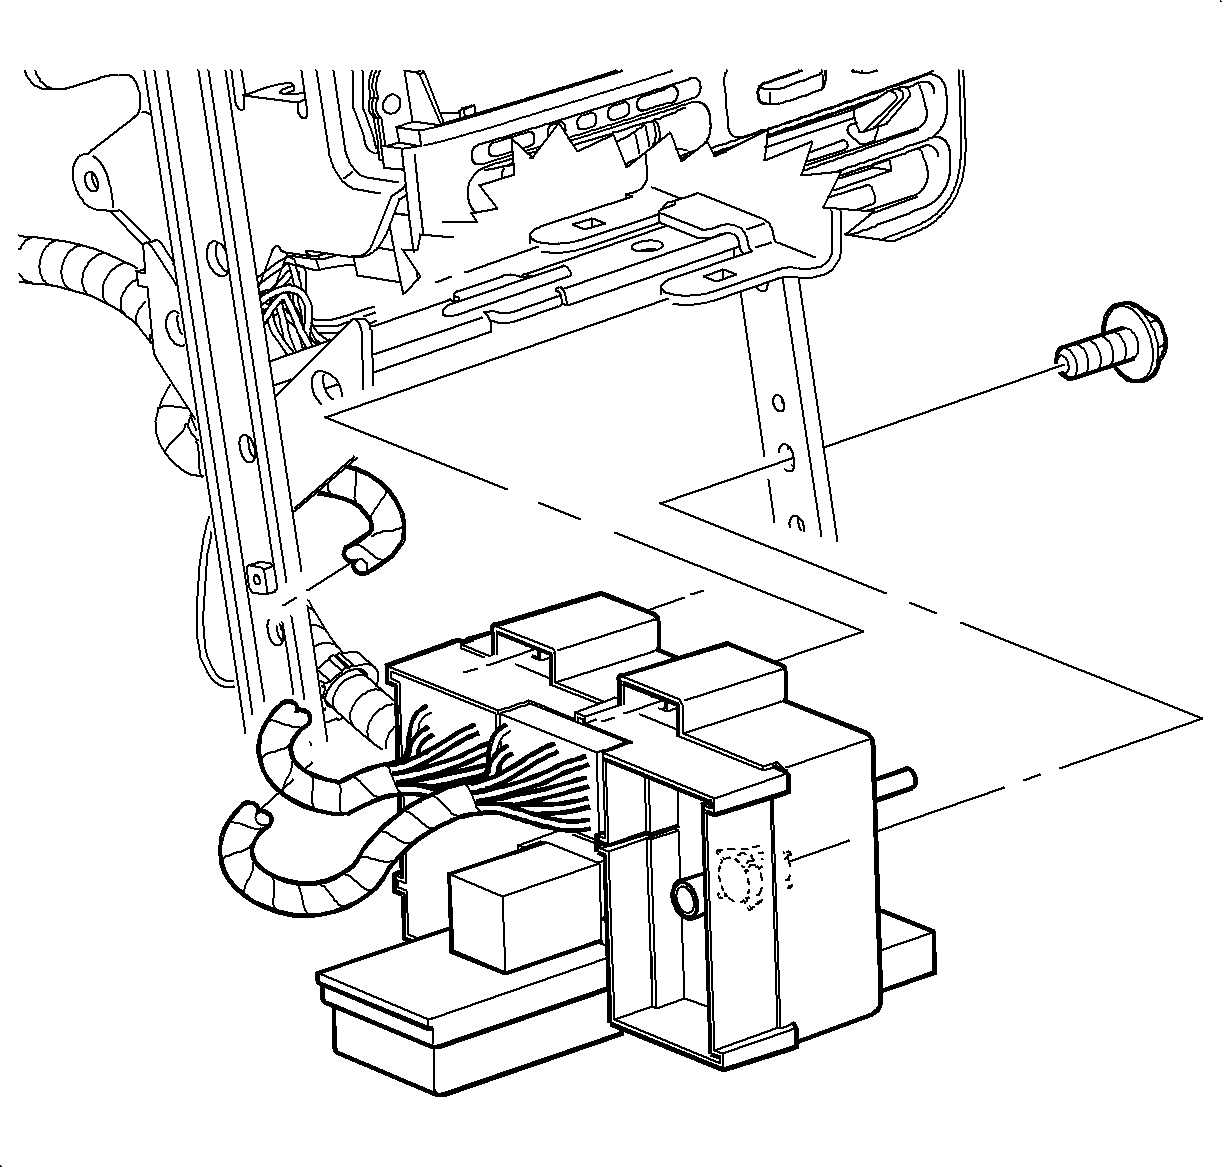
- Remove the instrument
panel junction block screw.
- Insert a small flat blade screwdriver from passenger side, to release
lock tabs on the instrument panel junction block and slide off of mounting pads.
- Feed the instrument panel junction block through H-brackets towards the
front of the car.
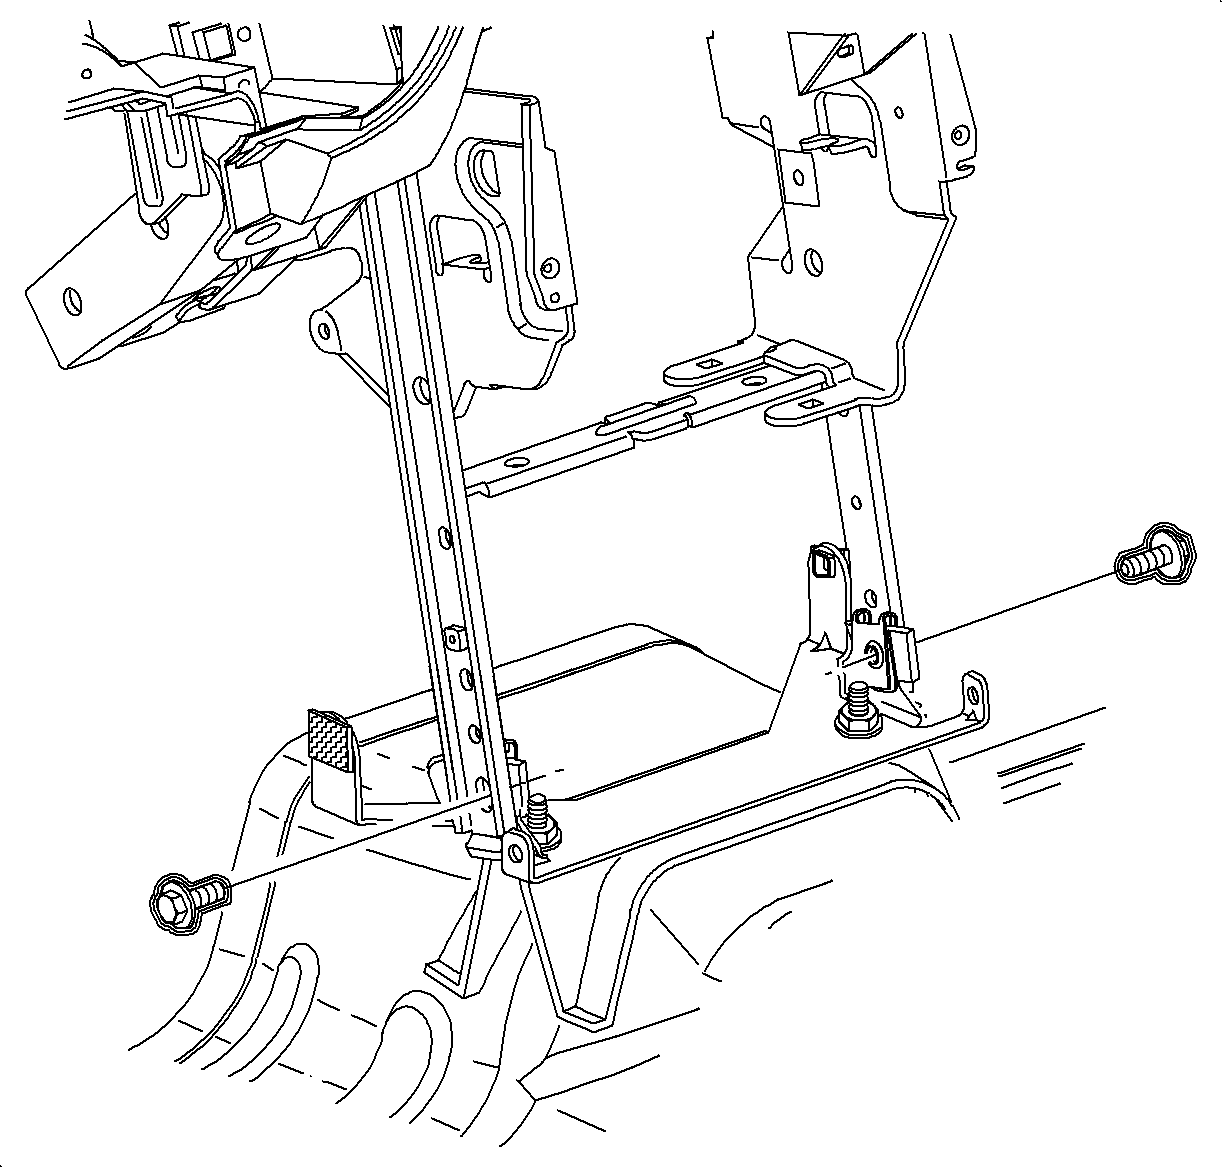
- Remove the bolts
from H-Bracket.
- Remove the screws from the data link connector(DLC)
and steering column filer panel.
- Remove the hood release cable from the lever
by releasing the cable housing, then rotating the cable downward to cutout.
- Remove the steering column filler panel.
- Disconnect the ignition switch electrical connector at the right steering column
bolt.
- Remove the steering column bolts and the lower column on the front seat.
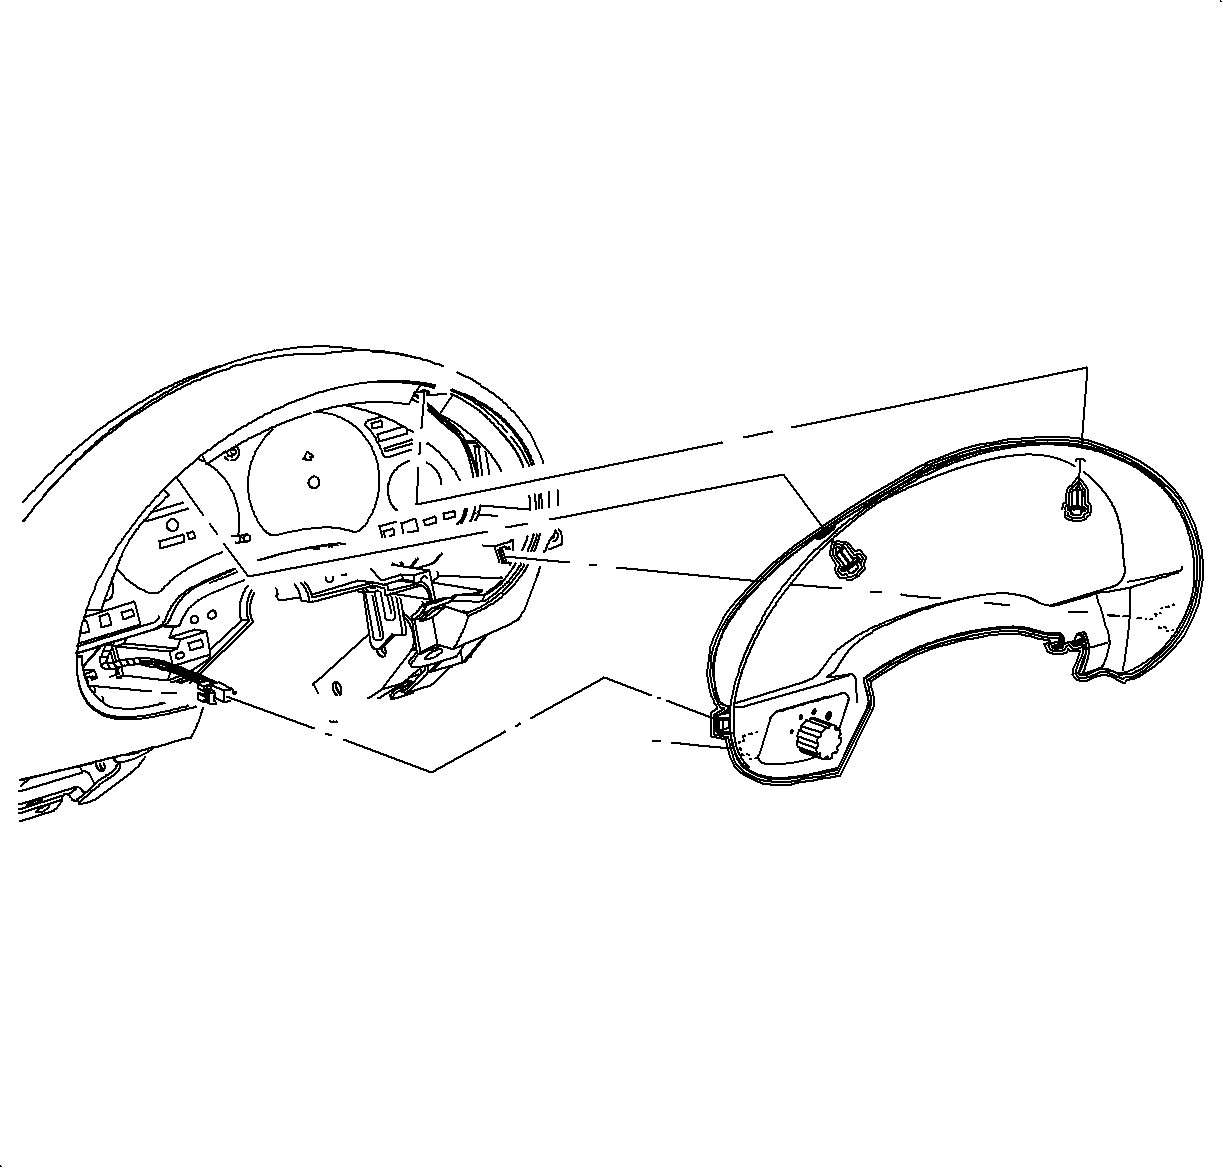
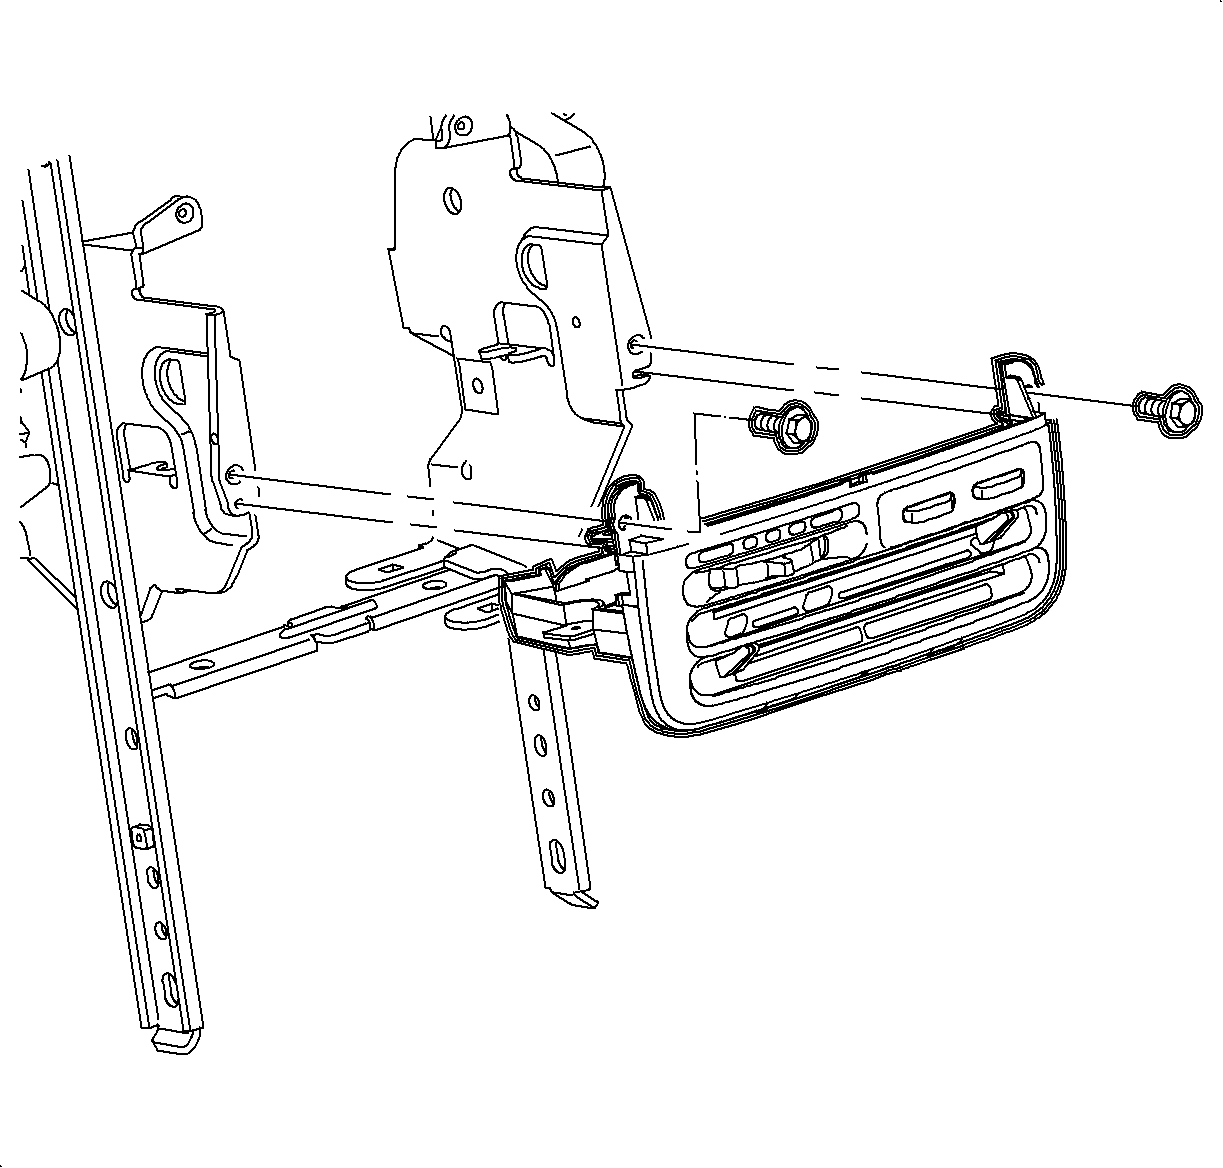
- Remove the fasteners
and pull the instrument cluster trim bezel rearward at clip locations.
- Disconnect the electrical connector from the instrument panel dimmer switch.
- Remove the connector position assurance (CPA) devices
and disconnect the electrical connectors from the instrument cluster by squeezing
the tabs on each side of connector.
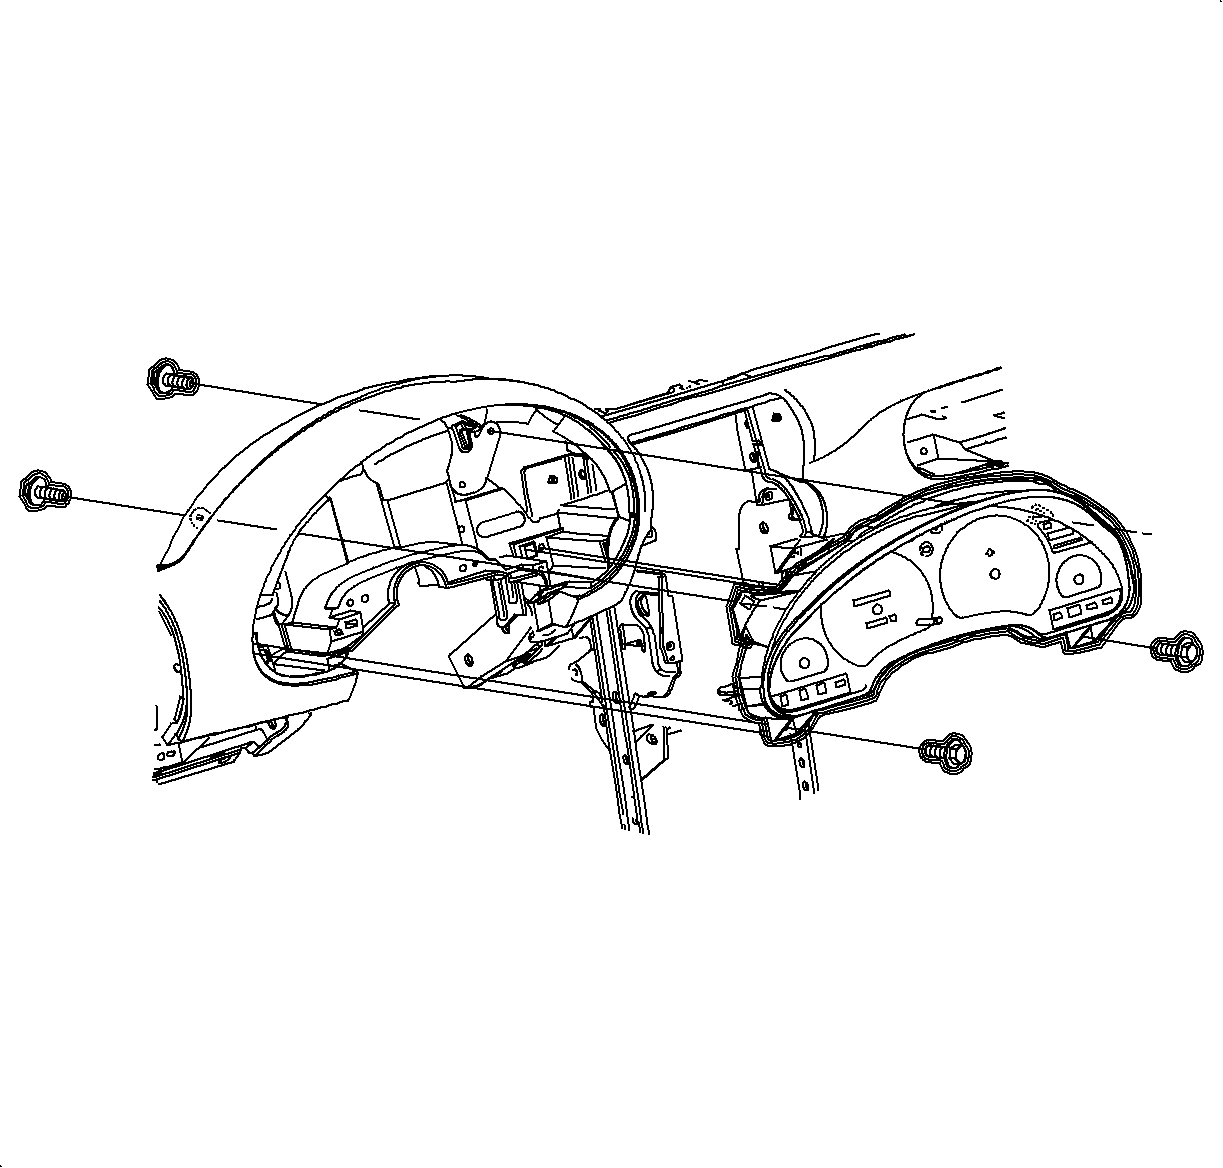
- Remove the front
and rear instrument cluster screws.
- Remove the instrument cluster.
- Remove the dimmer switch wiring harness from the instrument
panel reinforcement.
- Remove the passenger side air bag harness from cross car beam and energy
absorber.
- Remove the passenger
side air bag harness from the cross car beam and energy absorber.
- Remove
the glove box door stops by rotating 90 degrees and let door hang down.
- Remove the screws from the glove box and compartment and striker.
- Remove the glove box assembly by pulling rearward at the clip locations.
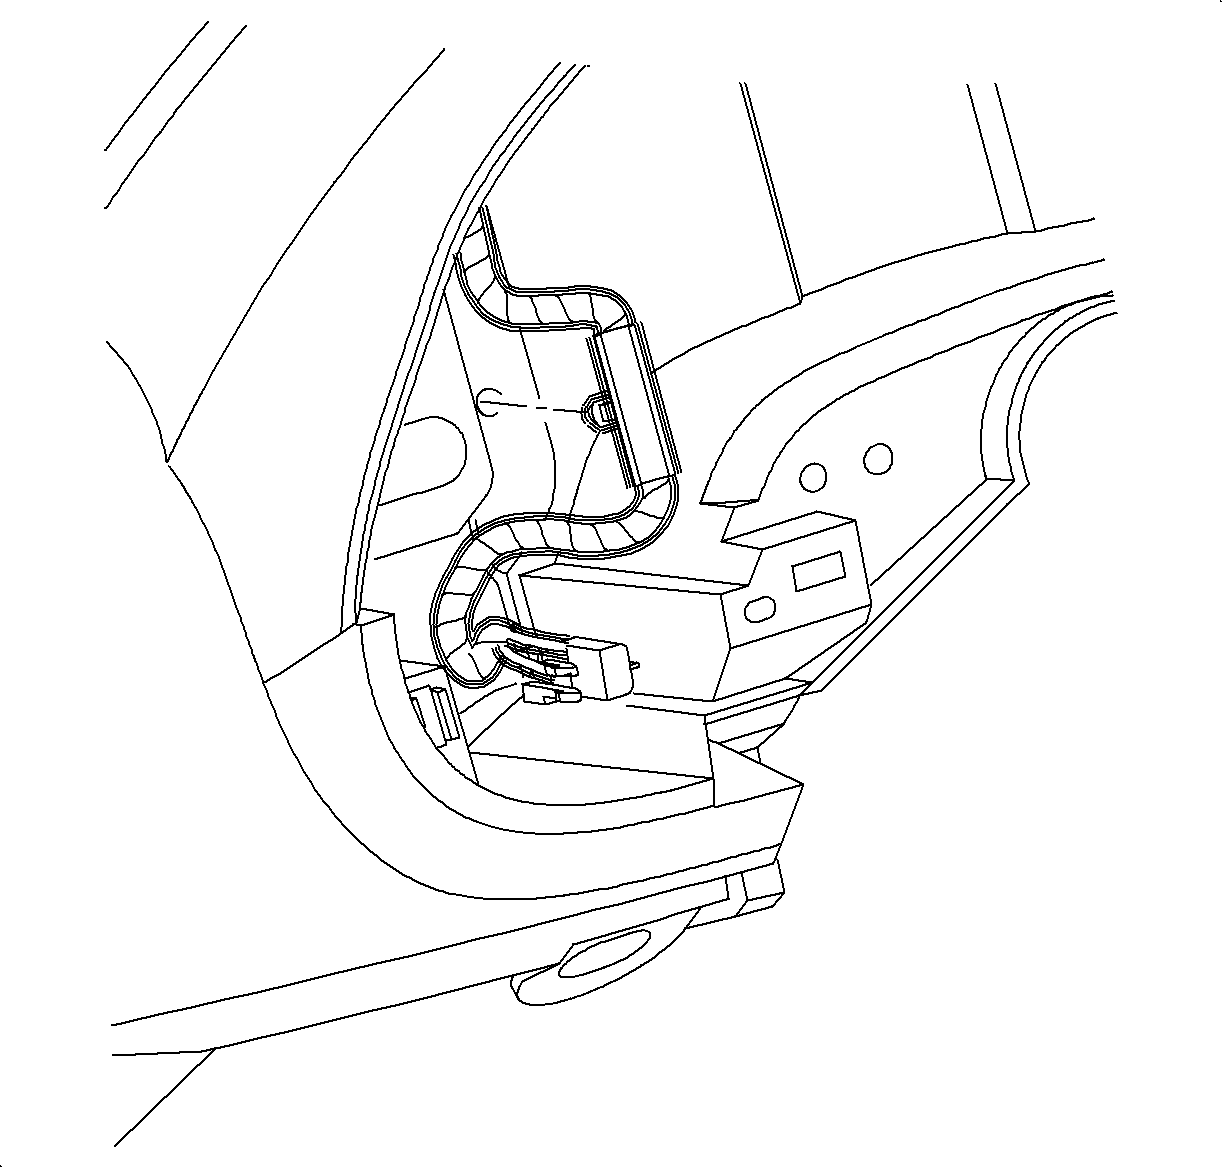
- Disconnect the antenna cable at the lower right side of the instrument panel
reinforcement.

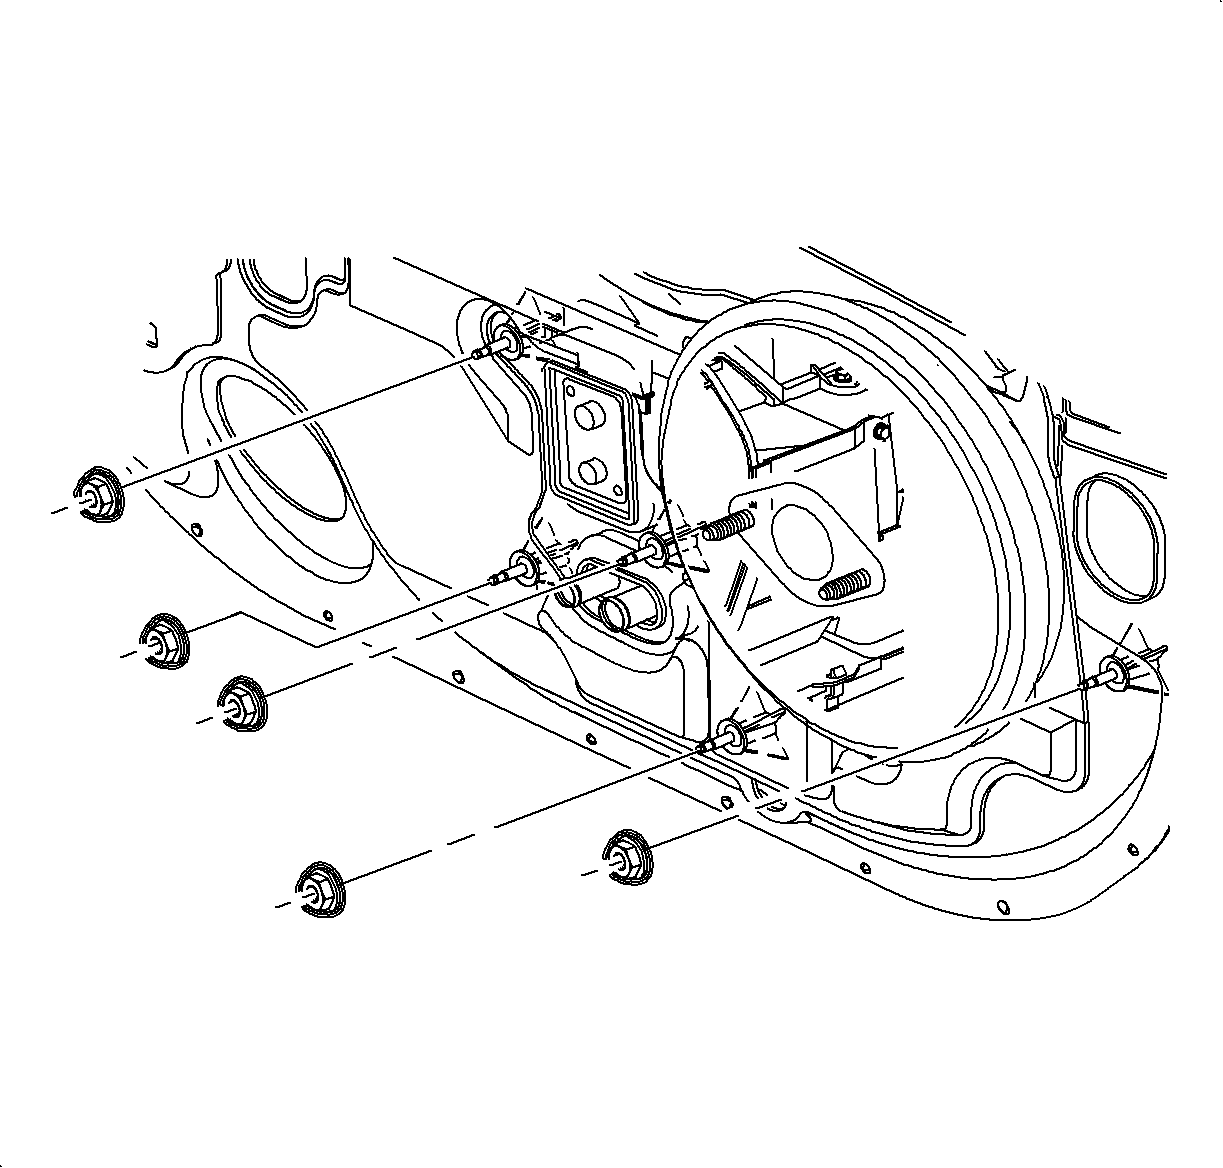
- Use the illustration to determine fastener location and direction of removal.
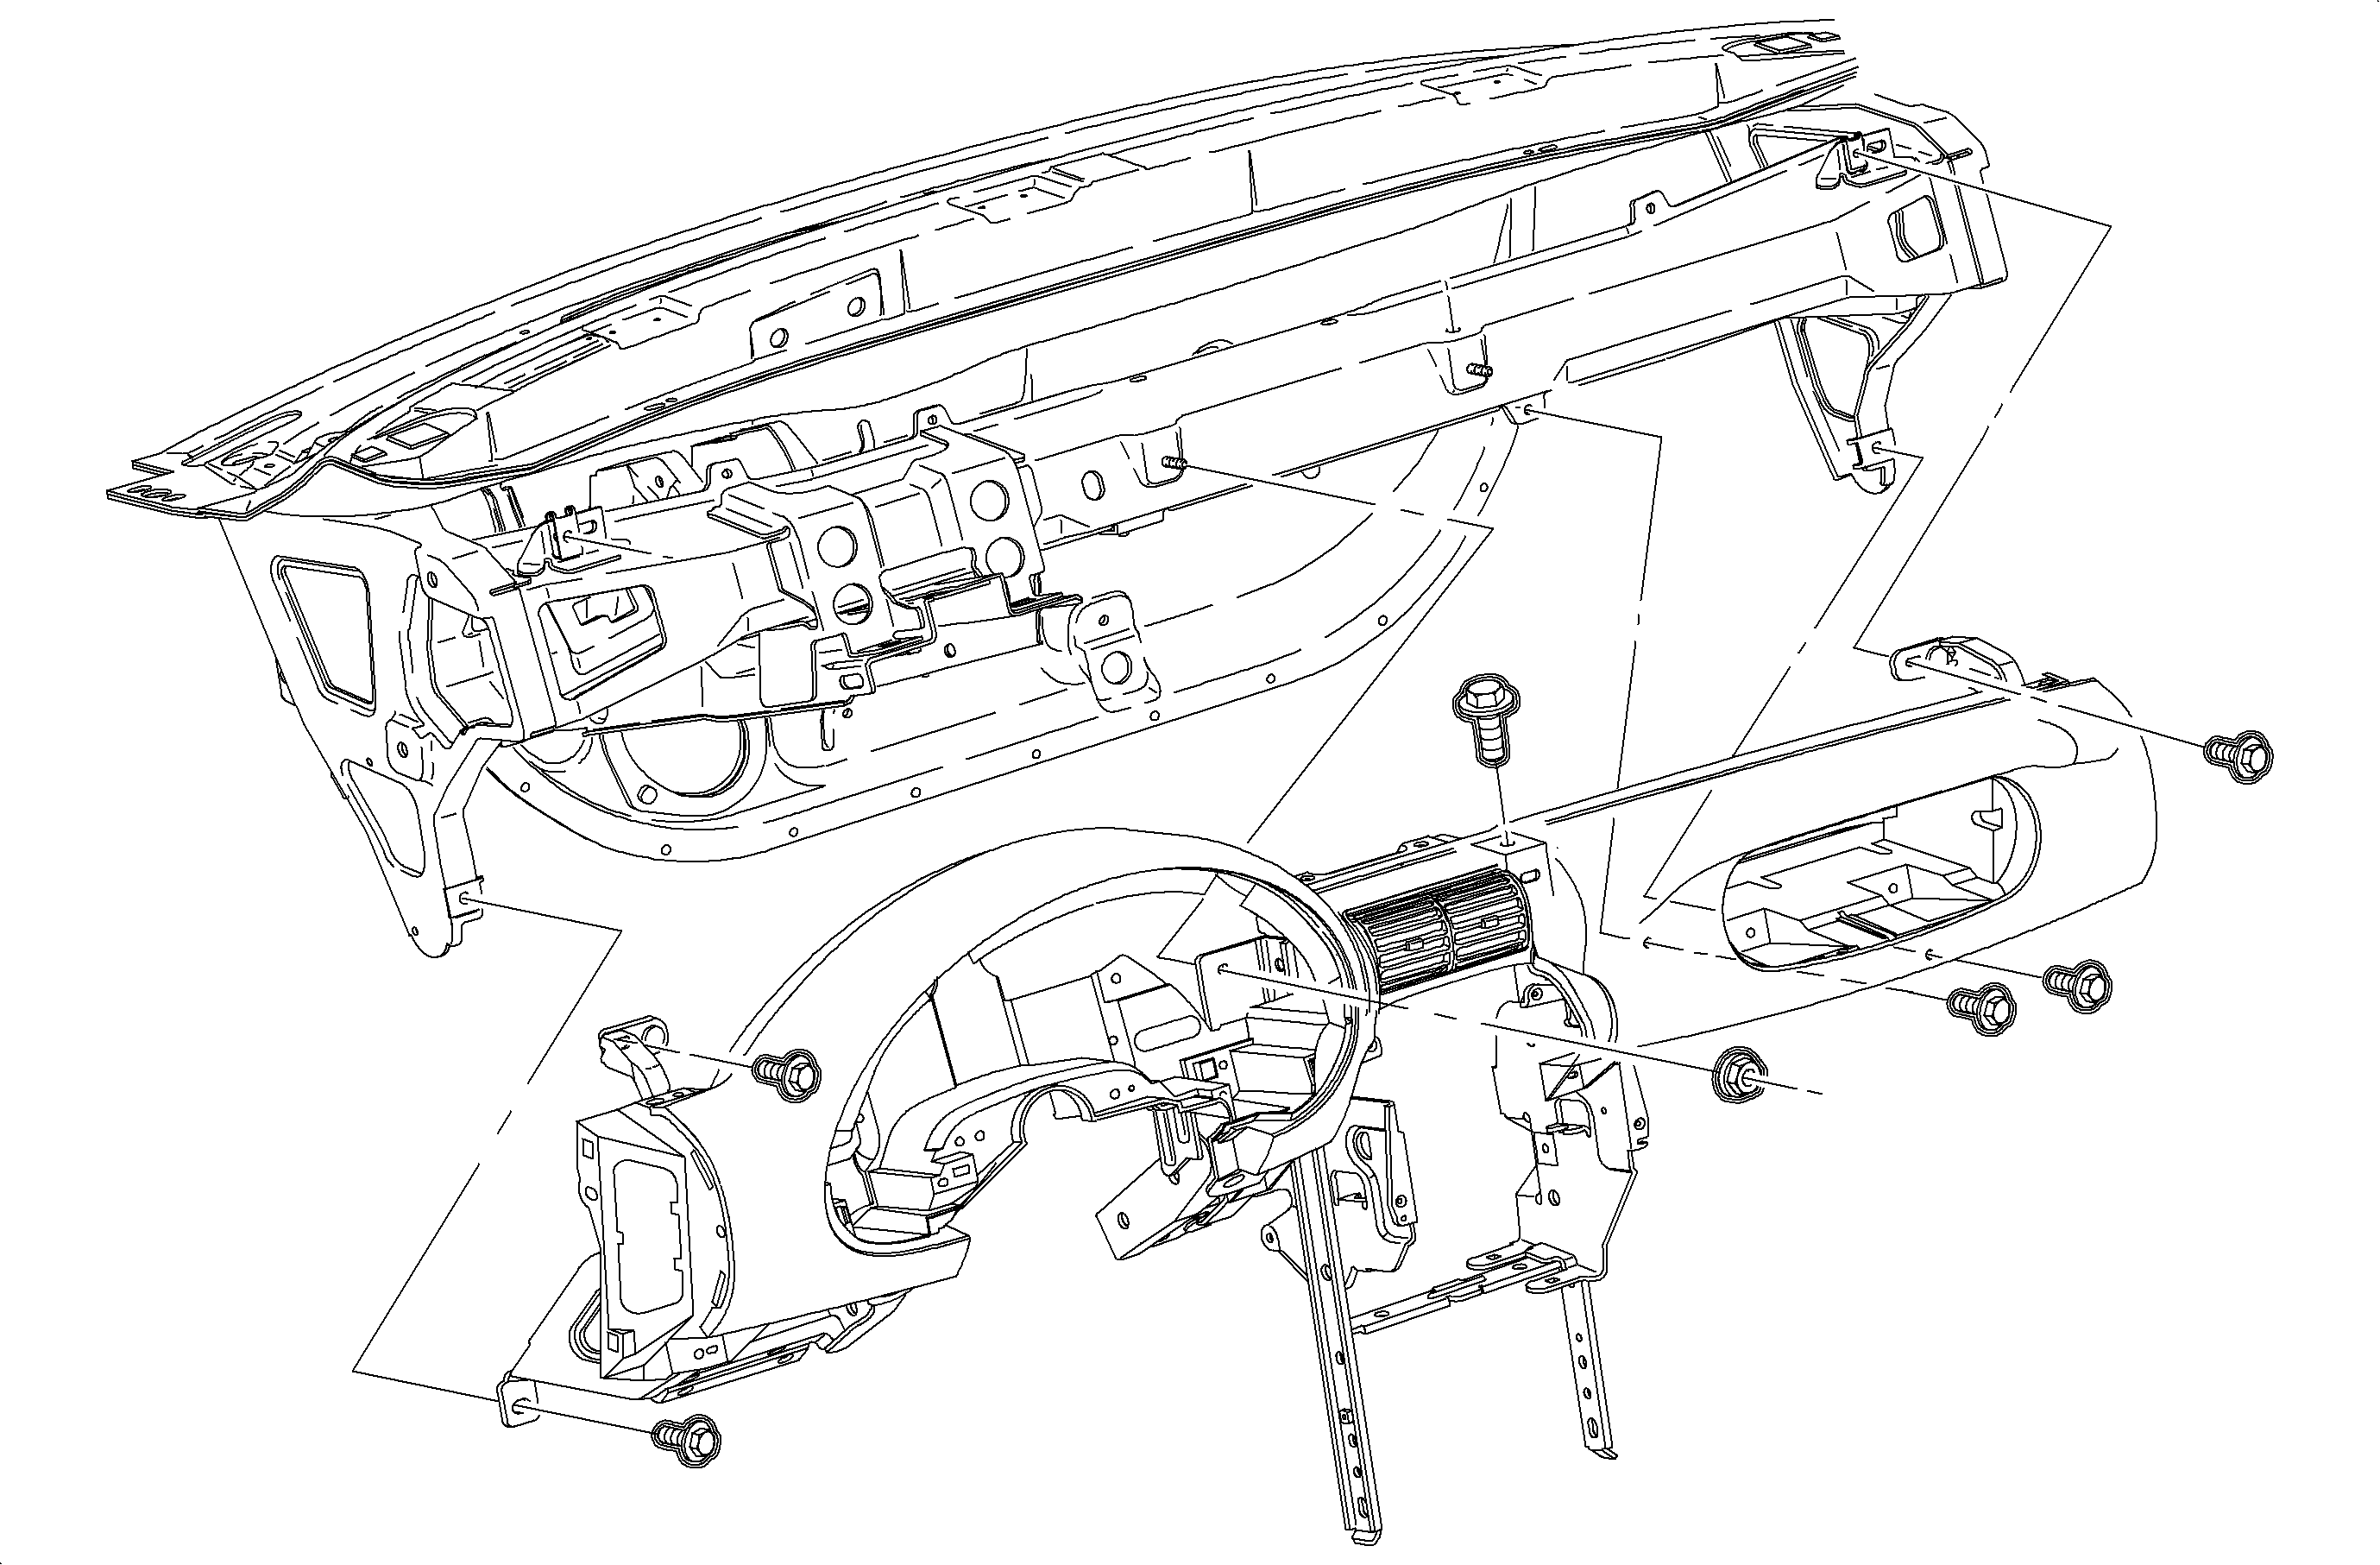
- Remove the nut, screws and instrument panel pad/reinforcement assembly.
- Remove the I/P lower closeout panel by pulling out at the top edge, and then
rotating the top downward.

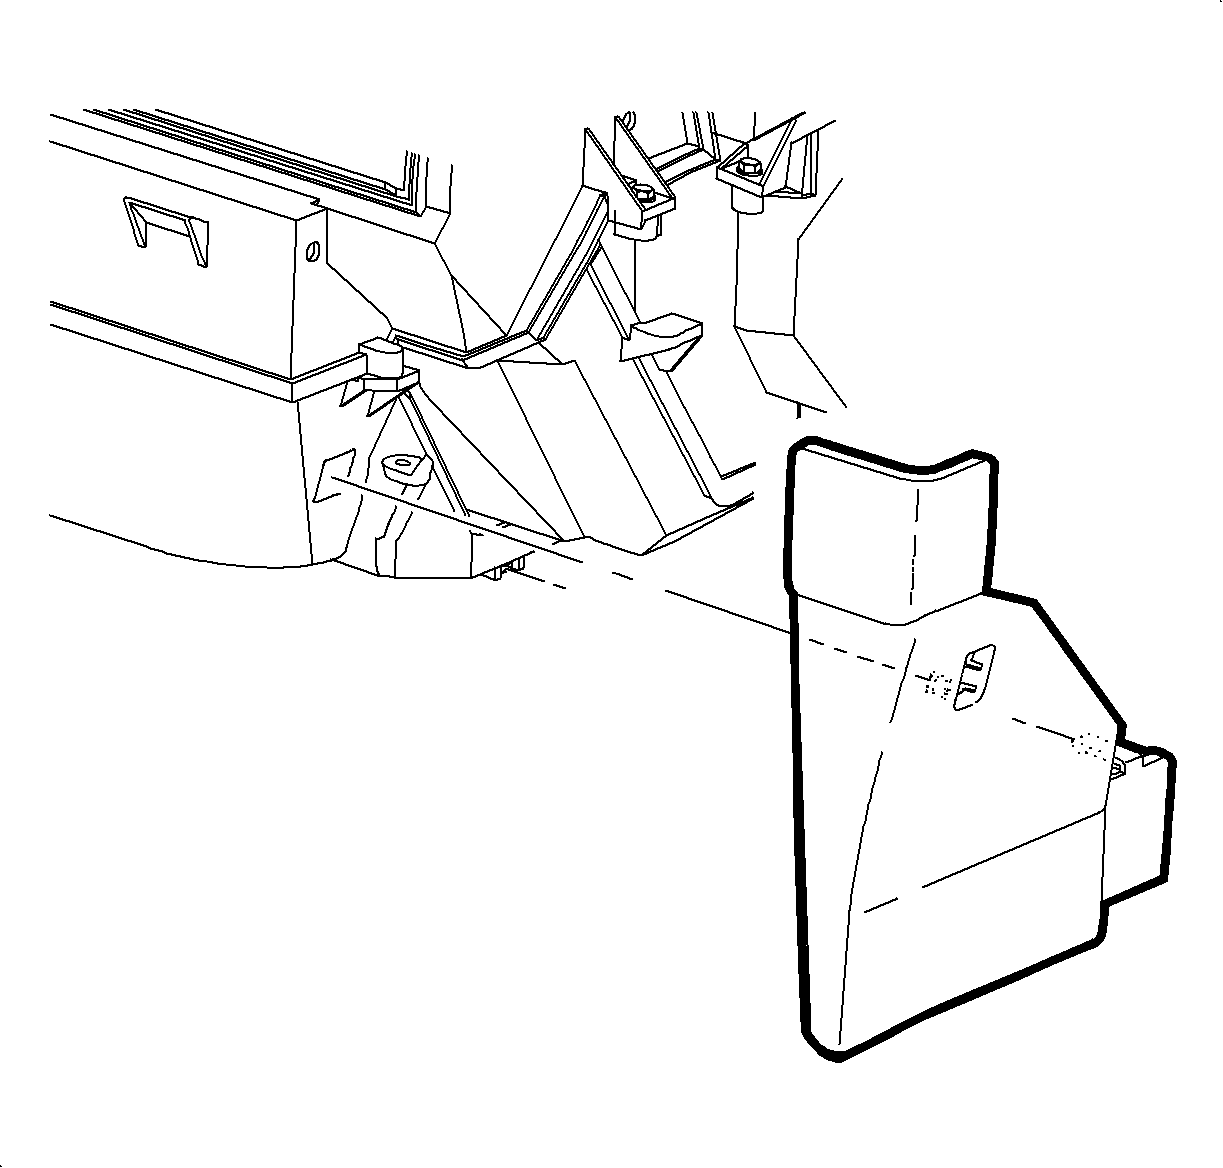
- For Sedans and Wagons, remove the lower heater duct. (Refer to Heater Core Removal"
in this service manual.)
- Lift rear floor heater duct off of the mounting bolt and remove.
Notice
Be careful not to damage foam seal.
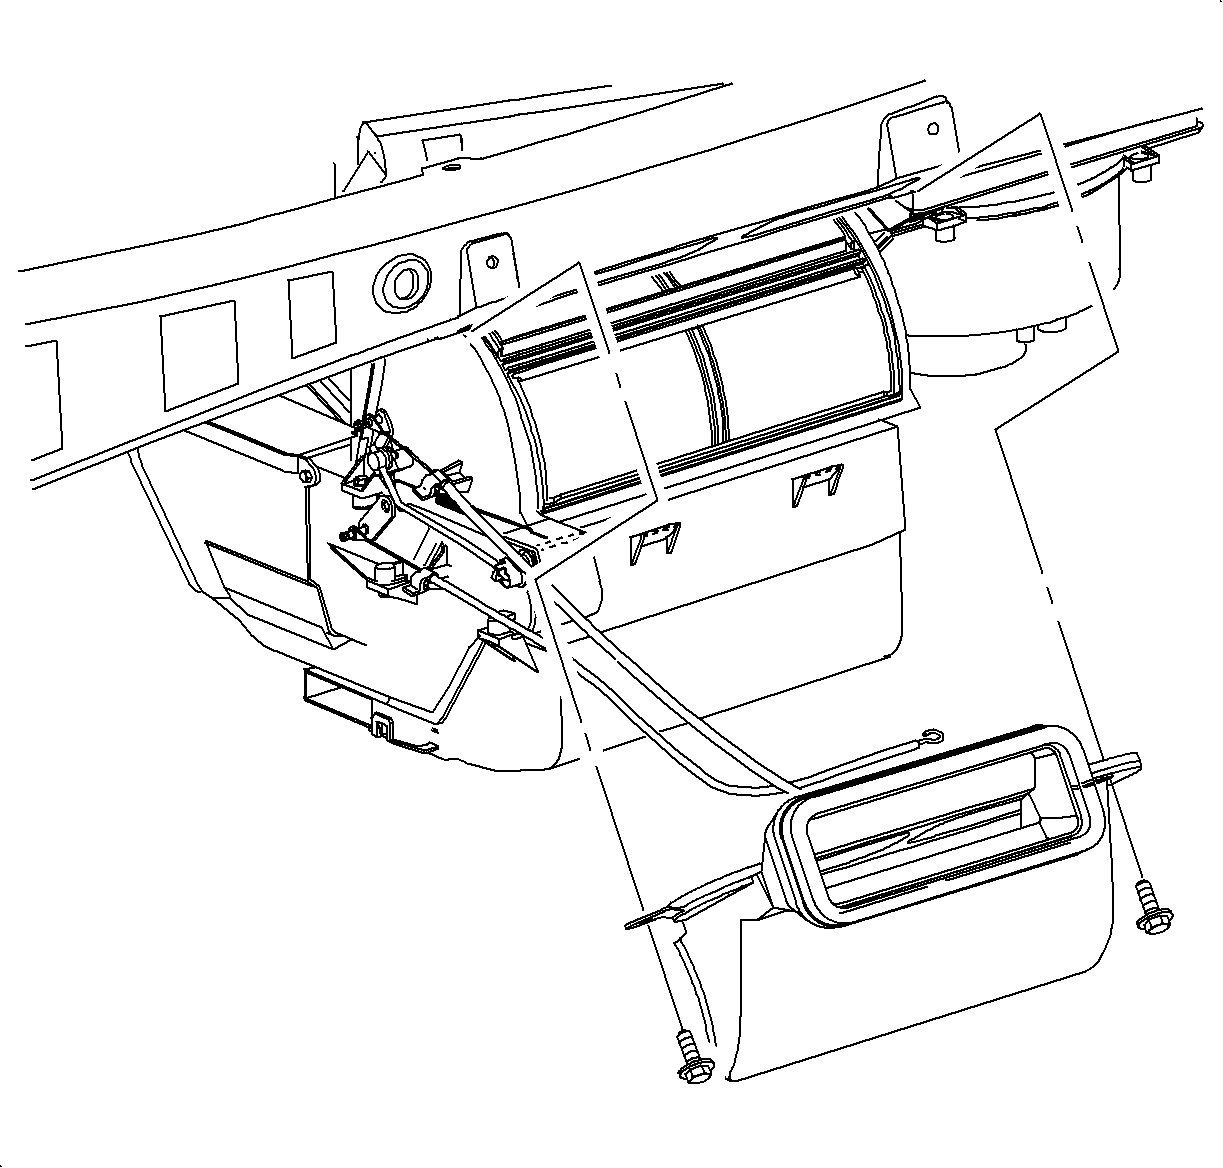
- Remove the screws and center air outlet duct.
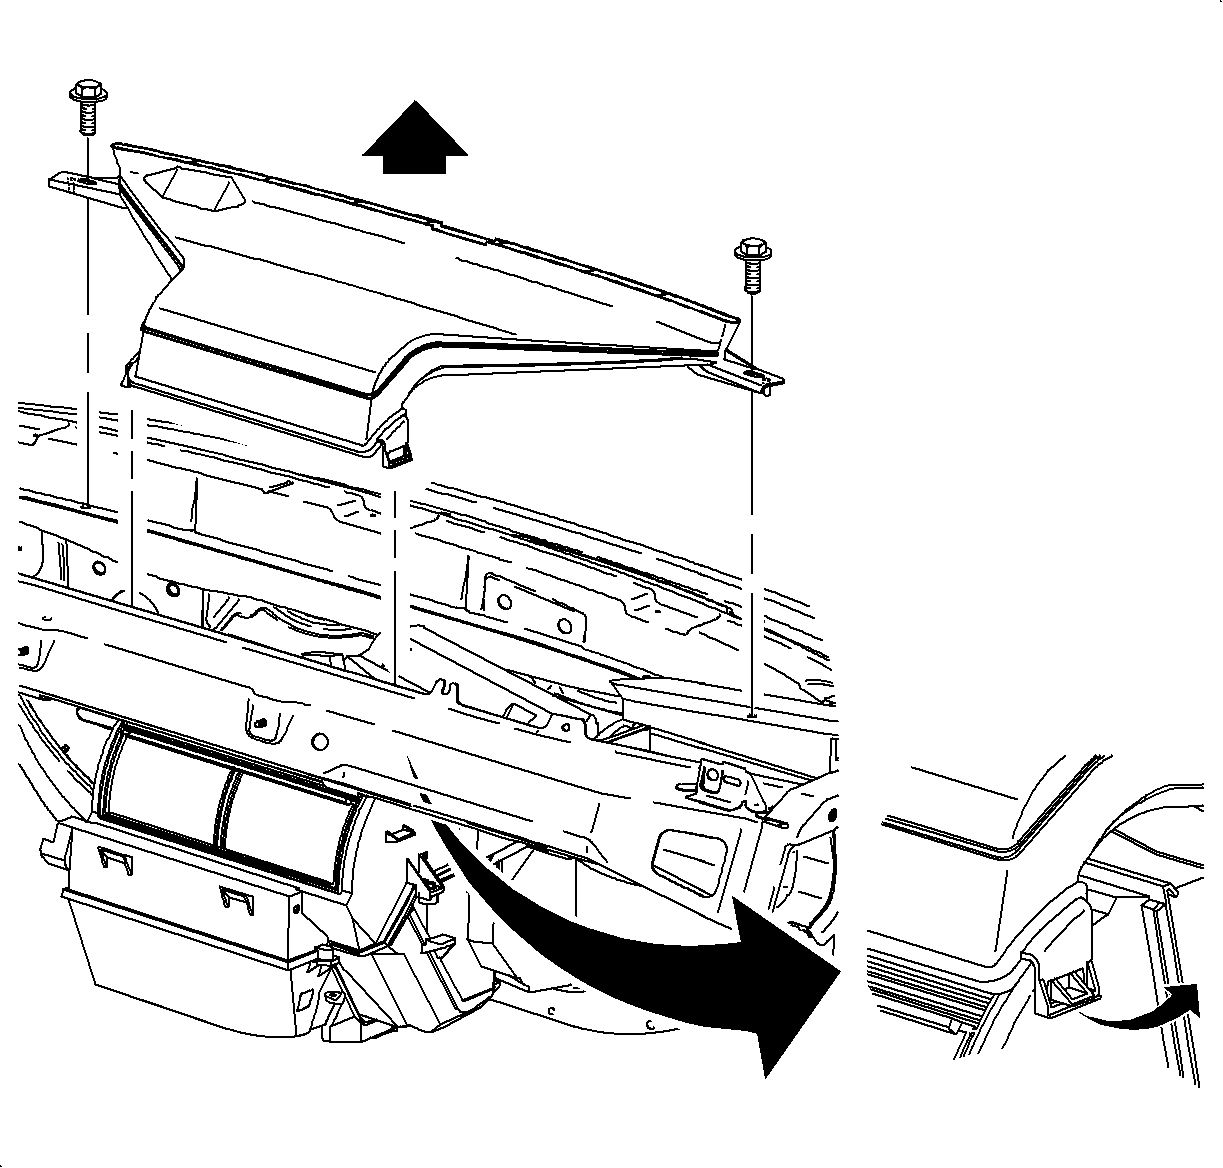
- Remove the screws and unsnap windshield defroster nozzle from the mode valve
assembly
Important
For SC1 and SC2 vehicles, leave the defroster
nozzle in place after disconnecting. Nozzle cannot be removed because of windshield
rake angle.
- Remove the defroster nozzle by rotating front of nozzle up and away from the
windshield.
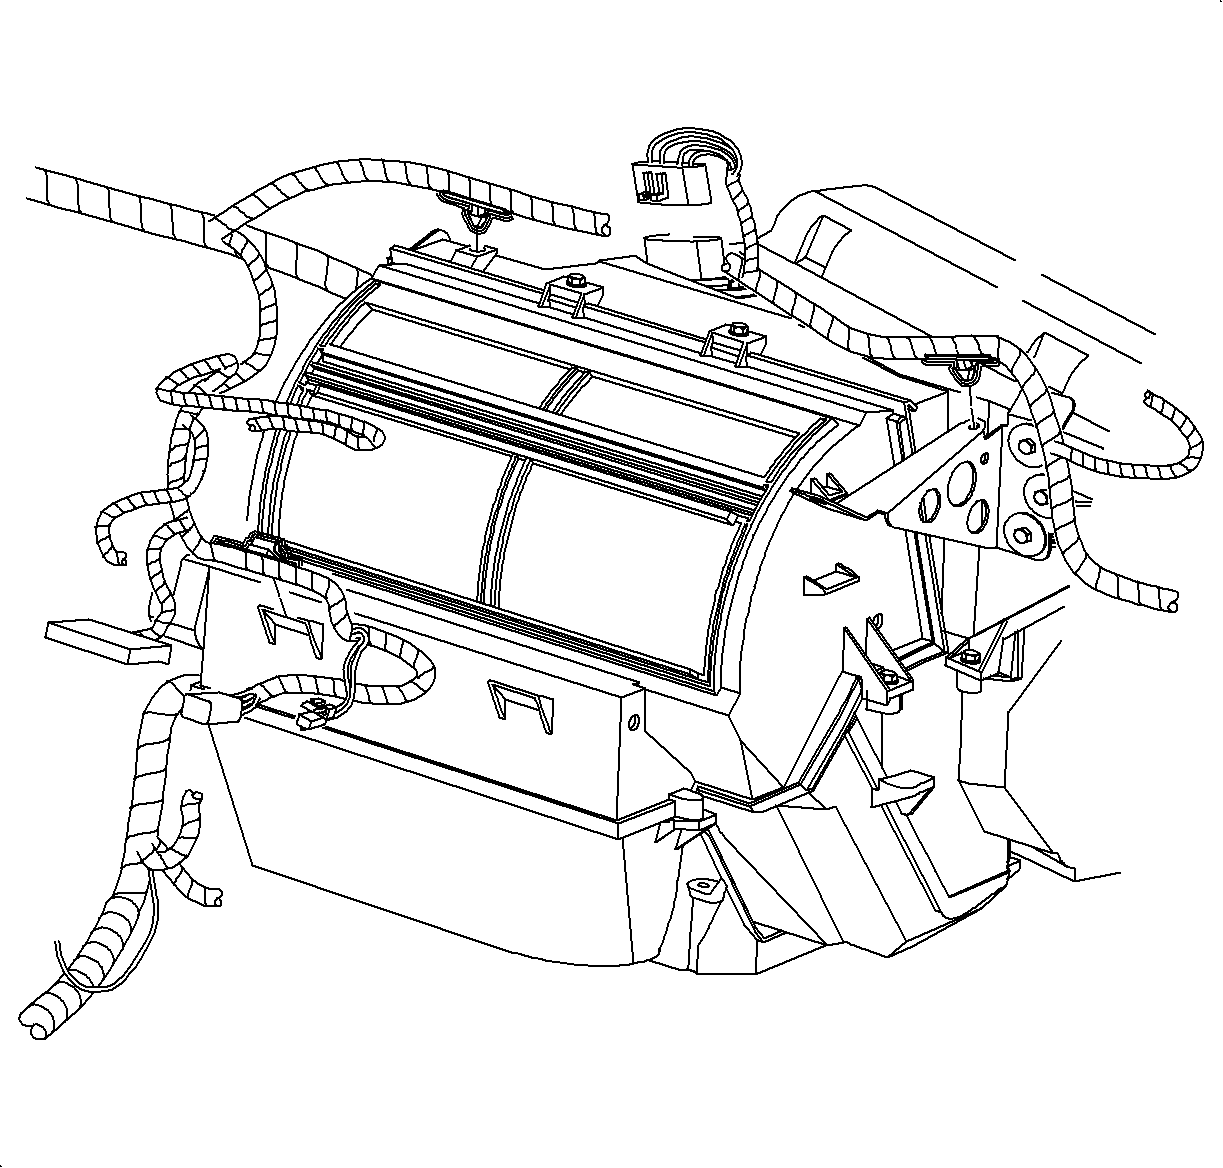
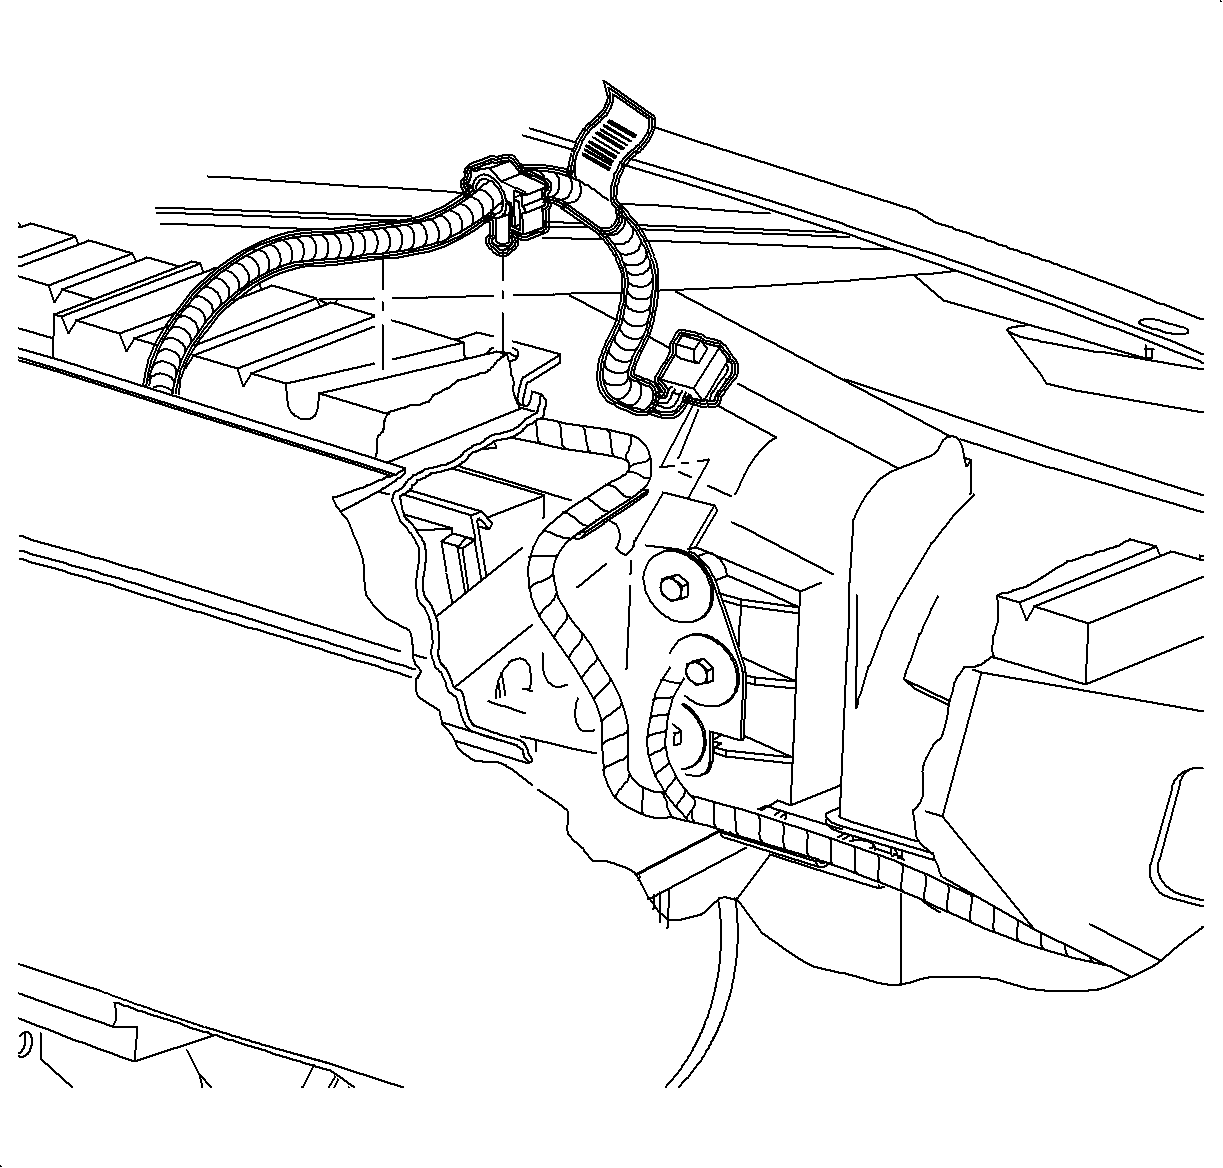
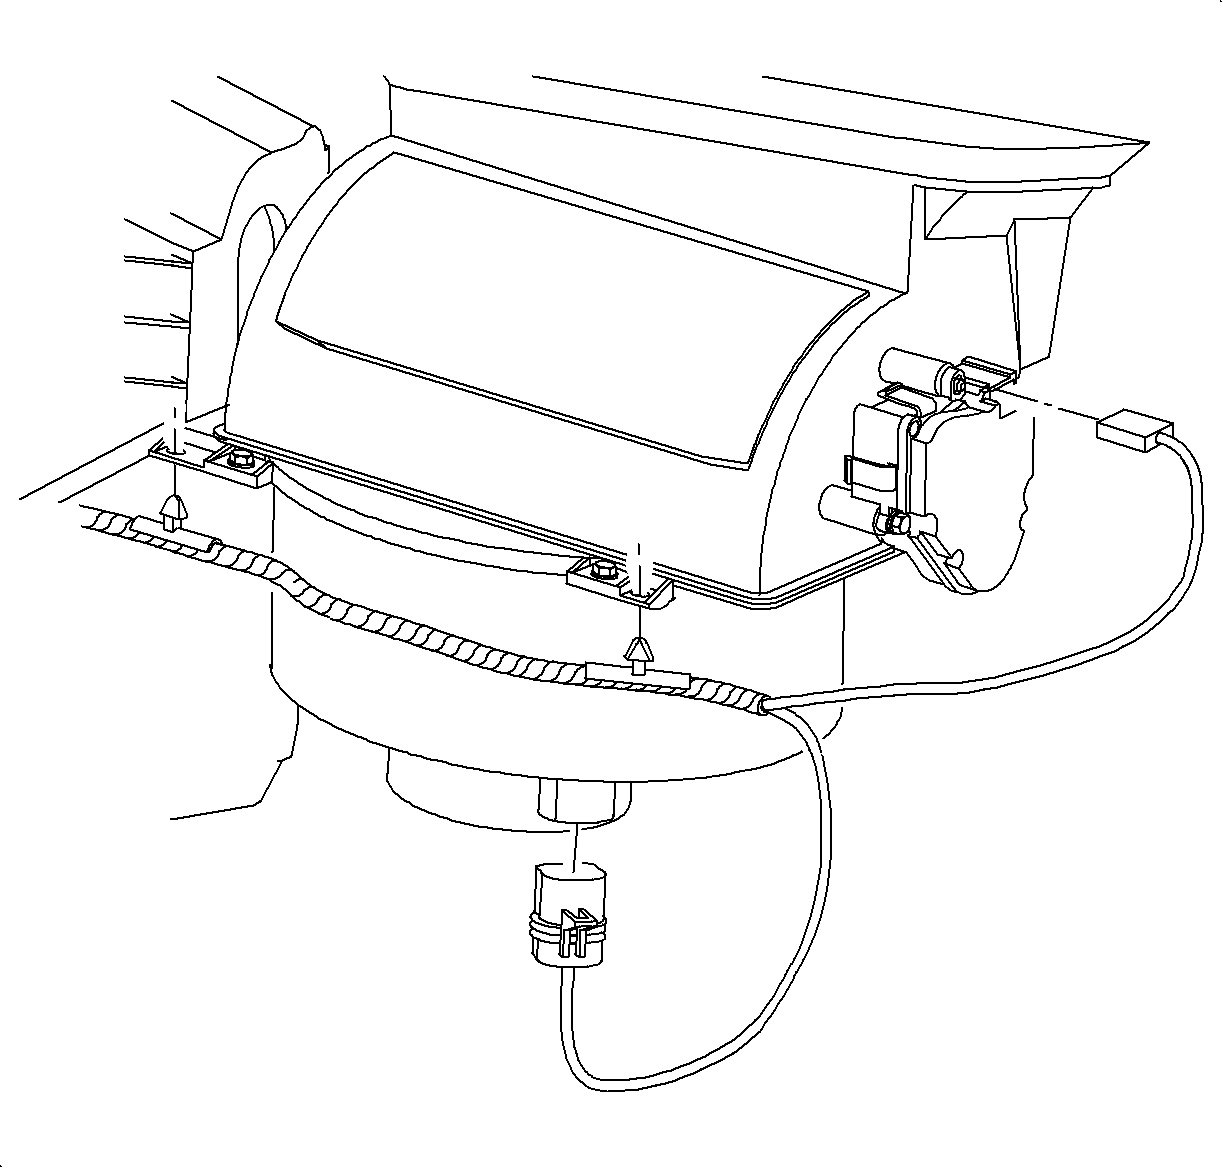
- Disconnect the blower motor resistor connector.
- Remove the wire harness and hold down clips from the HVAC module.

- Disconnect the blower motor and recirc motor electrical connectors.
- Remove the wiring harness and hold down the clips from the HVAC module.
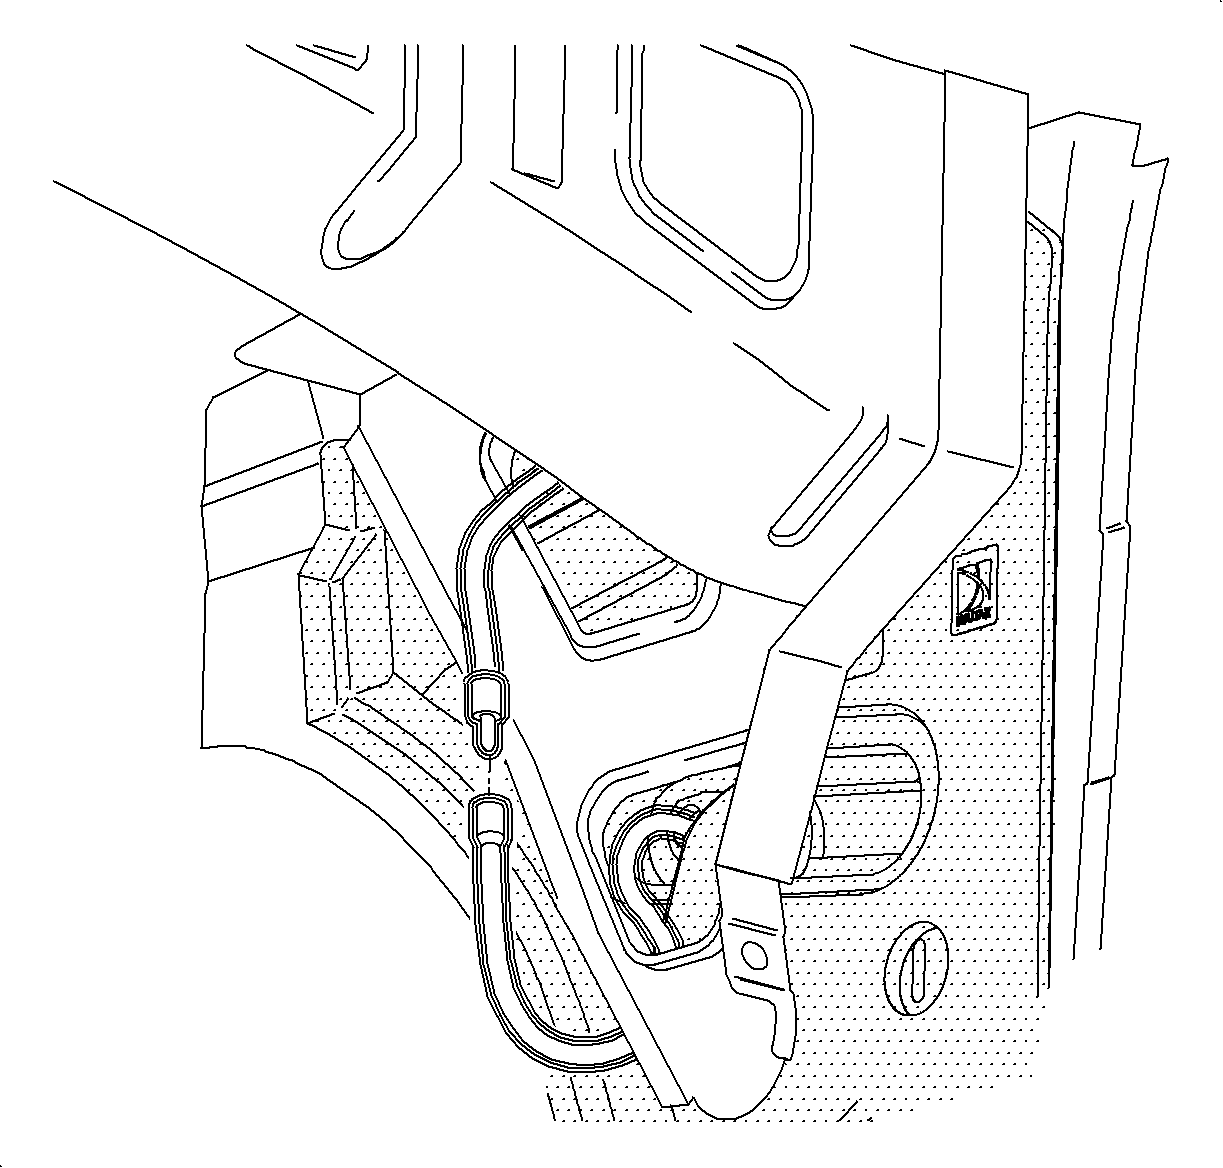
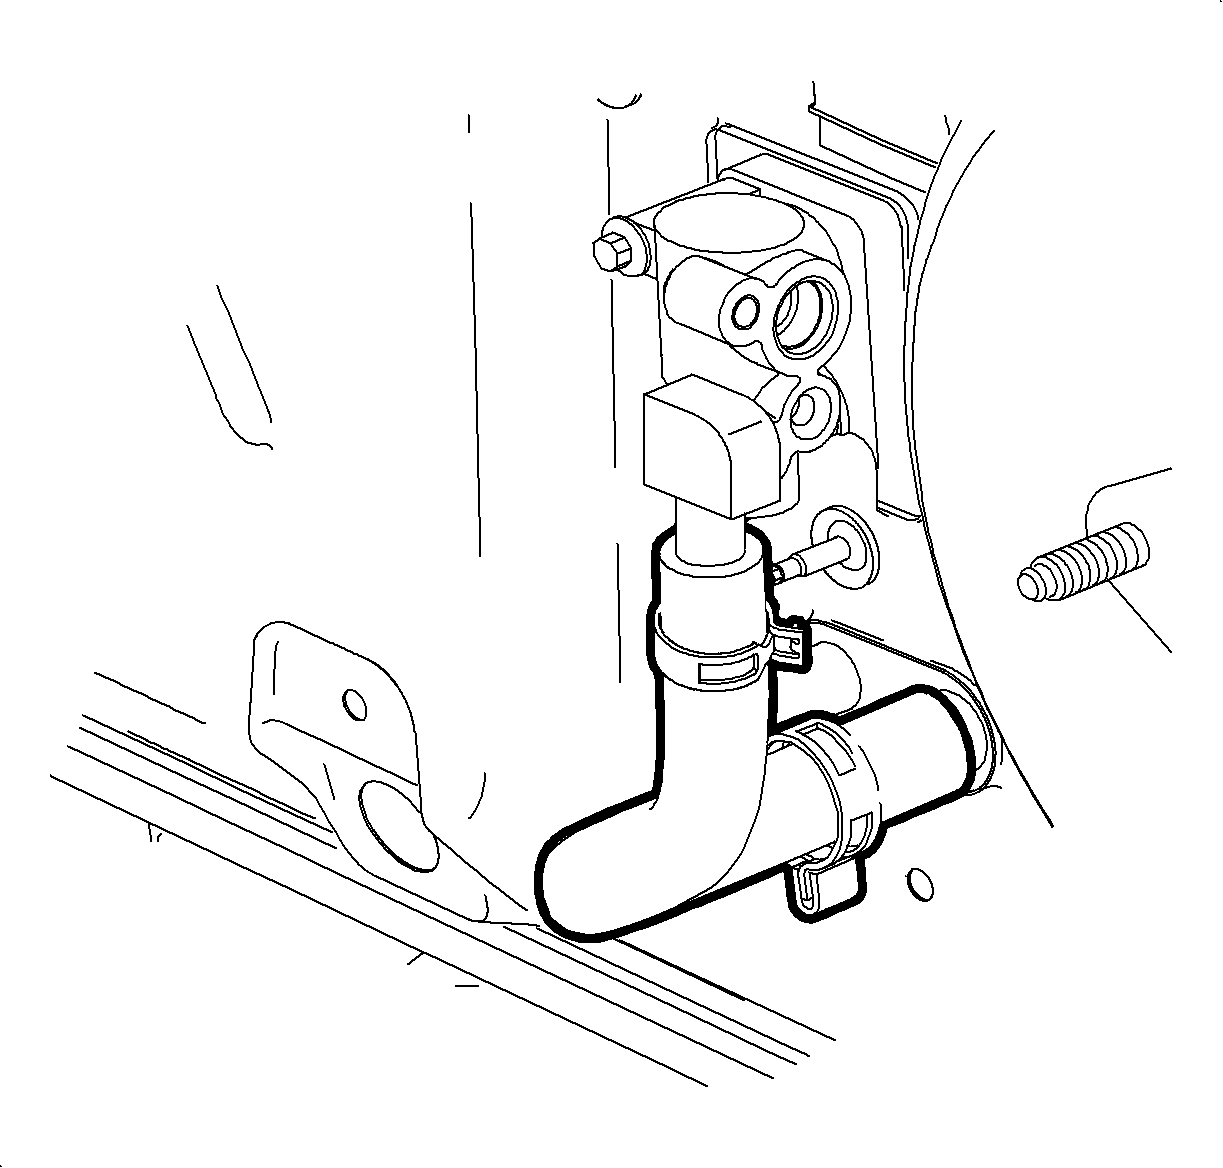
- Remove the fuel vapor line and clip from the HVAC module stud to gain access
to the nut.
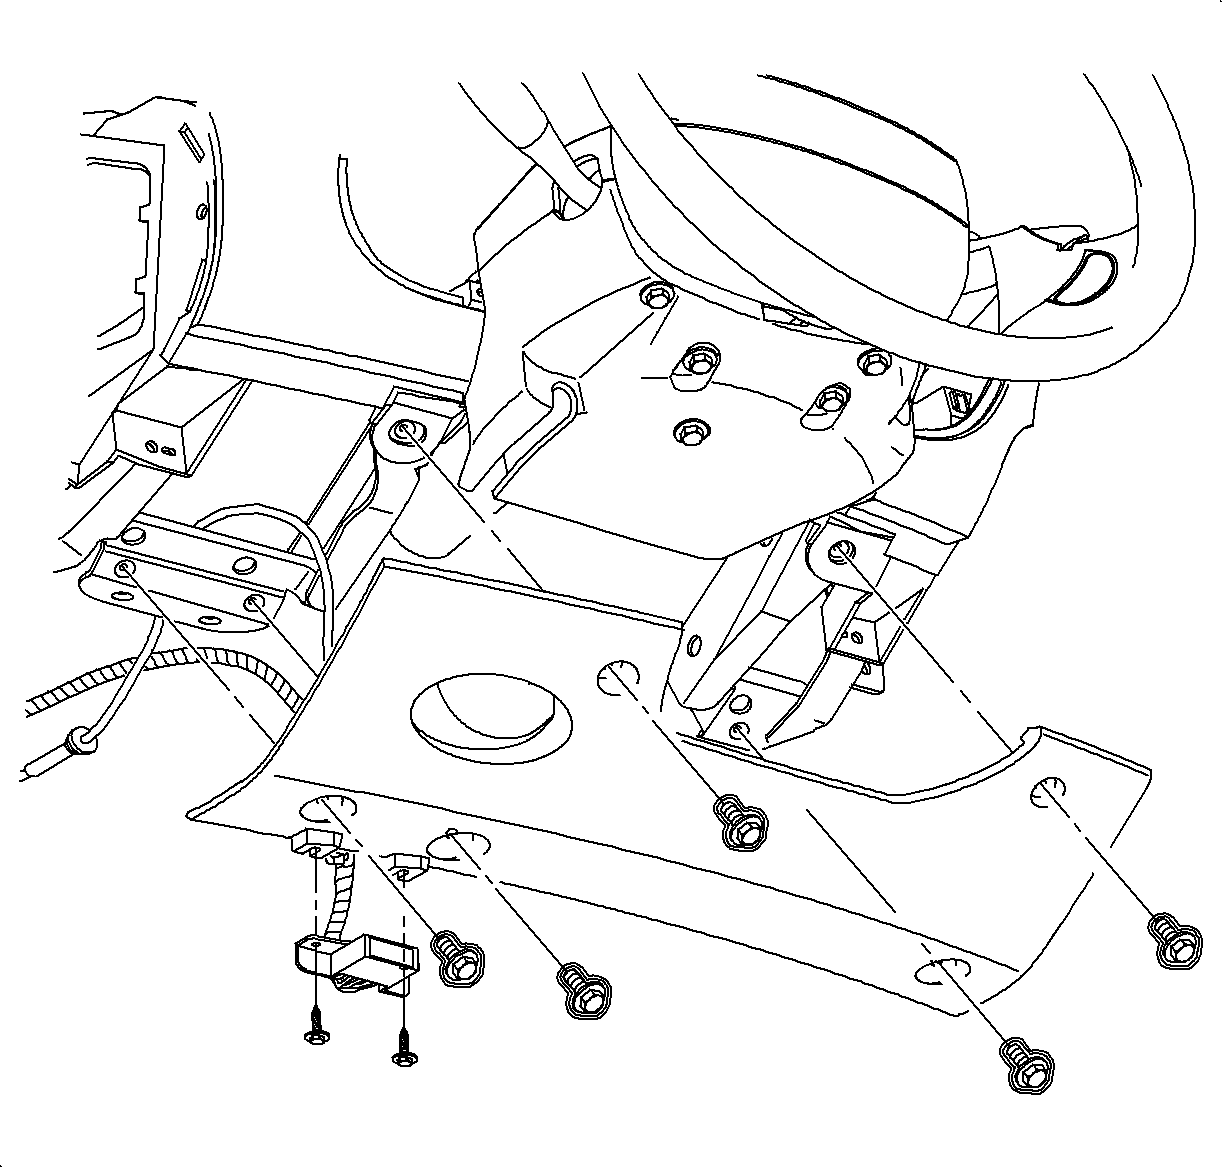
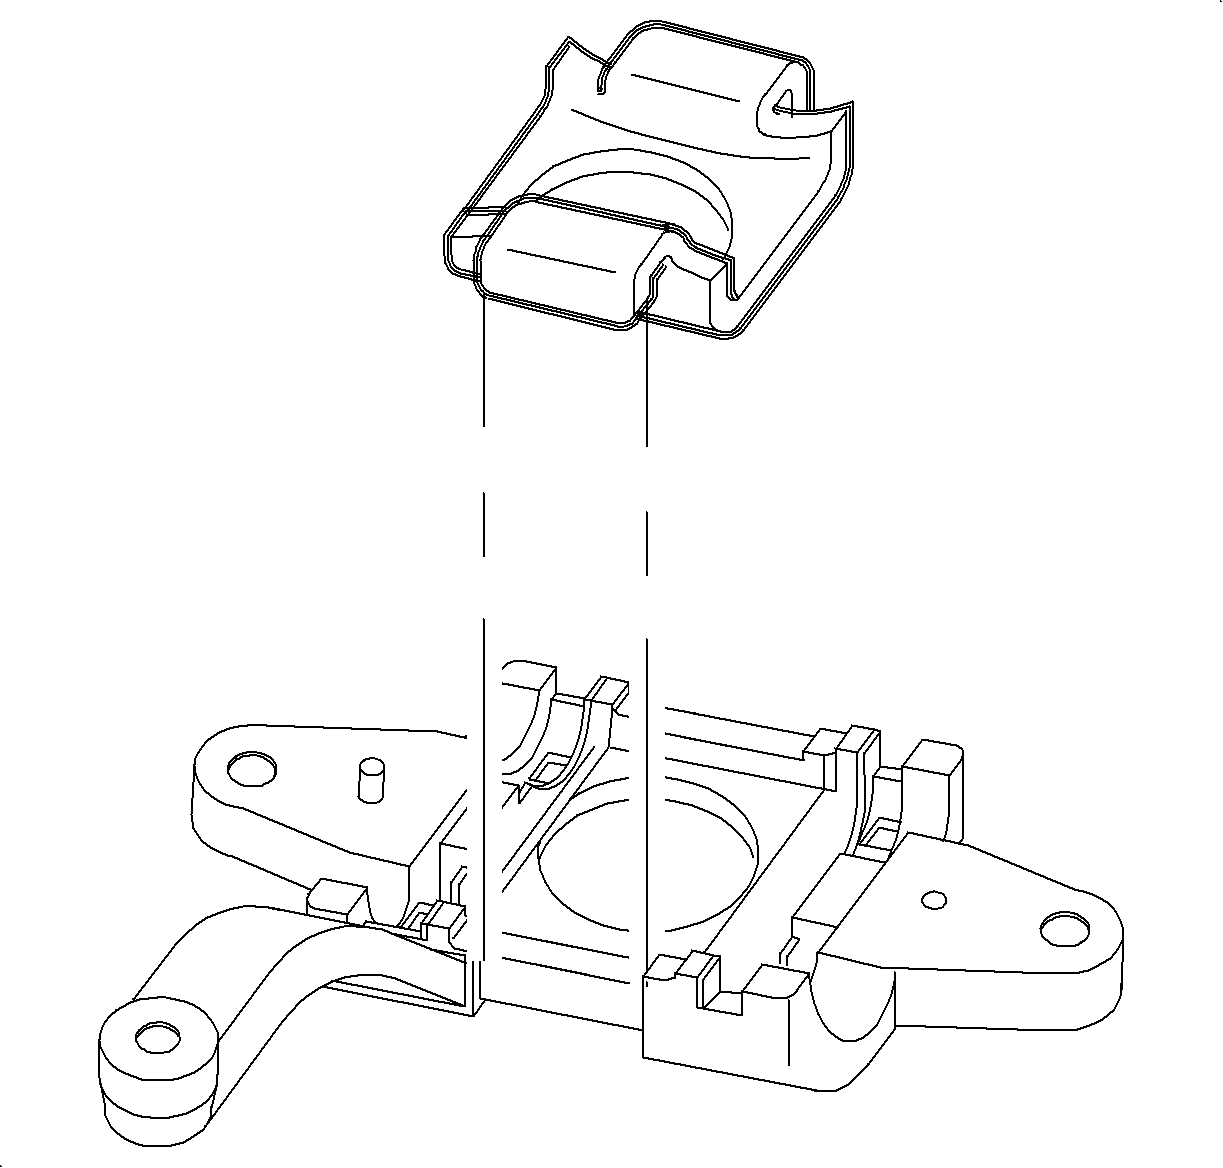
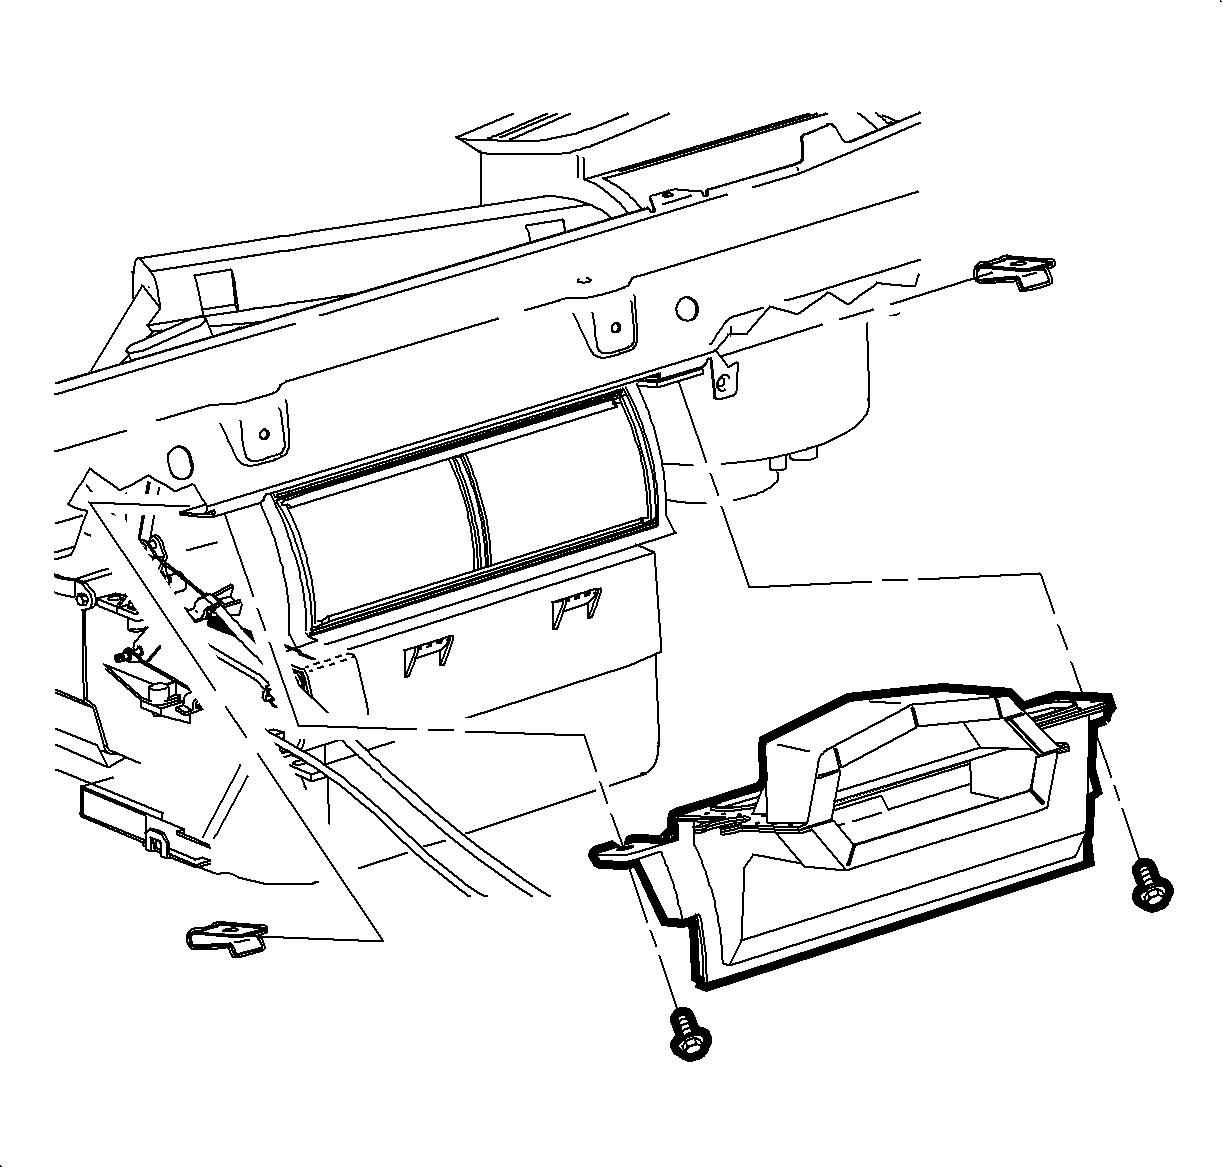
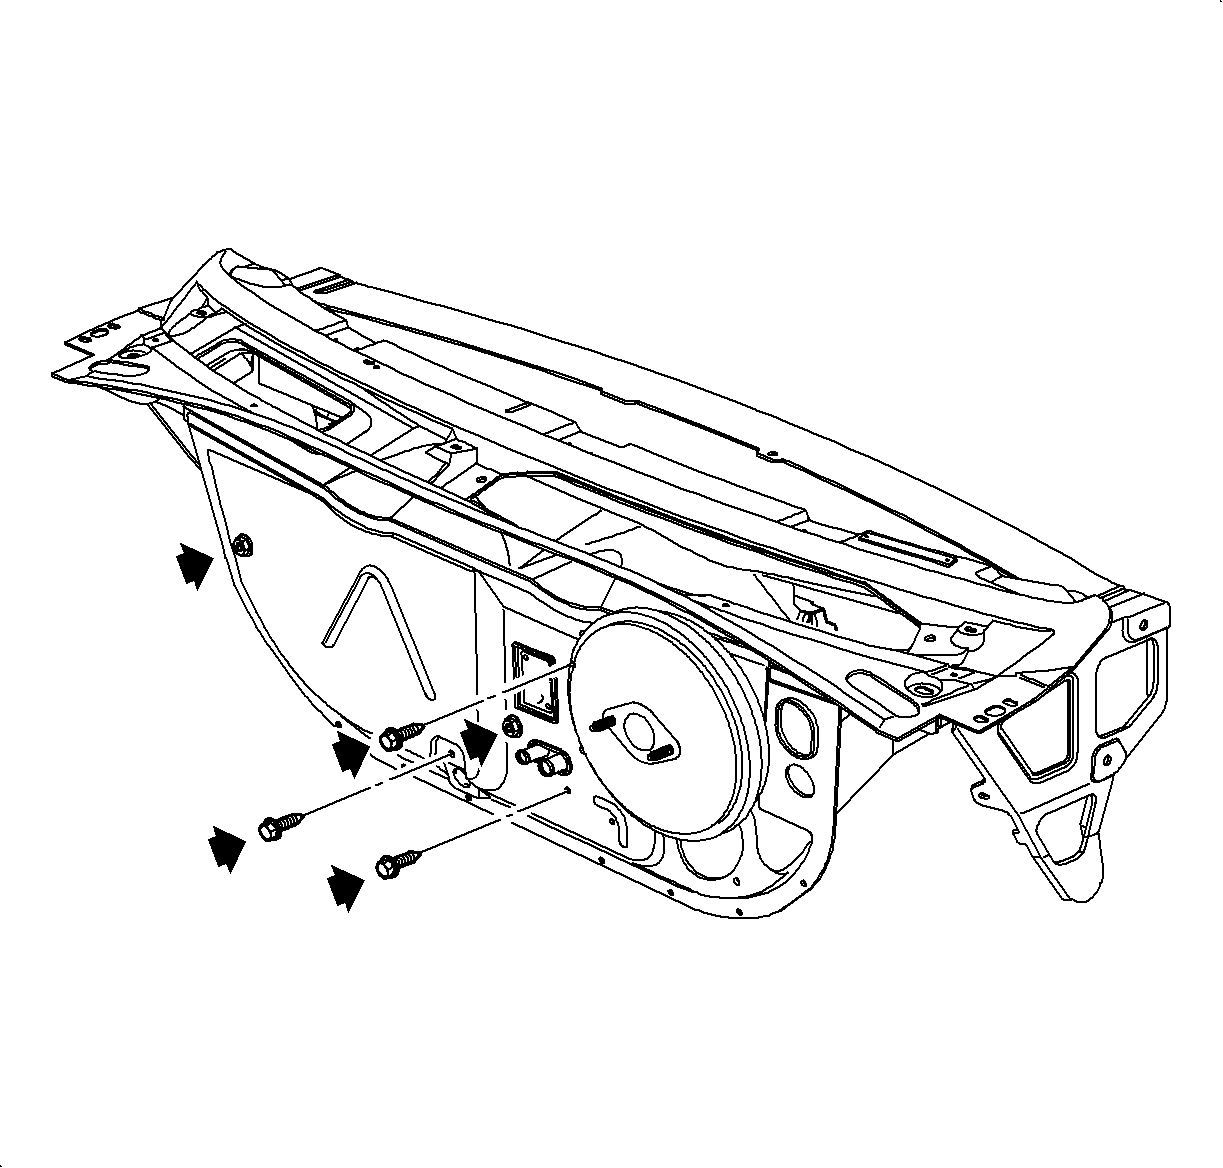
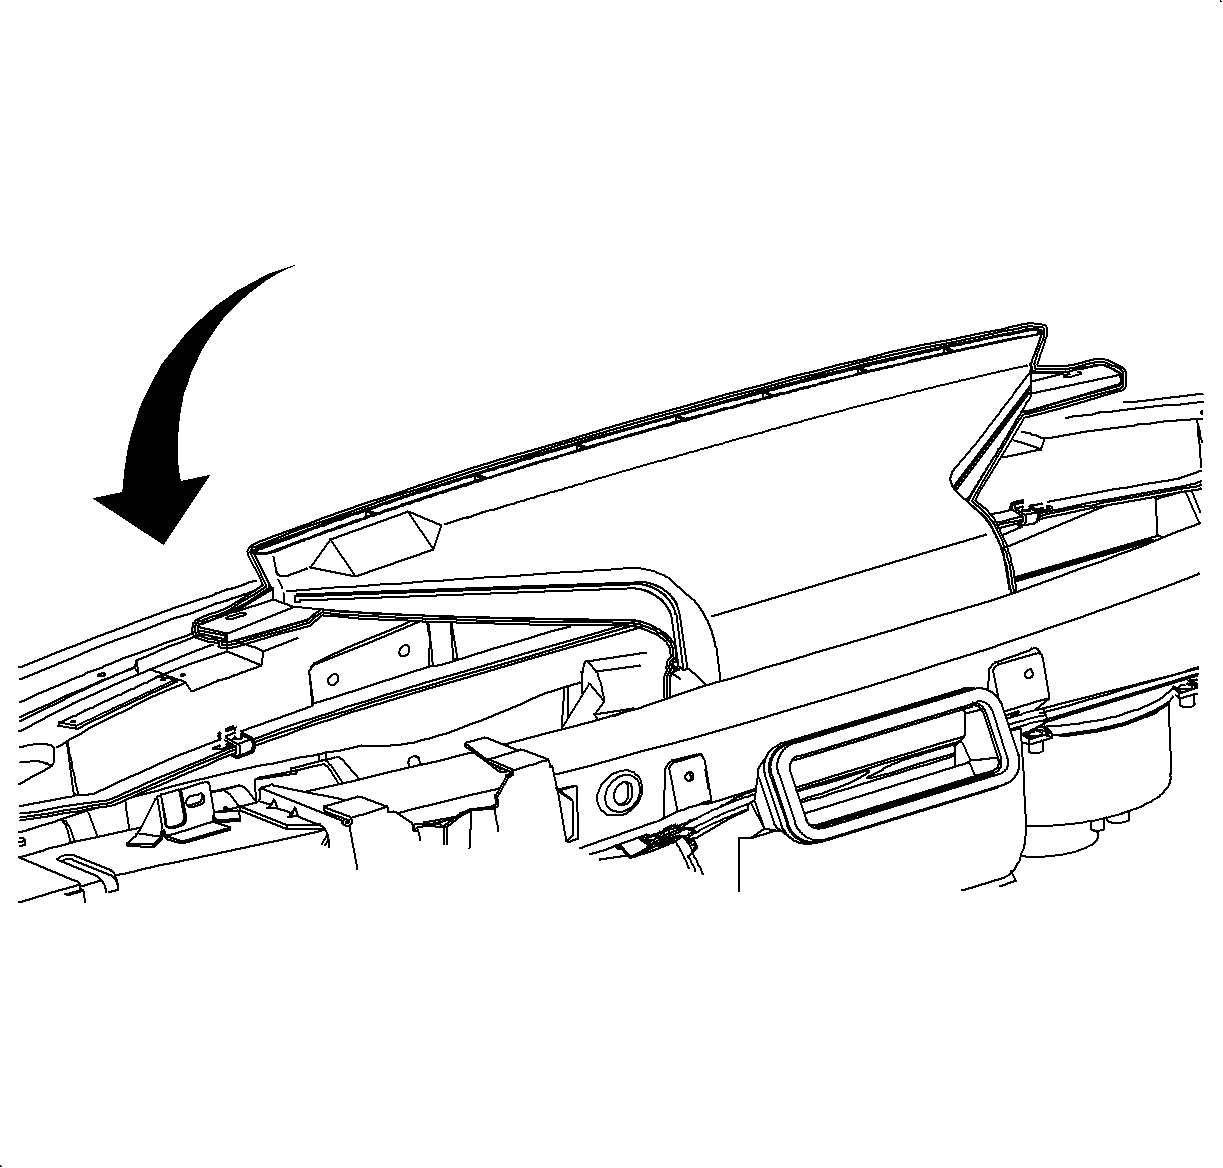
- Remove the three screws and two nuts holding the HVAC module to the cowl.
- Remove the HVAC module from the vehicle.
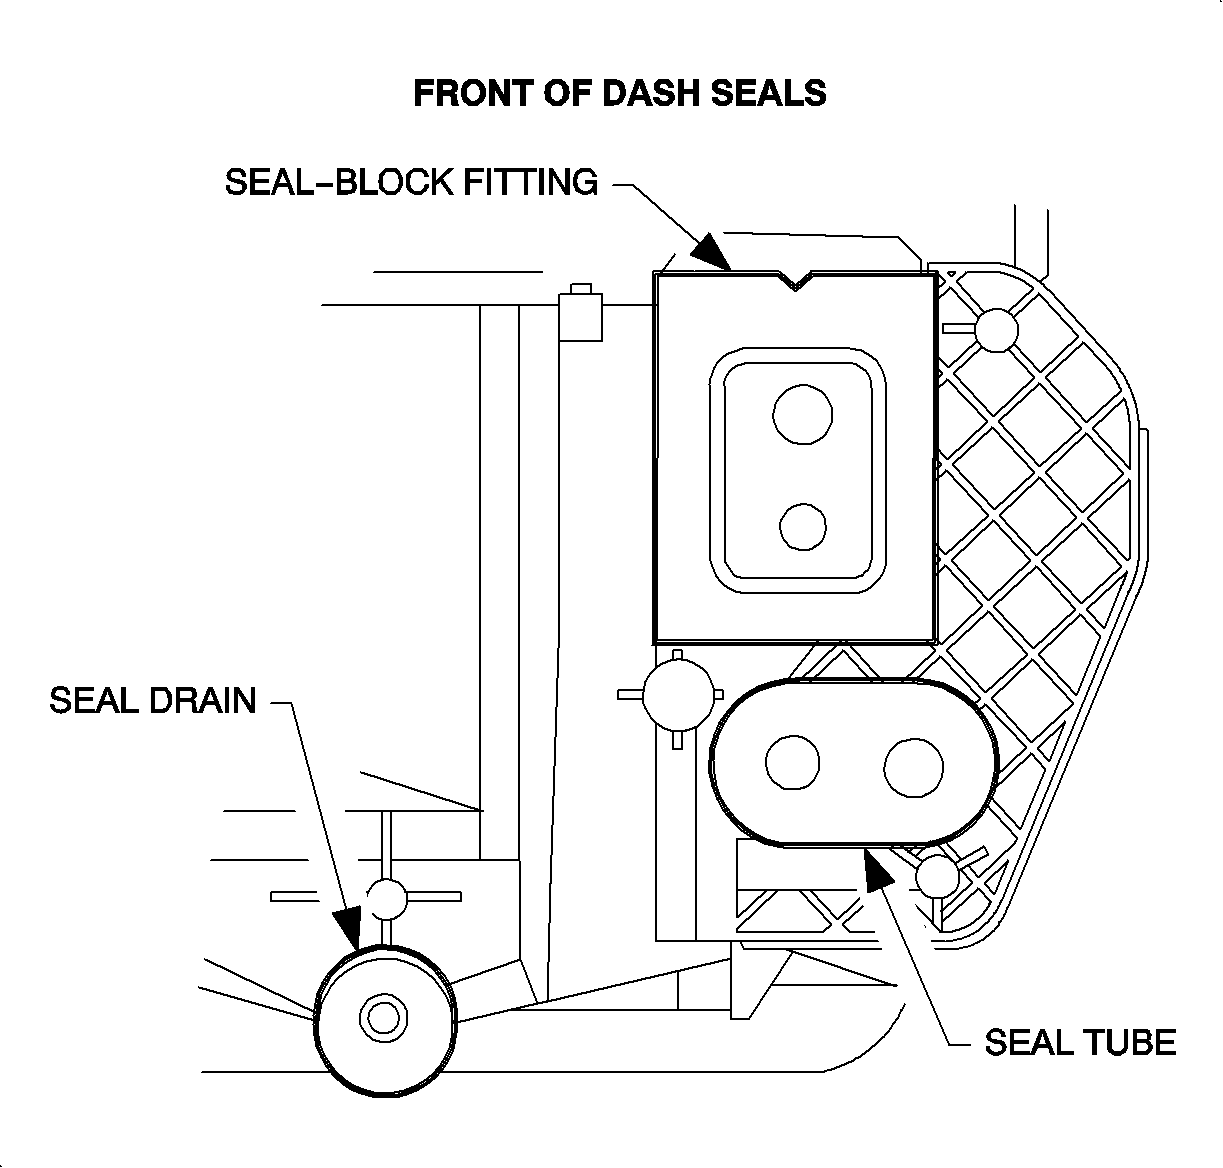
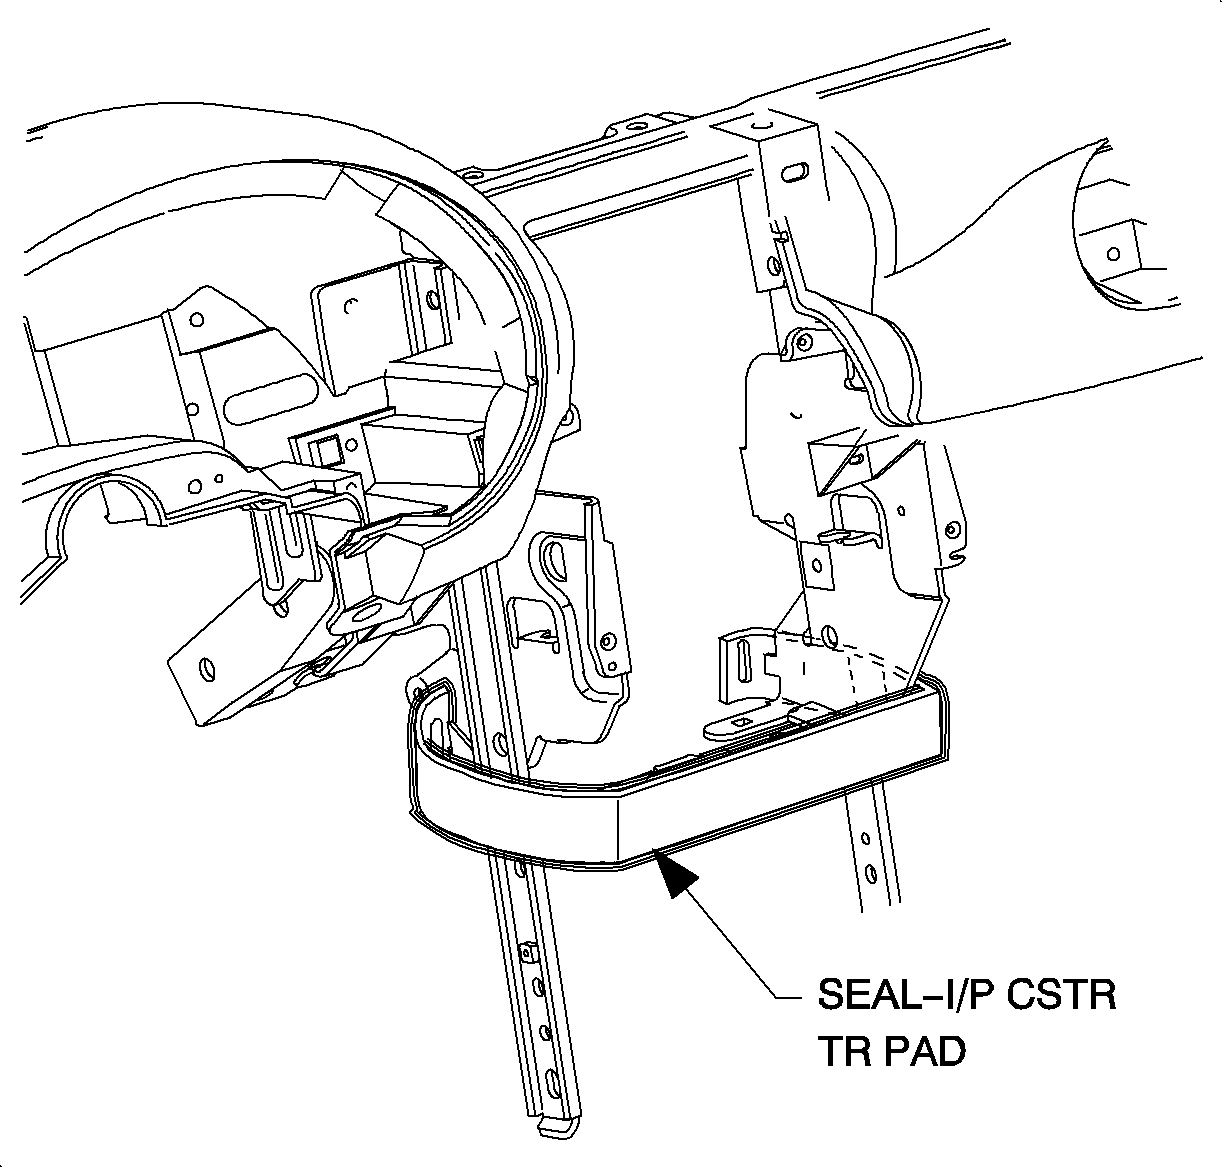
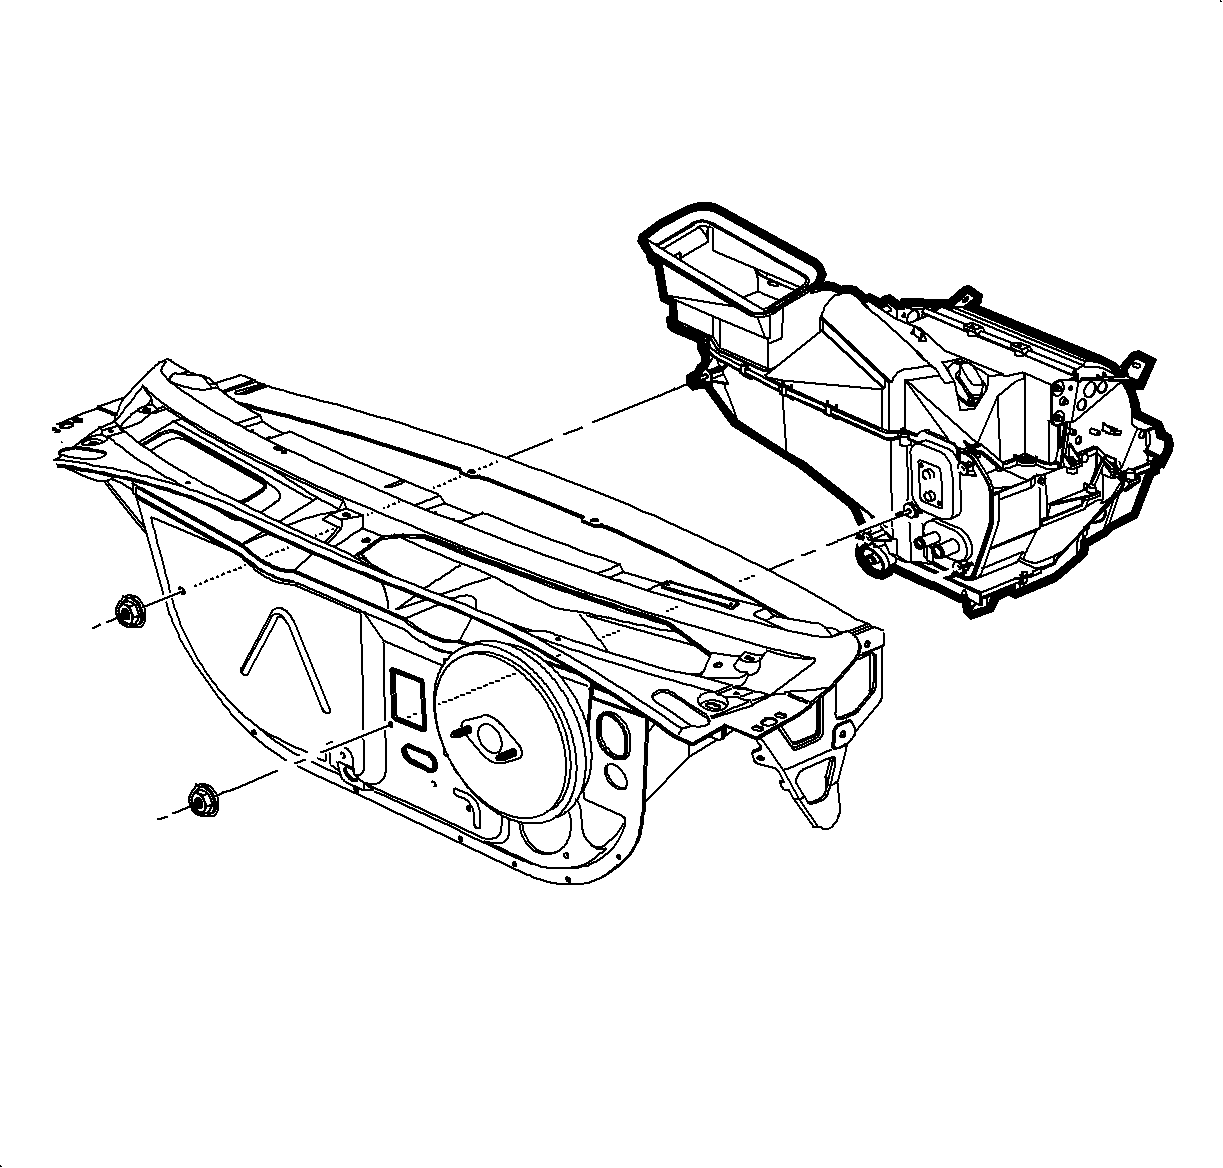
- Install the new
cowl panel seals on the heater core pipes, case drain, and evaporator block.
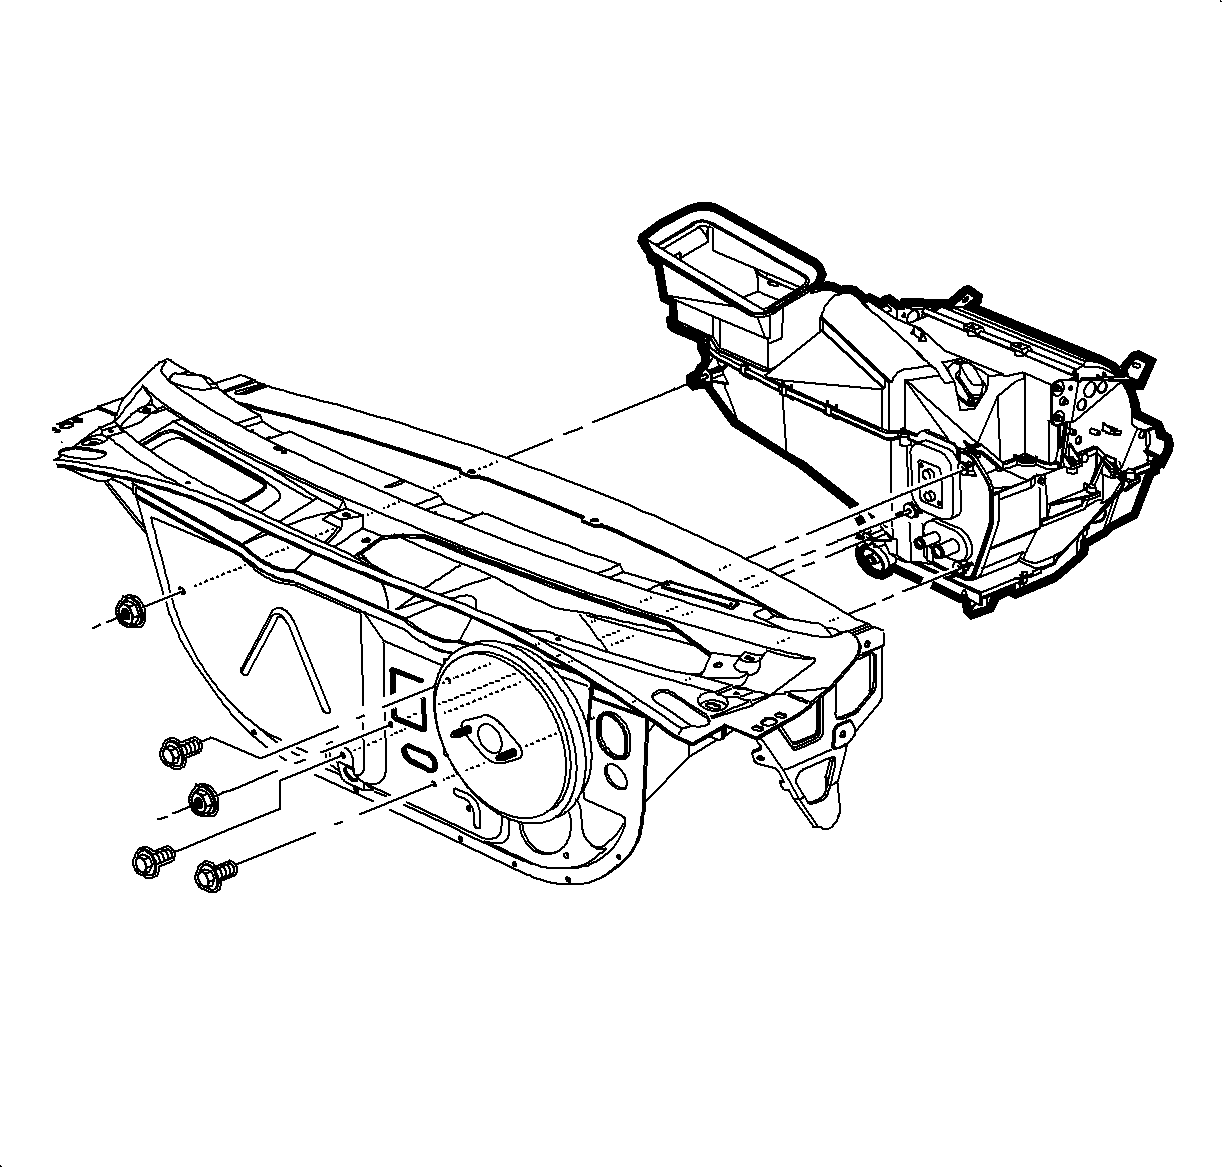
- Install the HVAC module through the cowl. Install the screws and nuts.
TightenTighten to 5 N·m (44 lbs in)
- Install the fuel vapor line and clip to stud below TXV.
- Connect the blower motor and recirc motor electrical
connectors.
- Install the wire harness hold down clips on HVAC module.
- Connect the blower motor resistor electrical connector.
- Install the wire harness hold down clips on the HVAC module.
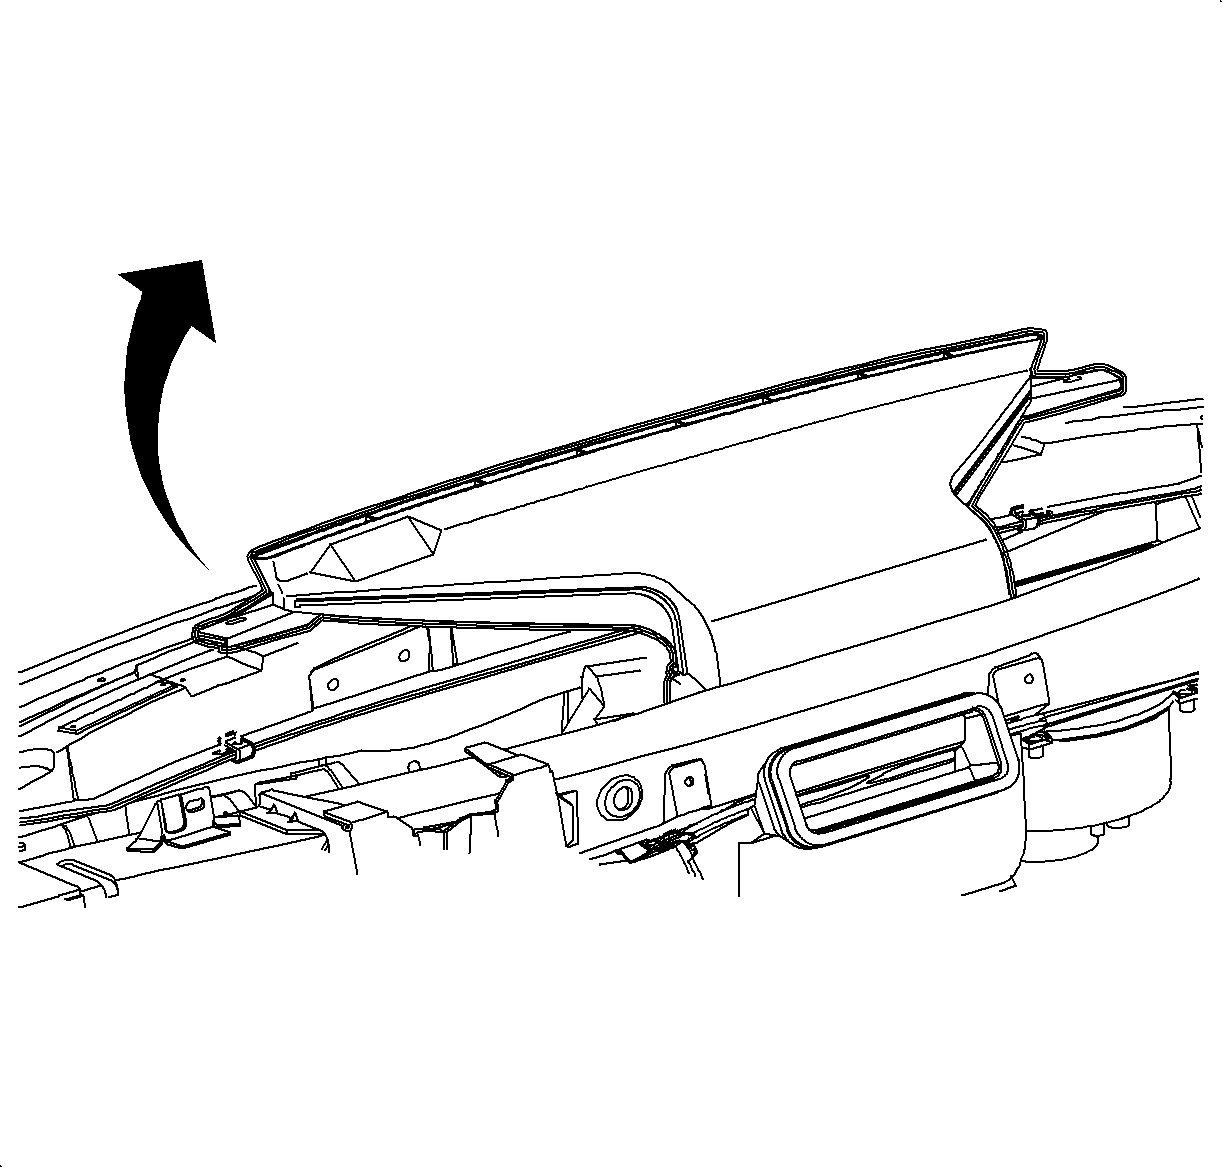
- Rotate the windshield defroster nozzle onto mode valve assembly and install
screws. Make sure the duct is snapped on both sides of HVAC module.
TightenTighten to 2.2 N·m (20 lbs in)
- Install the center air outlet duct and screws.
TightenTighten to 10 N·m (89 lbs in).
Important
Make sure that the plastic right mounting
tab is between knee beam and mounting bracket.
- For SL and SW only, install the rear floor heater duct
and place on mounting stud.
Notice
Be careful not to damage foam seal.
- Install the lower heater duct.
- Install the instrument panel pad/reinforcement assembly.
Important
Make sure wiring harnesses and instrument
panel junction block are in position.
- Install and tighten the nut and bolts.
Tighten Tighten to 10 N·m(89 lbs in).
- Connect the antenna cable at lower right side of the instrument panel reinforcement.
- Install
the glove box and snap in at the clip locations.
- Install and tighten the screws.
TightenTighten to 2.2 N·m (20 lb in).
- Install the glove box door stops.
- Adjust the striker as necessary.
- Install the passenger
side air bag harness to energy absorber and cross-car beam
- Install the dimmer switch wiring harness to instrument
panel reinforcement.
- Install the instument
cluster.
- Install and tighten the screws.
TightenTighten to 3 N·m (26 lbs in).
- Connect the electrical connectors to the instrument
cluster.
- Install the CPA.
- Connect the electrical
connector to the dimmer switch.
- Install the instrument cluster trim bezel. Push in at the clip locations.
- Install the push pin fasteners.
- Raise the steering column into position.
- Install and tighten the bolts.
TightenTighten the 35 N·m (26 lbs ft).
- Connect the ignition switch electrical connector at the right steering
column bolt.
- Route the hood release cable through I/P
and then install release cable to lever.
- Install the steering column filler panel
and DLC.
- Install and tighten the screws.
TightenTighten to 2.2 N·m (20 lbs in).
- Install and tighten
bolts into H-bracket.
TightenTighten bolts to 25 N·m (19 lbs in).
- Feed the instrument
panel juction block through the H-bracket towards the rear of the car.
- Slide the IPJB on mounting pads to lock the tabs.
- Install and tighten IPJB screw.
- Connect the rear electrical connector to
IPJB
- Tighten the screw.
Tighten Tighten to 6.5 N·m (5 lbs ft).
- Install the wiring harness, ground wire and screw to
H-bracket.
- Tighten the screw
TightenTighten to 2.2 N·m (20 lbs in).
- Install the closeout
seal.
Important
Make sure the tabs engage closeout seal holes
on both sides
- Install HVAC control.
- Install and tighten screws.
TightenTighten to 2.5 N·m (2.2 lbs in).
Install the temperature and mode cables over the pins
Cable Identification:
- Temperature cable- white
- Mode cable-black
- Install cable housings into channel and push down to lock.
- Connect the blower switch, A/C-Recirc and lighting electrical
connectors.
Important
Make sure wiring harnesses do not interfere
with control lever movement.
- Connect the electrical connector and antenna
to radio.
- Install
the radio.
Important
Make sure spring clips are seated in D-holes
on both sides.
- Install and tighten the screws.
TightenTighten to 2.5 N·m (22 lbs in).
- Connect the traction control/fog lamp/rear defog electrical connector, if equipped.
- Install the radio/HVAC control cover. Push in at clip locations.
- Install the push pins and lock.
- Place the shifter
in neutral.
- Lower the front of the console over shifter.
- Lower the rear of the console over parking brake lever onto rear mounting
pad.
Important
Make sure to place window/mirror and ashtray
light connectors through openings into position.
- Move the console rearward.
- Install the cigarette lighter bulb through opening and rotate counterclockwise.
- Connect cigarette lighter electrical connector.
- Move the console forward into position.
Important
Make sure that the upper tabs on front of
the console engage sheet metal on lower I/P brace.
- Install and tighten the front console screws.
TightenTighten to 1.2 N·m (11 lbs in).
- Install the left and right lower trim panel extensions by inserting hinges into
console openings. Then rotate closed and push in at dual lock location.
- For vehicles without
the console armrest:
- Connect the window/mirror
switch electrical connectors.
- Install the window/mirror switch by inserting front edge into opening.
Then push the rear edge down into position.
- Insert the bulb
through the opening until bulb socket is flush with cup holder. Push socket down to
engage lock tab.
- Install the wiring harness to the cup holder.
- Install the cupholder
by inserting through console opening and pushing straight down,
- Install the parking brake cover over lever.
- Install and tighten the screw.
Notice
Do not overtighten screw or it may pull through cover.
TightenTighten to 1.6 N·m (14 lbs in).
- Install the arm
rest unit into the console, if equipped. Install and tighten the screws.
TightenTighten to 1.6 N·m (14 lbs in).
- Install the right
and left end cap assemblies.
- Install and tighten the screws.
TightenTighten to 2.2 N·m (20 lbs in).

Caution
Ensure that the vehicle is properly supported and squarely positioned.
To help avoid personal injury when a vehicle is on a hoist, provide additional support
for the vehicle on the opposite end from which the components are being removed.
- Raise the vehicle.
- Install hose and clamp on heater core outlet. Position the clamp at a 7-8
o'clock position
- Install the hose and clamp on the heater core inlet. Position the clamp at 6
o'clock.
- Lower the vehicle.
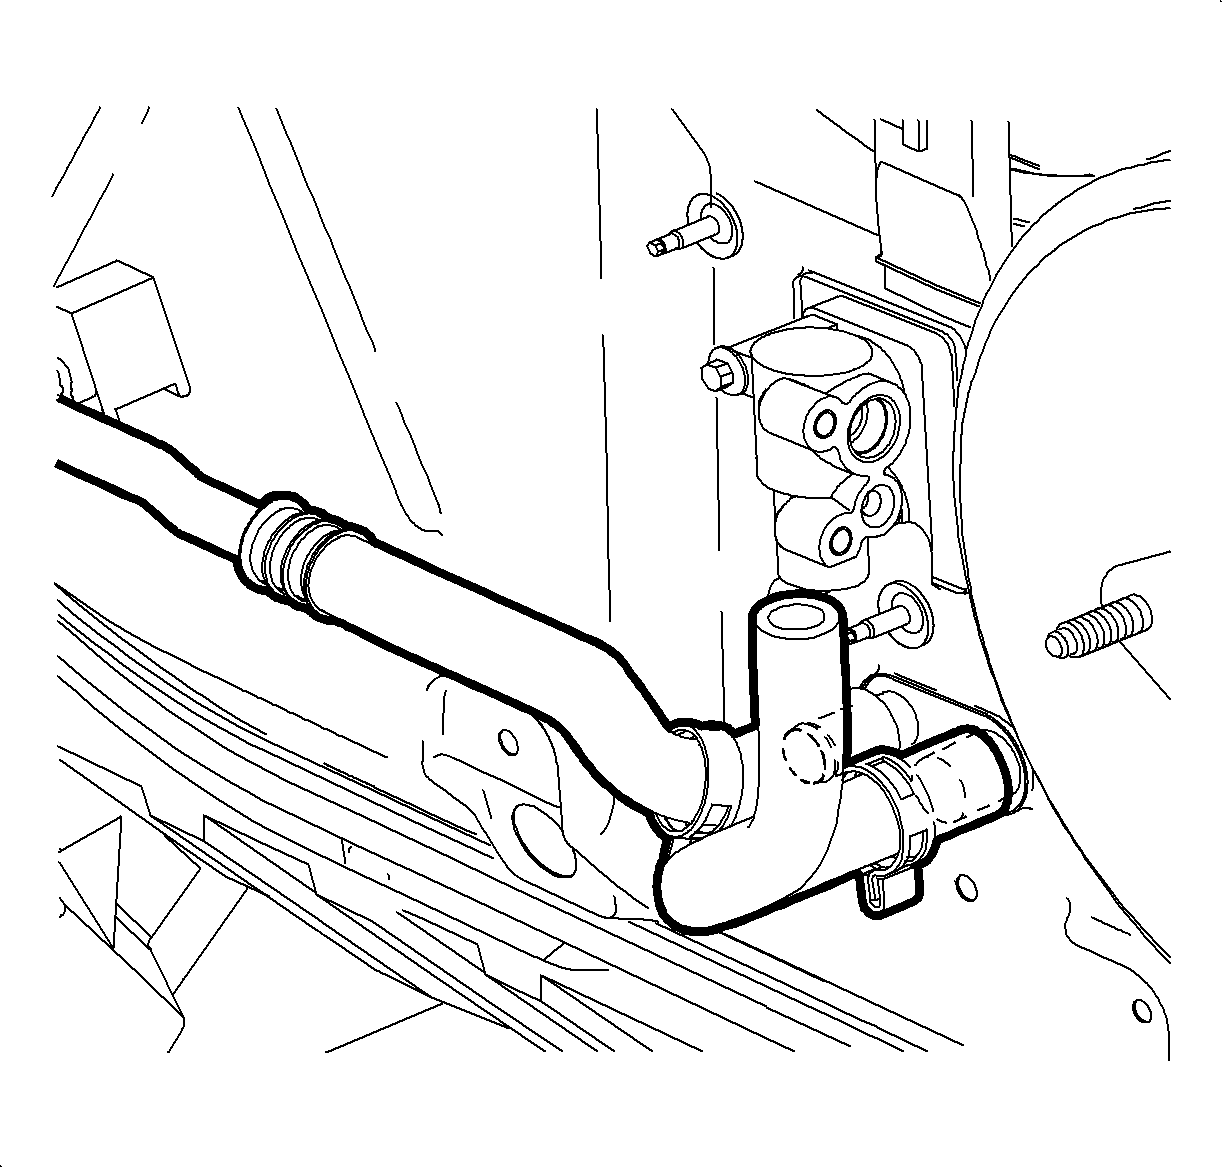
- Remove the protective covers. Lubricate with R-12 Refrigerant oil (mineral)
install new O-rings on evaporator pipes.
- Install the thermal explosion valve (TXV) on evaporator.
TightenTighten to 10 N·m (89 lbs ft).
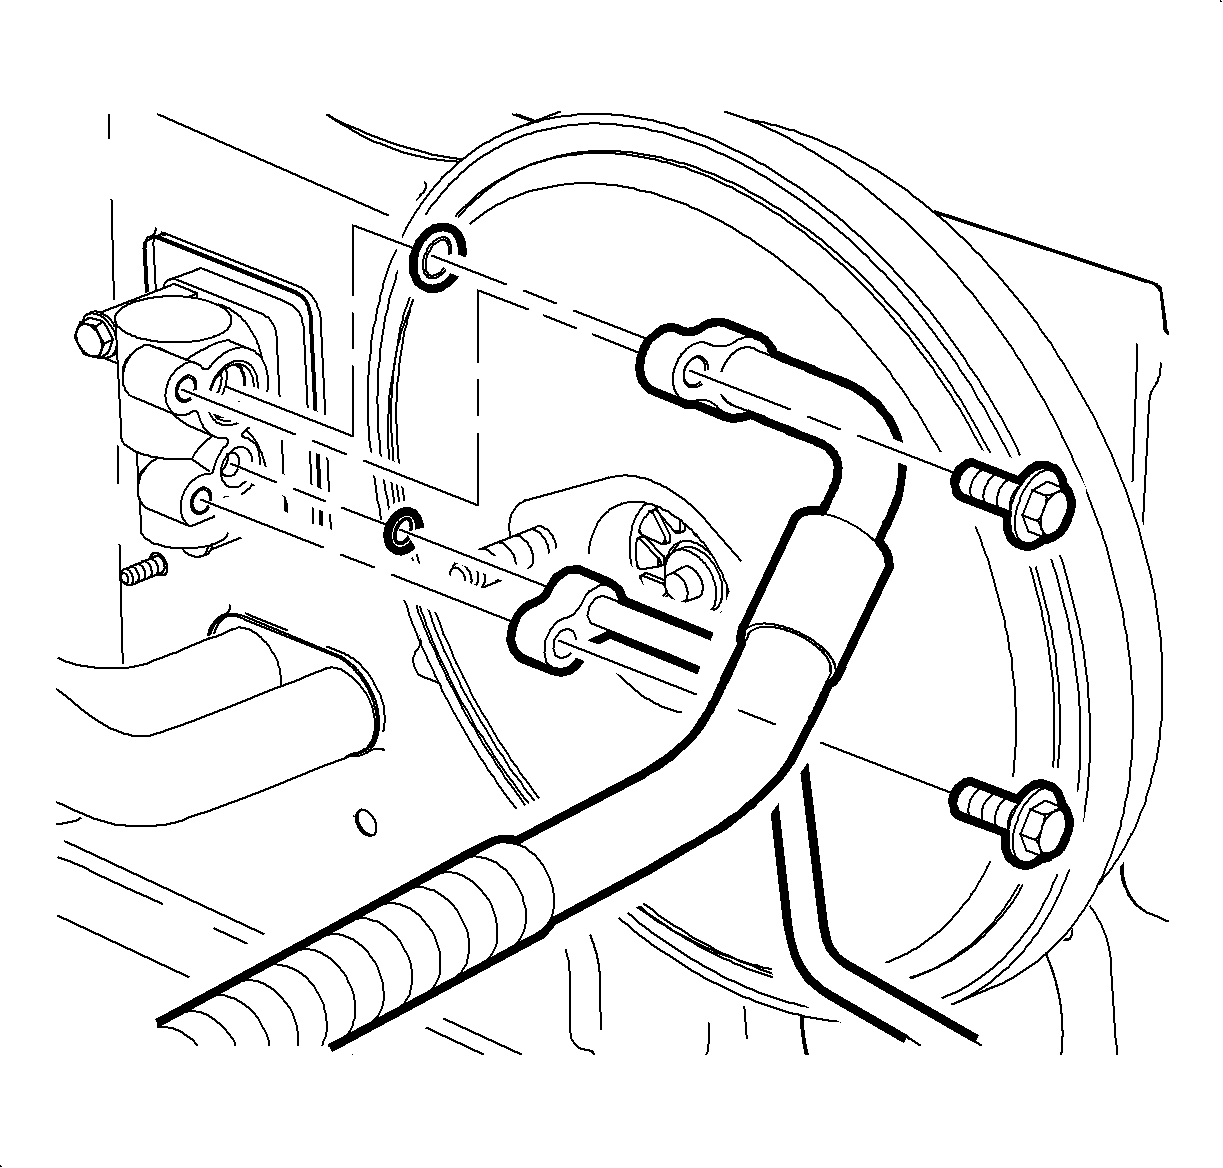
- Lubricate O-rings with R-12 Refrigerant oil (mineral) and install new O-rings
on suction hose and liquid line.
- Insall the liquid line on the TXV.
TightenTighten to 25 N·m (19 lbs ft).
- Install the suction hose on the TXV.
TightenTighten to 25 N·m (19 lbs ft).
- Install the air cleaner housing cover and air induction hose.
- Fill and pressure test the cooling system.
- Evacuate, charge, and leak test A/C system. Perform A/C Performance Test.
- Connect the negative battery cable.
TightenTighten to 17 N·m (151 lbs in).
- Set the clock to proper time if equipped.
- Enable the SIR system. (Refer to "Enabling the SIR System"
in this service manual.)
- Reset the radio stations.