Headliner Replacement Coupe - 2nd Design
Removal Procedure
Some 2nd design vehicles may be equipped with an optional head curtain inflator
module. Please read the following cautions before removing or installing vehicle
components located near these supplementary restraint devices.
Notice
Use care when working around the head curtain inflator module. Sharp tools may
puncture the curtain airbag. If the head curtain inflator module is damaged in any
way, it must be replaced.
Notice
If a vehicle is equipped with a head curtain inflator module ensure
that the inflator module and tether are undamaged. If tether or curtain airbag are
damaged in any way, they must be replaced.
Caution
The head curtain inflator module tethers must be routed correctly.
Improper routing may result in personal injury or improper curtain airbag deployment.
Important
Before removing, note the position of the
door weather-strip over the edge of headliner.
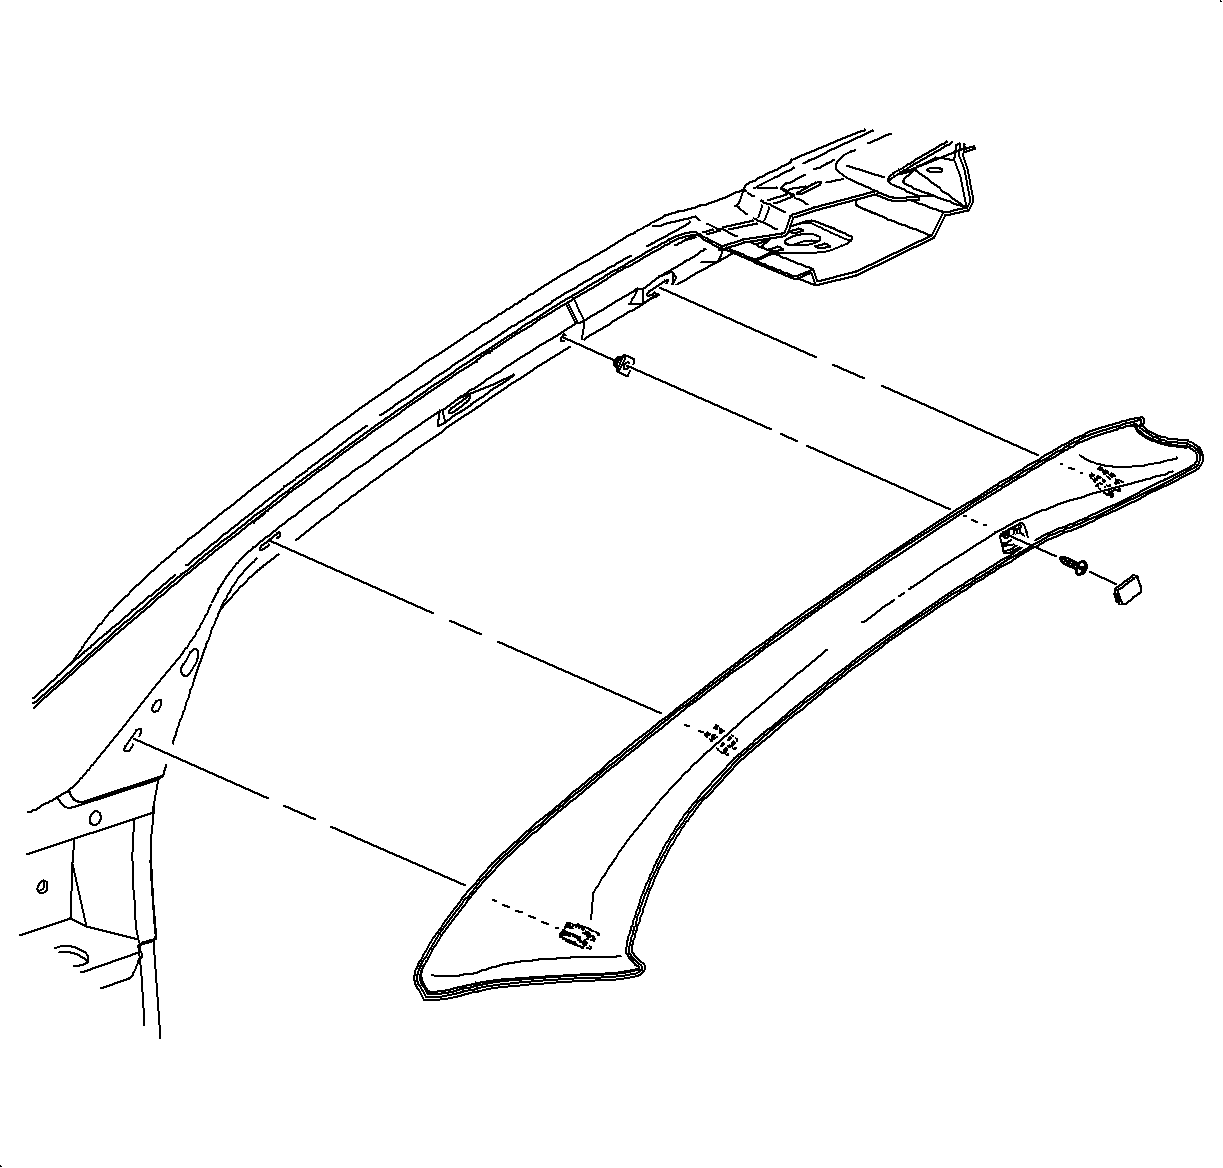

- Remove the windshield garnish moldings. Refer to
Windshield Garnish Molding Replacement
.
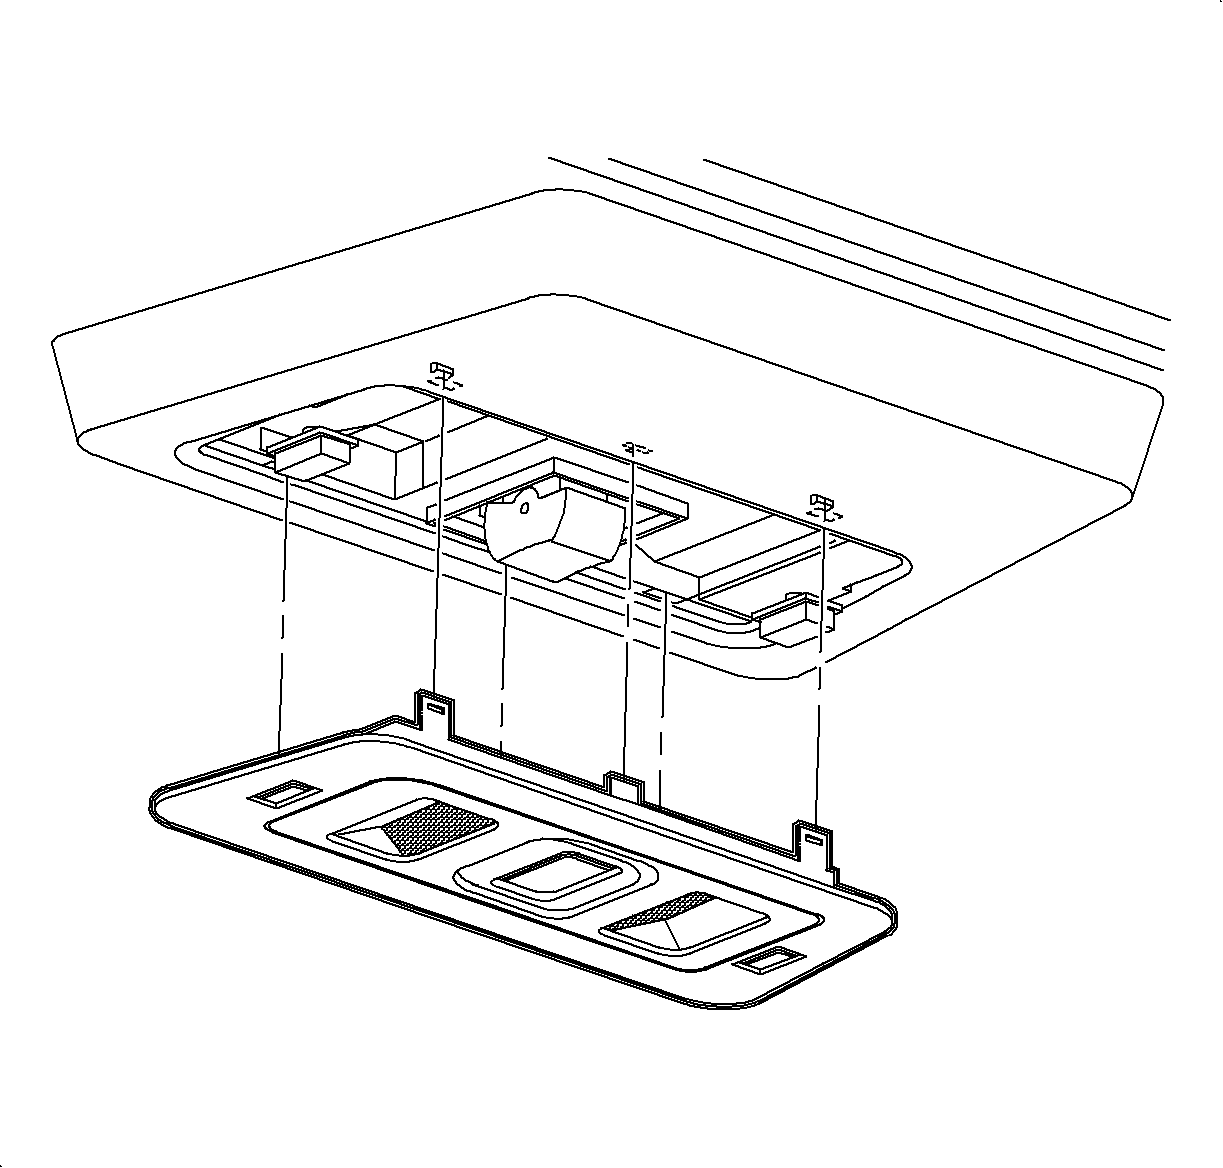
- If equipped with a sunroof, remove the bezel from the
map lamp and the sunroof switch console by prying at the outside edge to unsnap
the bezel.

- Remove the striker trim cover.
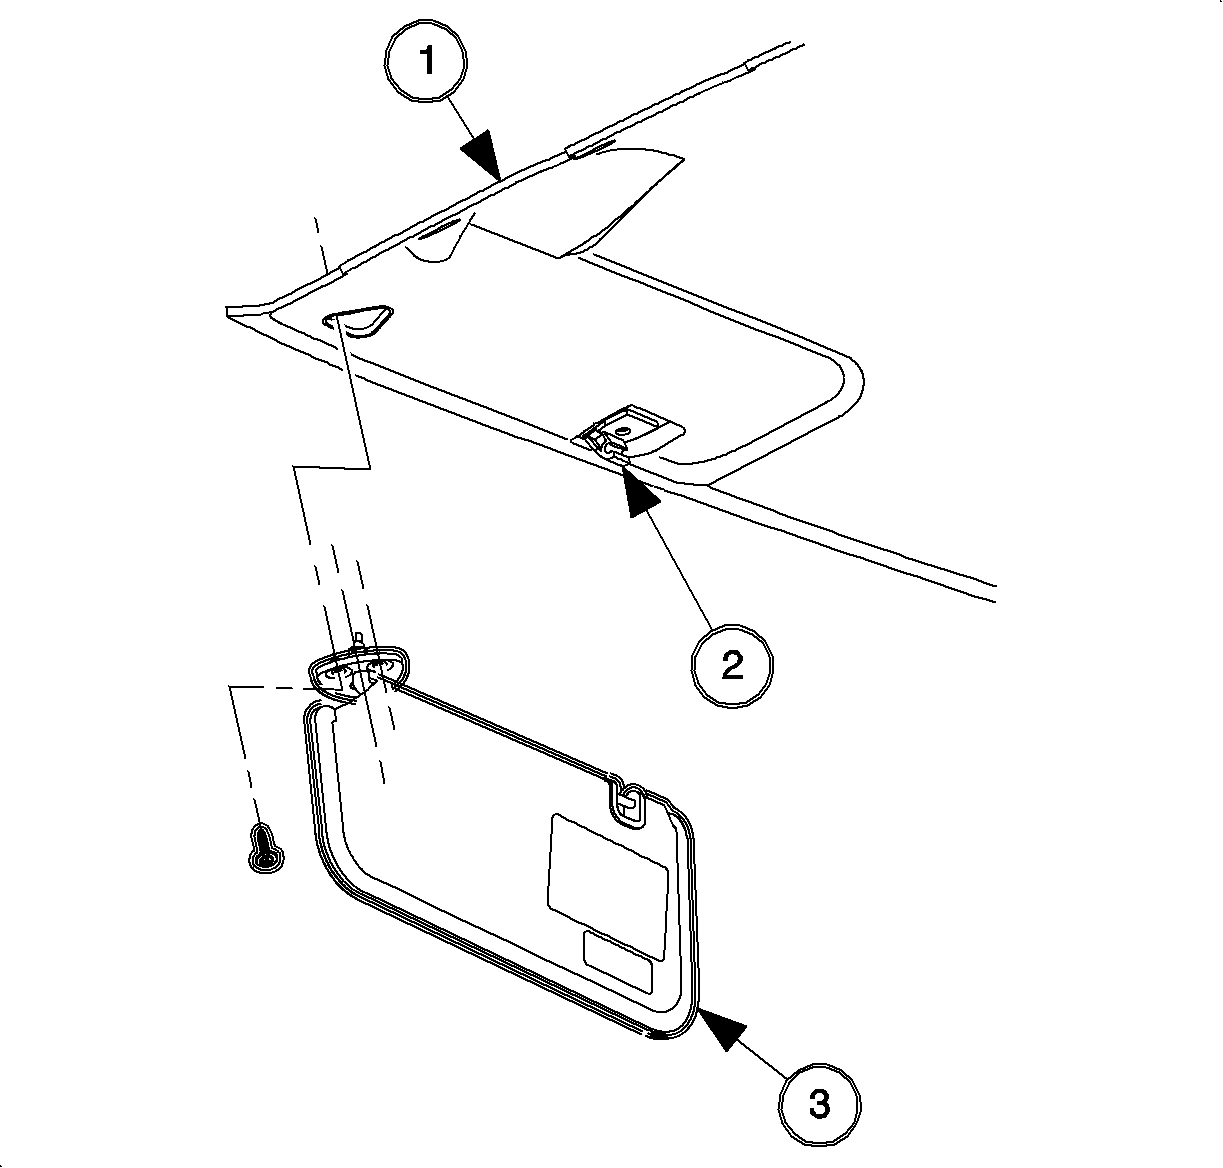
- Remove the sunshades, the sunshade supports, and
the screws.
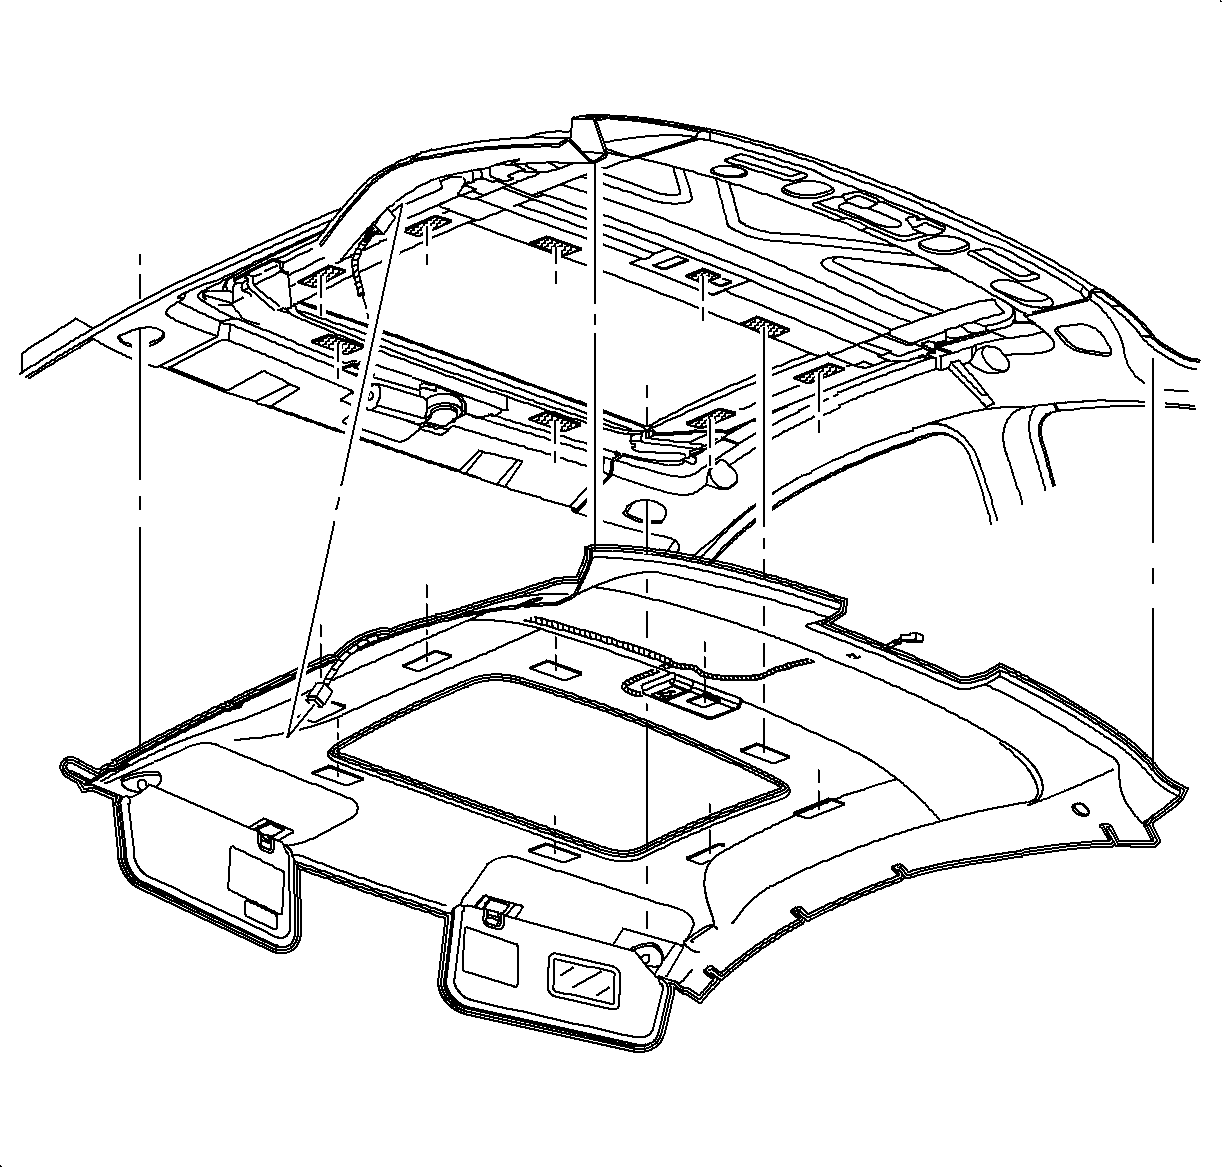
- Headliner (1)
- Sunshade Support (2)
- Sunshade (3)
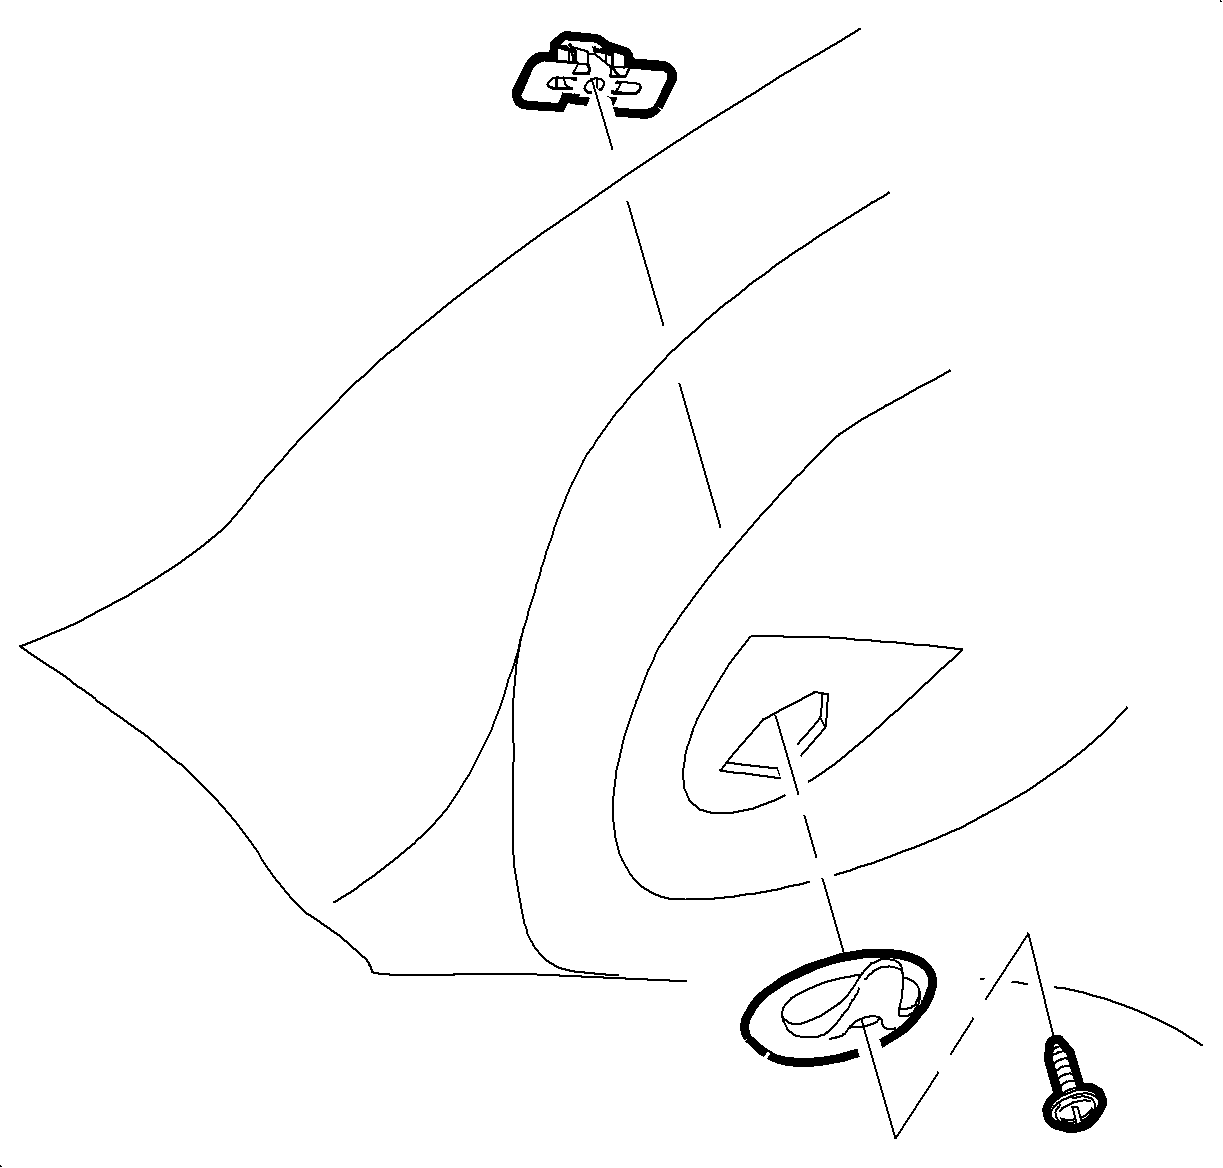
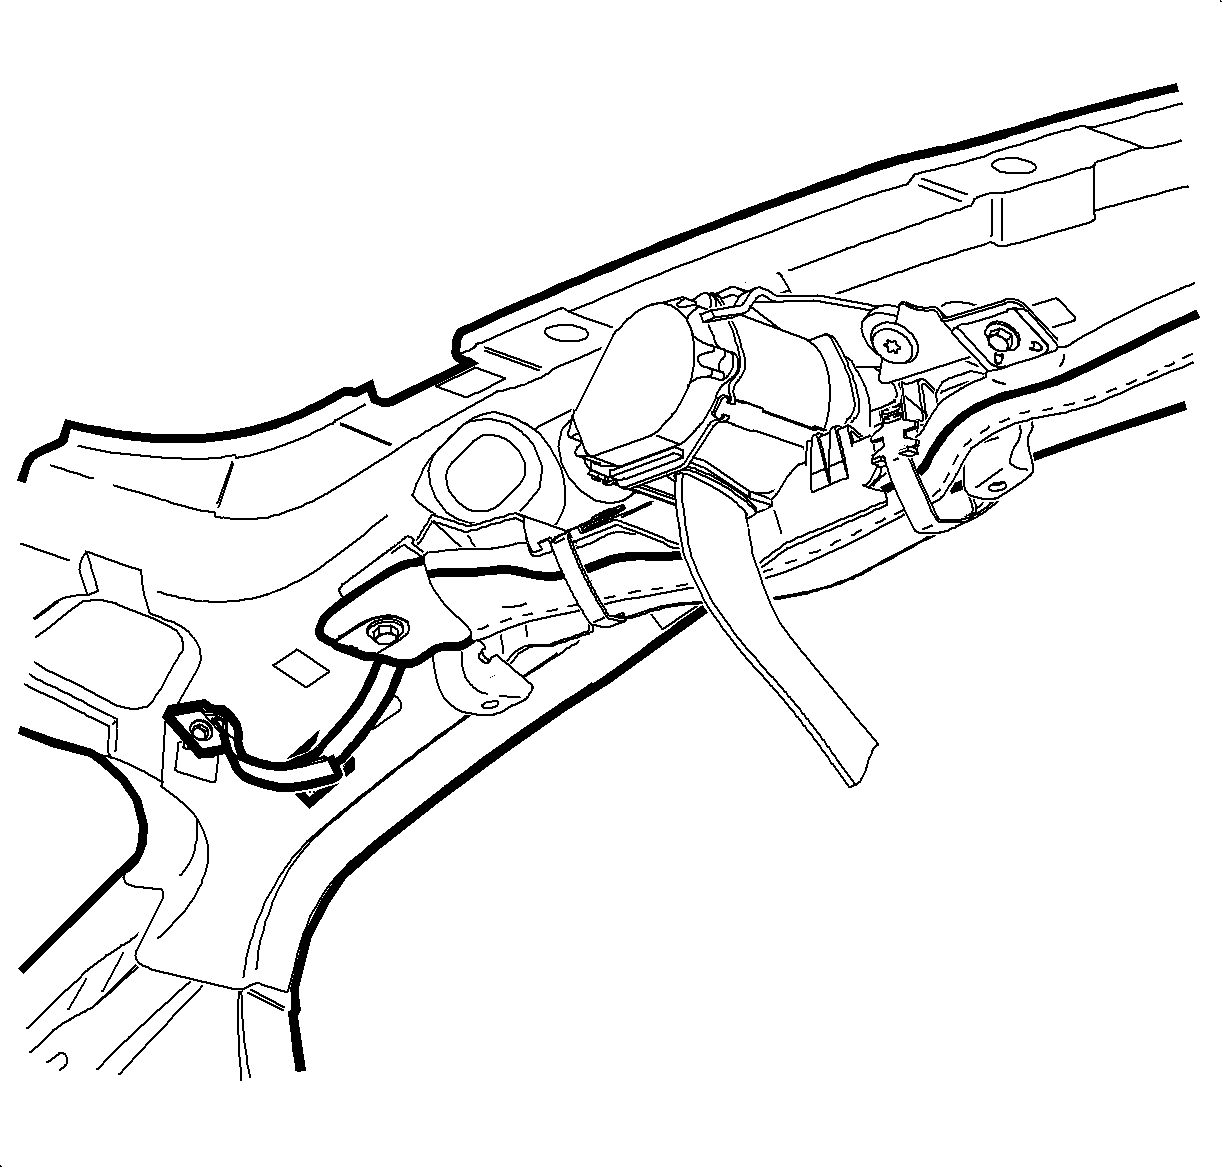
- Remove the left coat hook and the coat hook screw.
- Remove the center high-mount stop lamp cover by pulling
to disengage the clips.
- Disconnect the wiring harness.
- Unsnap the seat belt bolt cover.
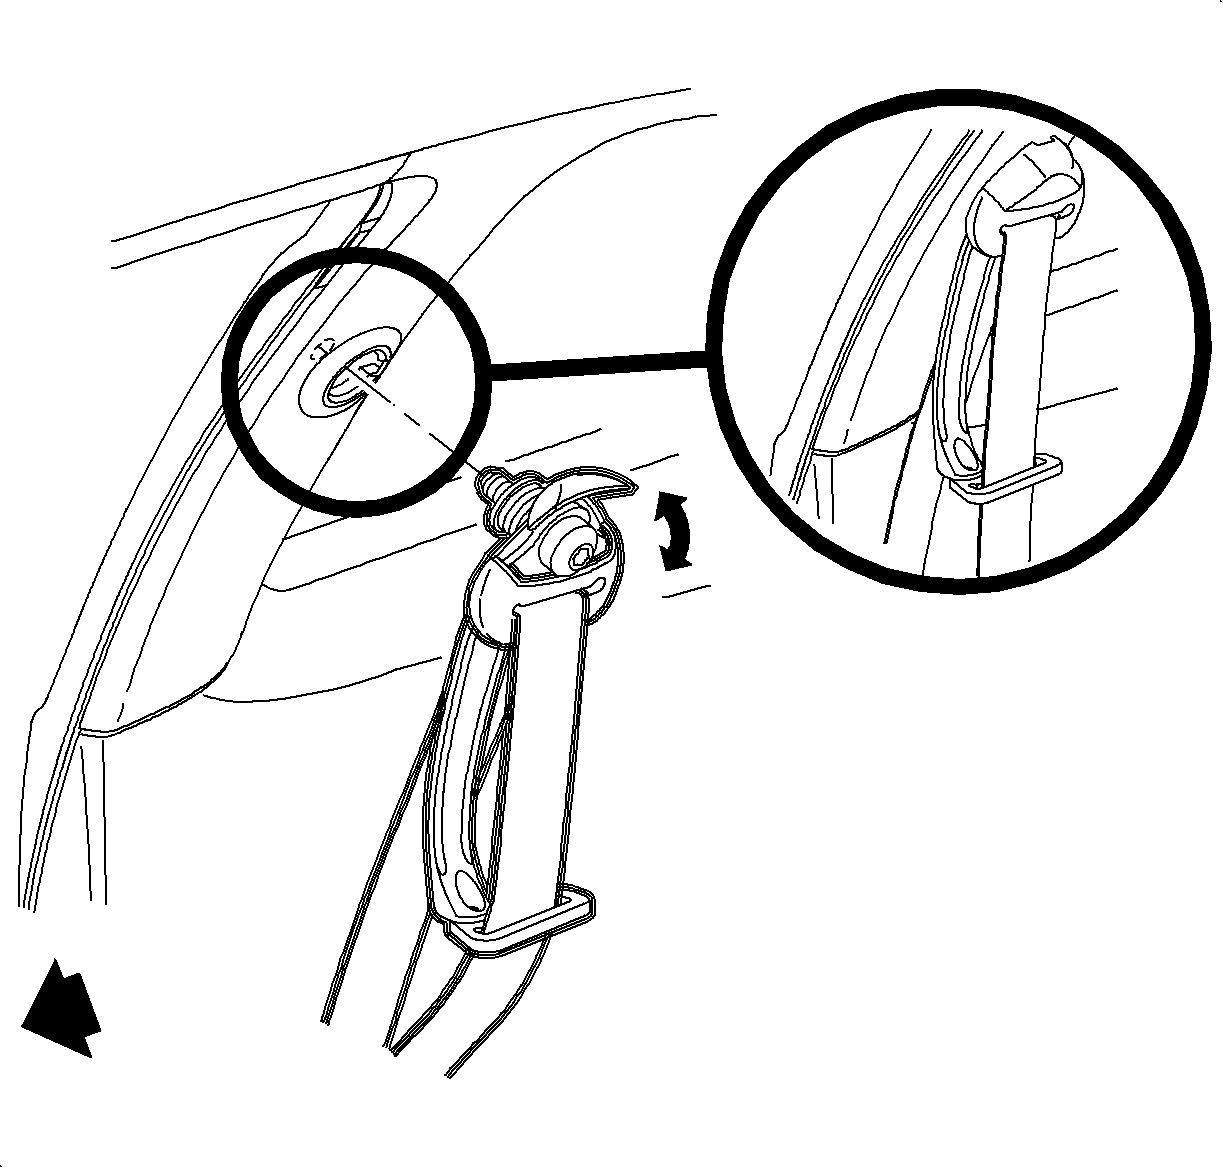
- Loosen the TORX® bolt and rotate the presenter arm forward to disengage
the presenter arm guide notch from the spaceframe.
- Remove the presenter arm and the seat belt unit.
- Lower both the front seat backs to the full back position.
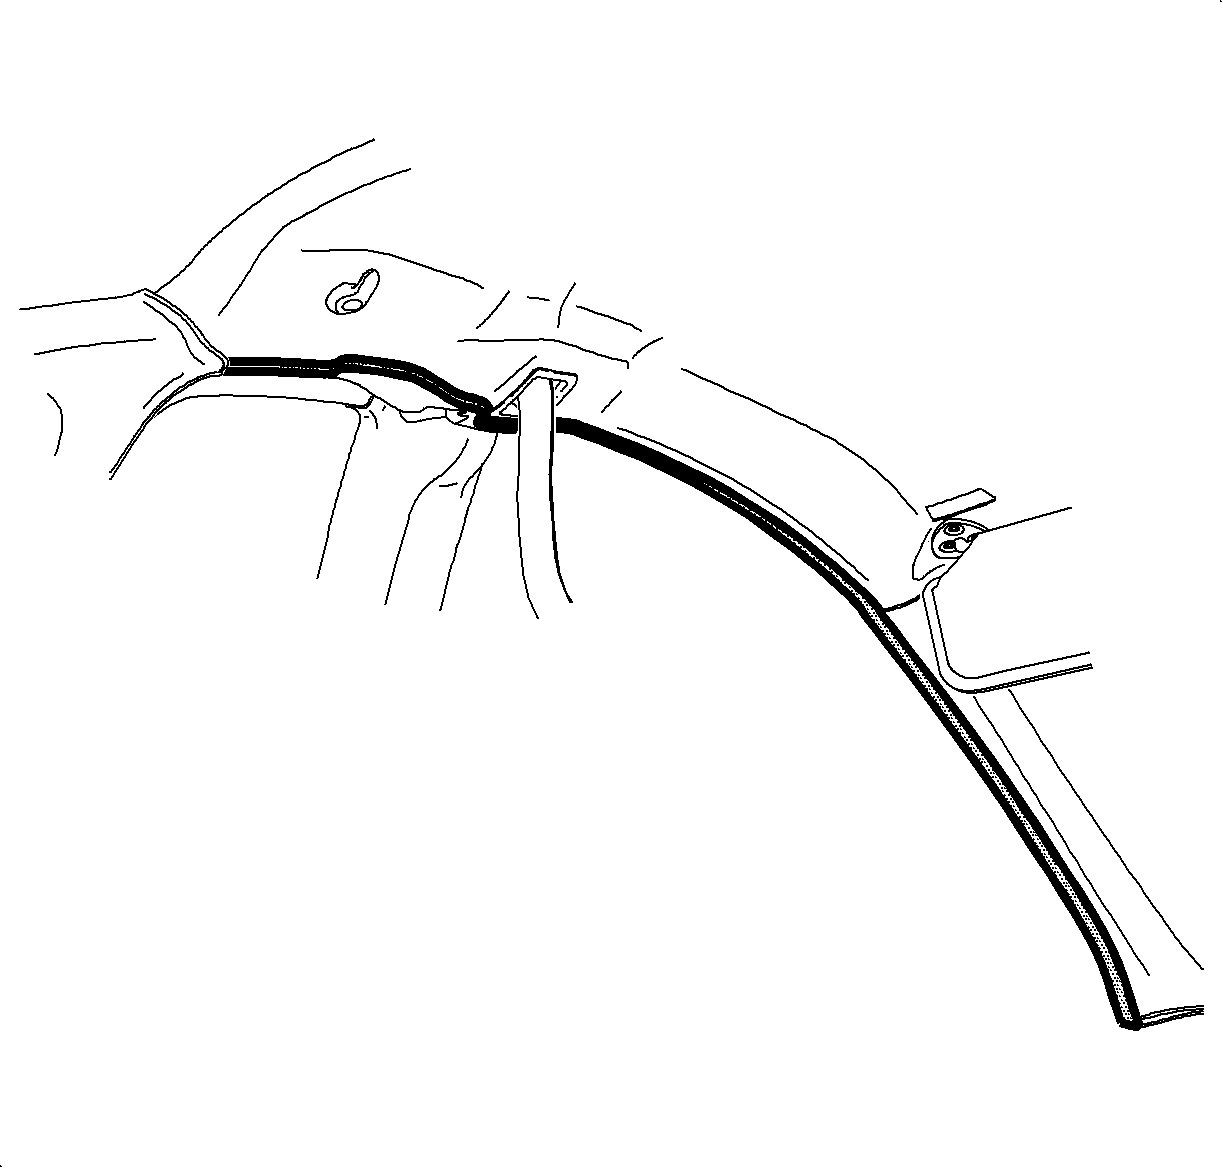
- Remove the quarter window garnish moldings by pulling
to disengage the clips.
- Defogger Lead (1)
- Defogger Notch (2)
- Interlock Tab (3)
- Disconnect the dome lamp electrical connector at the spaceframe on the
driver's side.
Notice
When removing the headliner, be careful not to bend the headliner.
If the headliner is bent, it will break and leave a wrinkle that cannot be repaired.
Notice
When removing a headliner it is possible for the Velcro®
fasteners
to tear from the headliner substrate. The Velcro®
to hook and loop
bond is much stronger than the Velcro®
to substrate. Once damaged,
the Velcro®
cannot be replaced
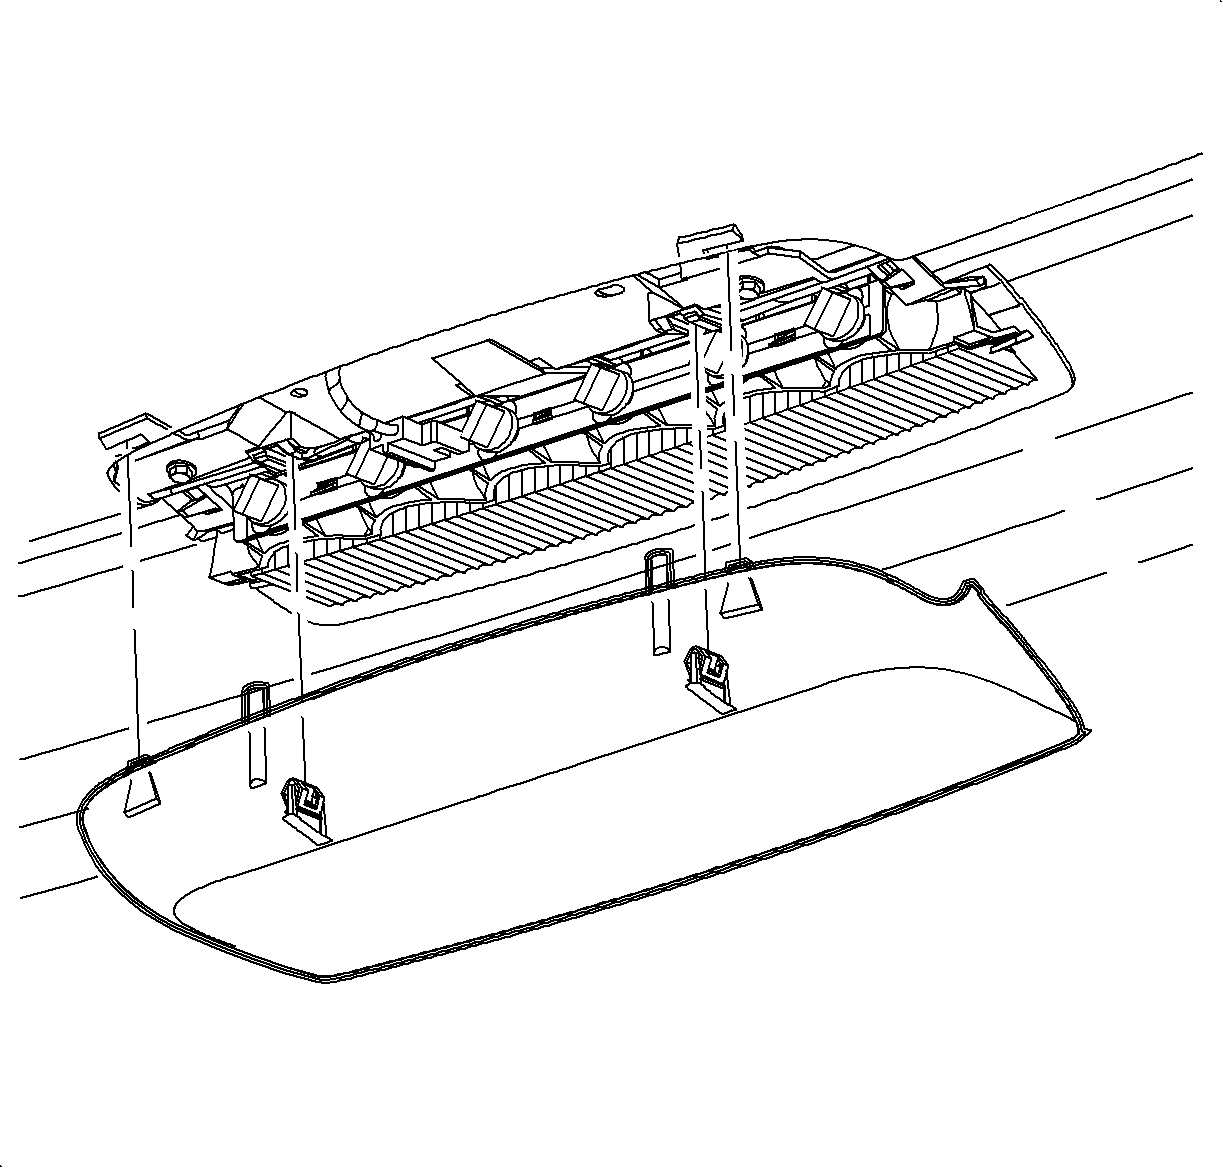
- Reach above the hook and loop retainer. Gently disengage
them from the headliner Velcro®.
- For non-sunroof vehicles, the Velcro® is located above the dome lamp.
- For sunroof vehicles, the Velcro® attachments surround the sunroof
opening. Disengage the Velcro® along the left and right sides first.

- Slide the seat belt webbing bezel outboard to disengage
it from the slot in the headliner.
- Remove the headliner through left side.
Installation Procedure
Notice
If a vehicle is equipped with a head curtain inflator module ensure
that the inflator module and tether are undamaged. If tether or curtain airbag are
damaged in any way, they must be replaced.
Caution
The head curtain inflator module tethers must be routed correctly.
Improper routing may result in personal injury or improper curtain airbag deployment.
Notice
When installing the headliner, be careful not to bend the headliner.
If the headliner is bent, it will break and leave a wrinkle that cannot be repaired.
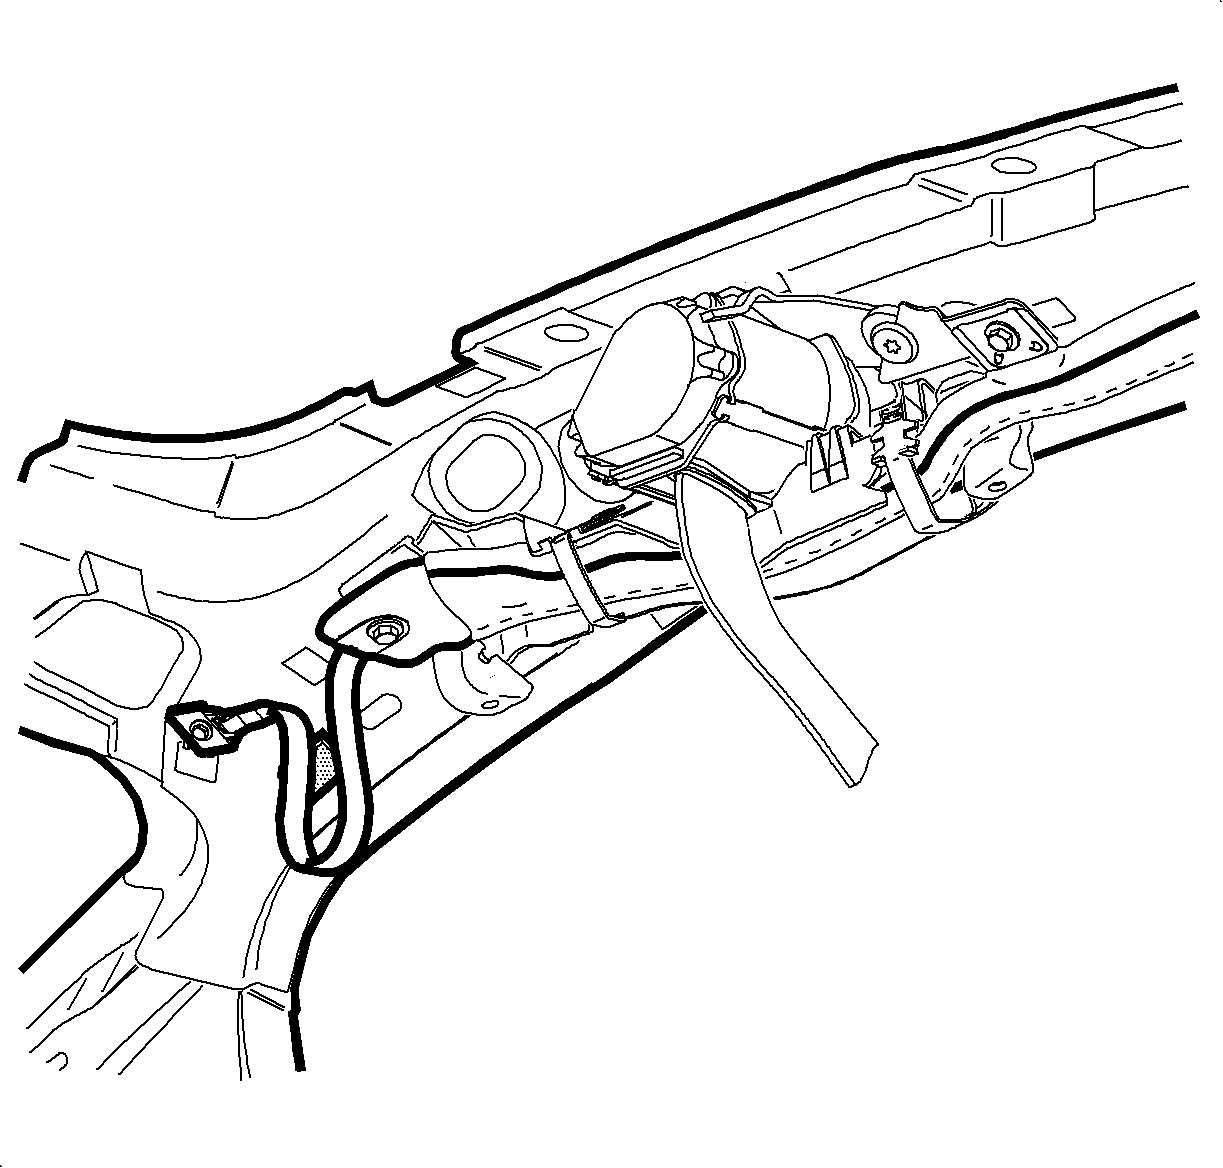
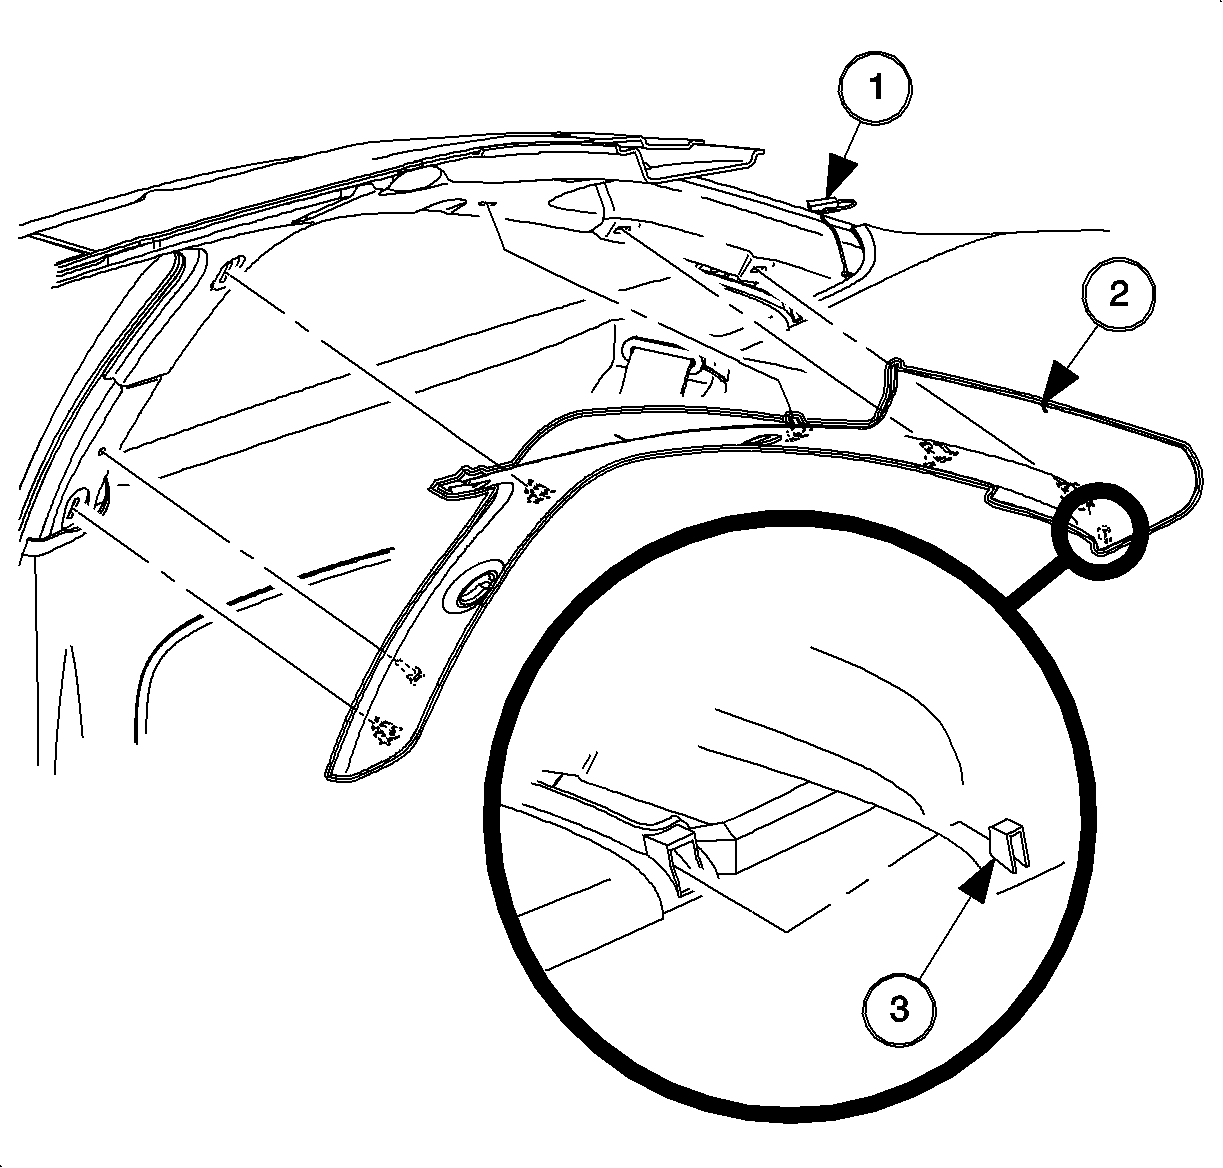
- If a vehicle is equipped with a head curtain inflator
module ensure that tether is correctly routed near the lock pillar.
- Tether is routed below the coat hook attachment area.
- Tether is securely fastened to the roof rail Velcro® pad.
- Ensure that there is no slack in the tether.
- Transfer the dome lamp wire harness and tape it in place.
- Insert the headliner through the left doors.
- Slide the seat belt webbing bezel into the slot in
the headliner.
- Center the headliner and apply pressure at the hook and loop locations.
Caution
Ensure that the curtain inflator module tether is not hanging below the edge
of headliner. Improper routing can cause personal injury or improper curtain airbag
deployment.
- Connect the dome lamp and the high mount stop lamp
wire harness.
- Install the sunshade, the sunshade supports, and the screws.
- Headliner (1)
- Sunshade Support (2)
- Sunshade (3)
- Install the coat hook and the coat hook screw.
- Install the high-mount stop lamp trim cover.
- On vehicles with a sunroof, install the map lamp and
the switch console cover.
- Install the quarter window garnish moldings.
Caution
Observe the orientation of the presenter arm assembly and the seat
belt unit. Incorrect orientation may result in personal injury.
Caution
Apply Loctite 242® Threadlocker US P/N 12345382 (Canadian P/N 10953489),
or equivalent, on all restraint bolts/nuts before installation. Failure to use such
threadlocker correctly may result in personal injury.
- Install the presenter arm and the seat belt unit.
Refer to
Seat Belt Retractor Replacement - Right Front
in Seat Belts.
- Install the striker trim cover.
- Install the windshield garnish moldings. Refer to
Windshield Garnish Molding Replacement
.
- Reposition the door weather-strip over the headliner
edge.
- Raise the front seat backs.