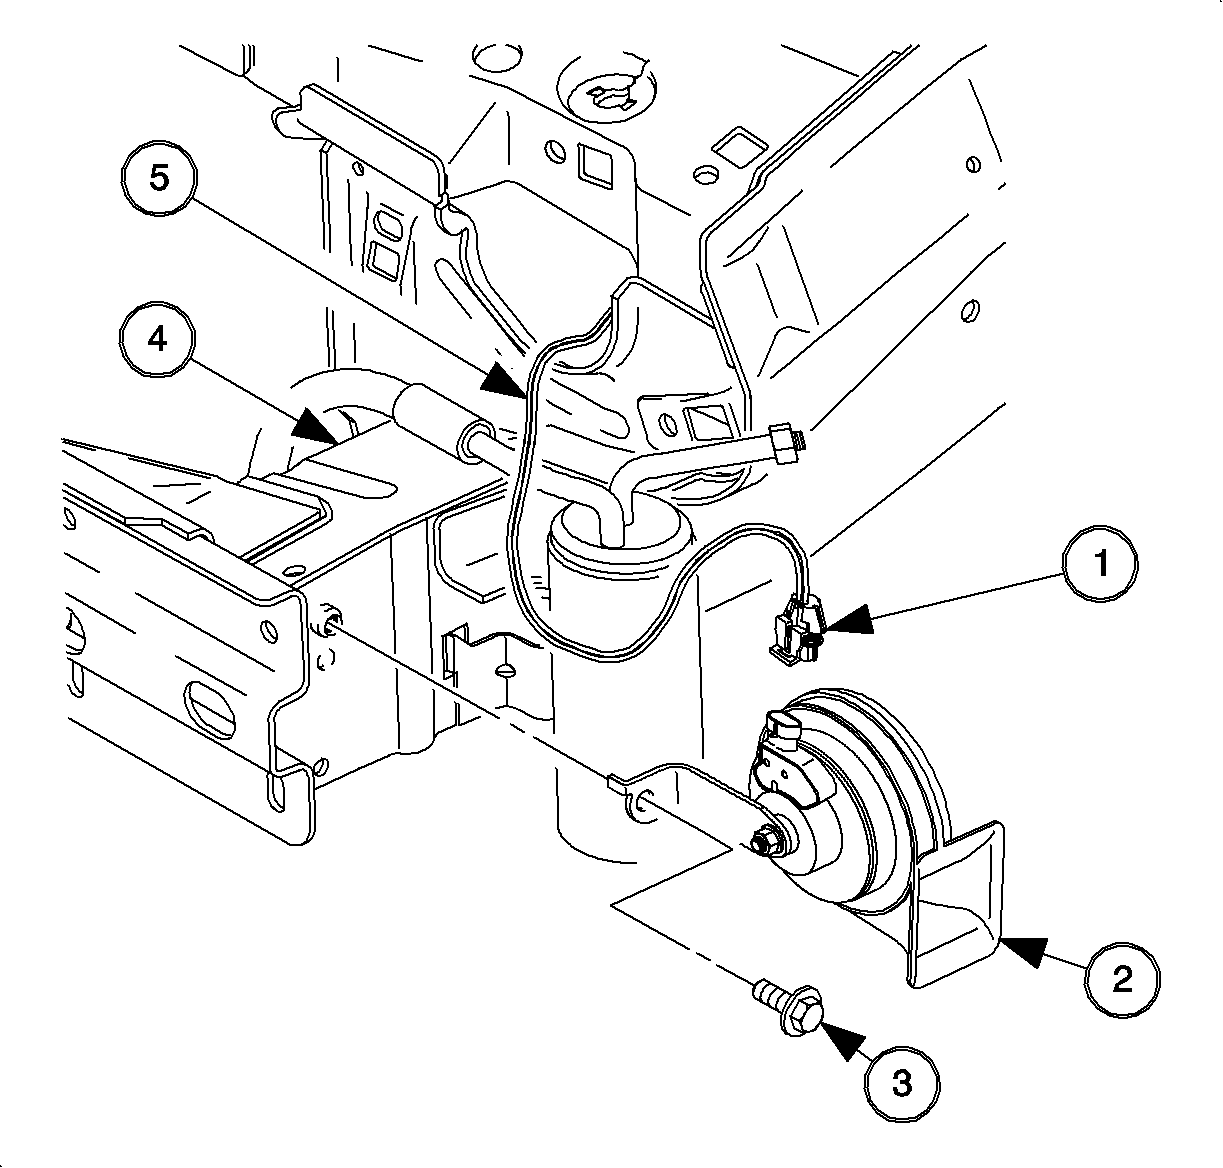
- Install the horn assembly, lining up the horn bracket to rail.
Notice
Refer to Fastener Notice in Cautions and Notices.
- Install the horn bolt.
TightenTighten the horn bracket-to frame rail bolt to 10 N·m (89 lb in).
- Connect the horn connector.
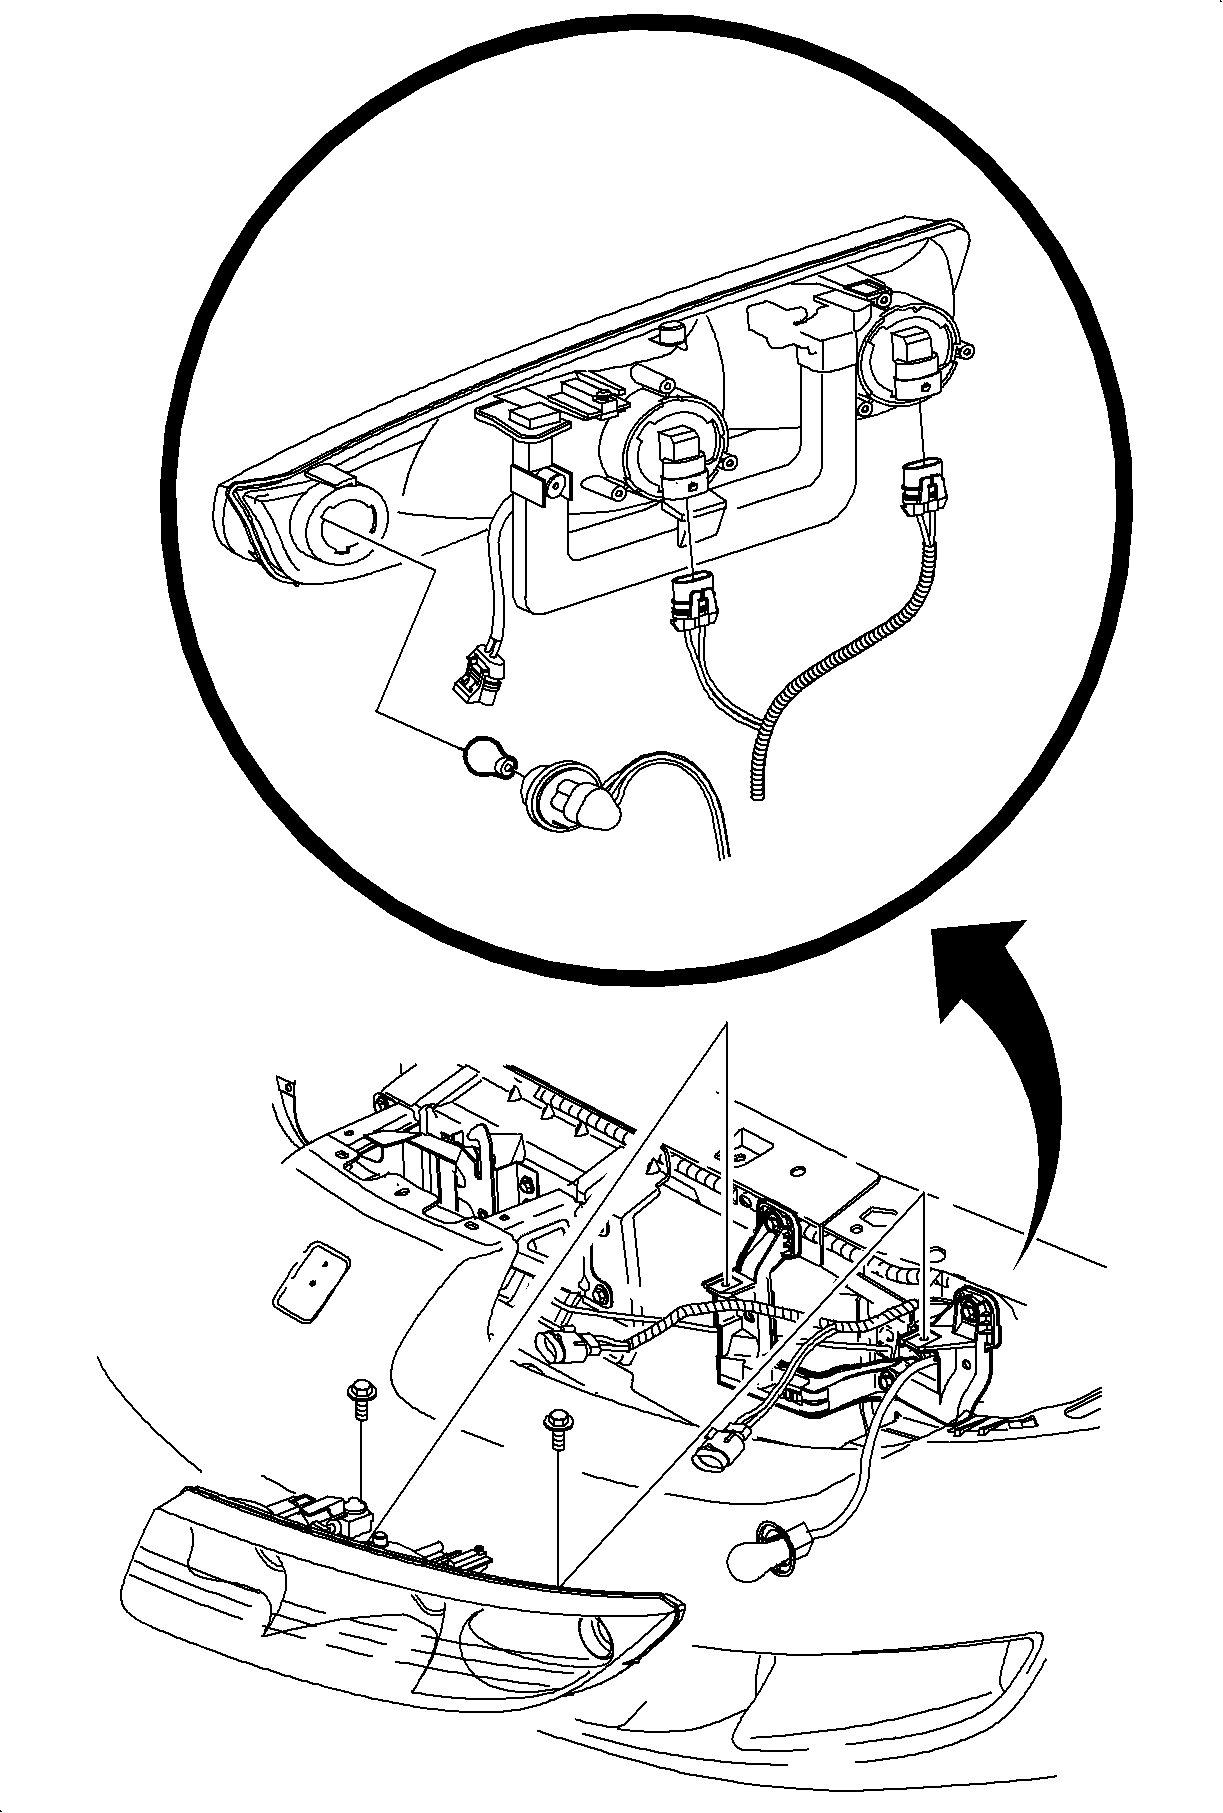
- Align the headlamp attachment bolts over the J-clips and push the lamp
down until it is seated.
- Install the headlamp bulb sockets and the turn signal socket into the
headlamp housing. Rotate the sockets to lock in place.
- Install the attaching bolts.
TightenTighten the headlamp attachment bolts to 6 N·m (53 lb in).
Caution
Halogen bulbs contain a gas under pressure. Handling a bulb improperly could
cause it to shatter into flying glass fragments. To help avoid personal injury:
- Turn off the headlamp switch and allow the bulb to cool before changing
bulbs. Leave the headlamp switch off until the bulb change is complete.
- Always wear eye protection when changing a halogen bulb.
- Handle the bulb only by its base. Avoid touching the glass.
- Do not drop or scratch the bulb. Keep moisture away.
- Place the used bulb in the new bulb's carton and dispose of it properly.
Keep halogen bulbs out of the reach of children.
- Check the headlamp aim. Adjust if required. Refer to
Headlamp Aiming
procedure in Lighting Systems.