Ignition Coil Available as a Service Part (P/N16167763, Ignition Coil) #99-T-14 - (Nov 25, 2003)
Ignition Coil Available as a Service Part (P/N16167763, Ignition Coil)1991-1999 Saturn vehicles
Purpose
The purpose of this bulletin is to notify retailers that the ignition coil is
now available as a separate service part. Previously, the ignition coil was only available
as part of the electronic ignition (EI) module assembly.
This bulletin provides ignition coil replacement guidelines and ignition coil
installation and removal procedures.
Ignition Coil Diagnosis
Do not replace the ignition coil unless it can be verified that it is only cause
for the condition and/or a related diagnostic trouble code (DTC).
If diagnosis leads to the ignition module assembly, and it can not be verified
that the ignition coil is faulty, the entire ignition module assembly must be replaced.
Refer to "Ignition Coil Inspection" to inspect the ignition coil.
Ignition Coil Inspection
The ignition coil can be checked using the following procedure.
- Inspect ignition coil for corrosion.
- If excessive corrosion is present on the ignition coil terminals, replace
the ignition coil only, and verify that the vehicle conditions and/or DTCs are no
longer present.
- If corrosion is not present on the ignition coil terminals, refer to step
2.
- Check resistance between ignition coil towers.
If resistance between the ignition coil towers is not within the specified range
of 8--15 K ohms, replace the ignition coil.
Refer to "Procedure" in this bulletin to replace the ignition coil.
Procedure
- Turn ignition Off.
- Disconnect ignition module harness connector.
- Remove upper and lower ignition coil bolts.

Important
For spark plug wires with a connector position assurance (CPA) installed (1999
model year or later), use a small, flat-bladed screwdriver to remove spark plug
wires from the coil tower by gently prying between the ignition module and black CPA
housing.
Important
Note which spark plug wire is removed from which ignition coil tower. The spark
plug wires must be connected to the correct ignition coil towers.
- Disconnect spark plug wires from ignition coil tower.
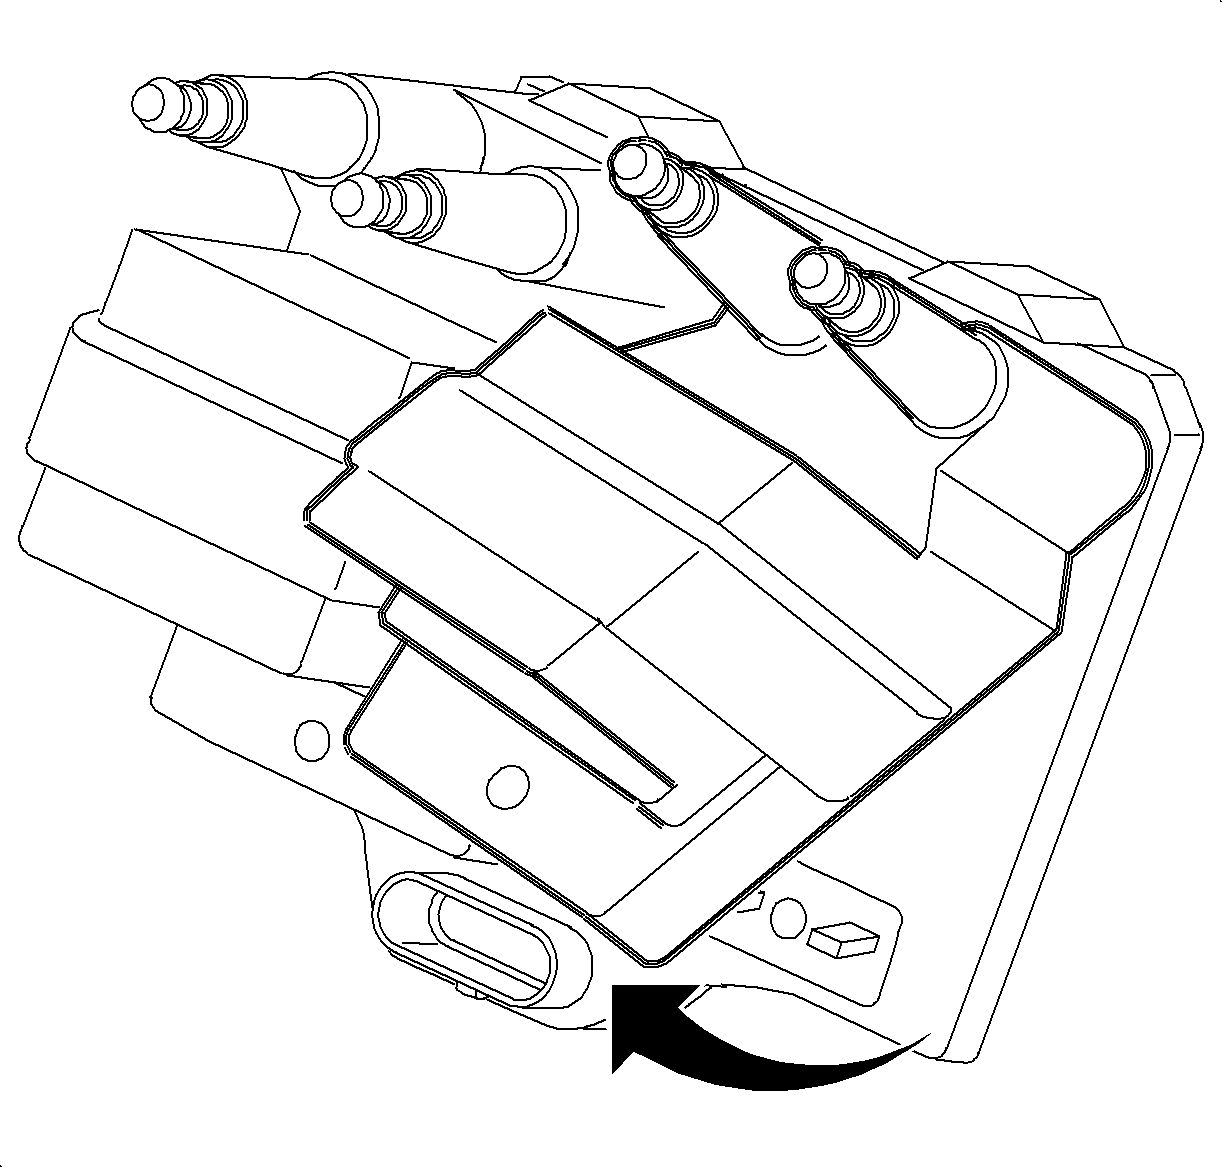
- Remove ignition coil from ignition module by rotating the coil in an upward
direction.
Important
Step 6 is required for 1991-1995 model year vehicles only.
- Remove white alignment pins from the ignition
module using pliers.
- Install new ignition coil.
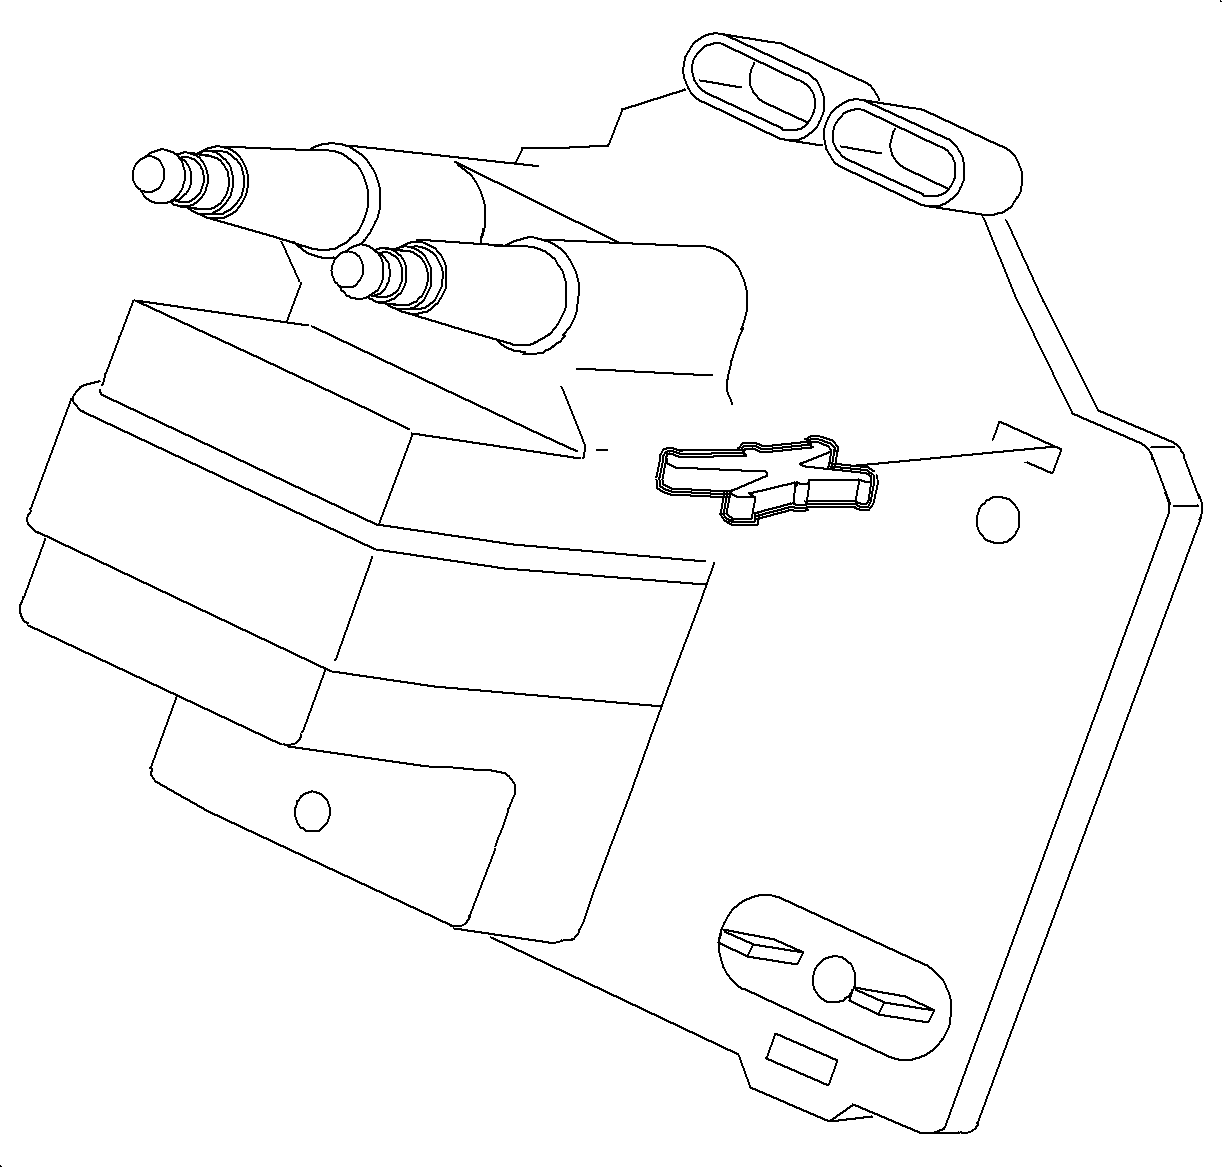
- Place ignition coil tab into ignition module slot.
Notice
Make certain electrical connectors are lined up before seating to avoid damage
to electrical connectors.
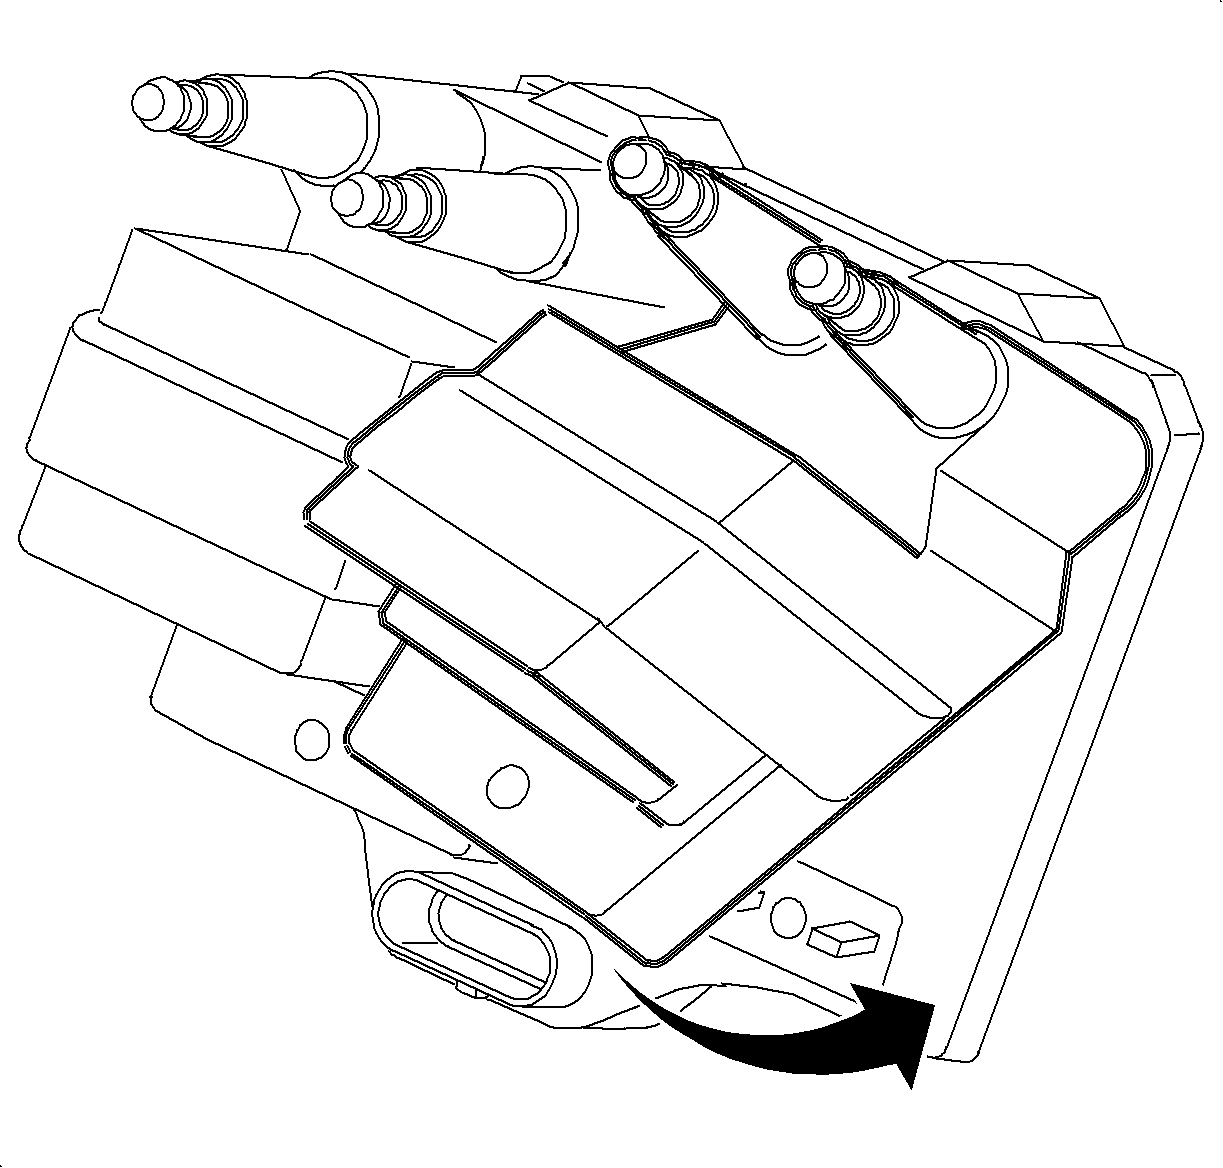
- Rotate ignition coil until lower portion of ignition coil is seated on
make electrical connectors.
Important
Perform step 8 if ignition module uses a CPA to retain spark plug wires. Refer
to step 9 if ignition module does not use a CPA to retain spark plug wires.
- Install spark plug wires housed with CPA.
Important
Ensure threads of bolts and threaded holes are clean and free of any residue.
- Install upper and lower ignition module bolts.
Tighten8 N·m (71 in - lb)
Parts Requirements
16167763 - Ignition Coil
Claim Information
To receive credit for this repair during the warranty coverage period, submit
a claim through the Saturn Dealer System as follows:
Case Type
| Description
| Labor Operation Code
| Time
|
VW
| Electronic Ignition Module Coil - Replace
| J4345
| 0.4 hrs
|
Add:
| To replace each additional coil
| | 0.2 hrs
|
GM bulletins are intended for use by professional technicians,
NOT a "do-it-yourselfer". They are written to inform these
technicians of conditions that may occur on some vehicles, or to
provide information that could assist in the proper service of a
vehicle. Properly trained technicians have the equipment,
tools, safety instructions, and know-how to do a job properly and
safely. If a condition is described, DO NOT assume that the
bulletin applies to your vehicle, or that your vehicle will have
that condition. See your GM dealer for information on whether
your vehicle may benefit from the information.
|

|
WE SUPPORT VOLUNTARY TECHNICIAN CERTIFICATION
|
© Copyright General Motors Corporation.
All Rights Reserved.