Inflatable Restraint Sensing and Diagnostic Module Replacement
Caution
Be careful when you handle a sensing and diagnostic module (SDM). Do not strike
or jolt the SDM. Before applying power to the SDM:
- Remove any dirt, grease, etc. From the mounting surface.
- Position the SDM horizontally on the mounting surface.
- Tighten all of the SDM fasteners and SDM bracket fasteners to the specified
torque value.
Failure to follow the correct procedures could cause air bag deployment, personal
injury, or unnecessary SIR system repairs.
Caution
Proper operation of the supplemental inflatable restraint (SIR) sensing system
requires that any repairs to the vehicle structure return the vehicle structure to
the original production configuration. Not properly repairing the vehicle structure
could cause non-deployment of the air bag in a frontal collision or deployment of
the air bag for conditions less severe than intended. Incorrect configuration may
result in personal injury.
ACCIDENT WITH OR WITHOUT AIR BAG DEPLOYMENT:After any collision, inspect these
components
as indicated. If you detect any damage, replace the component. If you find any damage
to the mounting hardware, repair or replace the hardware as needed.
- Steering Column -- Perform the "Checking Steering Column for
Accident Damage" procedures in the
Repairs and Inspections Required After a Collision
section in this service manual.
- I/P Knee Bolsters -- Inspect the knee bolsters for bending, twisting,
buckling, or any type of damage.
- I/P brackets, braces, etc. -- Inspect for bending, twisting, buckling,
or any other type of damage.
- Seat Belts -- Perform the "Safety Belt Operational Checks"
section in the "Body/Repair" service manual.
ACCIDENT WITH AIR BAG DEPLOYMENT:After a collision involving air bag deployment, replace
these components. If you detect any damage to the mounting hardware,
repair or replace the mounting hardware as needed.
- Inflatable Restraint I/P (inflator) Module
- Inflatable Restraint Sensing and Diagnostic Module
- Inflatable Restraint Steering Wheel (inflator) Module
After
a collision involving air bag deployment, inspect the following components as indicated.
Perform these component inspections in addition to the inspection indicated as "Accident
With or Without Air Bag Deployment." If you find any damage to the mounting
points or mounting hardware, repair the component or replace the hardware as needed.
- Inflatable Restraint Steering Coil Assembly -- Inspect the coil and
the coil wiring pigtail for melting, scorching, or other damage due to excessive
heat.
Removal Installation
Important
In the event deployment has occurred, inspect
the coil assembly wire for any signs of scorching, melting or other damage due to
excessive heat. If the coil has been damaged, it must be replaced.


- Disable the SIR
system. Refer to
Disabling the SIR System
.
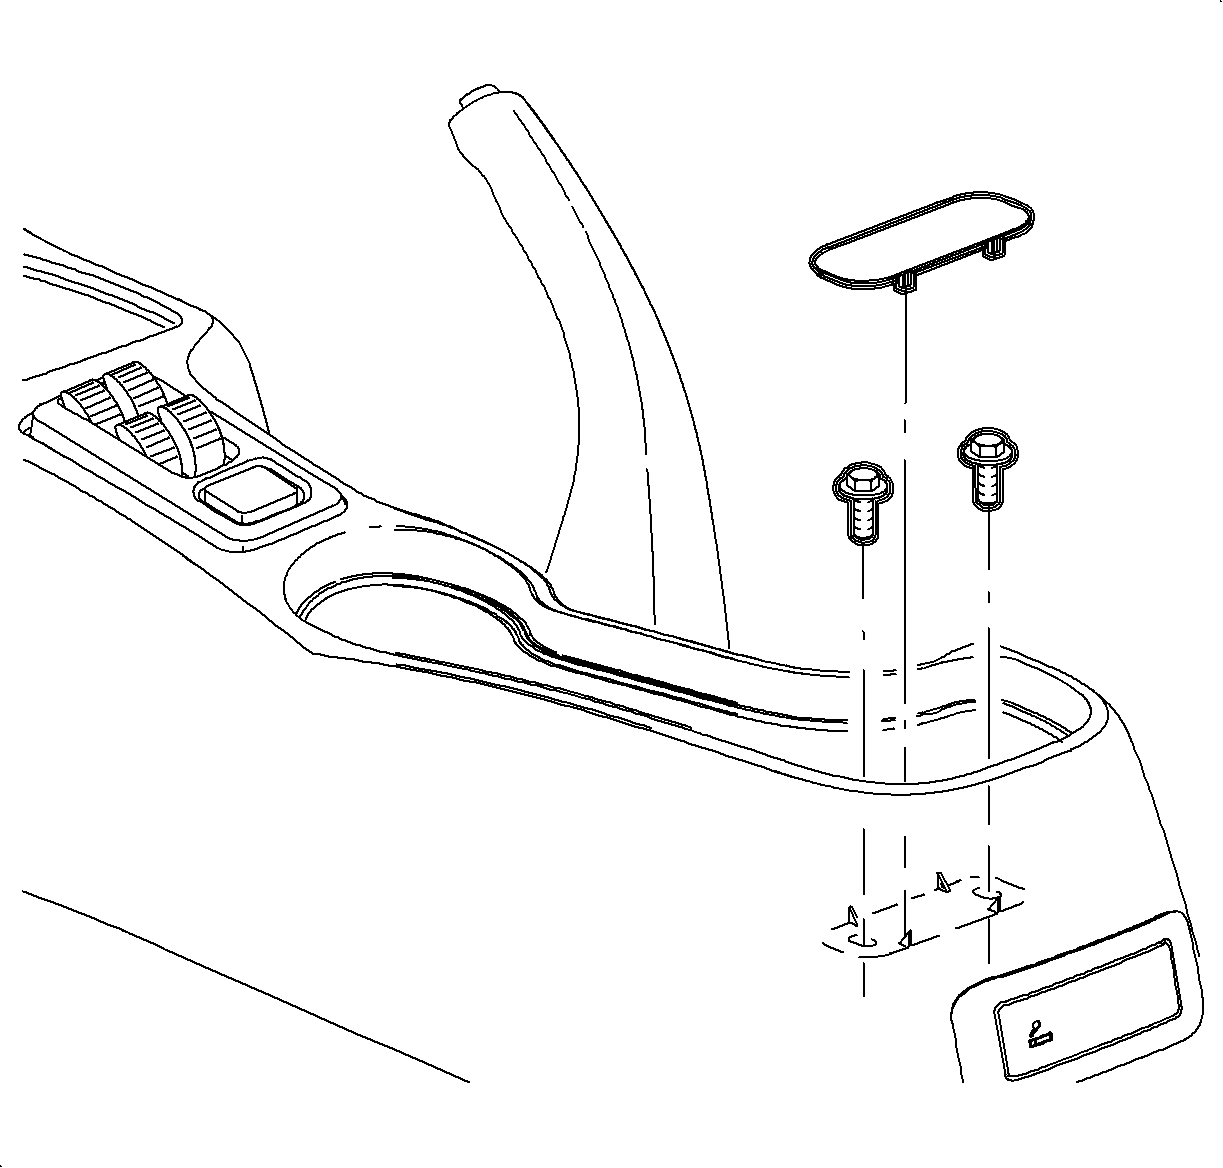
- Lift the parking brake lever.
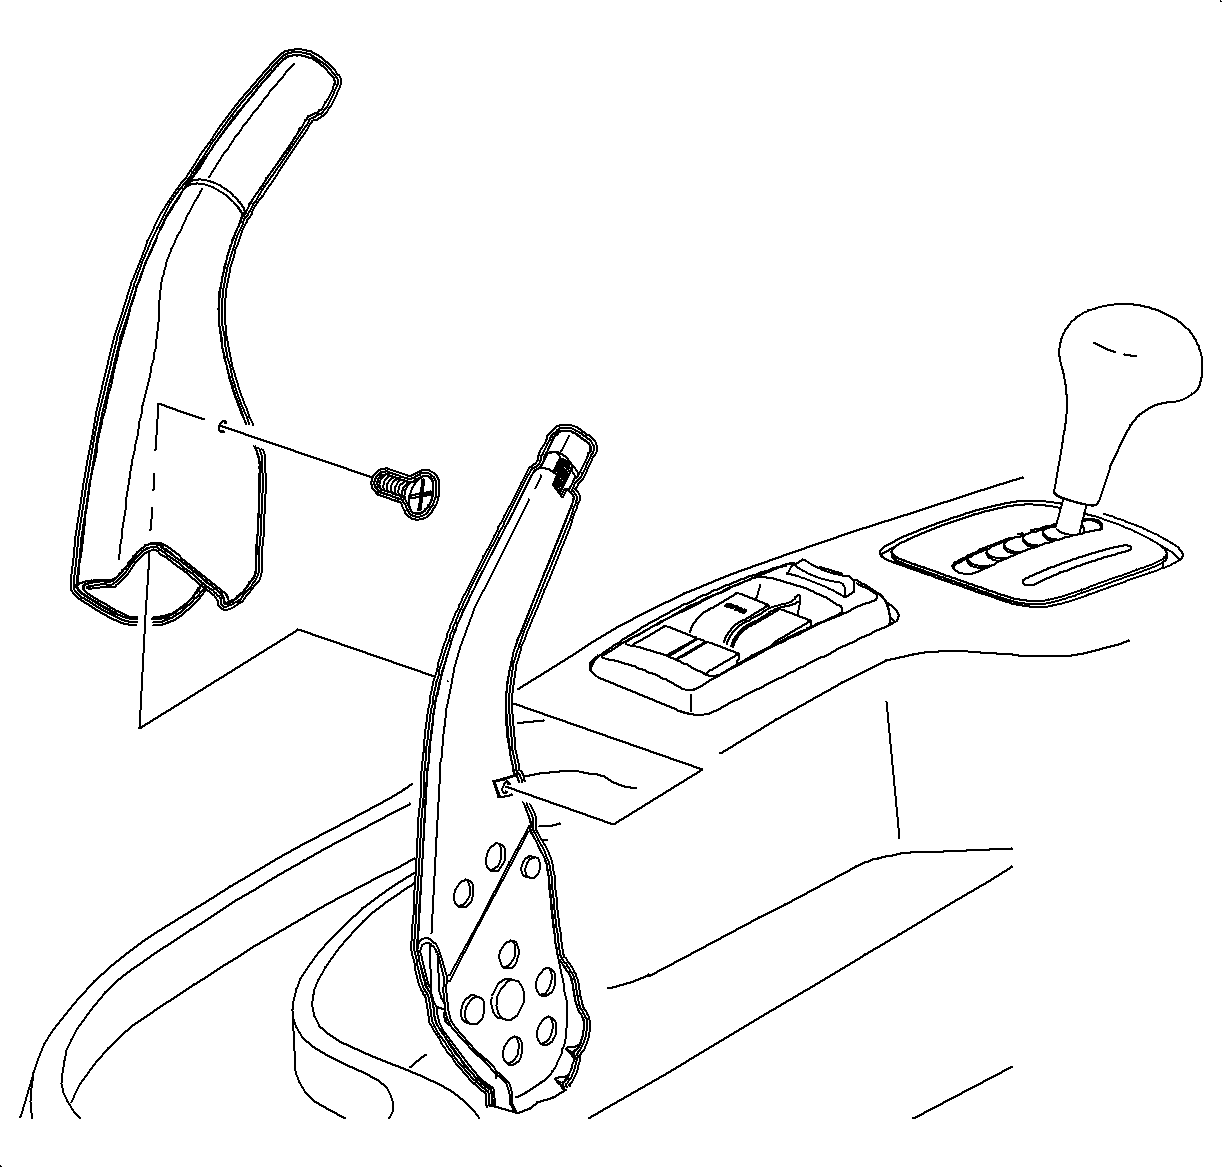
- Remove the parking brake lever cover screw.
- Remove the parking brake cover by lifting it straight off the lever.
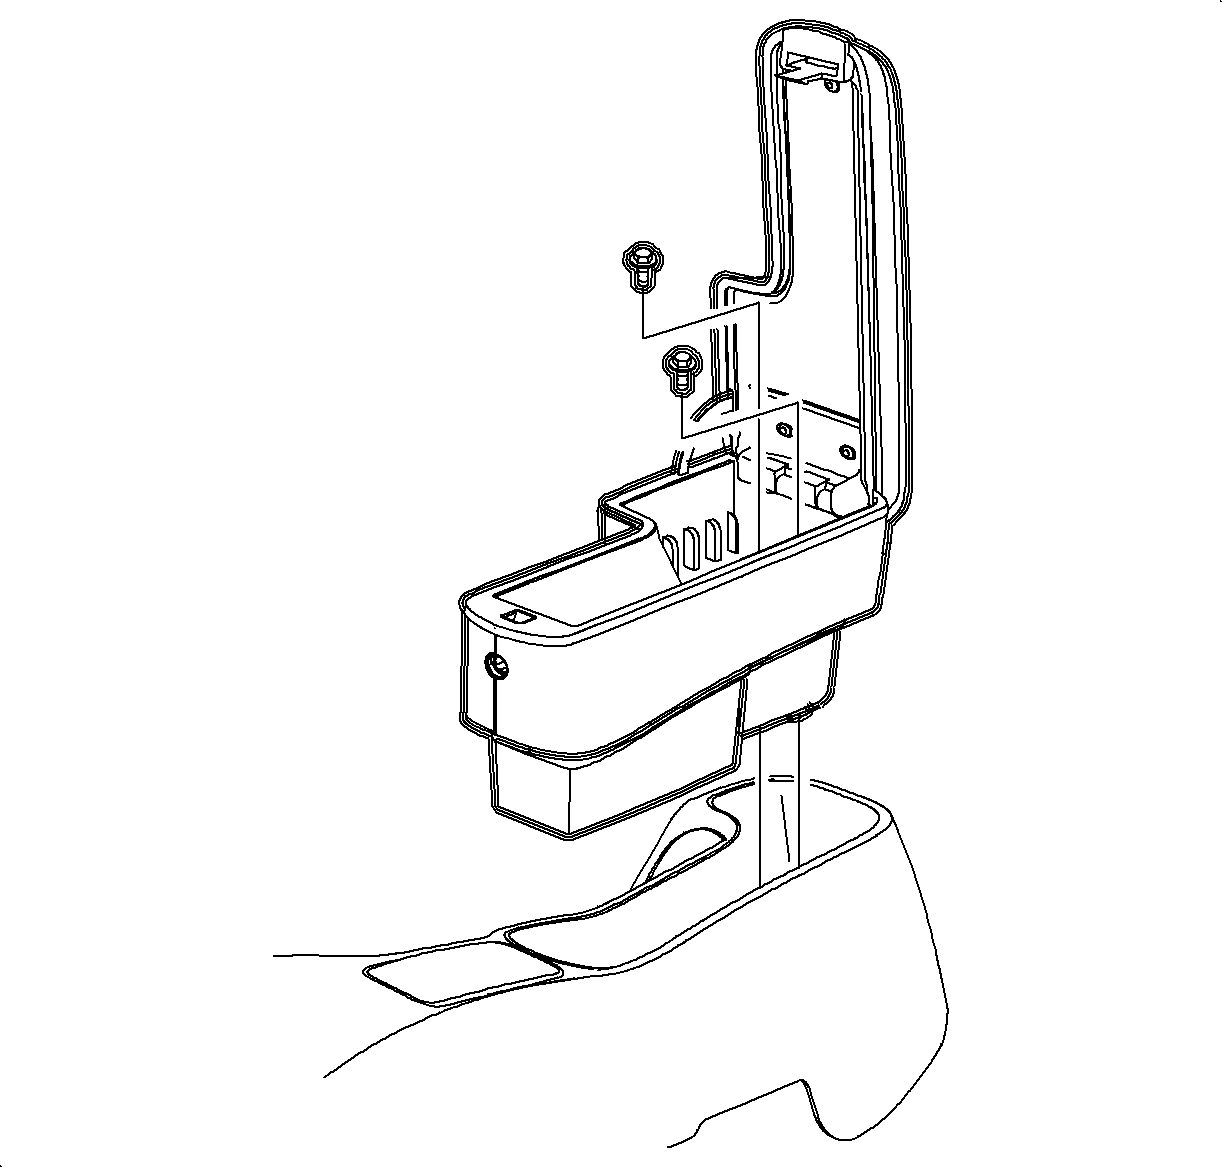
- Remove the ashtray from the cup holder by lifting it straight out.
- Remove the cup holder from the console by pulling upwards
starting at the rear edge.
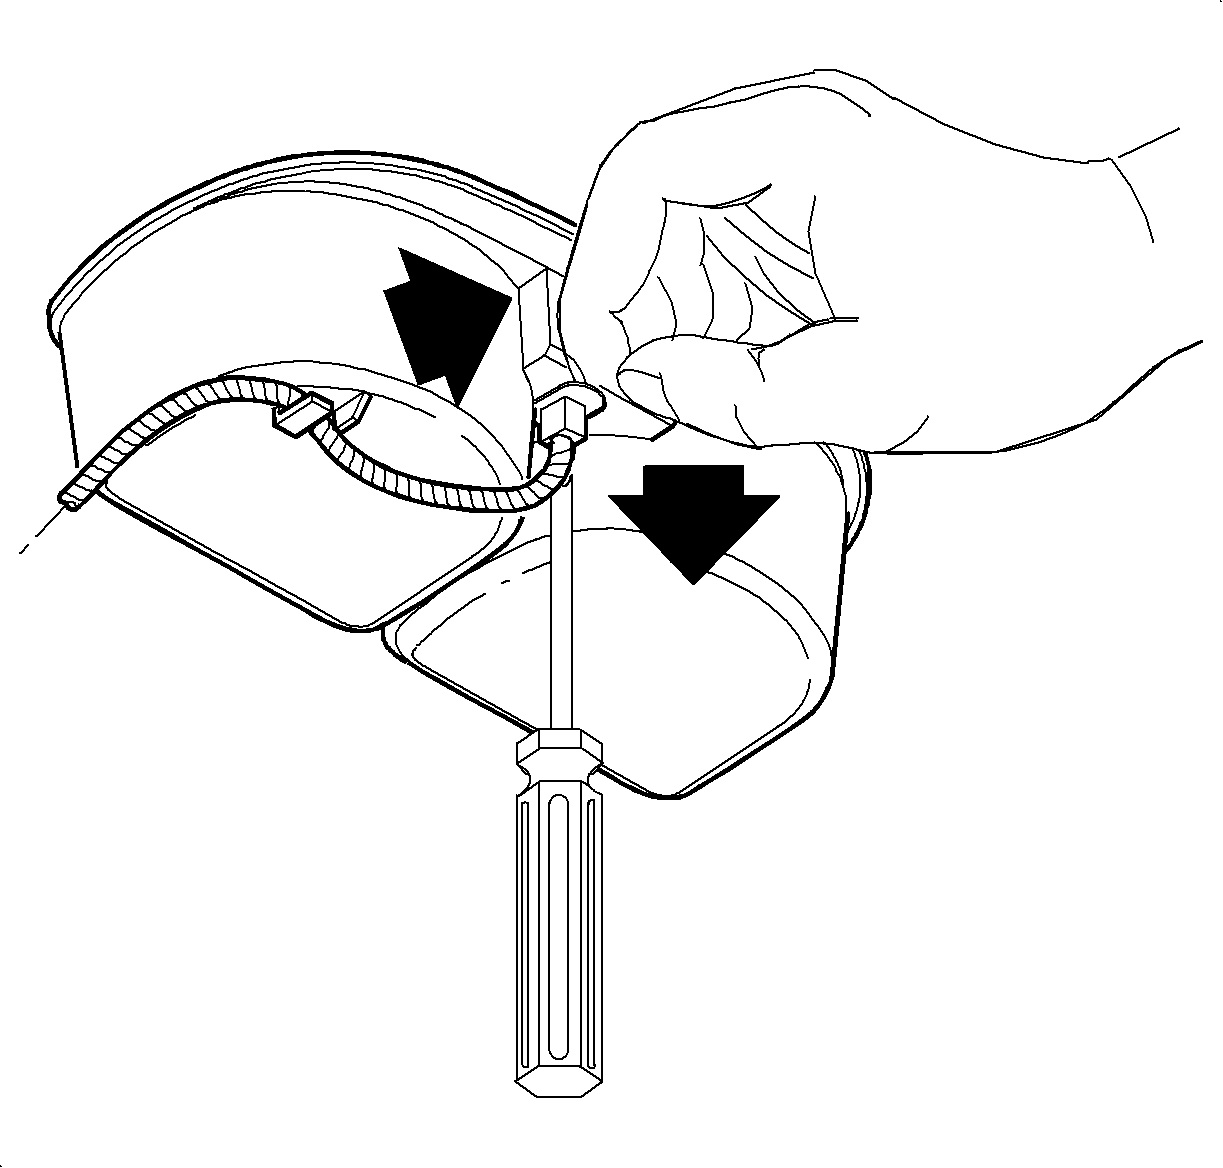
- Remove the ashtray
bulb socket by lifting the tab while sliding the socket upwards. Then pull the socket
straight out.
- Remove the wiring harness from the cup holder.
- Remove the window switch, if equipped, by sliding the
switch forward then lifting at the rear edge. Disconnect the electrical connectors.
- Remove the rear
screw cover by lifting at cut out.
- Remove the rear console screws.
- If equipped with
center console/arm rest, remove the center console/arm rest from the center console.
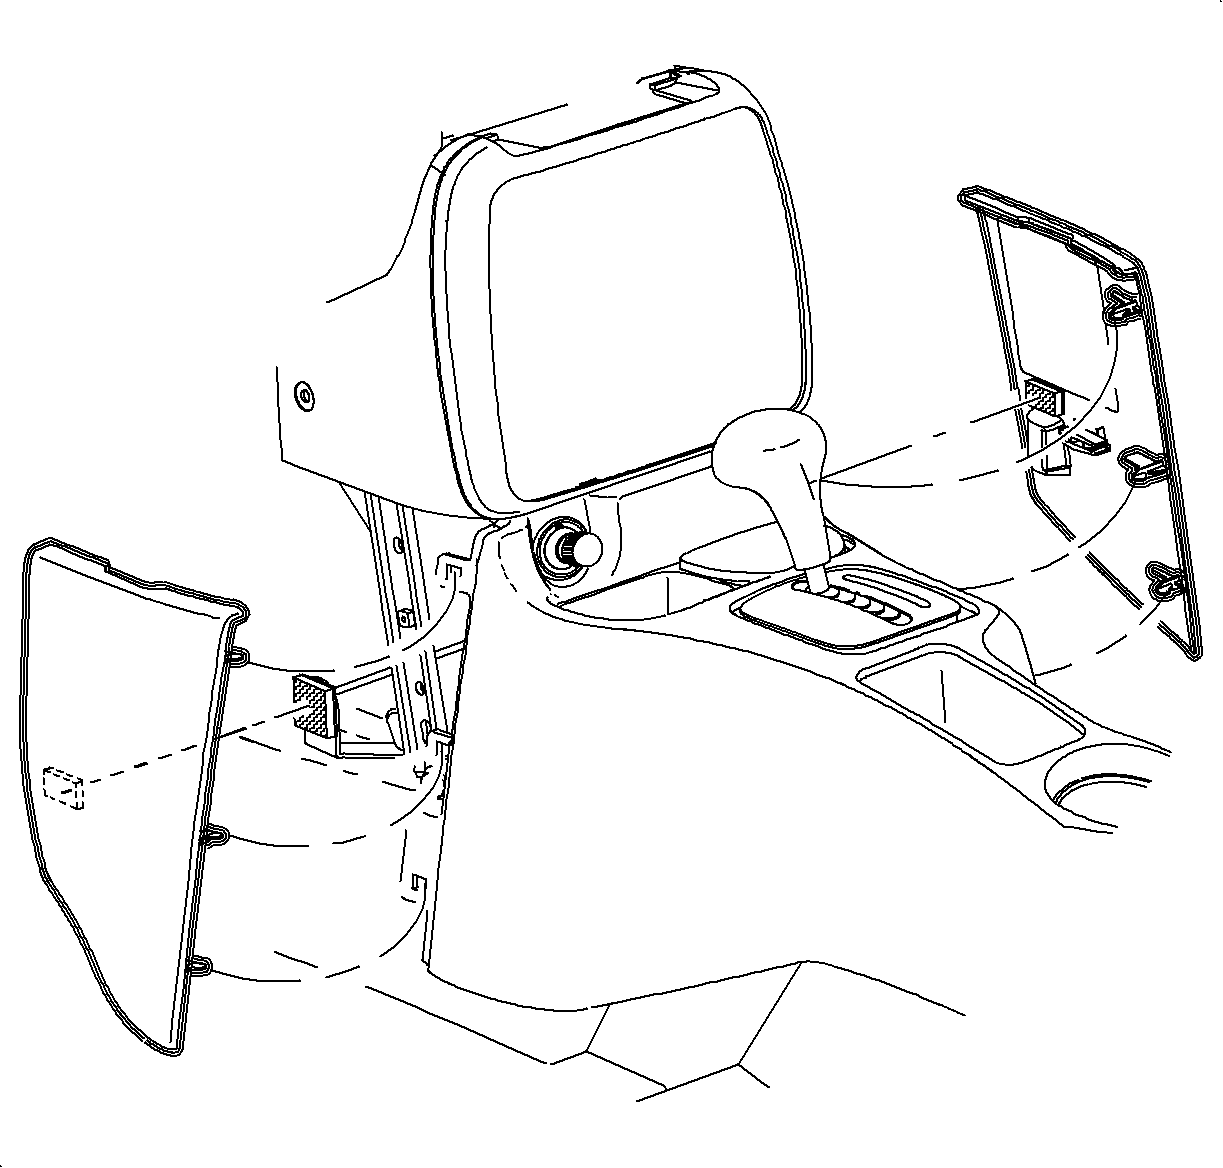
- Remove the left and right lower trim panel extensions
by pulling outward at the dual lock locations. Then rotate the panels outward to
disengage the hinges from the console.
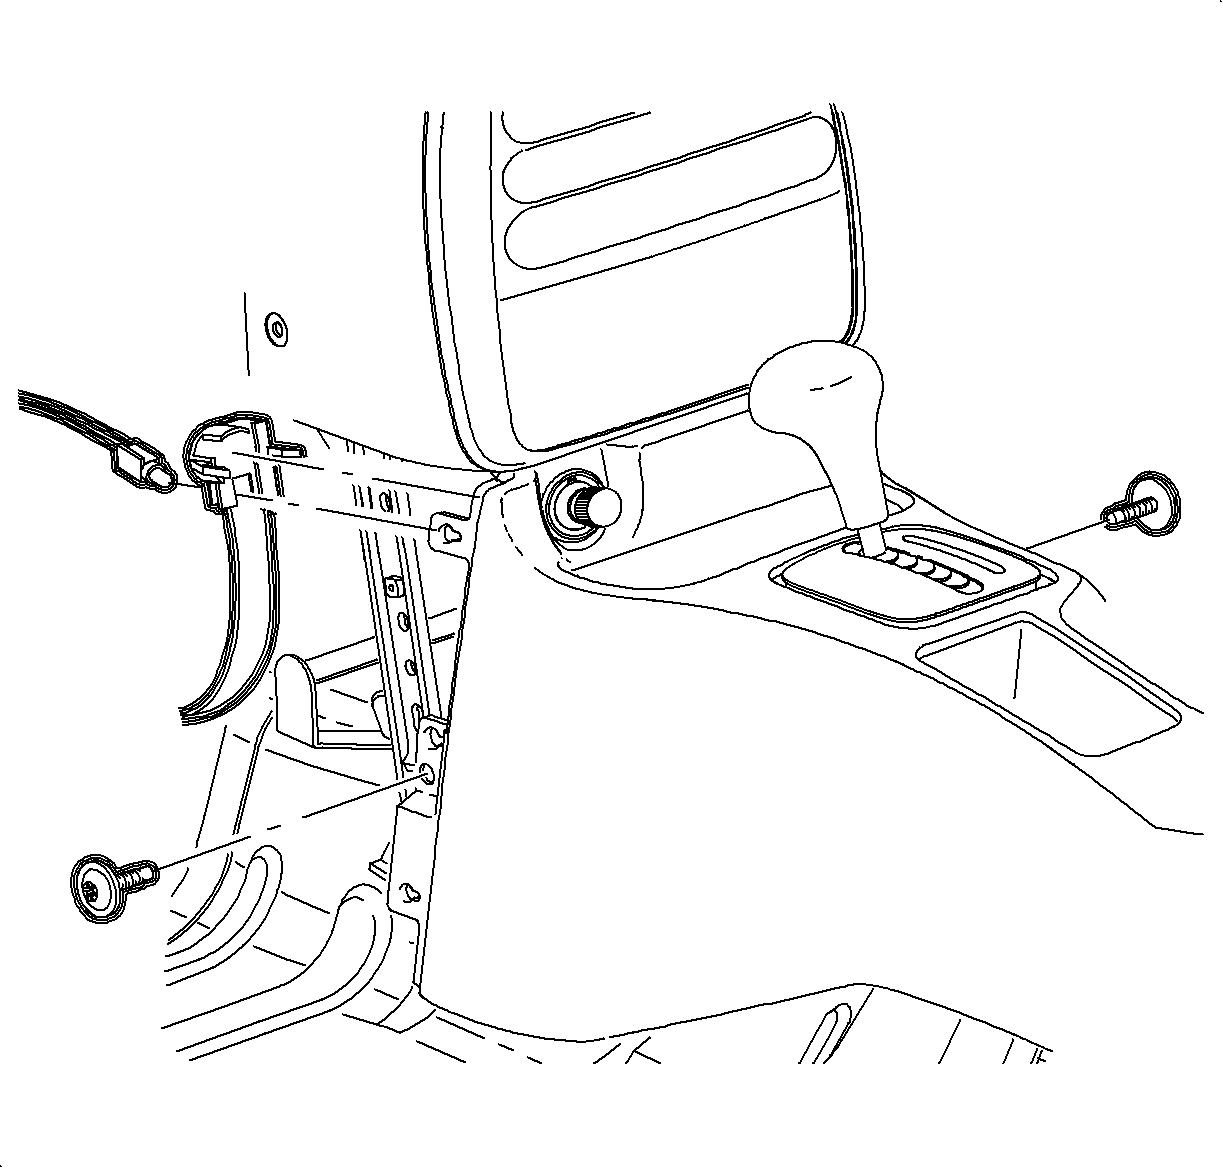
- Remove the front console screws.
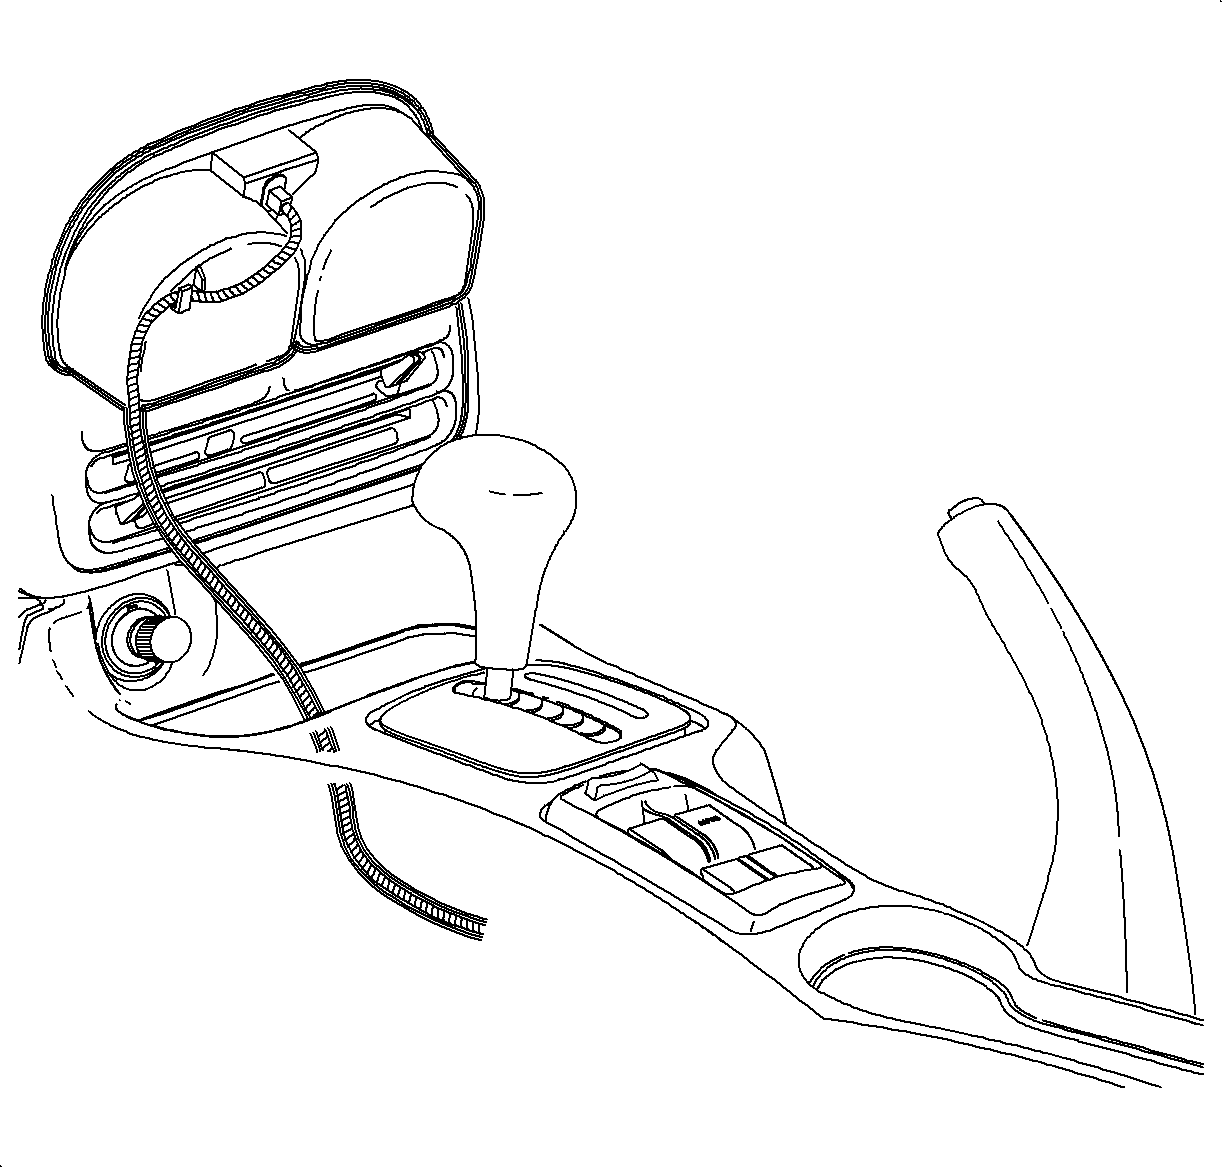
- Move the console rearward.
- Remove the bulb socket from the cigarette lighter by rotating counterclockwise
and pulling it straight out.
- Disconnect the cigarette lighter electrical connector.
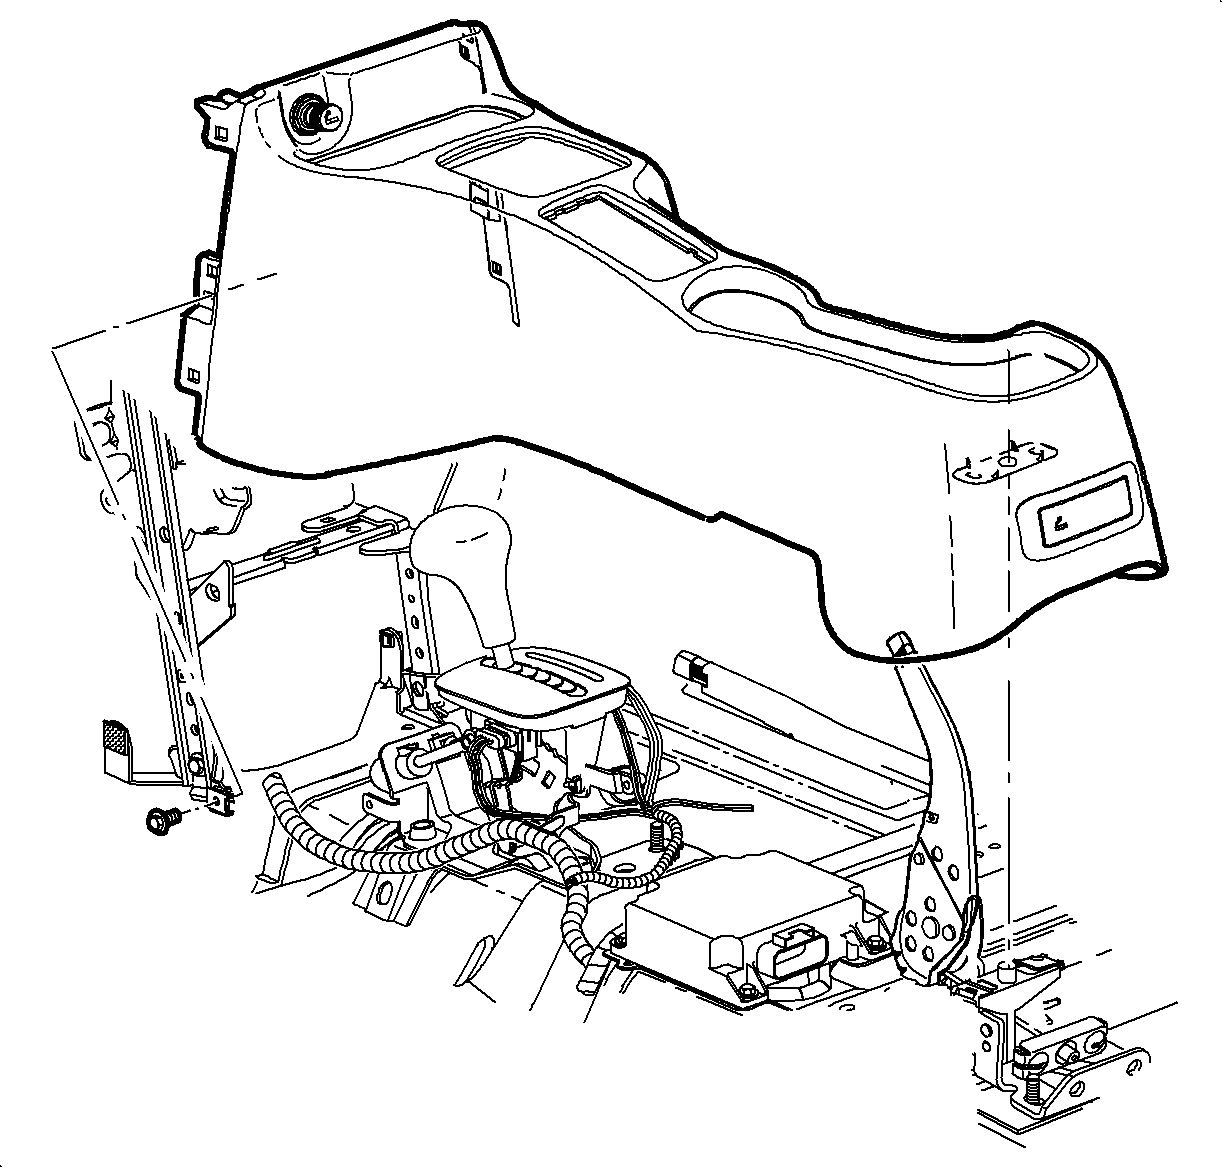
- On automatic transaxle equipped vehicles, tape the shifter button in to clear
the shifter opening.
- Lift the console at the rear. Slide the console rearward and lift straight
up to remove.
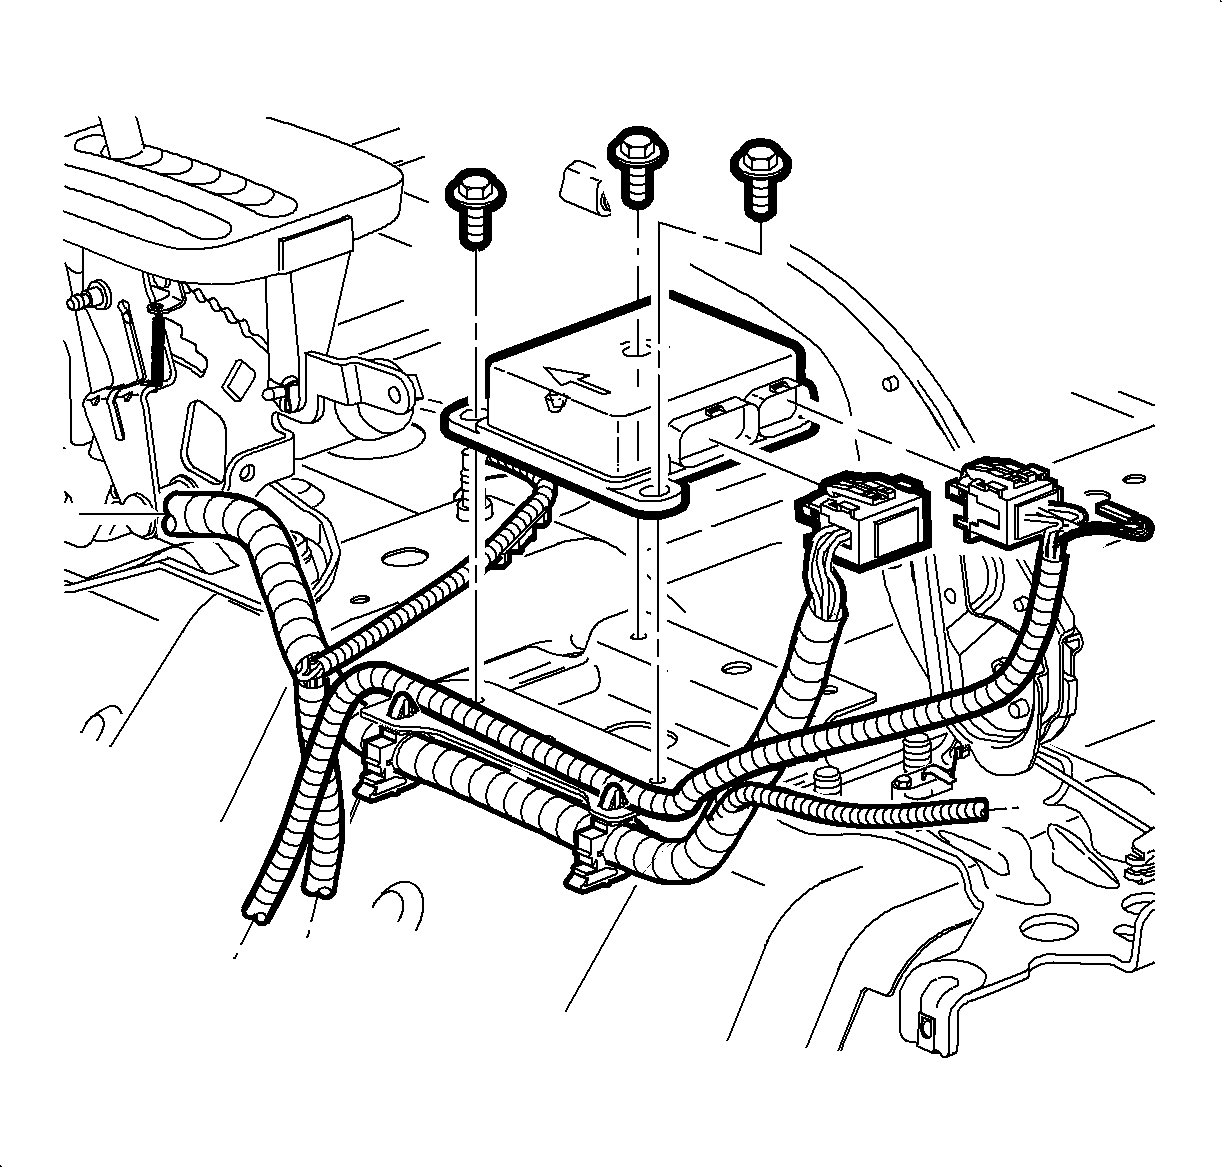
- Remove the connector position assurance (CPA) device and disconnect the SDM.
- Remove the SDM bolts and remove the SDM.
Installation Procedure
Important
Make sure the SDM is oriented with the arrow
facing forward.
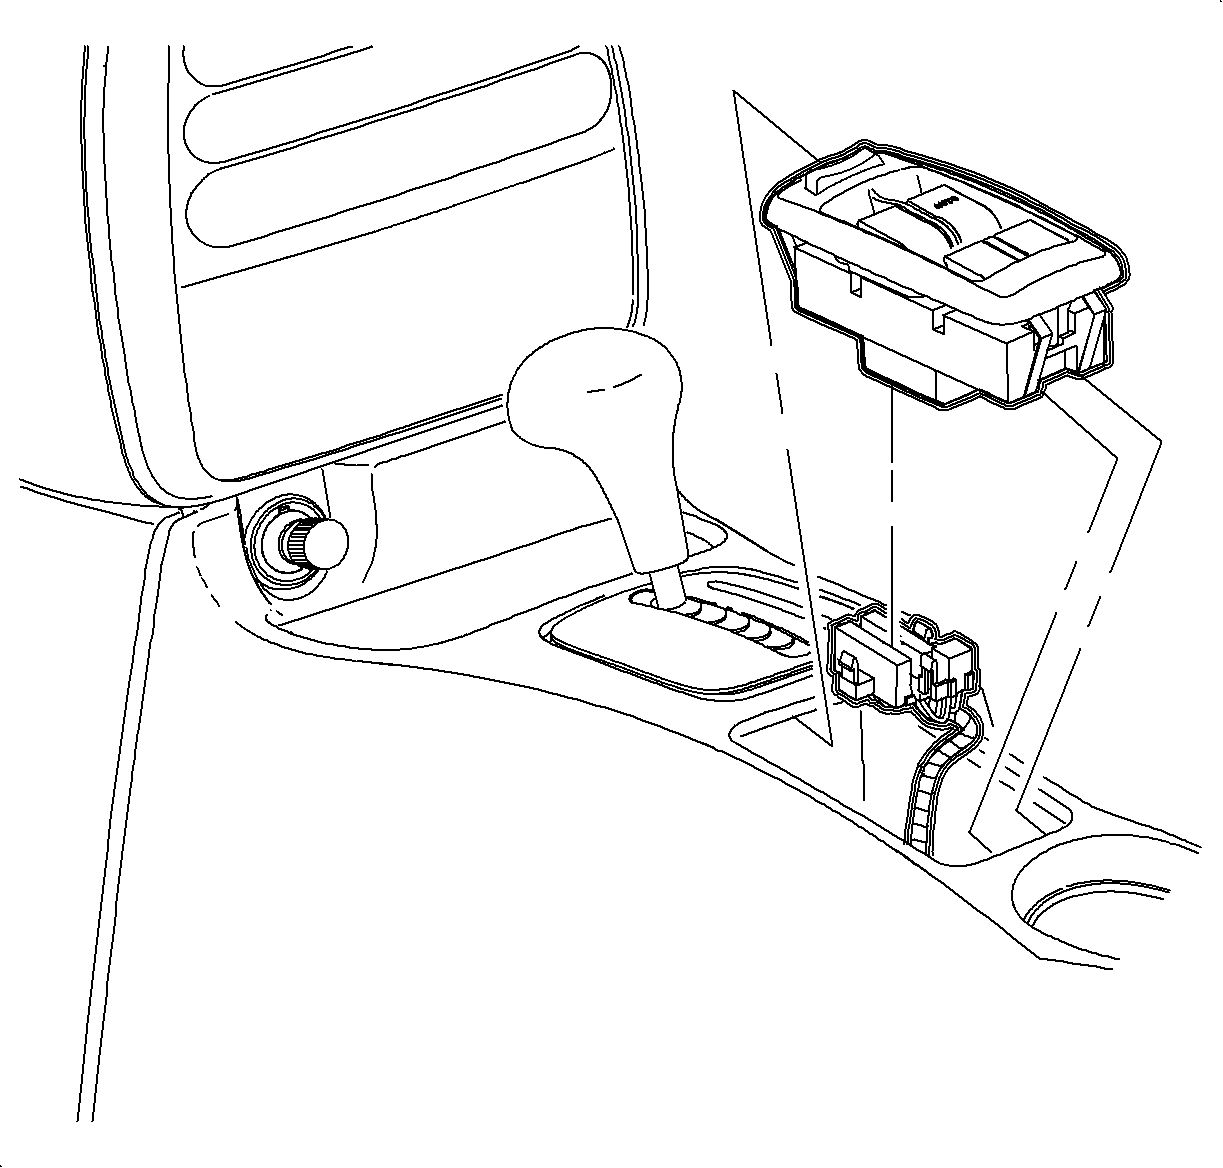
- Install the SDM and bolts to the vehicle.
TightenTighten the bolts to 15 N·m (133.5 lb in).
- Connect the electrical connector and install the connector position assurance
(CPA) device.
- Place the shifter in neutral.
- Lower the front of the console over the shifter.
Important
Make sure to place the window/mirror and
ashtray light connectors through the openings into position.
- Lower the rear of the console over the parking brake lever on to the rear mounting
pad.
- Move the console rearward.
- Connect the cigarette lighter electrical connector.
- Install the cigarette lighter bulb through the opening and rotate clockwise.
Important
Make sure the upper tabs on the front of
the console engage the sheet metal on the lower I/P brace.
- Move the console forward into position.
- Install and tighten the front console screws.
TightenTighten the front console screws to 1.2 N·m
(11 lb in).
- Align the rear of the console with the pin on the mounting pad.
- If equipped with
center console/arm rest, position the center console/arm rest to the center console.
- Install and
tighten the screws.
TightenTighten the screws to 1.6 N·m (14 lb in).
- Install the screw cover.
- Install the left trim panel extension by inserting the
hinges into the console openings. Then rotate until closed and push in at dual lock
locations. Wait to install the right trim panel until the fuse is installed during
SIR system enabling.
- Connect the window/mirror switch electrical connectors.
- Install the window switch by inserting the front edge into the opening.
Then push the rear edge down into position.
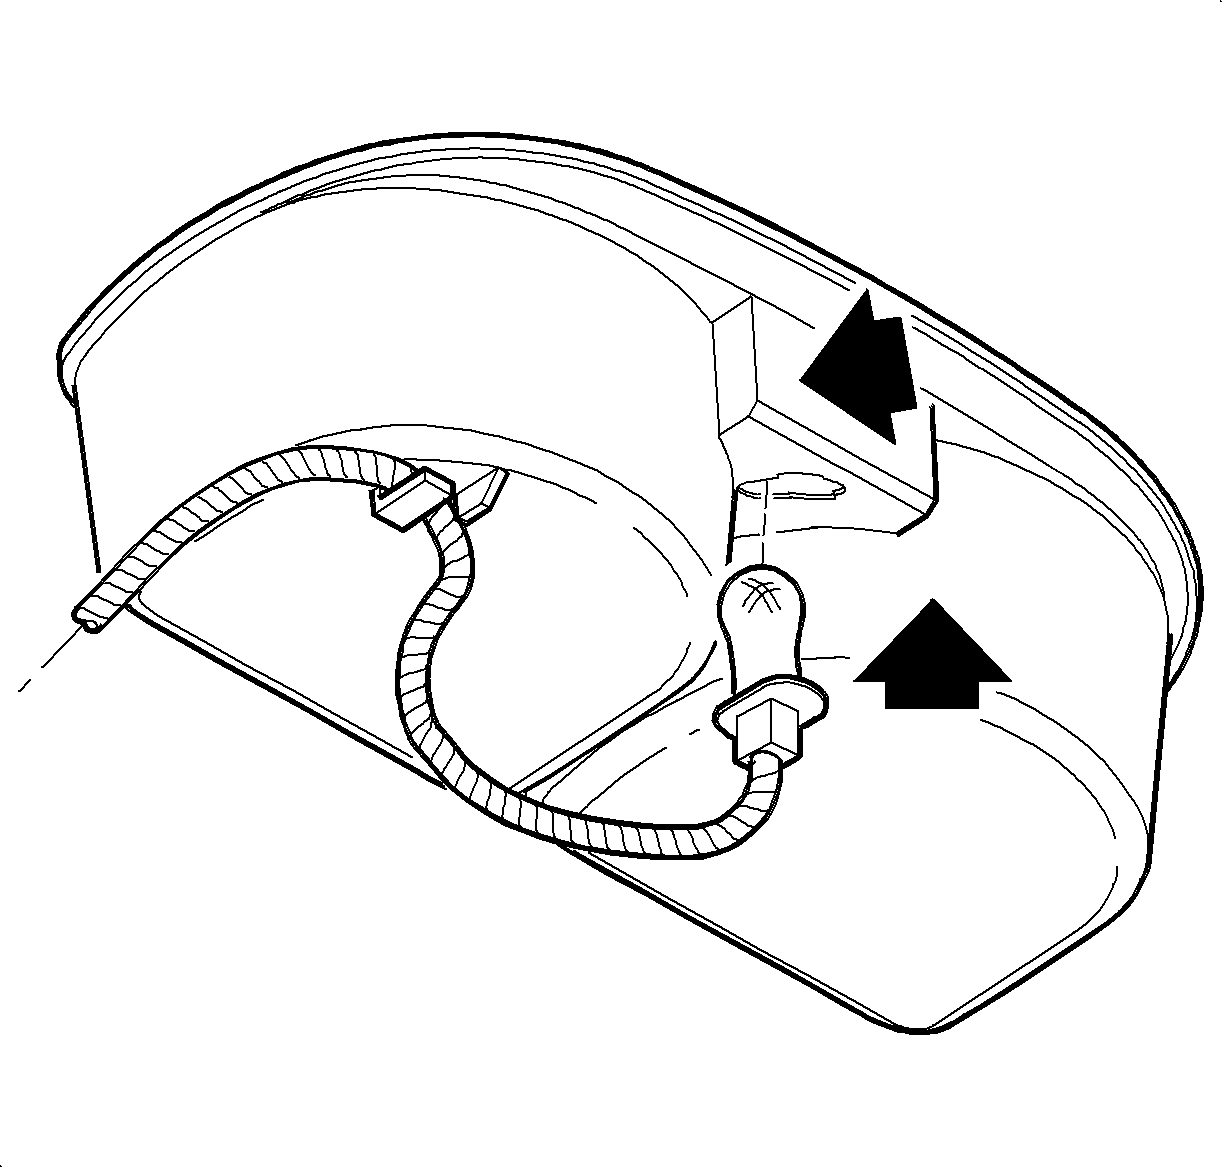
- Insert the bulb
through the opening until the bulb socket is flush with the cup holder. Push the
socket down to engage the lock tab.
- Install the wiring harness to the cup holder.
- Install the cup holder by inserting it through the console
opening and pushing straight down.
- Enable the SIR system. Refer to
Enabling the SIR System
in this service manual.
- Install the parking brake cover over the lever.
Notice
Do not overtighten screw or it may pull through cover.
- Install and tighten the screw.
TightenTighten the screw to 1.6 N·m (14 lb in).