Service Information for New 1991-1997 First Design Key (Square Head) Ignition Lock Cylinders #99-T-01 - (Dec 18, 2002)
Service Information for New 1991 -- 1997 First Design Key (Square Head)
Ignition Lock Cylinders. This Bulletin Updates the Ignition Lock Cylinder Coding Procedure
in the 98 -- 99 Body repair Service Manual.1991 -- 1996 and 1997 interim Saturns with first design key (square
head)
Purpose
Due to a design change in the service replacement parts for 1991 -- 1996
and 1997 first design key (square head) ignition lock cylinders, the ignition lock
cylinder packages, ignition lock cylinder components parts, and the 1991 -- 1999
Saturn Key Code Manual need to be updated.
All 1991 -- 1997 first design key (square head) service replacement ignition
lock cylinders will now have a sidebar and six tumblers. The sidebar is not serviced
separately . The tumblers, tumbler springs, bezel, ignition pin, and ignition pin
spring are all unique to the new design and are used only for service replacement
of 1991 -- 1997 first design key (square head) ignition lock cylinders--not
for 1998-1999 Saturns.
Important
All first design key (square head) ignition
lock cylinders in need of repair or coding should be serviced with second design service
replacement ignition lock cylinder packages (refer to parts list) and coded using
second design ignition lock cylinder components parts.
In addition, the
1991 -- 1999 Saturn Key Code Manual must be updated to reflect the change to
a 6-tumbler ignition lock cylinder design. Please make the following column
heading changes in the "1991- 1997 Saturn Key Code List" section of the 1991 --
1997 Saturn Key Code Manual:
Master Key 91-97 INT IGN DOOR R/CMPT
Also, cut two new keys (P/N 21097940) for all customers using the "Master Key
" code. Some customer with 1991- 1994 vehicles may have the shorter version
of the first design key (P/N 21097305) which will rub on the bezel of the 1991 --
1994 second design ignition lock cylinder. (Reference Technical Bulletin 94 --
T -- 50 for key length change) After cutting new keys, scrape off any burrs and
perform a functional check of all vehicle lock cylinders with new keys.
The following pages provide the ignition lock cylinder coding procedure. Copies
of this bulletin should be made and inserted in the "General Information" section
of all 98-99 Body Repair Service Manuals before the "Ignition Lock Cylinder
Coding -- All" procedure.
Procedure
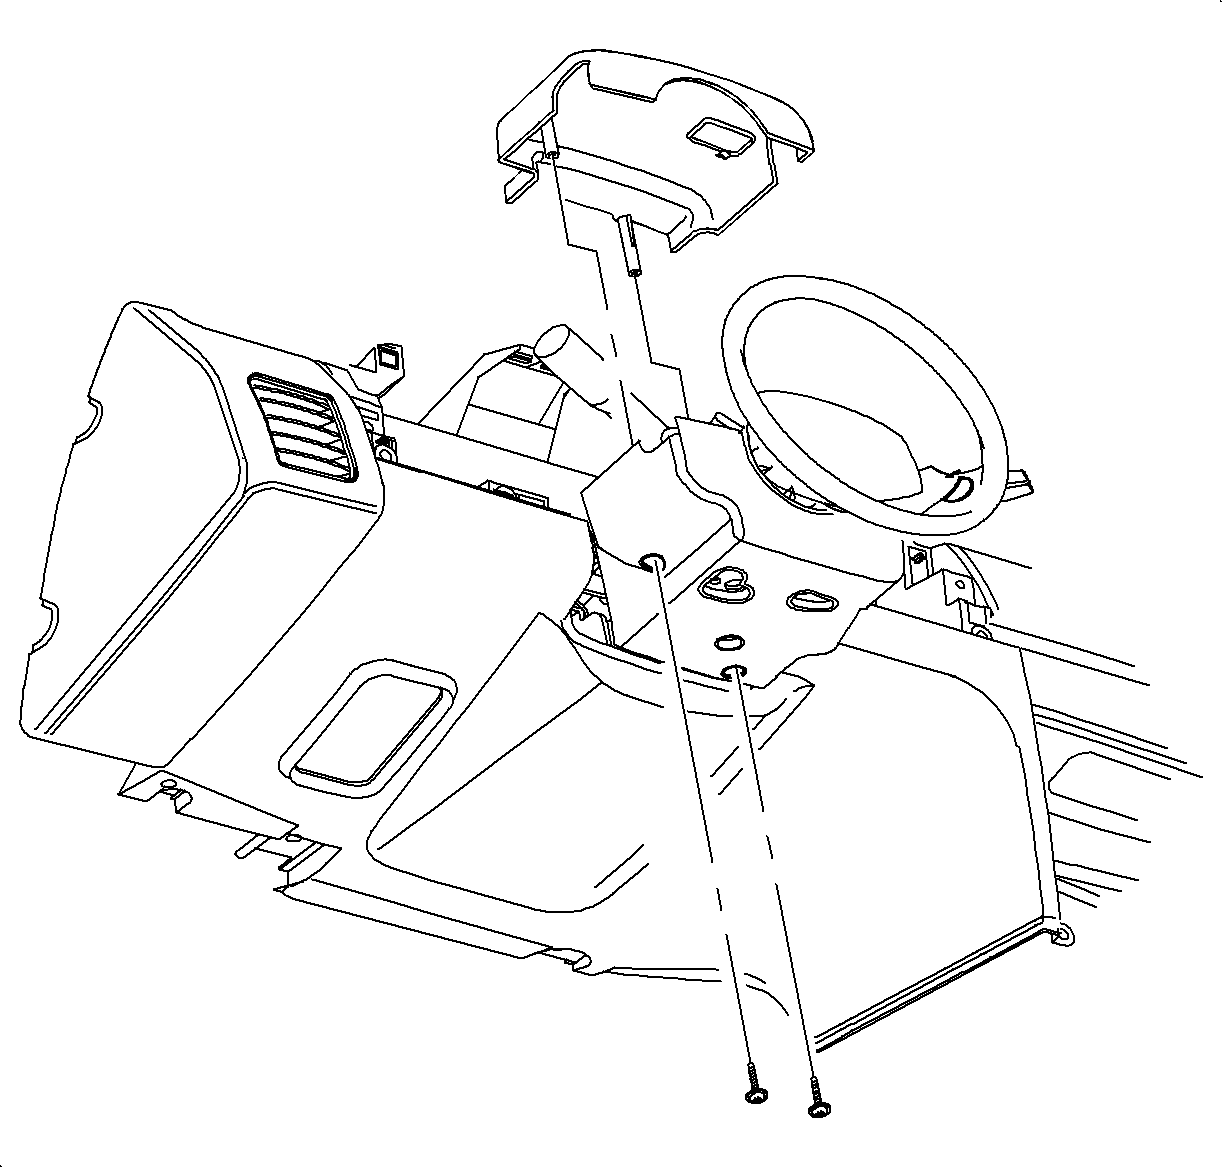

- Remove shroud fasteners (5.5 mm hex head) and remove
steering column upper shroud panel.
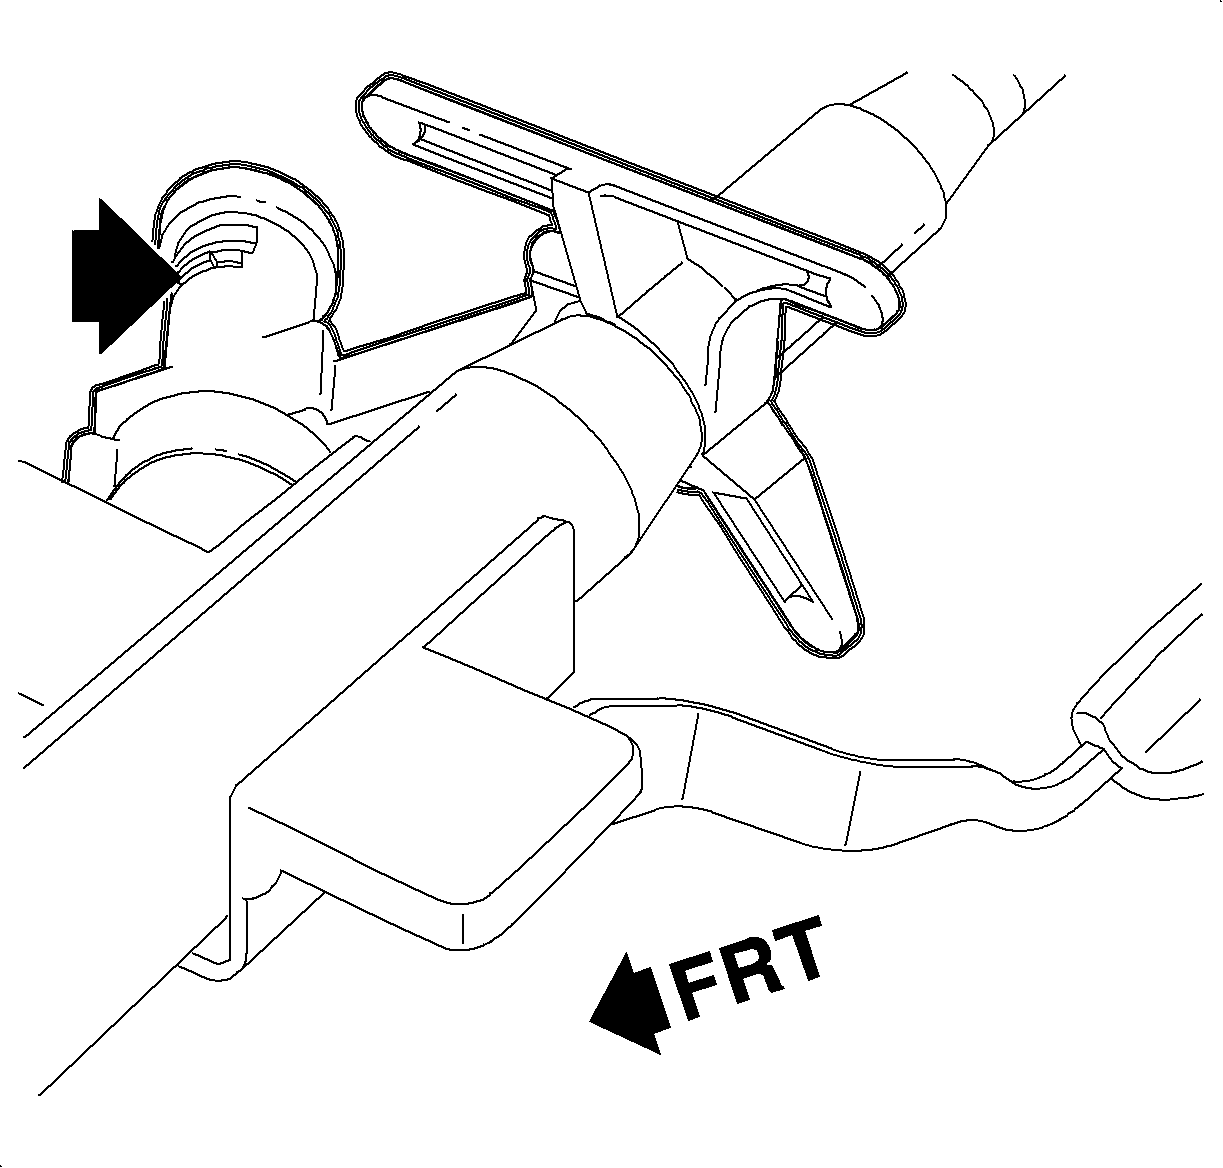

- Insert key into ignition lock cylinder and rotate to
ACC position.
- Depress the square locking button on the top of ignition module assembly
from ignition module housing.
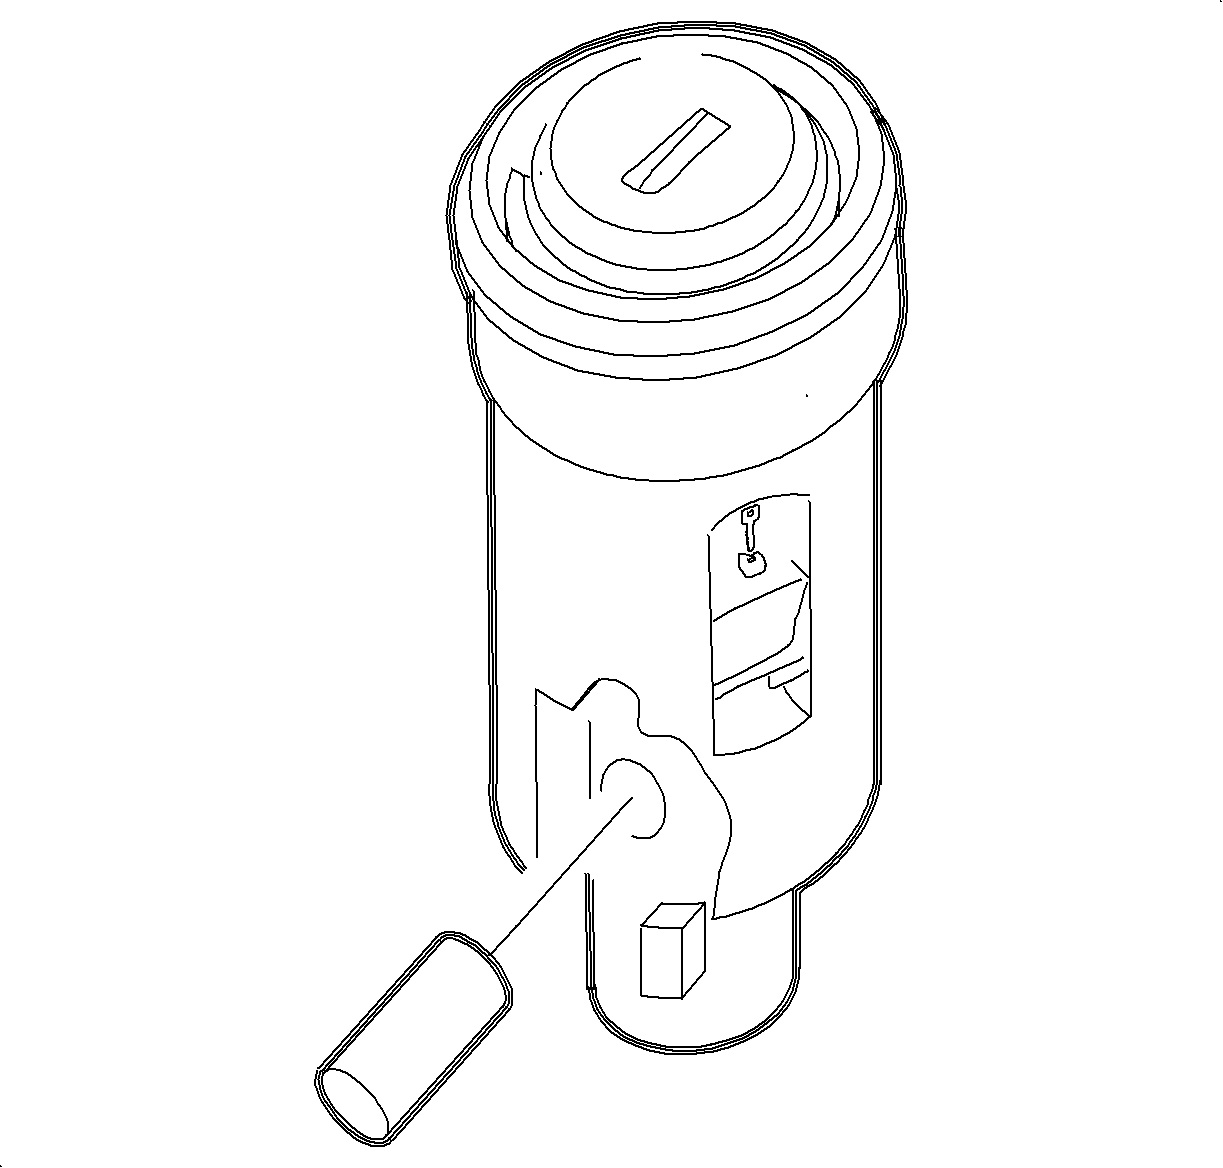

- Remove lock cylinder bezel by carefully prying from
lock cylinder with thin bladed screwdriver.
- Insert key into ignition lock cylinder assembly and depress ignition locking
pin using a thin bladed screwdriver.
- Rotate cylinder and remove ignition locking pin.
- Remove cylinder from case.
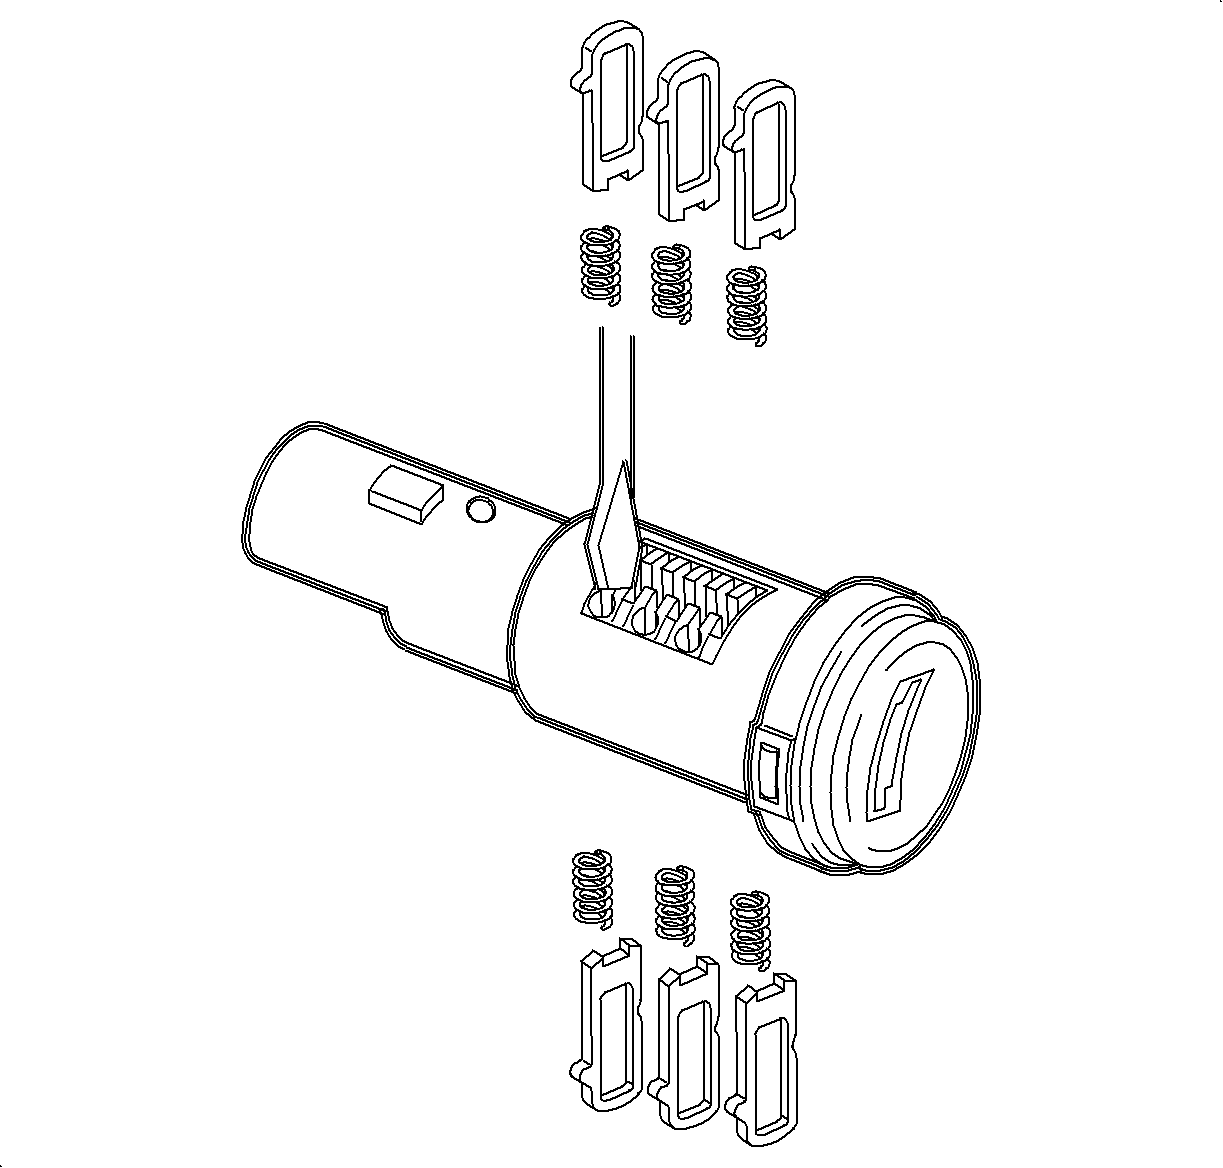

- Push tumblers out of lock cylinder using a thin bladed
screwdriver.
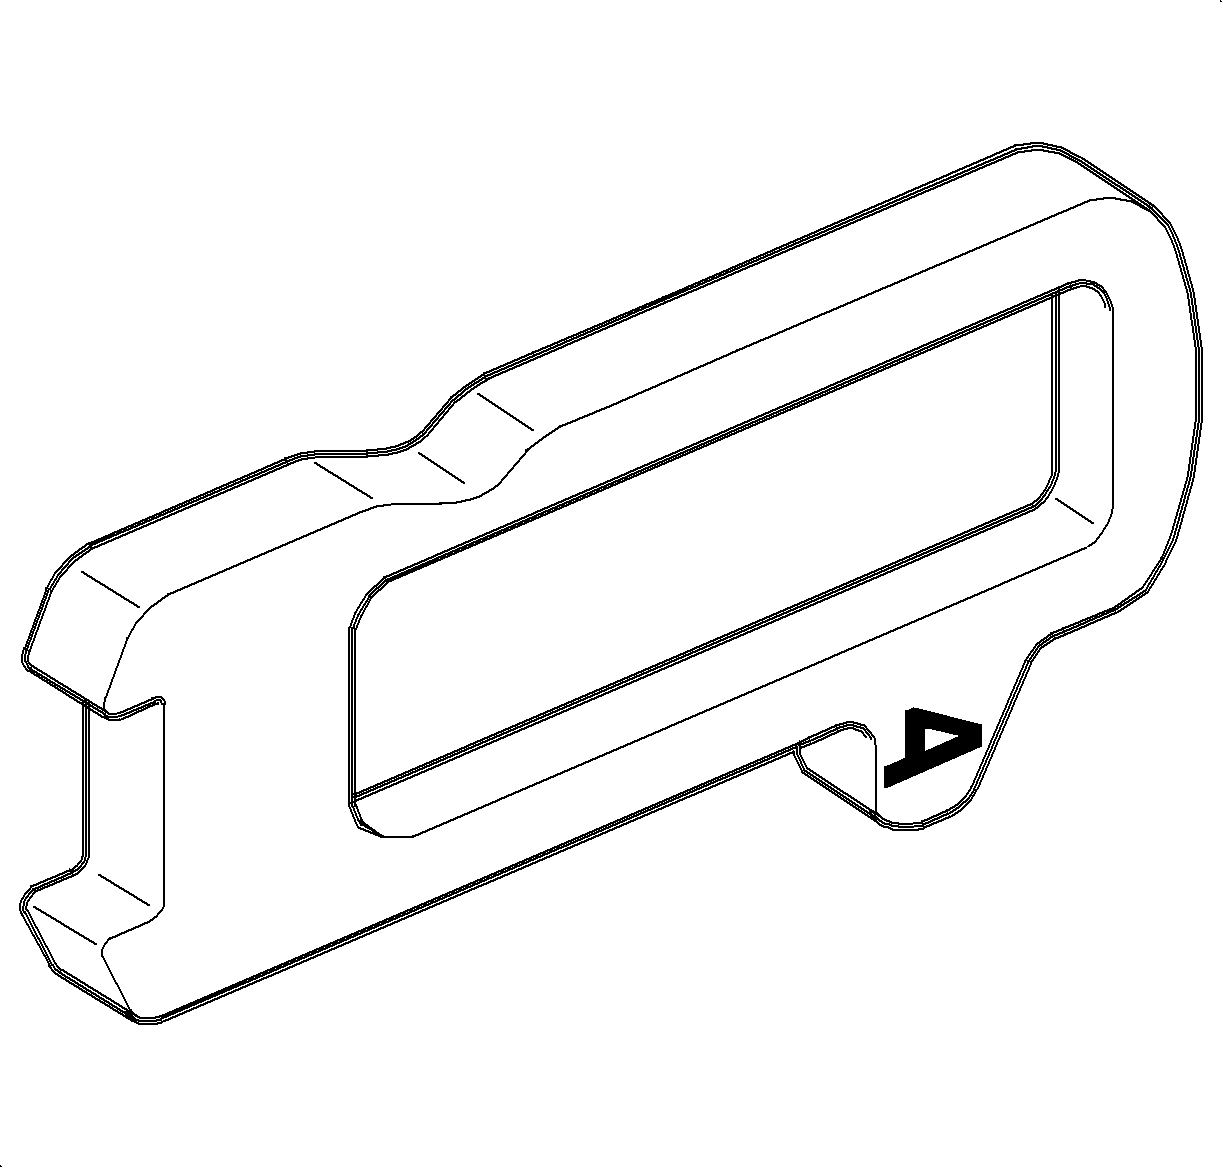

Important
Ignition lock cylinder reads key cut positions
1 through 6.
- Select the correct tumblers for the desired code by the number stamped on the
tumbler.
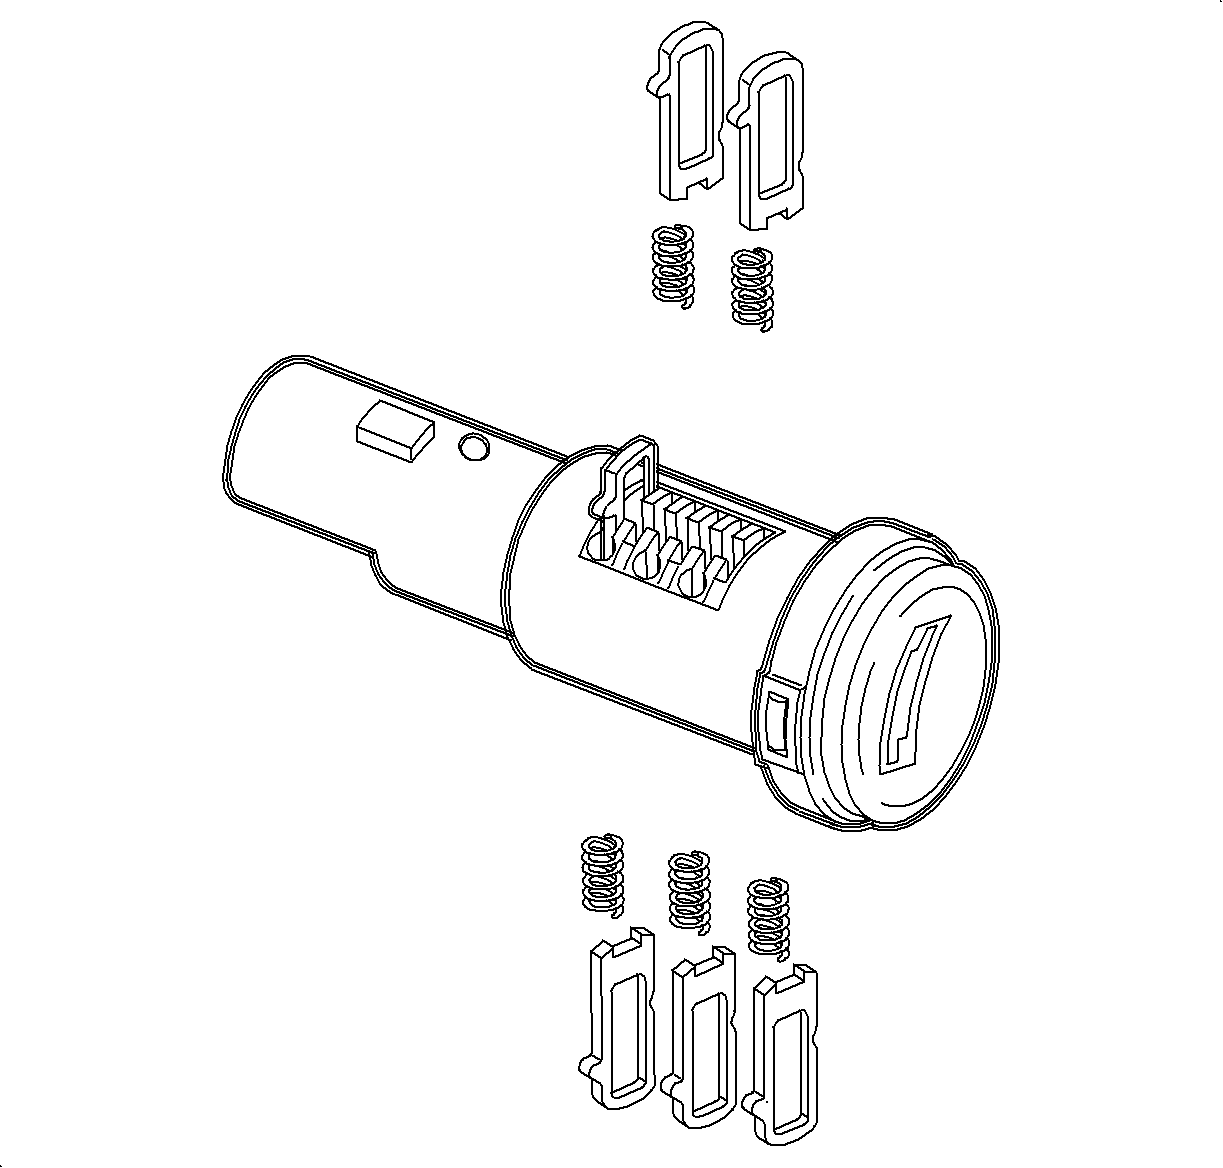

Important
Make sure the tumbler springs are in place
before installing tumblers.
Important
The new design tumblers do not lock the ignition
lock cylinder. The tumblers may fall out of the ignition lock cylinder without the
key installed.
- Install tumblers by applying downward pressure. If the tumblers are difficult
to install, make sure that the sidebar is not crooked. Push down on the raised end
of sidebar to level it.
- After all tumblers are installed, depress all six tumblers and sidebar
will be flush with cylinder with key inserted.
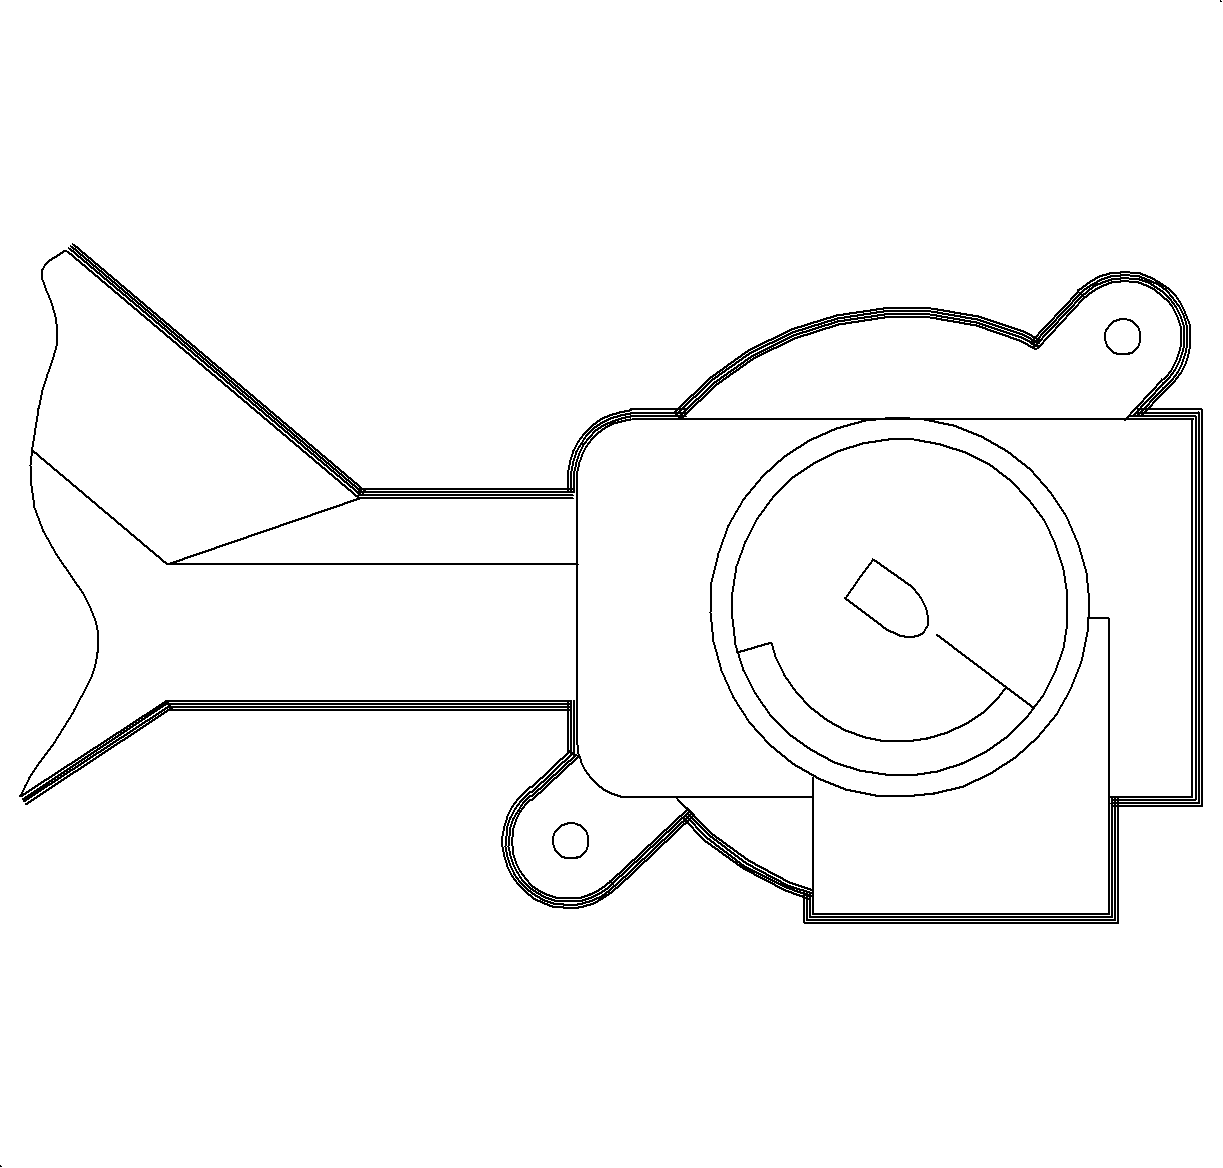

Important
Actuator blade within ignition module housing
must be in the ACC position to install lock cylinder assembly. If rotated, replace
it to the ACC position using needle nose pliers.
- Oil lock set with a light oil or graphite lubricant (as needed) and install
cylinder into case.
- Install ignition locking spring and pin.
Depress pin and rotate
cylinder to engage.
- Remove key and install lock cylinder bezel.
- Insert key and reverse steps 1 through 3.
Parts Requirements
21171128
| Package - Ignition Lk Cyl
| 1991 - 1994
|
21171151
| Package - Ignition Lk Cyl
| 1995 - 1997 First Design Key
|
21171147
| Tumbler - Ign Lk Cyl #1
| 1991- 1997 First Design Key
|
21171148
| Tumbler - Ign Lk Cyl #2
| 1991- 1997 First Design Key
|
21171149
| Tumbler - Ign Lk Cyl #3
| 1991- 1997 First Design Key
|
21171150
| Tumbler - Ign Lk Cyl #4
| 1991- 1997 First Design Key
|
21171160
| Spring - Ign Lk Cyl Tumbler
| 1991- 1997 First Design Key
|
21171145
| Pin - Ign Lk Cyl
| 1991- 1997 First Design Key
|
21171144
| Spring - Ign Lk Cyl Pin
| 1991- 1997 First Design Key
|
21171146
| Bezel - Ign & Start Sw
| 1991- 1997 First Design Key
|
Claim Information
To receive credit for this repair during the warranty coverage period, submit
a claim through the Saturn Dealer System using the appropriate Electronic Labor Time
Guide and Labor Time Guide and Labor Operation Code E7200.
GM bulletins are intended for use by professional technicians,
NOT a "do-it-yourselfer". They are written to inform these
technicians of conditions that may occur on some vehicles, or to
provide information that could assist in the proper service of a
vehicle. Properly trained technicians have the equipment,
tools, safety instructions, and know-how to do a job properly and
safely. If a condition is described, DO NOT assume that the
bulletin applies to your vehicle, or that your vehicle will have
that condition. See your GM dealer for information on whether
your vehicle may benefit from the information.
|

|
WE SUPPORT VOLUNTARY TECHNICIAN CERTIFICATION
|
© Copyright General Motors Corporation.
All Rights Reserved.


