
- RTV is removed from aluminum surfaces using a plastic or wood scraper, Scotch-Brite® Pads, and disk (3M® Clean-N Strip® 2 in D x 1/2 in W x 1/4 in center hole).
- The front cover, cylinder head and block bolt holes must be cleaned with a 3/16 in drill and tap handle. The oil drain back hole must also be free of RTV. The front cover non tapped holes can be cleaned with a 3/8 in drill.
- After all RTV is removed, clean the surfaces with a chlorinated solvent, such as carburetor spray cleaner, brake clean, or alcohol Saturn P/N 21007432 or equivalent.
If excessive RTV is applied, or oil builds up in the blind holes, the casting
will crack when the bolts are installed. Make sure all oil gallery openings and the
oil pan are covered with a shop towel to prevent debris entry.Notice
Do not use petroleum cleaners such as mineral spirits. They leave a film onto
which RTV will not stick.Notice
The oil pump must be packed with petroleum jelly for priming if removed or
the cylinder block is replaced.Important
Tighten the oil pump cover-to-front cover to 11 N·m (8 lb ft).
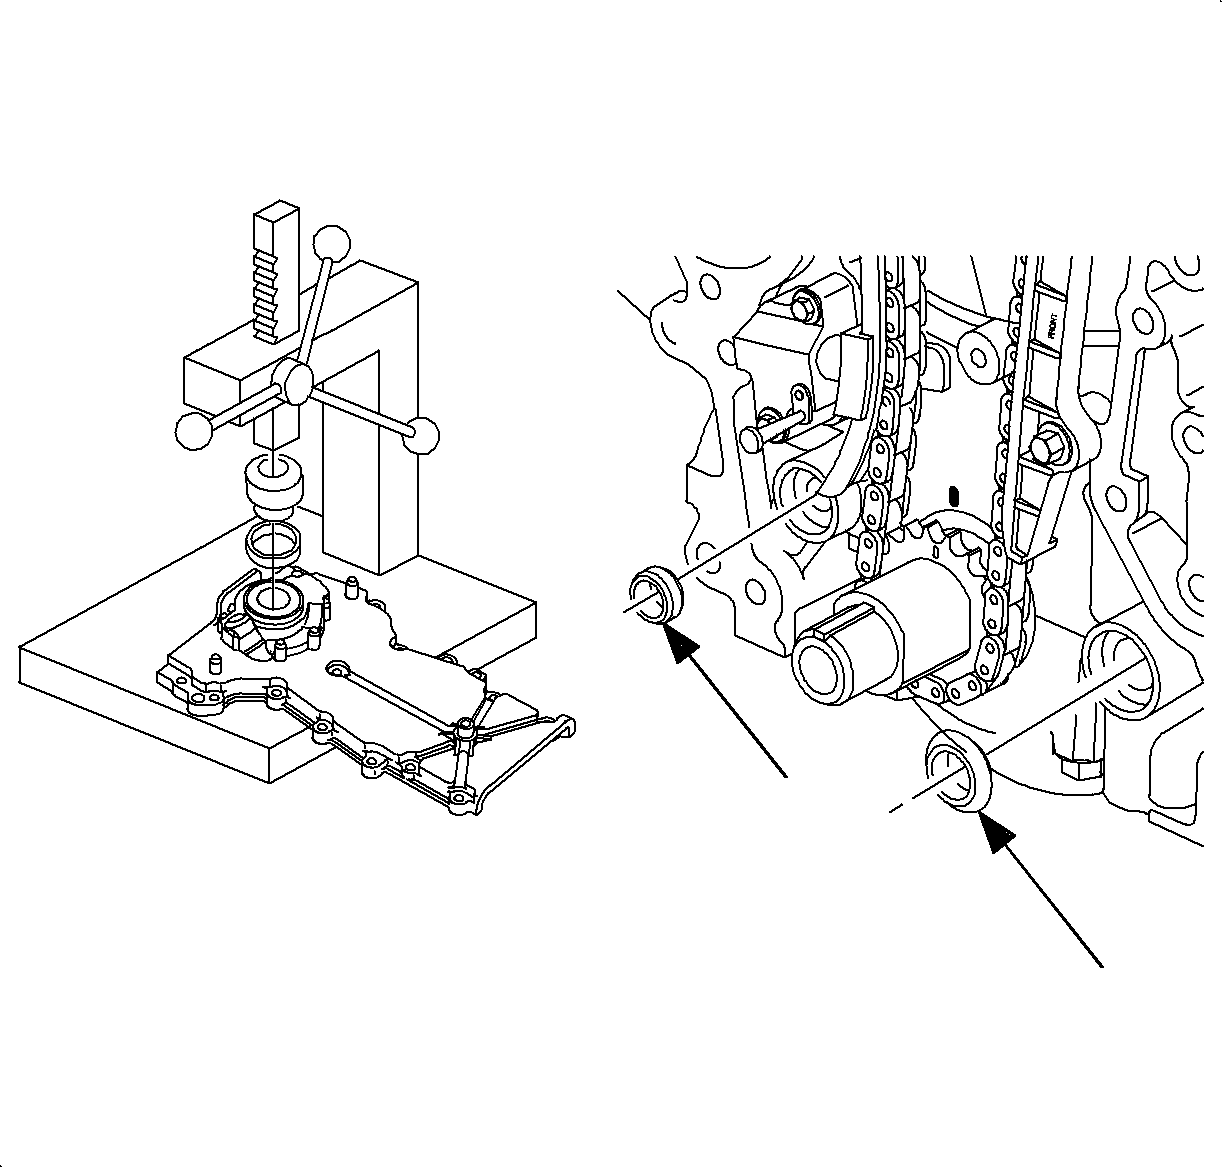
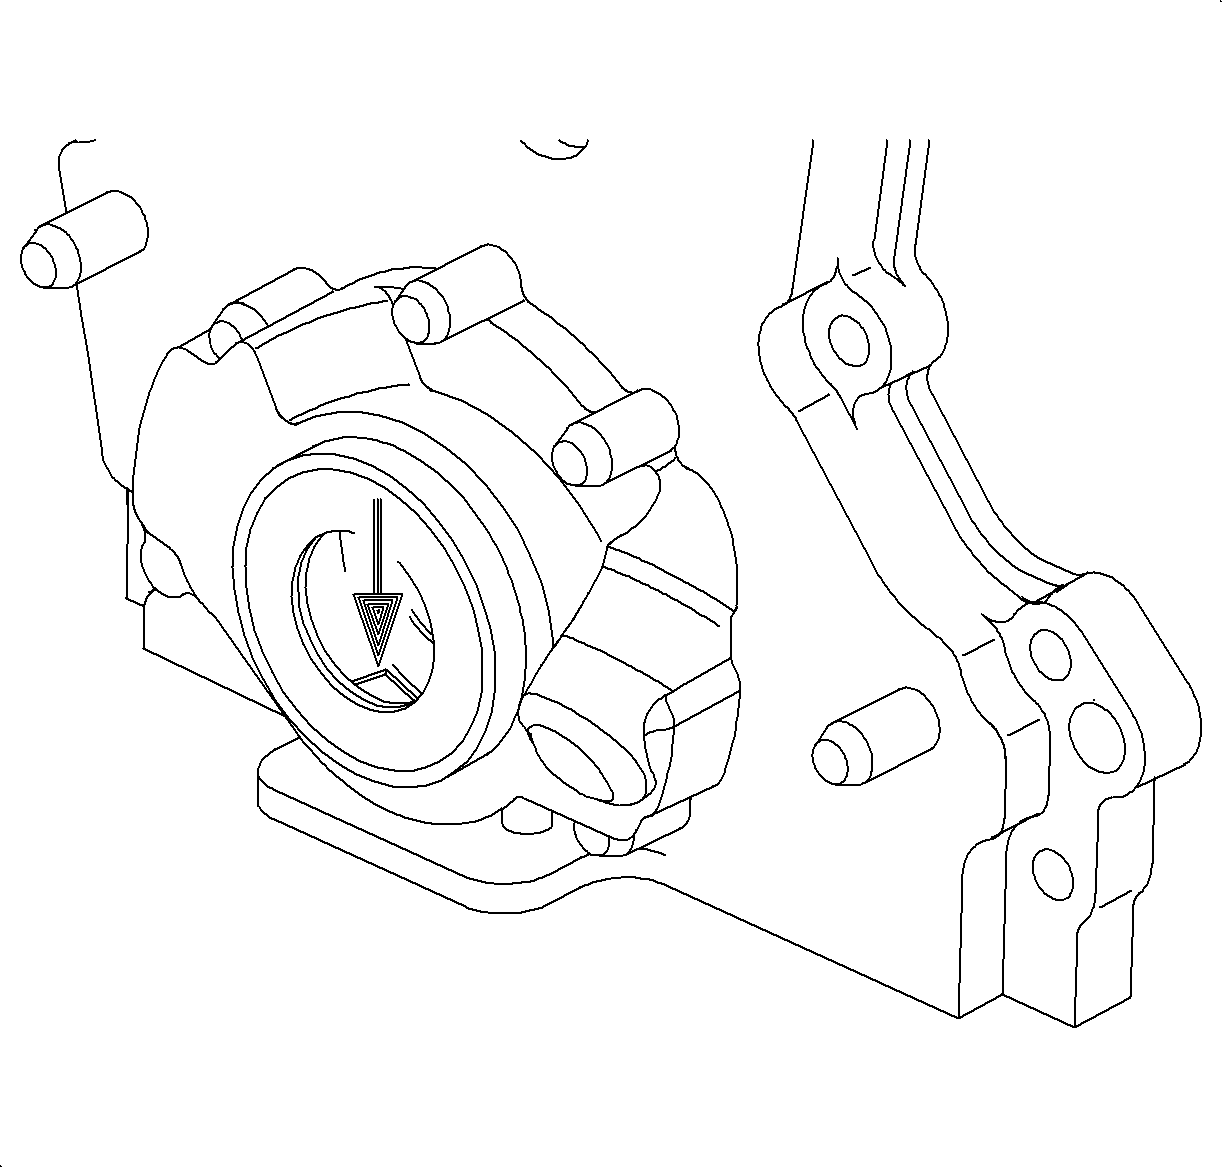
- If the front seal was removed, use a SA9104E to install a new seal. Never tap on the seal or seal installer with a hammer.
- Install new oil pressure and suction seals into their respective cavities in the cylinder block.
The front cover oil seal drain back hole and passageway must be kept free of
RTV.Important
Extra RTV is required at the oil pan, cylinder head to block, cylinder head
and rocker cover T-joints to make sure gaps are filled.Important
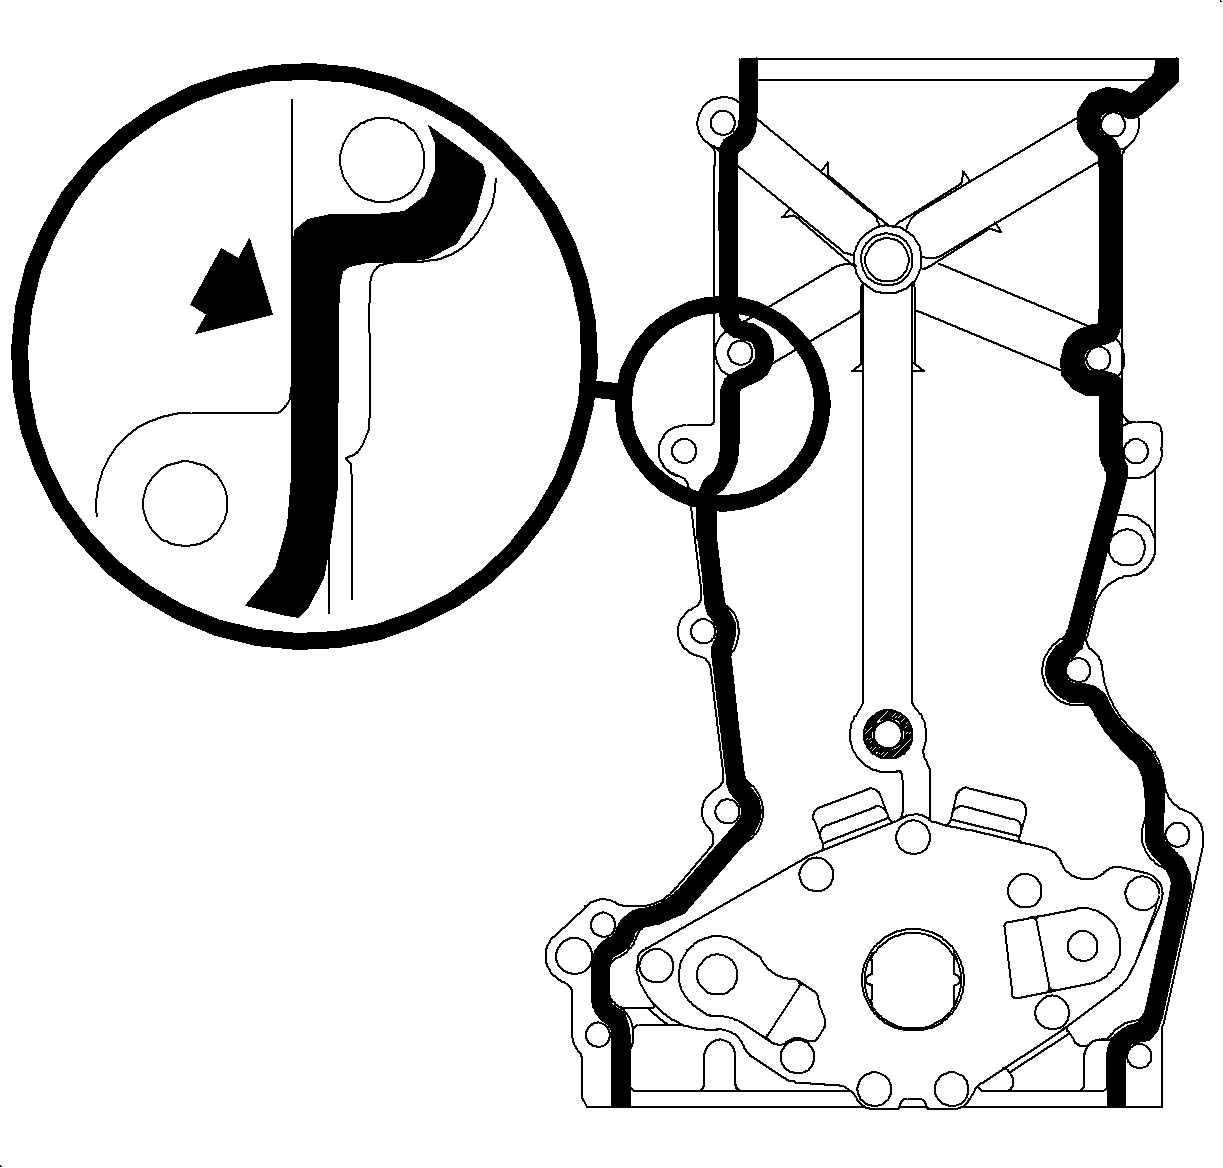
A full 2 mm (0.08 in) RTV bead is required on the front cover
at the intersection of the front cover and exhaust side of the cylinder head. If too
little RTV is applied, an oil leak may occur.Notice
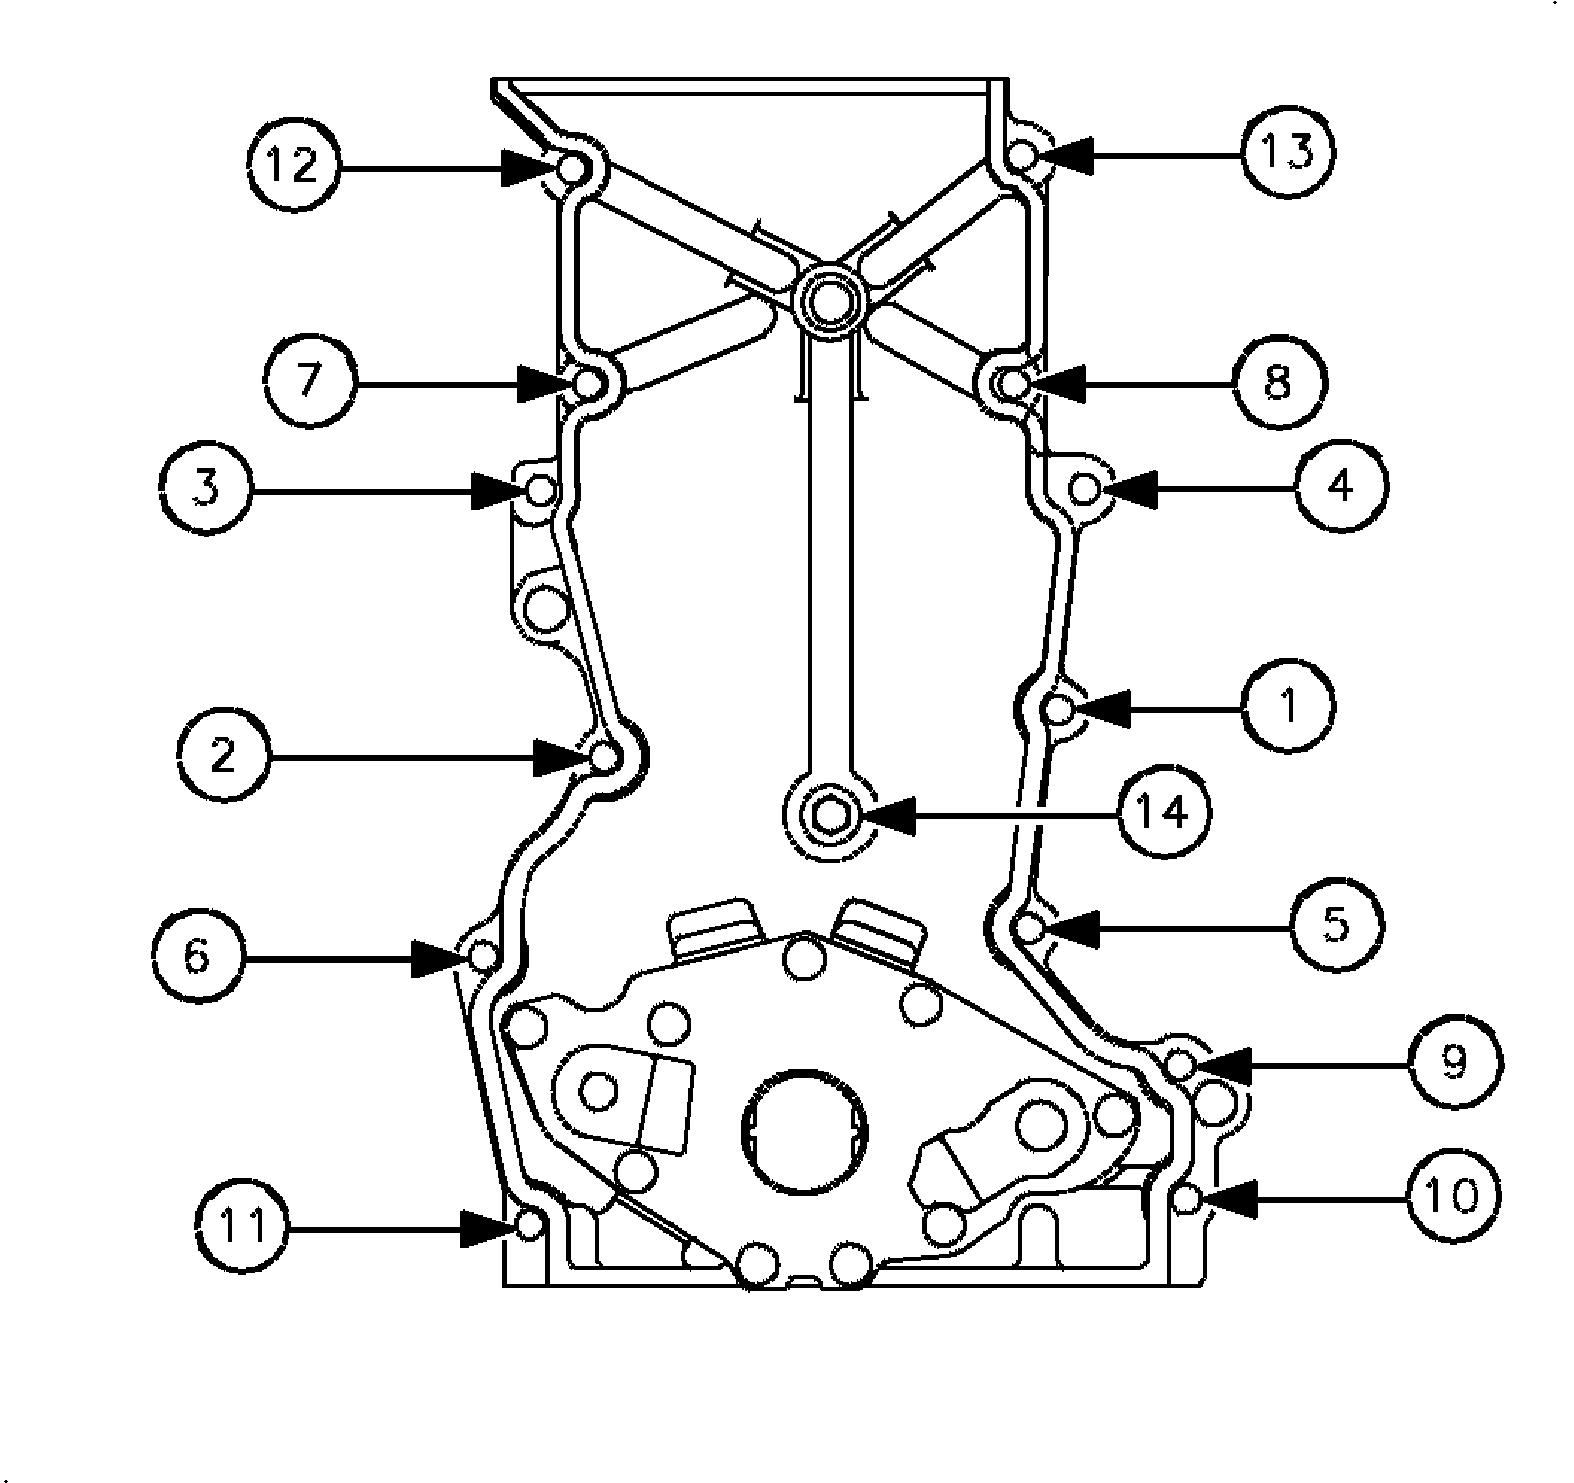
- Tighten the front cover perimeter bolts to 30 N·m (22 lb ft).
- Tighten the front cover lower center bolt (Number 14) to 10 N·m (89 lb in).
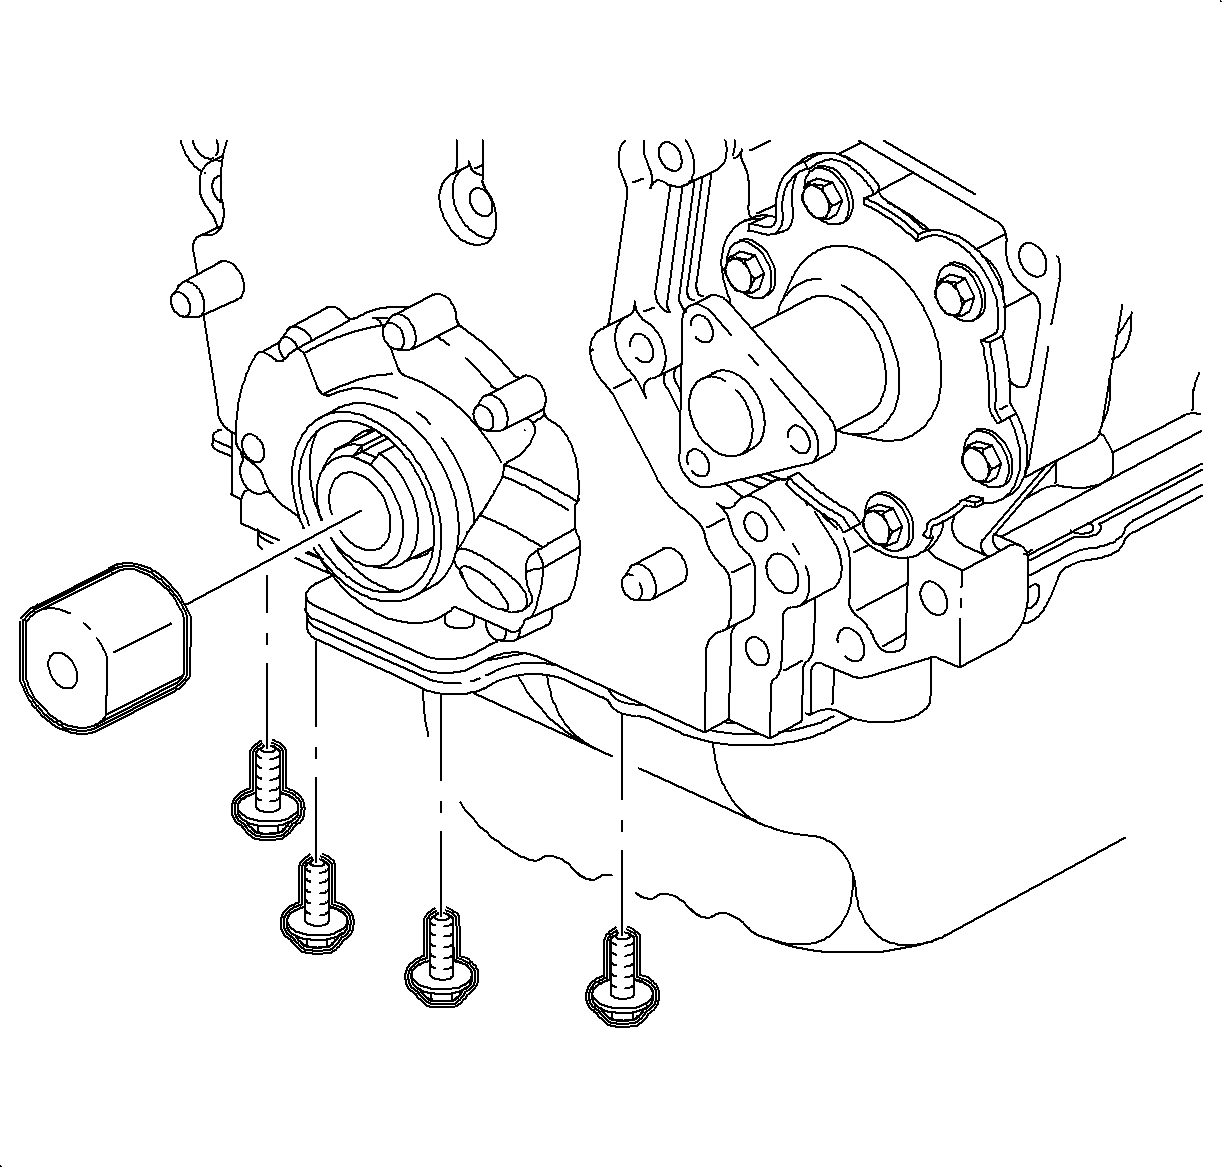
Tighten the oil pan-to-block to 9 N·m (80 lb in).
After the front cover is installed, 6-12 squirts of oil can
be pumped through the front oil seal drain back hole to make sure it is not plugged
to prevent front seal damage.Notice
Install a thin film of RTV sealant P/N 21006236 between the damper/pulley
assembly flange and washer only. The washer and bolt head flange are designed to
prevent oil leakage and do not require sealant.Important
Tighten the water pump pulley-to-water pump hub to 25 N·m (19 lb ft).
Hold the pulley with a strap wrench or use a 3/4 in square x 12 in
long piece of wood wedged between the pulley spoke and rear, lower side of cover
when removing the bolt.Important
Tighten the crankshaft pulley bolt (L24) to 215 N·m (159 lb ft).
Tighten the rocker arm cover-to-head (L24) to 30 N·m (22 lb ft).
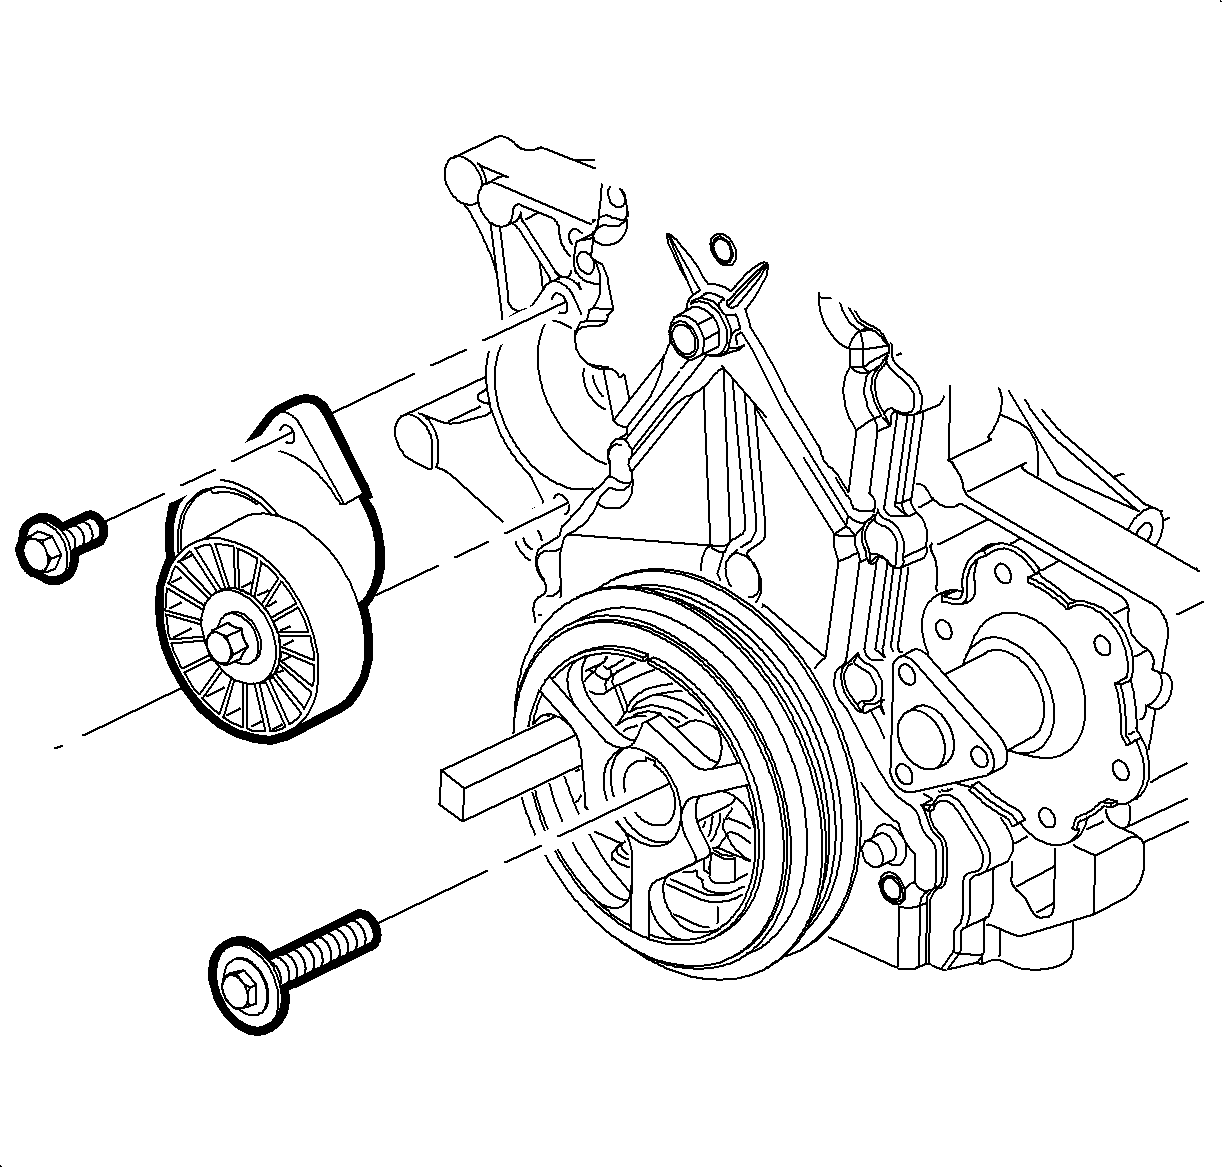
Tighten the belt tensioner-to-block to 30 N·m (22 lb ft).
Tighten the belt idler pulley-to-front cover to 27 N·m (20 lb ft).
Tighten the oil pan drain plug to 37 N·m (27 lb ft).
Tighten the spark plug-to-head to 27 N·m (20 lb ft).
Tighten the accelerator control cable bracket-to-intake manifold (L24) to 30 N·m (22 lb ft).
- The generator attachment bolts, if removed. Tighten
- The starter motor to block, if removed. Tighten
- The starter support bracket to axle shaft bracket, if removed. Tighten
Tighten the generator bolts to 32 N·m (24 lb ft).
Tighten the starter motor-to-block to 37 N·m (27 lb ft).
Tighten the starter support bracket-to-axle shaft bracket to 30 N·m (22 lb ft).
Tighten the power steering pump-to-bracket to 30 N·m (22 lb ft).
- Tighten the A/C compressor-to-rear bracket to 25 N·m (19 lb ft).
- Tighten the front A/C bracket-to-block to 47 N·m (35 lb ft).
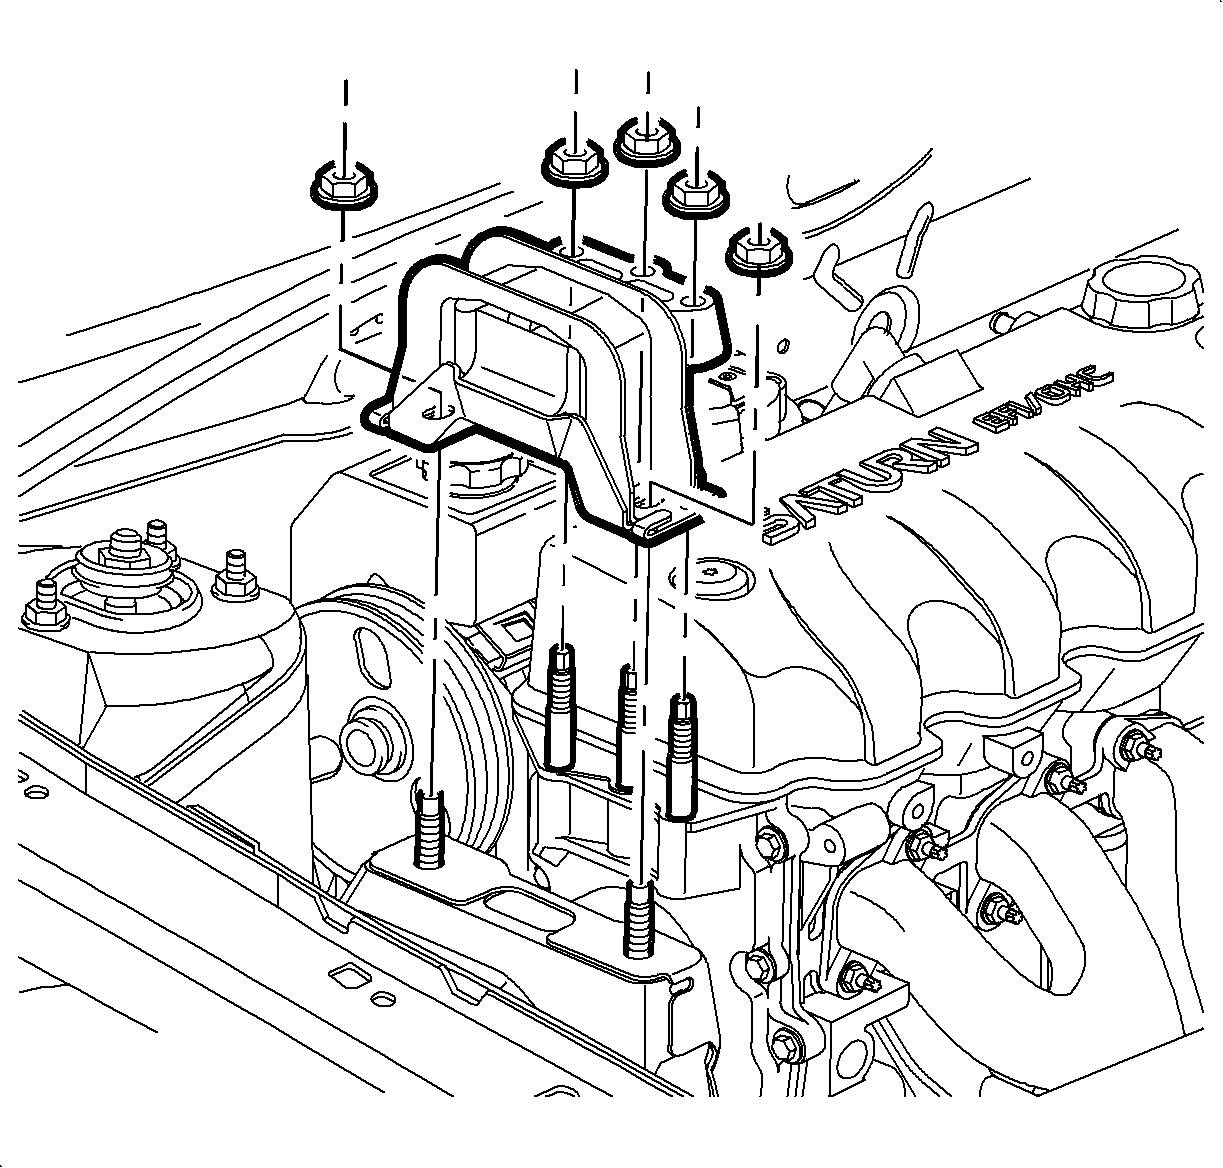
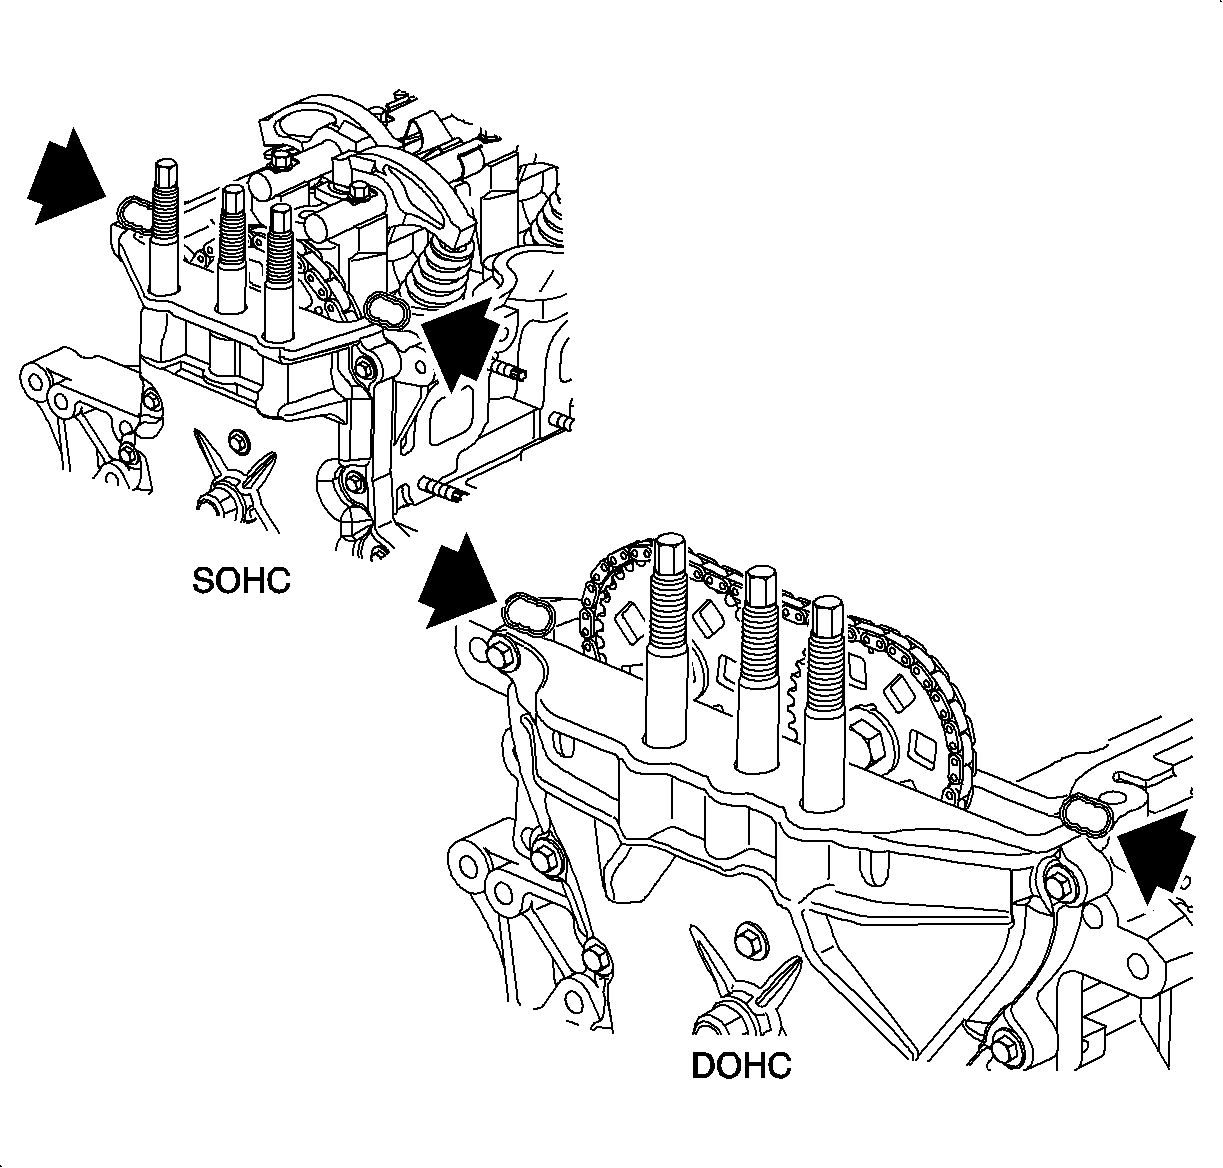
To prevent engine front cover and mount damage, the three engine mount to engine
front cover nuts must be tightened down uniformly.Notice
- Tighten the engine mount-to-front cover nuts to 50 N·m (37 lb ft).
- Tighten the upper mount-to-frame rail bracket to 50 N·m (37 lb ft).
Tighten the wheel nuts to 140 N·m (103 lb ft).
- The EVAP canister purge
- The throttle body vacuum harness
- The PCV
- The fresh air
- The brake booster
- The MAP sensor
- The upper radiator hose
- The heater hose
- Grounds, if disconnected, at engine/transaxle
Tighten
Tighten the engine/transaxle grounds to 25 N·m (19 lb ft).
- Oxygen sensor
Tighten
Tighten the oxygen sensor to 25 N·m (19 lb ft).
- Coolant temperature
Tighten
Tighten the coolant temperature sensor to 8 N·m (71 lb in).
- Fuel injectors
- Idle air control (IAC) valve
- EGR valve
Tighten
Tighten the EGR valve-to-head top 30 N·m (22 lb ft).
- Throttle position (TP) sensor
- EVAP Canister Purge
- Manifold absolute pressure (MAP) sensor
- Generator
- Starter Motor
- A/C Compressor
Tighten the intake manifold support bracket (L24)-to-block and intake to 30 N·m (22 lb ft).
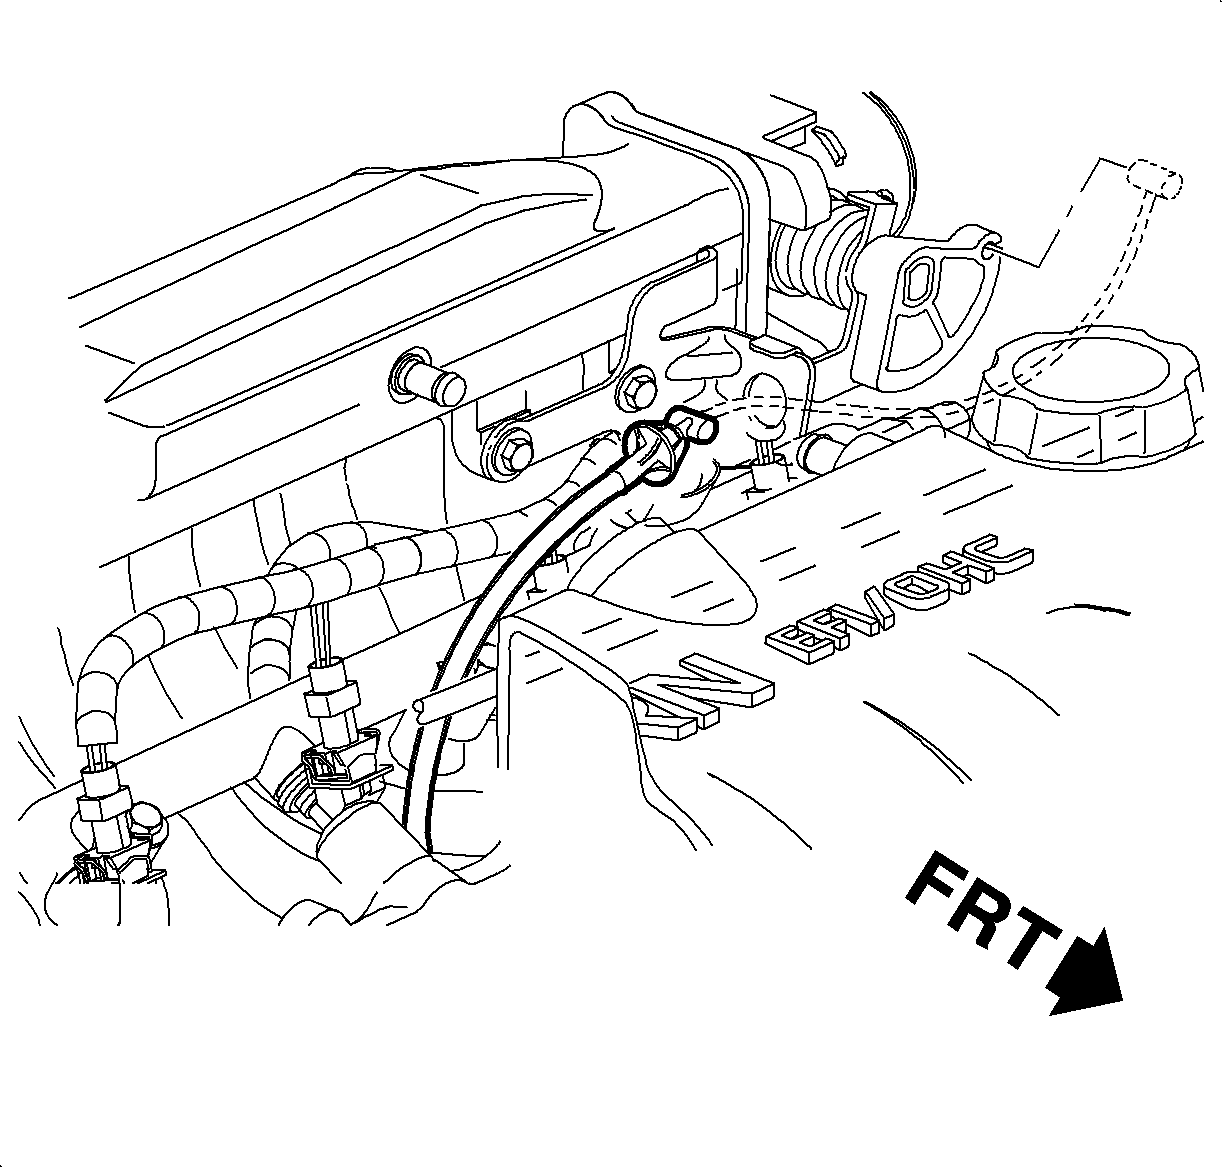
- Deaeration line fitting to the cylinder head and nut to the fitting.
Tighten
Tighten the deaeration line fitting-to-cylinder head (L24) to 9 N·m (80 lb in).
- Deaeration line to rear lift bracket.
Tighten
Tighten the deaeration line clamp-to-engine bracket (L24) to 11 N·m (97 lb in).
Replace plastic fuel retainer whenever the fuel supply is disconnected at the
fuel rail. Install the new retainer into the female cavity of the connection. Care
must be taken to assure that the locking tab is centered in the window of the female
cavity. Firmly press the female connection onto the male end until a click is heard,
then pull back to confirm engagement. Pinched, kinked, or damaged fuel lines must
be replaced.Notice
The service retainers are different in color from the original equipment retainers.
The service fuel feed line retainers are clear in color.Important
Tighten the fuel line retainer clip to 4 N·m (35 lb in).
Tighten the cylinder block drain plugs to 5 N·m (26 lb ft).
Vehicle must be level when filling with coolant.Important
Tighten the Battery Terminal Bolts 17 N·m (13 lb ft).
- Cycle ignition on for 5 seconds and then off for 10 seconds.
- Repeat step 31.1 twice.
- Crank engine until it starts, maximum starter motor cranking time is 20 seconds
- If engine does not start, repeat steps 31.1-31.3 .
Allow the engine to idle for 3-5 minutes. If lifters are noisy
or cylinders are misfiring, warm the engine up at a low RPM, less than 2,000.
After the coolant temperature has reached approximately 85°C (185°F), cycle
engine RPM from idle to 3,000 for approximately 10 minutes or drive the vehicle
5 minutes to purge the air. If the air cannot be purged, the faulty lifters
will have to be replaced.Important