Engine will Not Crank, MIL and ABS Light On, Park Lamps Inoperative, Fuel Gage Inoperative, and/or Radio Speaker Inoperative #98-T-22 - (Jan 2, 2003)
Engine will not Crank, MIL and ABS Light On, Park Lamps Inoperative, Fuel
Gage Inoperative, and/or Radio Speaker Inoperative -- Repair Wire Harness1996-1998 Saturn equipped with MP2/MP3 manual transaxles
Condition:
The customer may comment that on occasion, one or more of the following conditions
may have occurred:
- The engine will not crank.
- The malfunction indicator lamp (MIL) (SERVICE ENGINE SOON lamp) is ON
with or without inoperative fuel gage.
- The anti-lock brake system (ABS) light is ON.
- The park lamps are inoperative.
- One or more of the radio speakers is inoperative.
Cause:
Important
- The I/P harness contains approximately 100 circuits that are routed above
the clutch pedal. It would be difficult to list all circuits contained in the harness
and their respective failure modes associated with a short to ground. Based on the
manufacturing process of the I/P harness, and the location of certain circuits in
the harness, the circuits listed in this bulletin have the highest probability of
potentially coming into contact with the clutch pedal pivot bolt/clip.
- If the vehicle is equipped with an MP2/MP3 transaxle, and a difficult
to diagnose electrical condition exists, inspect the harness above the clutch pedal
pivot.
The cause of the above conditions may be the instrument panel wire harness coming
in contact with the clutch pedal pivot bolt/clip causing a short to ground on the
following circuits:
- The engine will not crank -- May be caused by an open #2 Maxifuse
(ignition 3) due to circuit #5 (yellow wire) shorting on the clutch pedal pivot bolt/clip
or an open #5 Maxifuse (ignition 40 due to circuit #3C (pink wire) shorting on the
clutch pedal pivot bolt/clip.
- The MIL (SERVICE ENGINE SOON LIGHT) ON with diagnostic trouble codes (DTC)s P1640
or P1641 (low fuel circuit fault) -- May be caused by circuit 1885 (purple wire).
circuit 35 (dk. green wire), or circuit 172 (yellow wire) shorting on the clutch pedal
pivot bolt/clip.
- The MIL (SERVICE ENGINE SOON LIGHT) ON with DTCs P1650 or P1651 (quad
driver B output fault) -- May be caused by circuit 419 (brown/white wire) or
circuit 456 (tan/black wire) shorting on the clutch pedal pivot bolt/clip.
- The ABS light ON with ABS DTC P0572 (Brake Switch Stuck Open -- Voltage
Low) -- May be caused by circuits 341F (brown wire) or 86A (brown wire) shorting
on the clutch pedal pivot bolt/clip.
- The park lamps inoperative -- May be caused by the 10-amp park fuse
being open. Circuits 240 (orange wire) or circuit 9K (brown wire) shorting on the
clutch pedal pivot bolt/clip.
- One or more radio speakers inoperative -- This may be caused by circuits
199A (brown wire), 116A (yellow wire), 46A (dk. blue wire), and/or 115A (lt. blue
wire) shorting on the clutch pedal pivot bolt/clip.
Correction:
From the driver side footwell area, inspect the instrument panel wire harness
at the location directly above the clutch pedal pivot bolt/clip. If any wire is found
to be chaffed on the clutch pedal pivot bolt/clip, refer to the following repair procedures.
If no wire damage is observed, refer to the appropriate Service Manual for diagnostic
information.
Procedure:
- Disable the SIR system. Refer to Disabling the SIR System procedure in
the SIR Service Manual.
- Remove the connectors from the powertrain control module (PCM).
- Remove the PCM from the vehicle.
Cut the existing wire harness
tie strap rose bud clip off, so the harness is loose from the spaceframe. The rose
bud clip is located directly above the clutch pedal.
- Loosen the harness clamp. Located 76 mm (3 in) away from
the rose bud clip.
- Remove the I/P harness tape from the starter relay to the branch that
goes down to the IPJB.
- Separate the harness until the damaged wire is exposed. Cut the damaged
wire at the location of the chafe, if the harness is not chaffed, refer to the appropriate
Service Manual section for diagnostic information.
Important
With the wiring used in Saturn vehicles,
it is recommended that the approved Packard Electric Crimp and Seal Splice Sleeves,
or equivalent, be used.
- Remove the insulation from both ends of the cut wire, recommended wire strip
length is 9.5 mm (3/8 in). Caution must be used to prevent cutting the
wire strands. Locate the new splice a minimum of 40 mm (1.5 in) from
other splices. If necessary add a 51 mm (2 in) length of stranded copper
wire, the same size, and same gage as the existing wire.
- Using the Saturn approved crimp and seal sleeve found in special tools
kit SA9138Z, position the stripped ends of the wires in the sleeve until the wires
hit stop.
Important
When using the salmon splice sleeve with
0.35 (22 gage) wire. remove 19 mm (3/4 in) of insulation. Bend
the stripped portion in half to double the thickness of the wire going into the splice
sleeve. twist the stripped, doubled wire and insert it into the splice sleeve.
- INSERT TABLE SHOWING WIRE SIZE AND GAGES
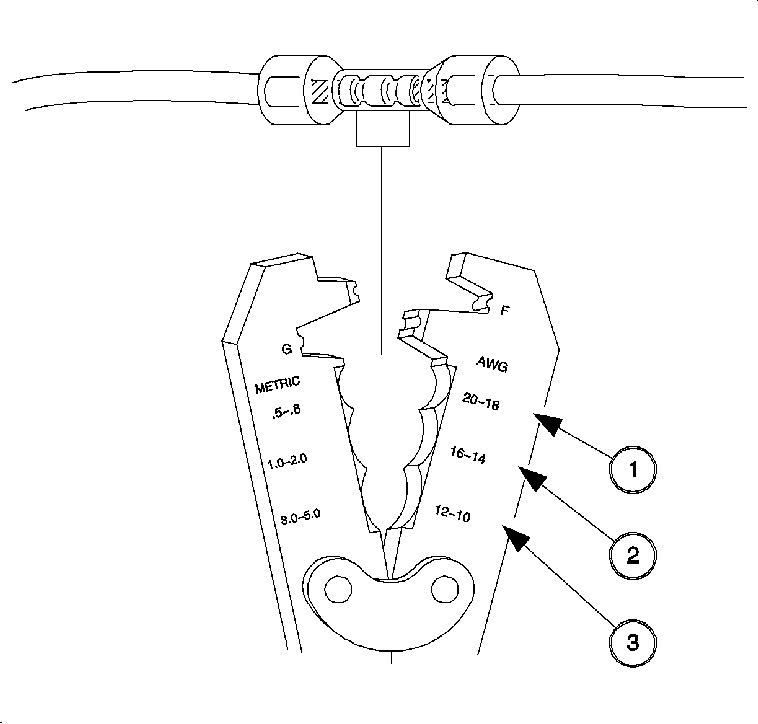

- Hand crimp the sleeve using the appropriate crimping
tool. Gently tug on the wires to ensure they are secure before applying heat to them.
Caution
Do not use a match or open flame to apply
heat to the splice sleeve.
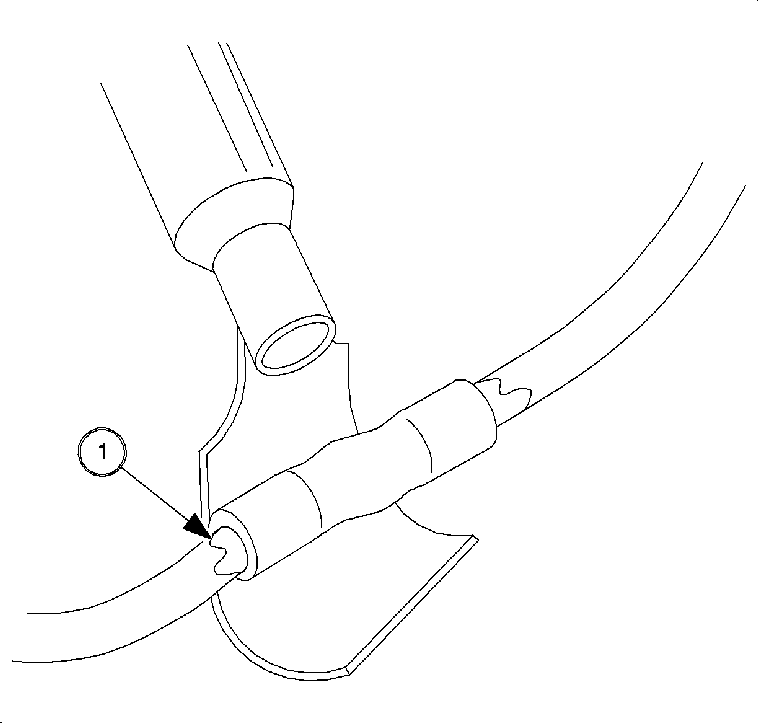
- Apply heat using Ultratorch® or some
other device, heating to 175°C (347°F) until the glue flows around the edges
of the sleeve.
- Inspect for continuity in the wire.
- Install 101 mm (4 in) of conduit P/N 1023495 to
the I/P harness. Make sure to position the conduit over the clutch pedal pivot clip.
- Tape the conduit and fasten the wire harness clip to the harness and spaceframe.
- Using Saturn P/N 08905262, wiring harness clip, install the clip
on the harness and insert the rose bud into the hole that the previous strap was removed
from.
- Enable the SIR system. Refer to enabling the SIR System procedure in the
SIR Service Manual.
- Clear any DTCs that may have been set.
Parts Requirements:
Part Number
| Description
|
08905262
| Clip -- Wire Harness
|
12089189* or (21760**)
| Splice Sleeve -- Salmon (Pink) -- 6 Required
|
21023495
| Conduit
|
*Order through Packard at 1-800-PACKARD (1-800-722-5273)
**Order through Saturn Special Tool Catalog. Included with Terminal Repair Kit
(SA9138Z)
|
Claim Information:
| To receive credit for this repair during the warranty coverage period, submit
a claim through the Saturn Dealer System as Follows:
|
--
| Case Type
| Description
| Labor Operation Code
| Time
|
--
| VW
| Repair Wire Harness
| T7991
| 1.1 hrs
|
--
| ADD:
| To repair each additional wire
| --
| 0.30 hrs
|
GM bulletins are intended for use by professional technicians,
NOT a "do-it-yourselfer". They are written to inform these
technicians of conditions that may occur on some vehicles, or to
provide information that could assist in the proper service of a
vehicle. Properly trained technicians have the equipment,
tools, safety instructions, and know-how to do a job properly and
safely. If a condition is described, DO NOT assume that the
bulletin applies to your vehicle, or that your vehicle will have
that condition. See your GM dealer for information on whether
your vehicle may benefit from the information.
|

|
WE SUPPORT VOLUNTARY TECHNICIAN CERTIFICATION
|
© Copyright General Motors Corporation.
All Rights Reserved.