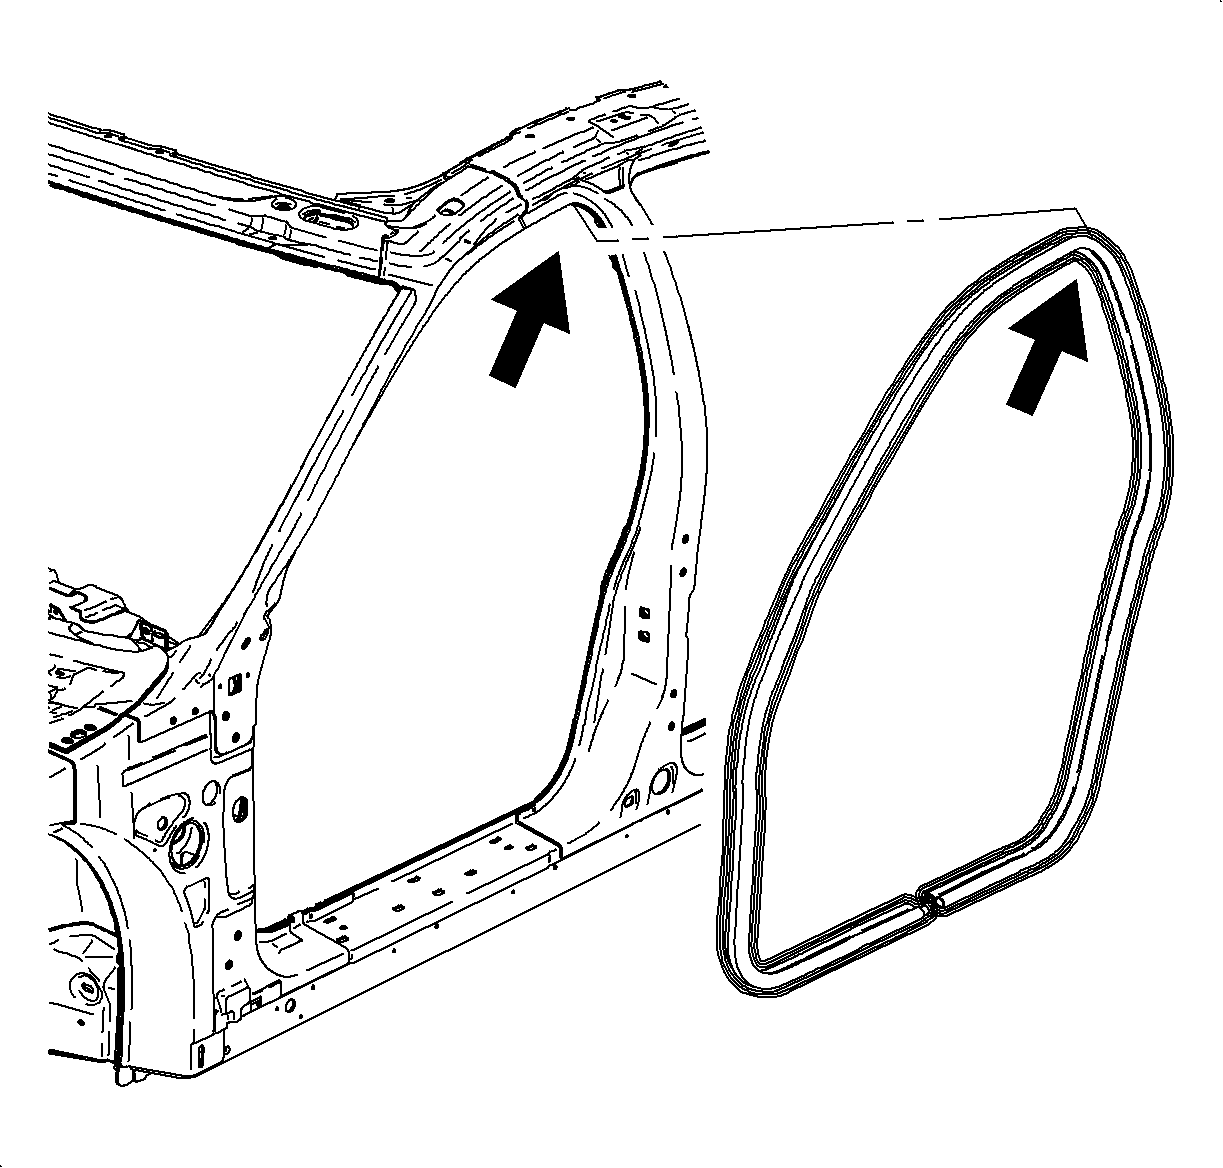
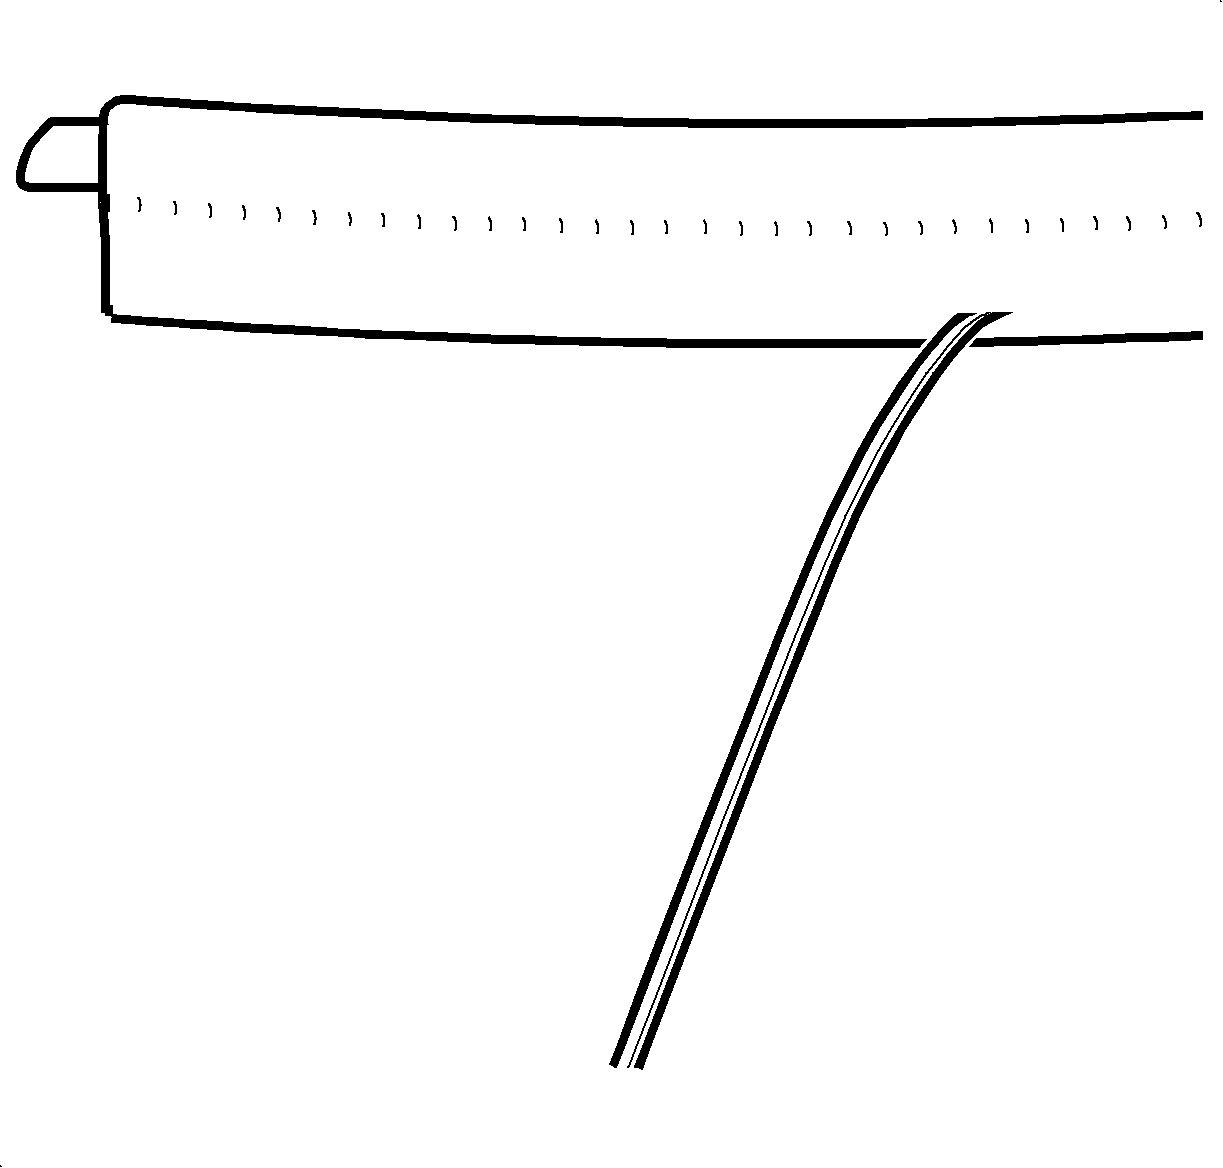
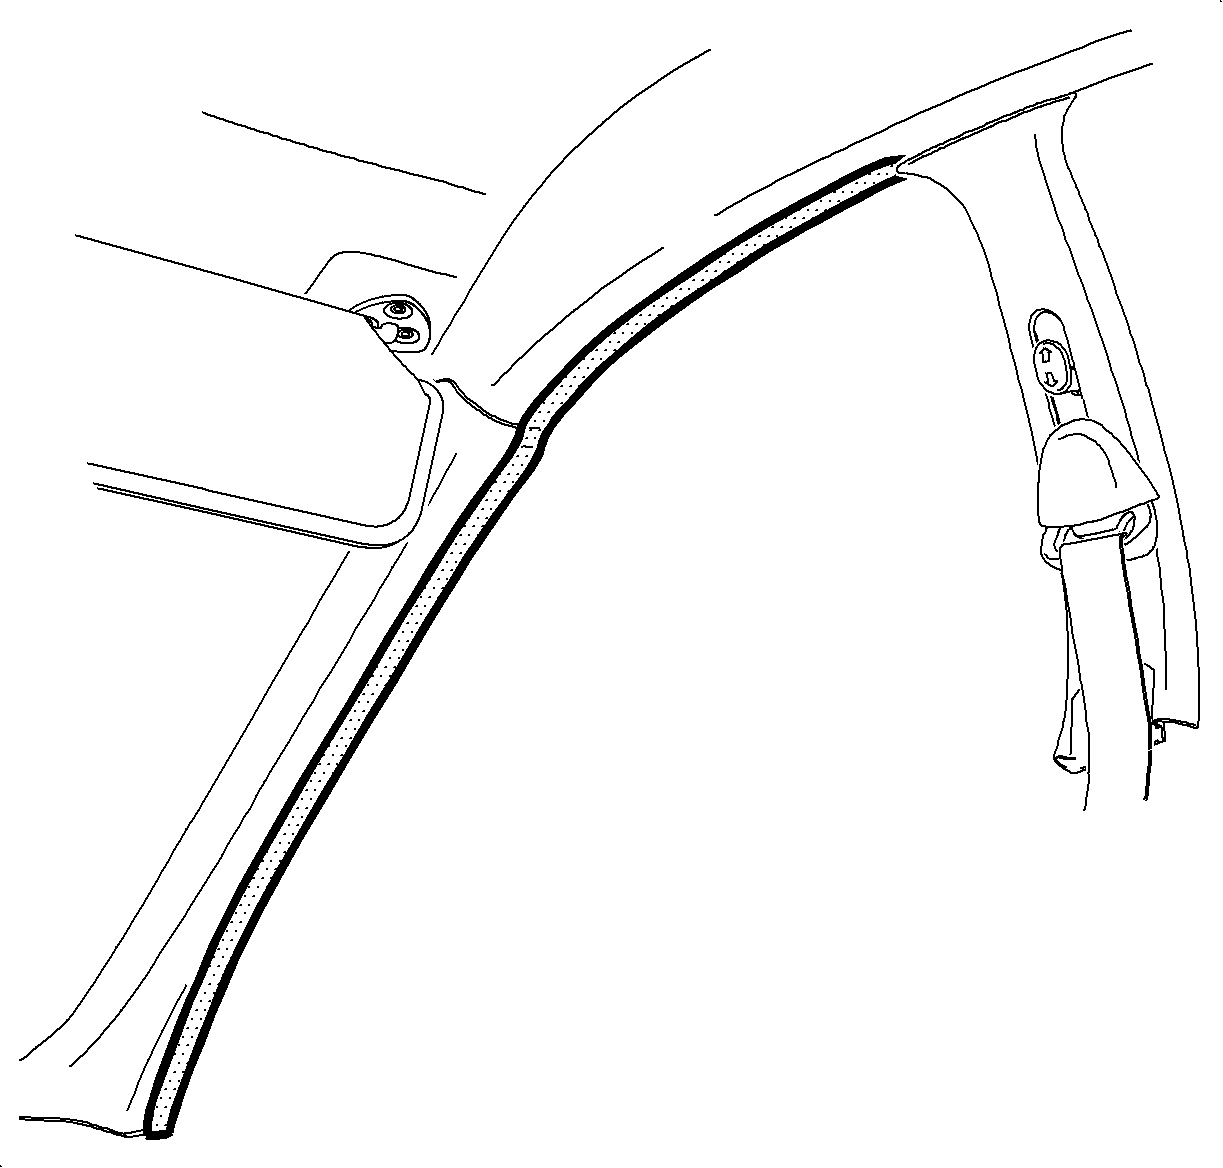
Document ID# 876631
1998 Saturn SL2/SC2/SW2
 

Weatherstrip Replacement - Front Door 2nd Design Sedan/Wagon-Coupe Similar

Removal Procedure

    Object Number: 867873  Size: SH
    Click here for detailed picture of above image.
  1. Remove hinge pillar garnish molding.

  2. Object Number: 862917  Size: SH
    Click here for detailed picture of above image.
  3. Remove weatherstrip from door opening by starting at the seal joint at the bottom of the door opening. Separate the seal at the joint, noting this position.
  4. Slowly pull the seal loose.
Installation Procedure
  1. Clean old adhesive off of flange area.

  2. Object Number: 869478  Size: SH
    Click here for detailed picture of above image.
  3. Remove rip-cord from new seal by pulling at the exposed end. This rip cord is a production assembly aid and is not required for service.

  4. Object Number: 862917  Size: SH
    Click here for detailed picture of above image.

    Important

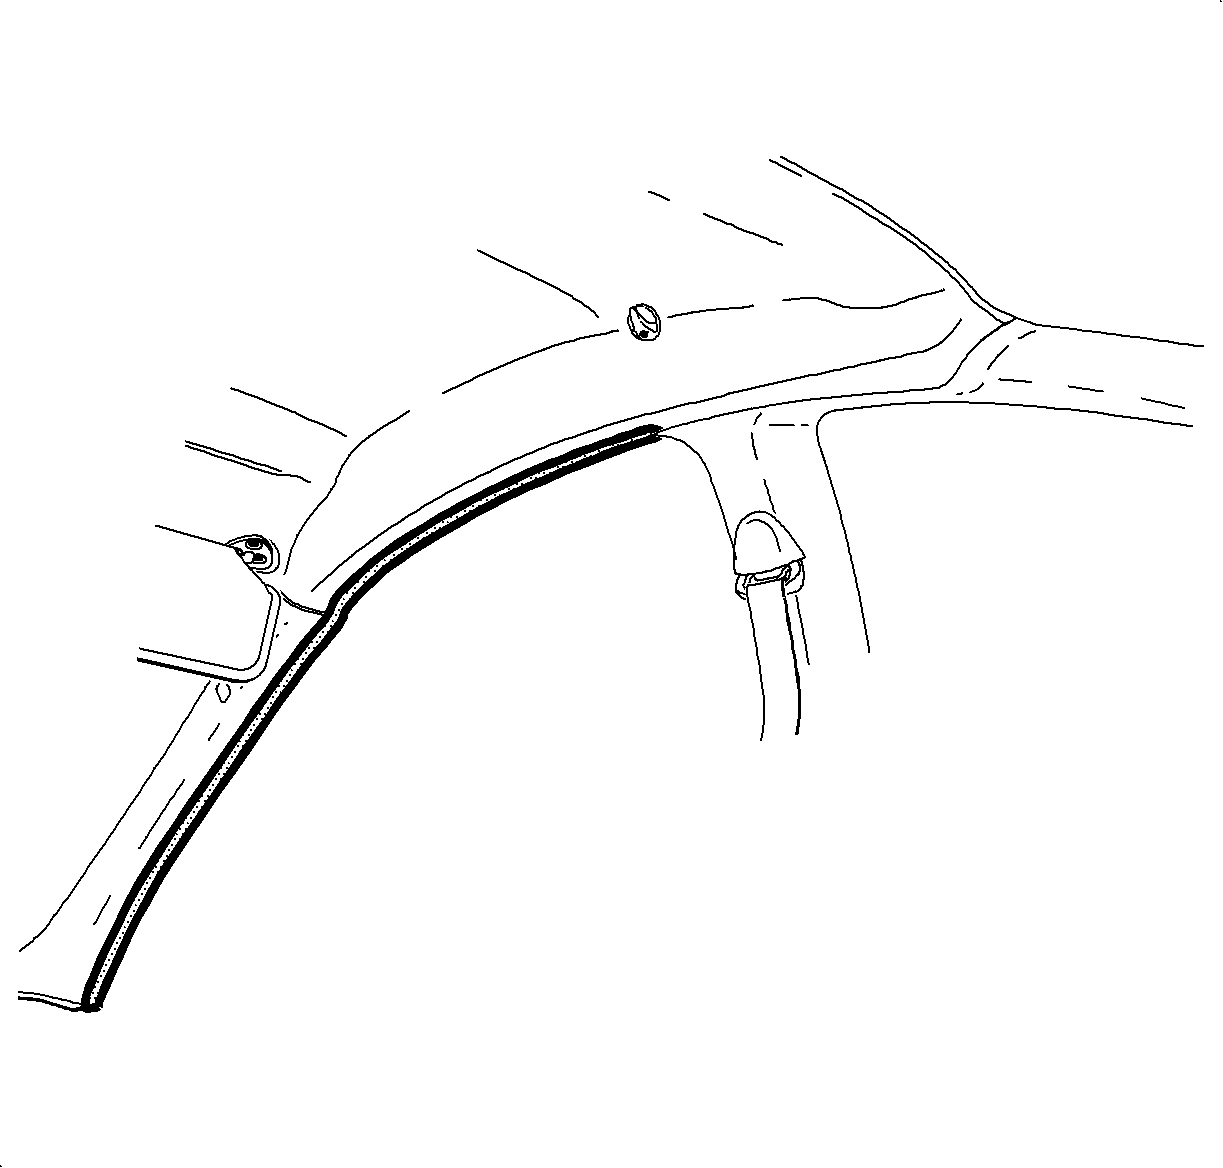
    For proper sealing, rigid portion of weatherstrip (approximately 191 mm [7 1/2 in.]) must be located at top rear corner as shown in illustration.

  5. Start seal over flange area in position noted above. Press weatherstrip over flange firmly to seat it.
  6. Tuck seal lip under the B-pillar upper and lower finish panels and at the end of the instrument panel.
  7. Install hinge pillar garnish molding.

  8. Object Number: 869344  Size: SH
    Click here for detailed picture of above image.
  9. Verify the front door weatherstrip seal lip is covering the headliner and windshield garnish molding as shown in illustration.

  Document ID# 876631
1998 Saturn SL2/SC2/SW2