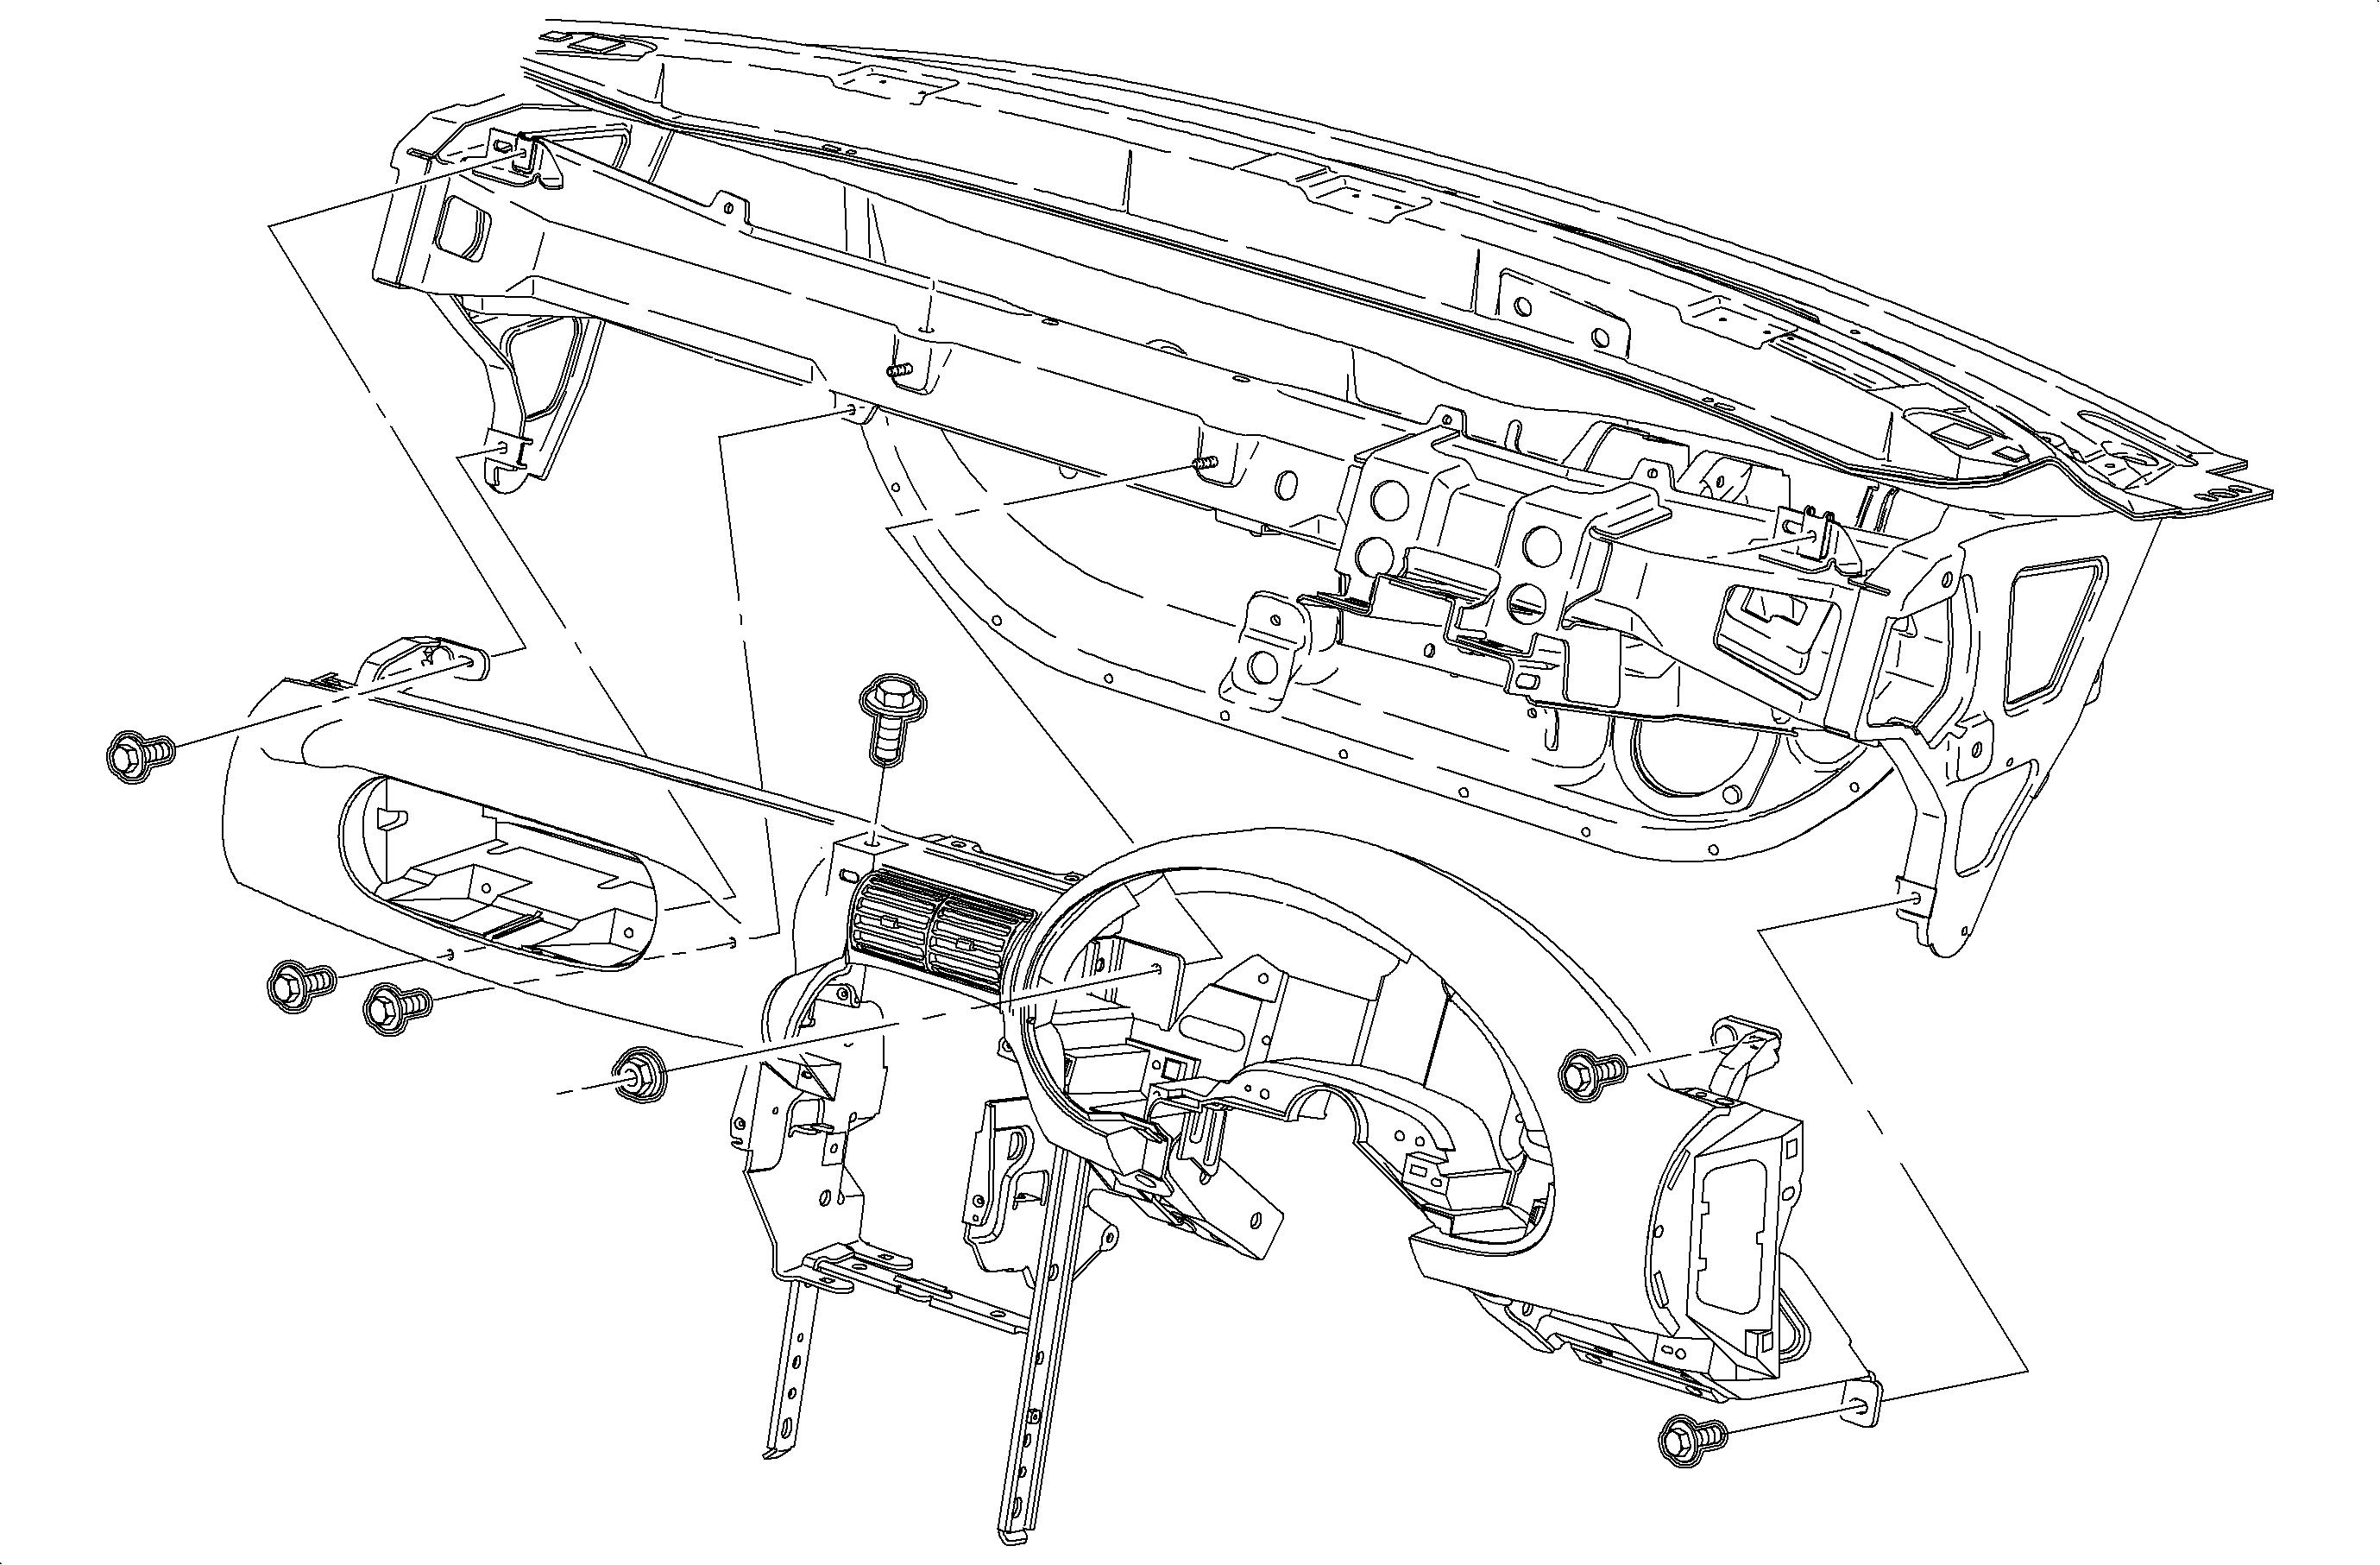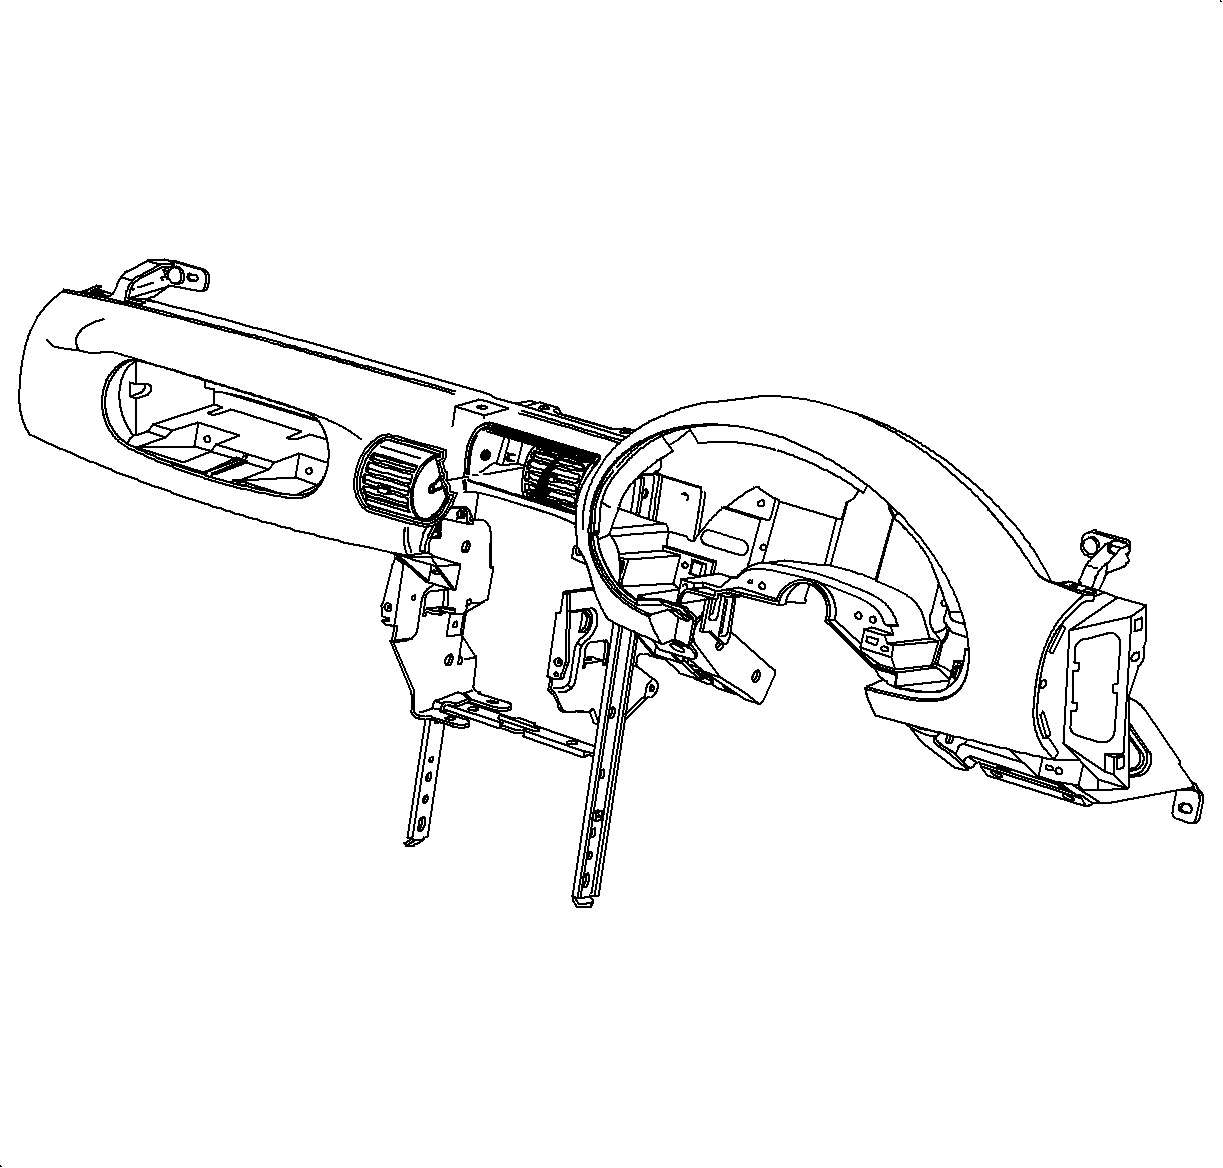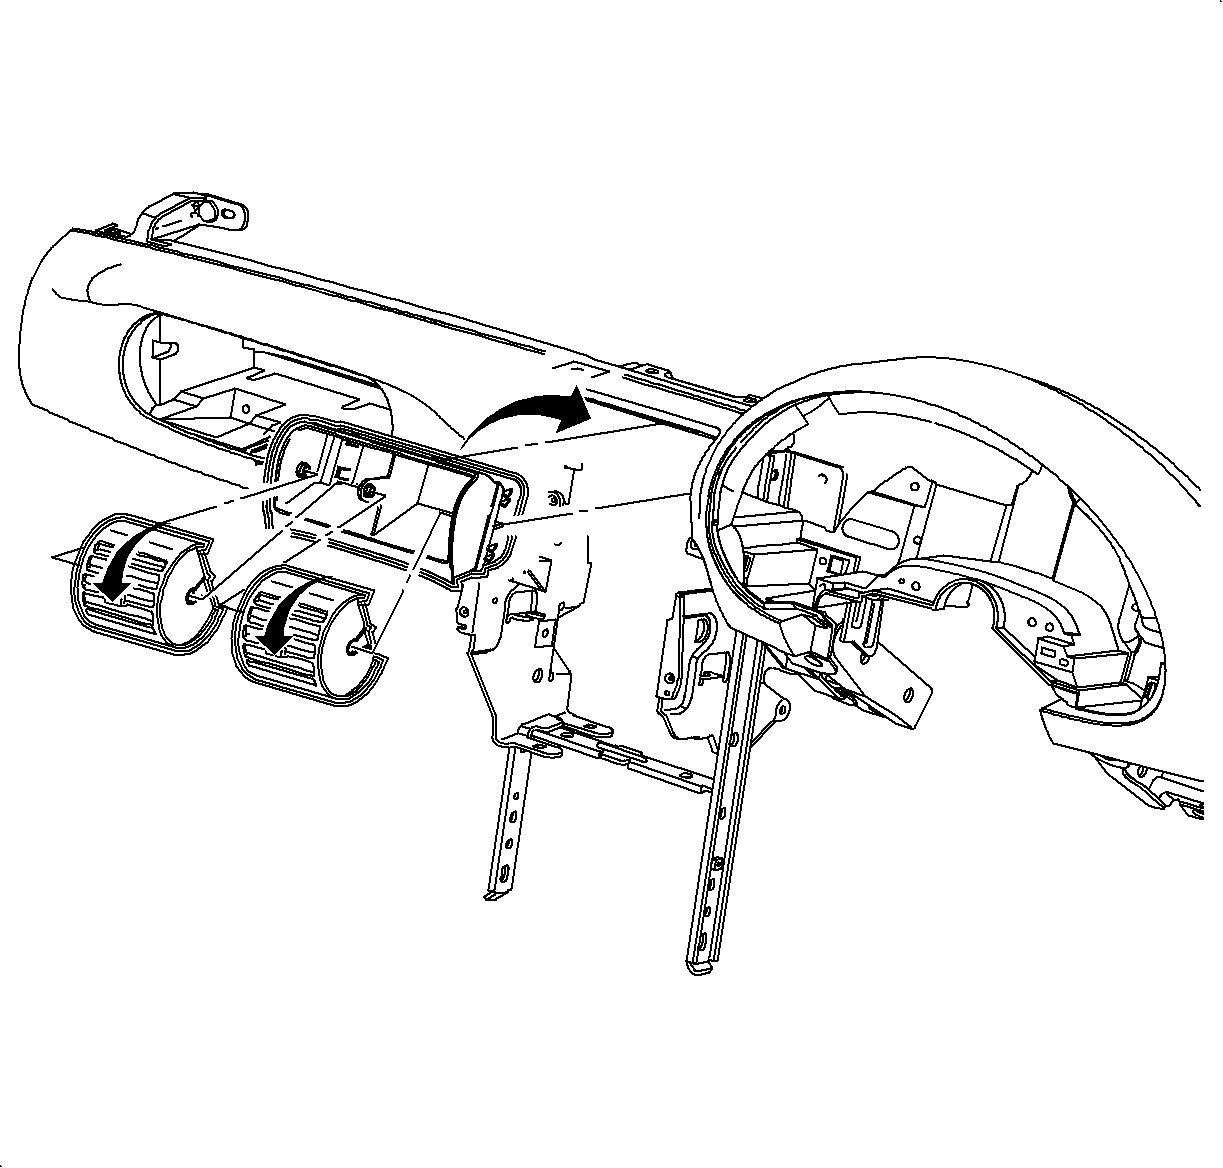

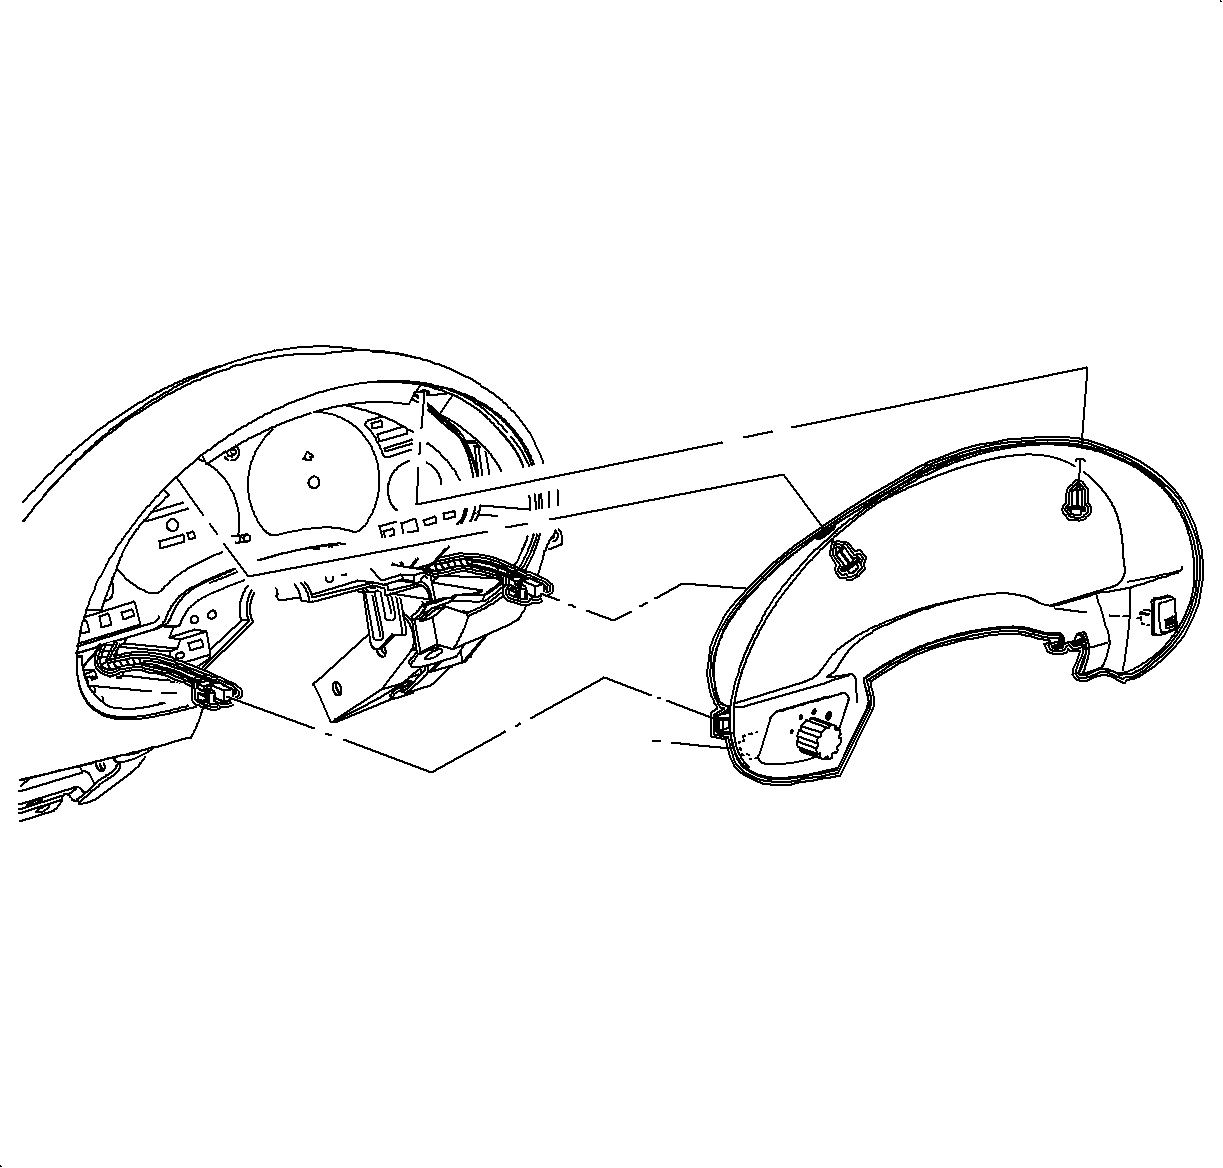
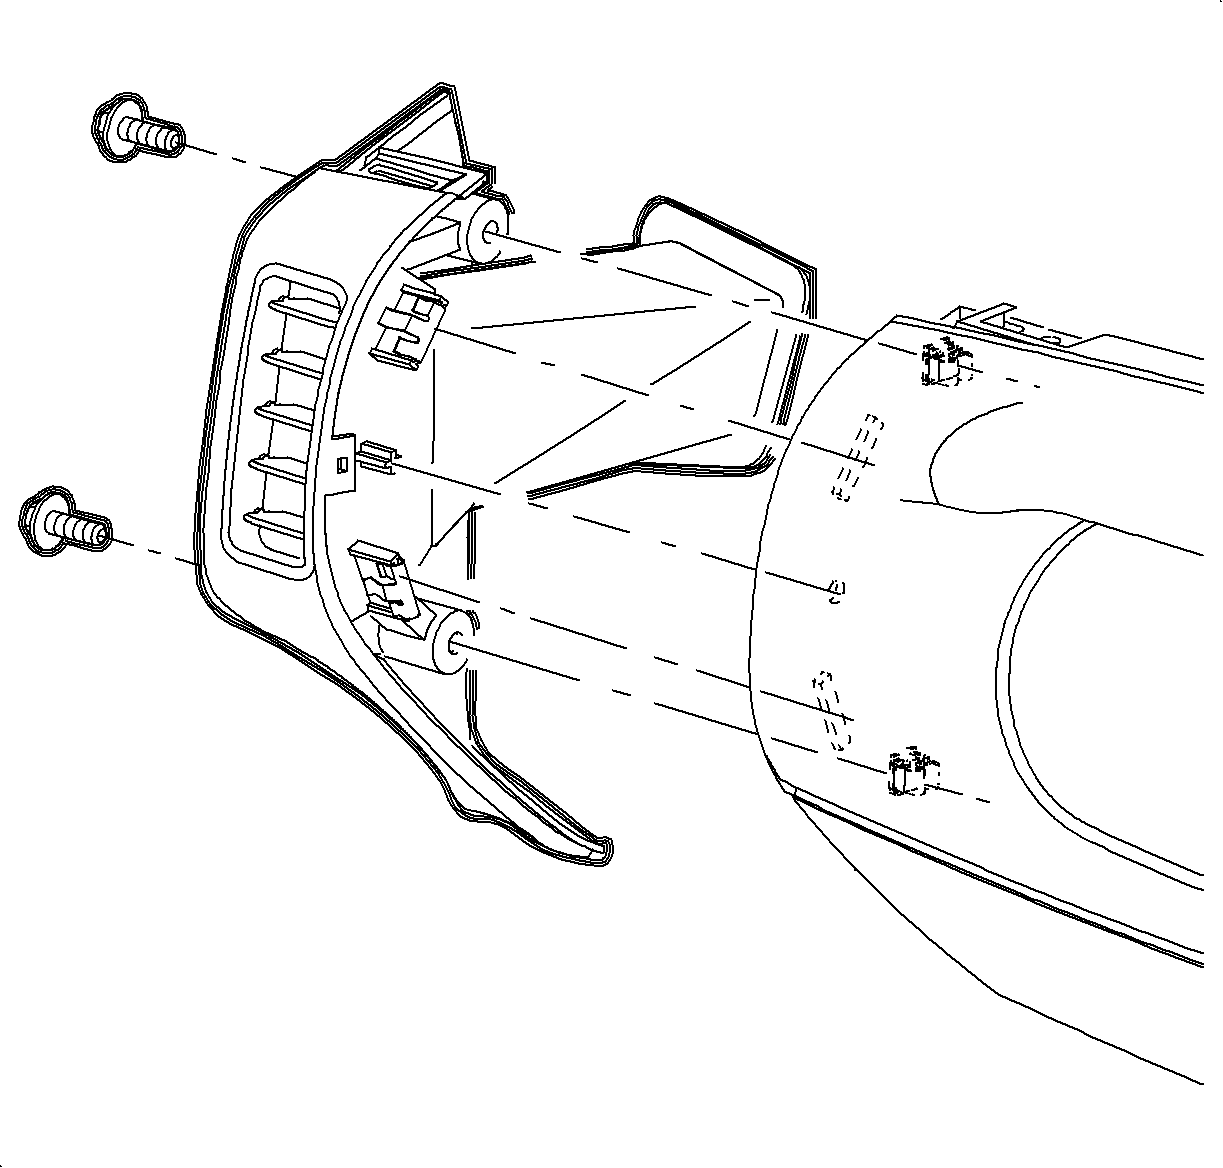
- Install center outlet housing into openings in instrument panel retainer. Push
in until the tabs are flush with sides of the housing.
Important
Small pivot pins are in the center of the
housing. Large pivot pins are on the sides of the housing.
- Rotate the center outlets down and snap into the housing.
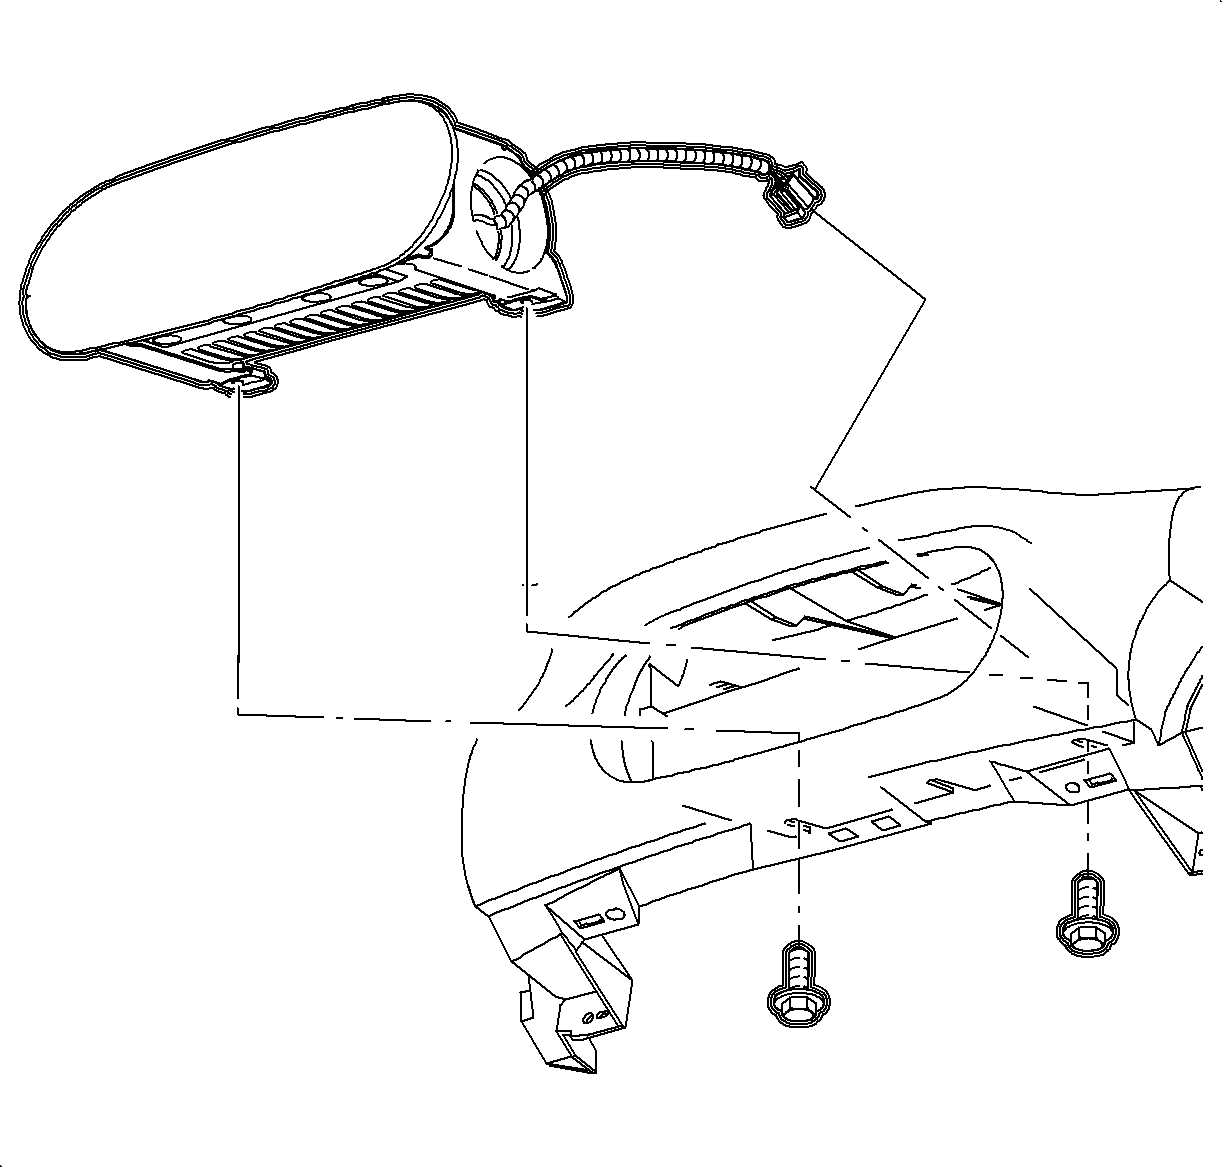
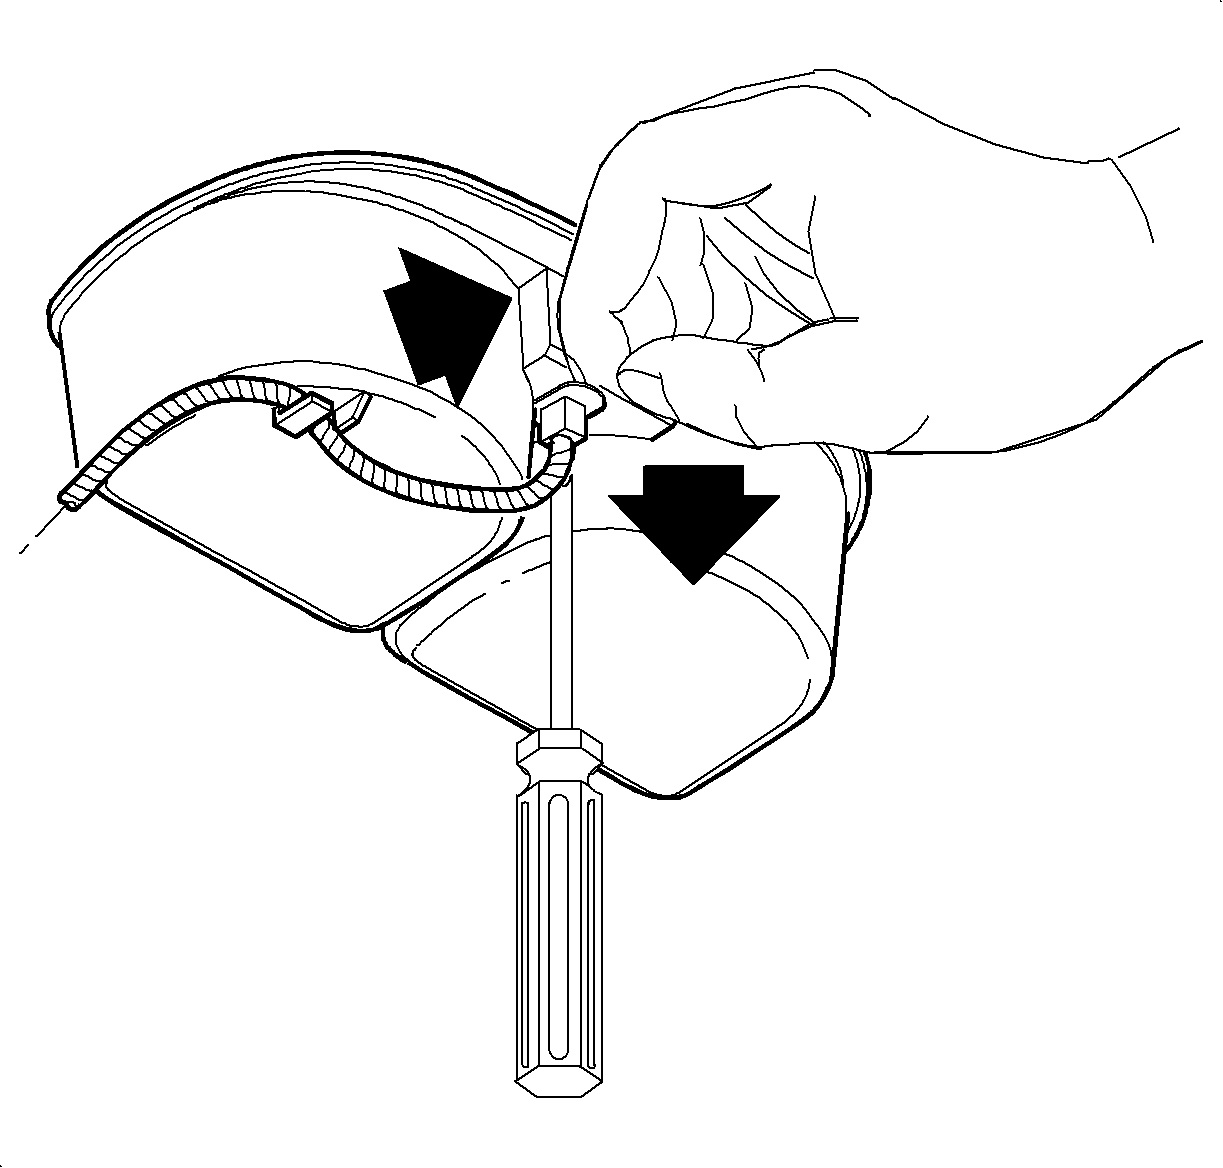
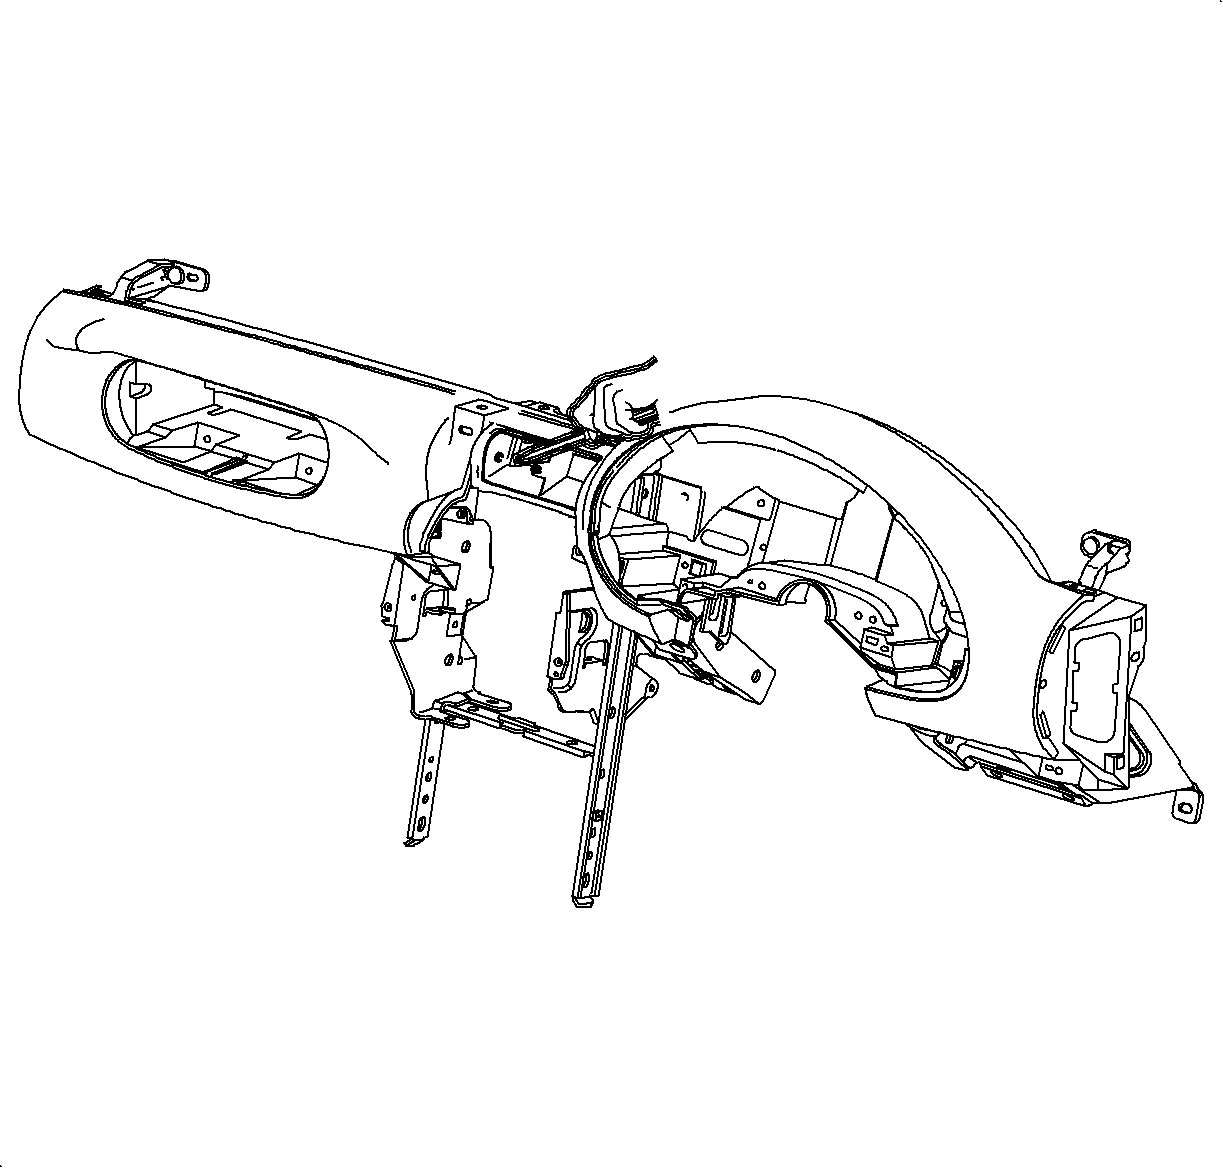
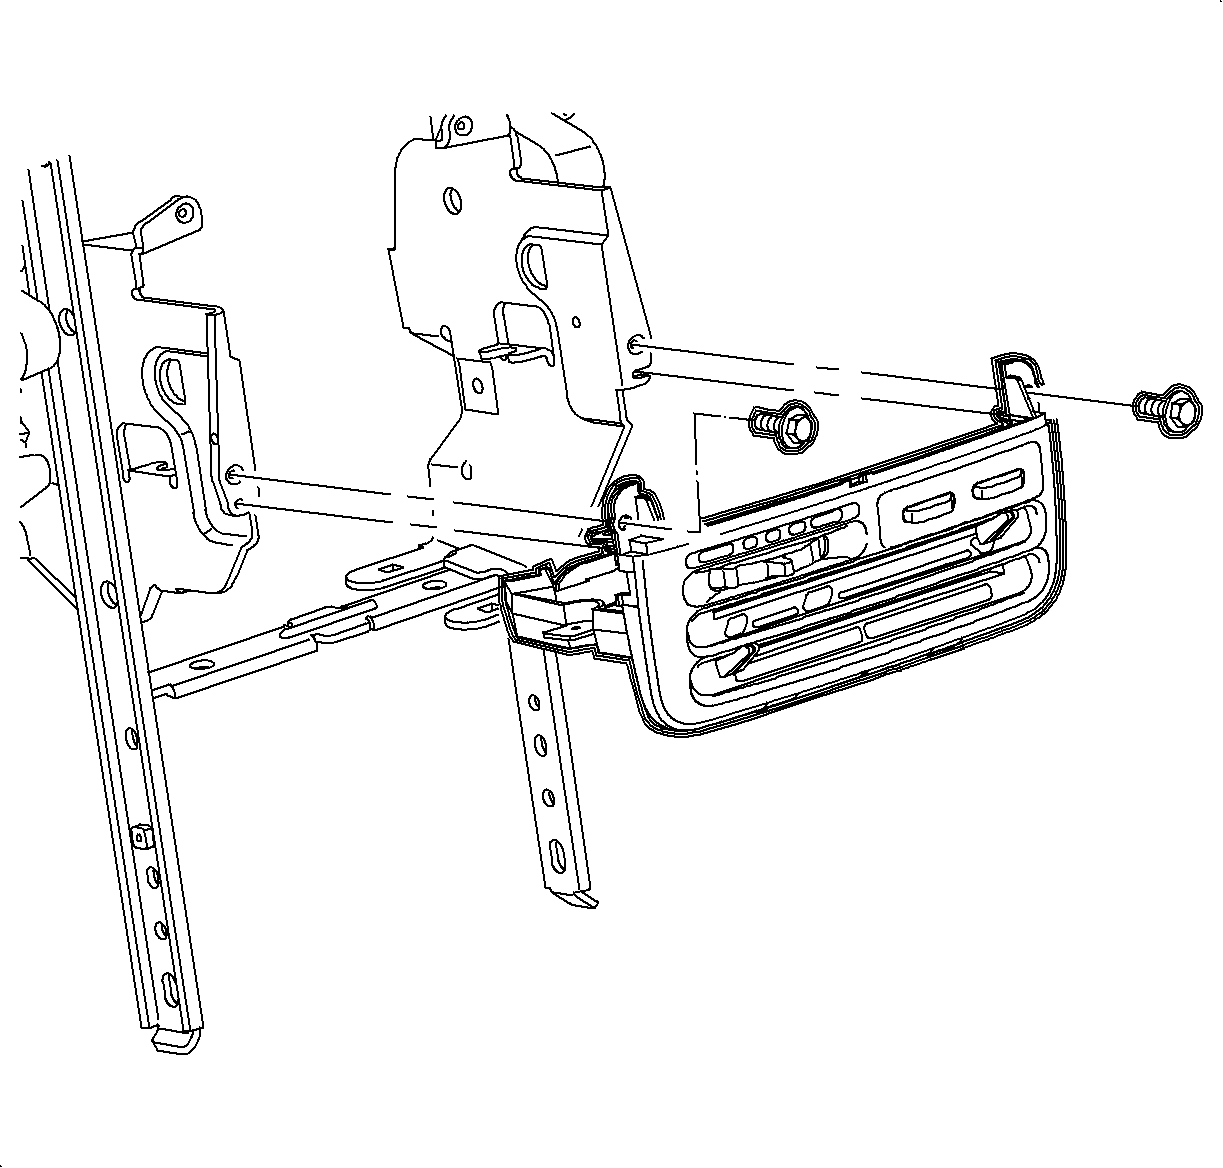
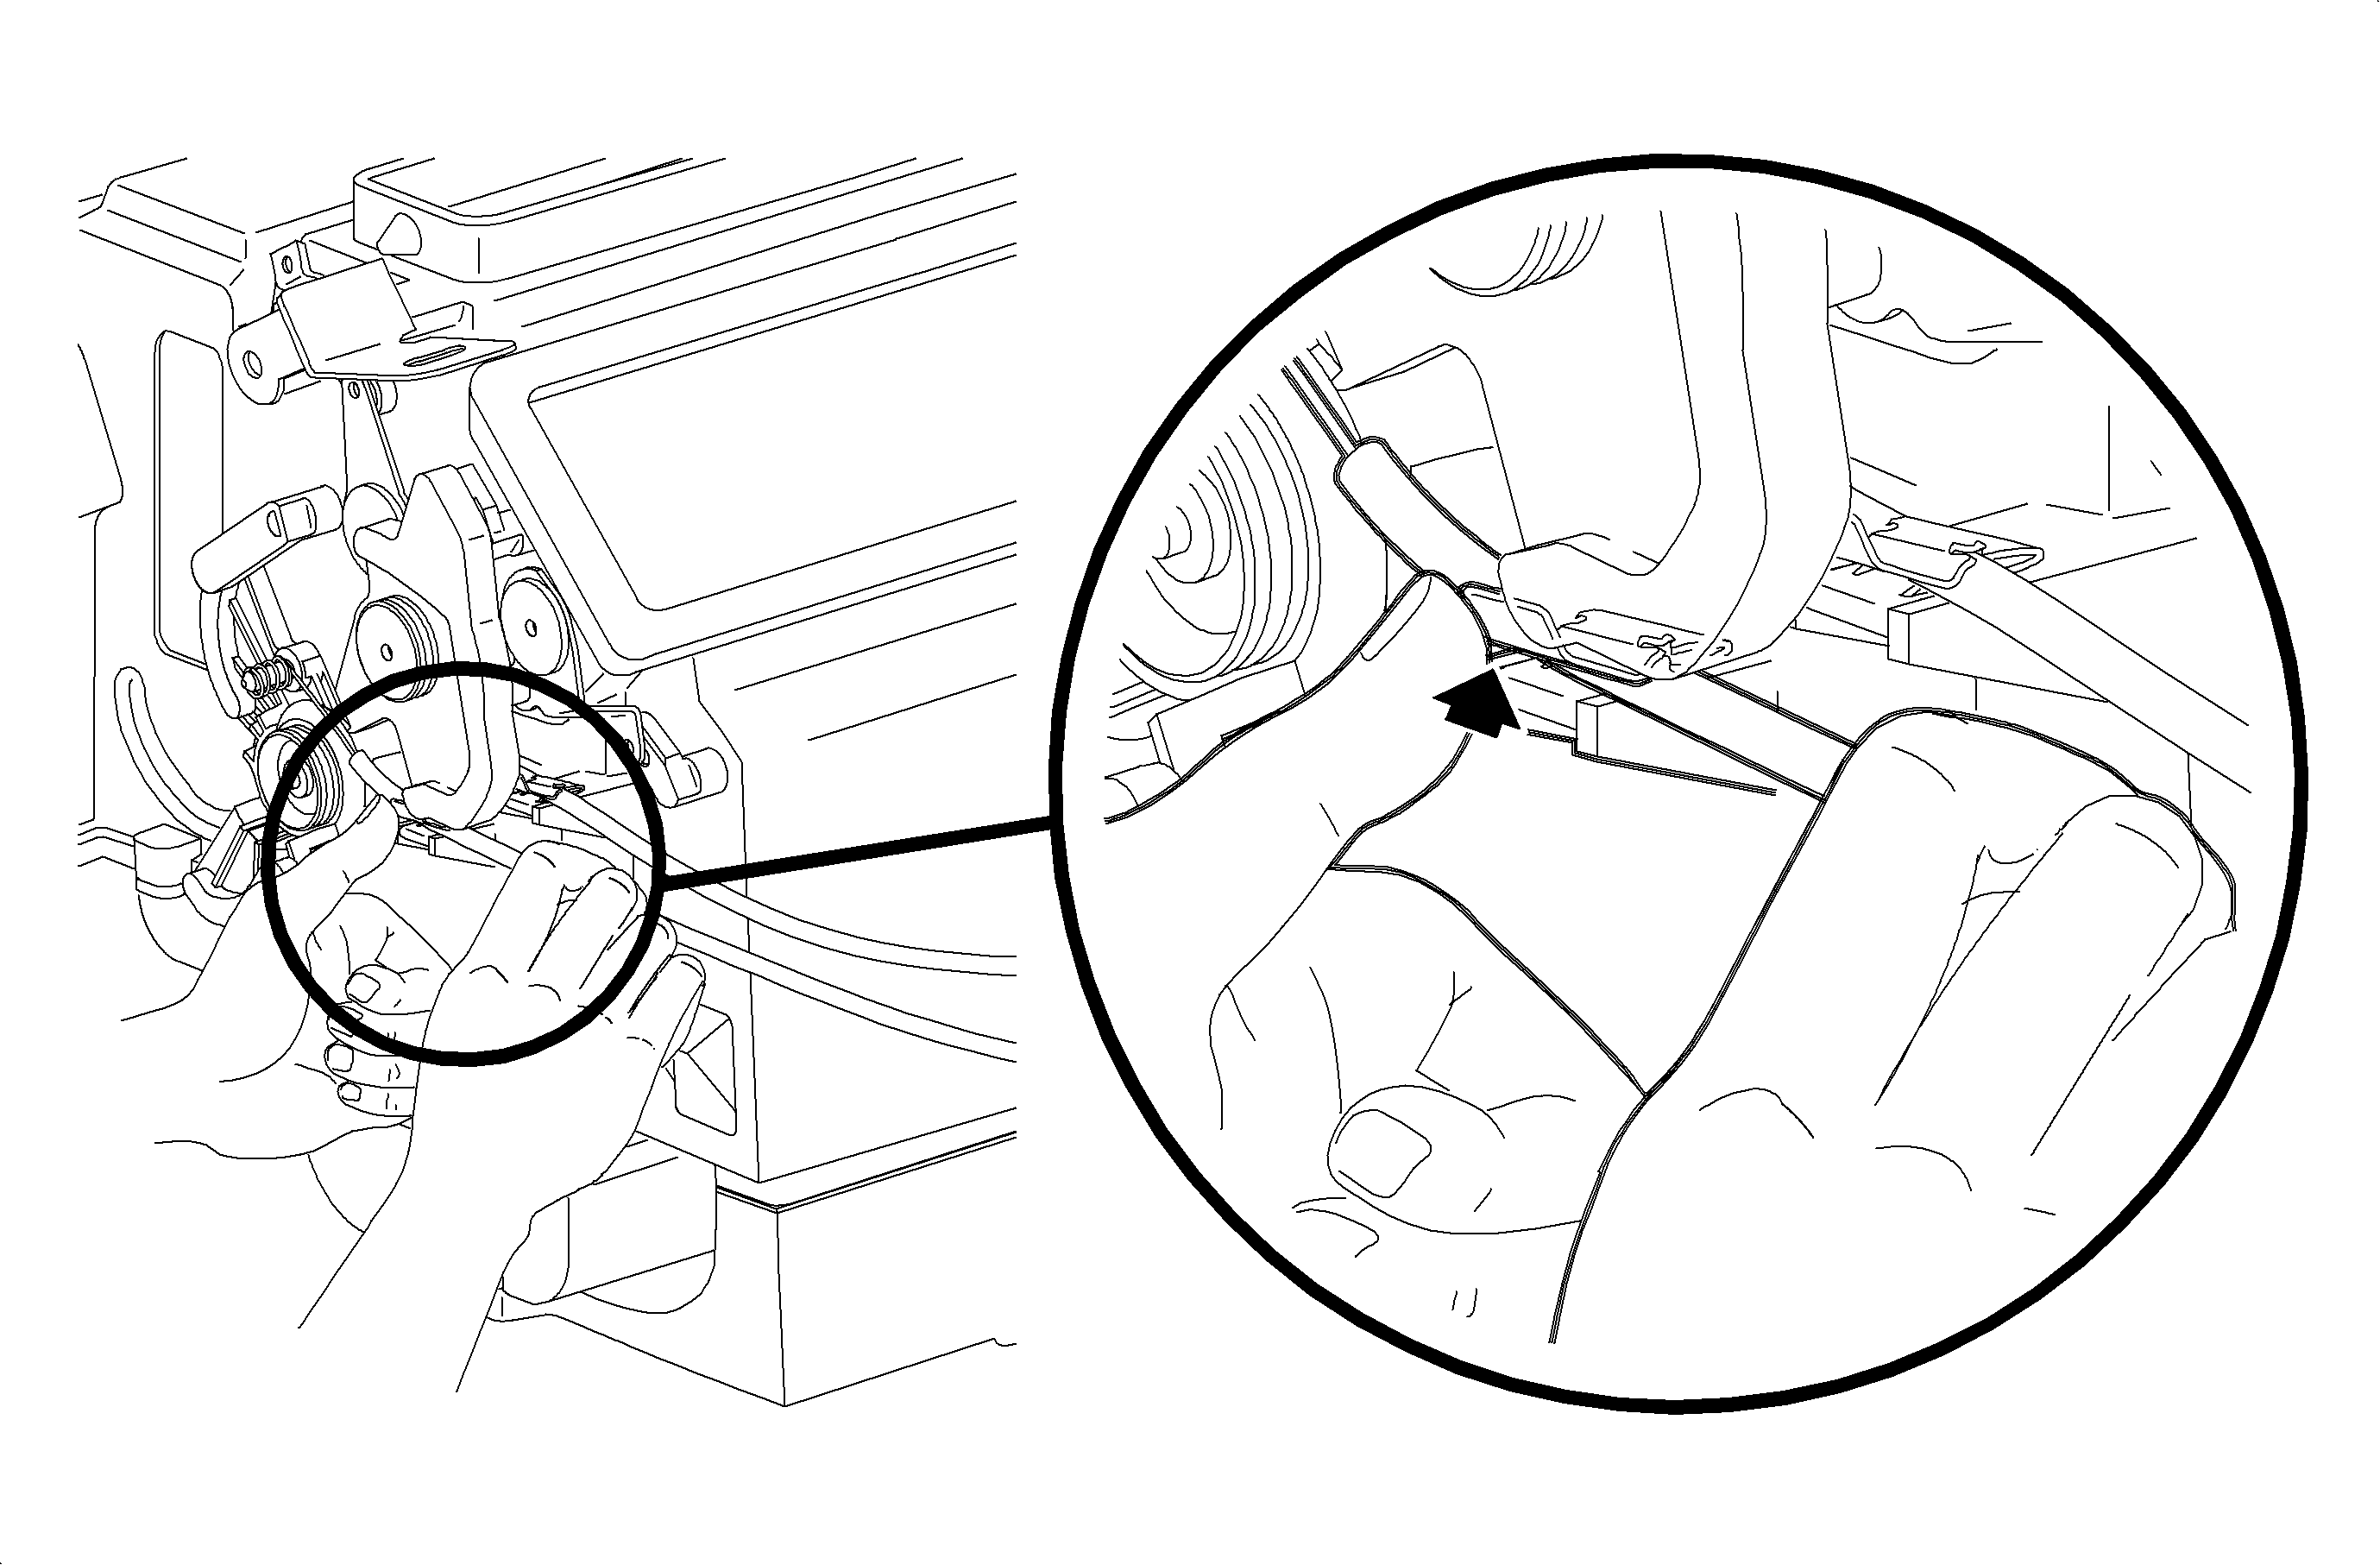
- Install the passenger
side air bag. Feed the wiring harness into position.
Notice
Refer to Fastener Notice in Cautions and Notices.
- Install and tighten the screws.
TightenTighten the screws to 10 N·m (89 lb in).
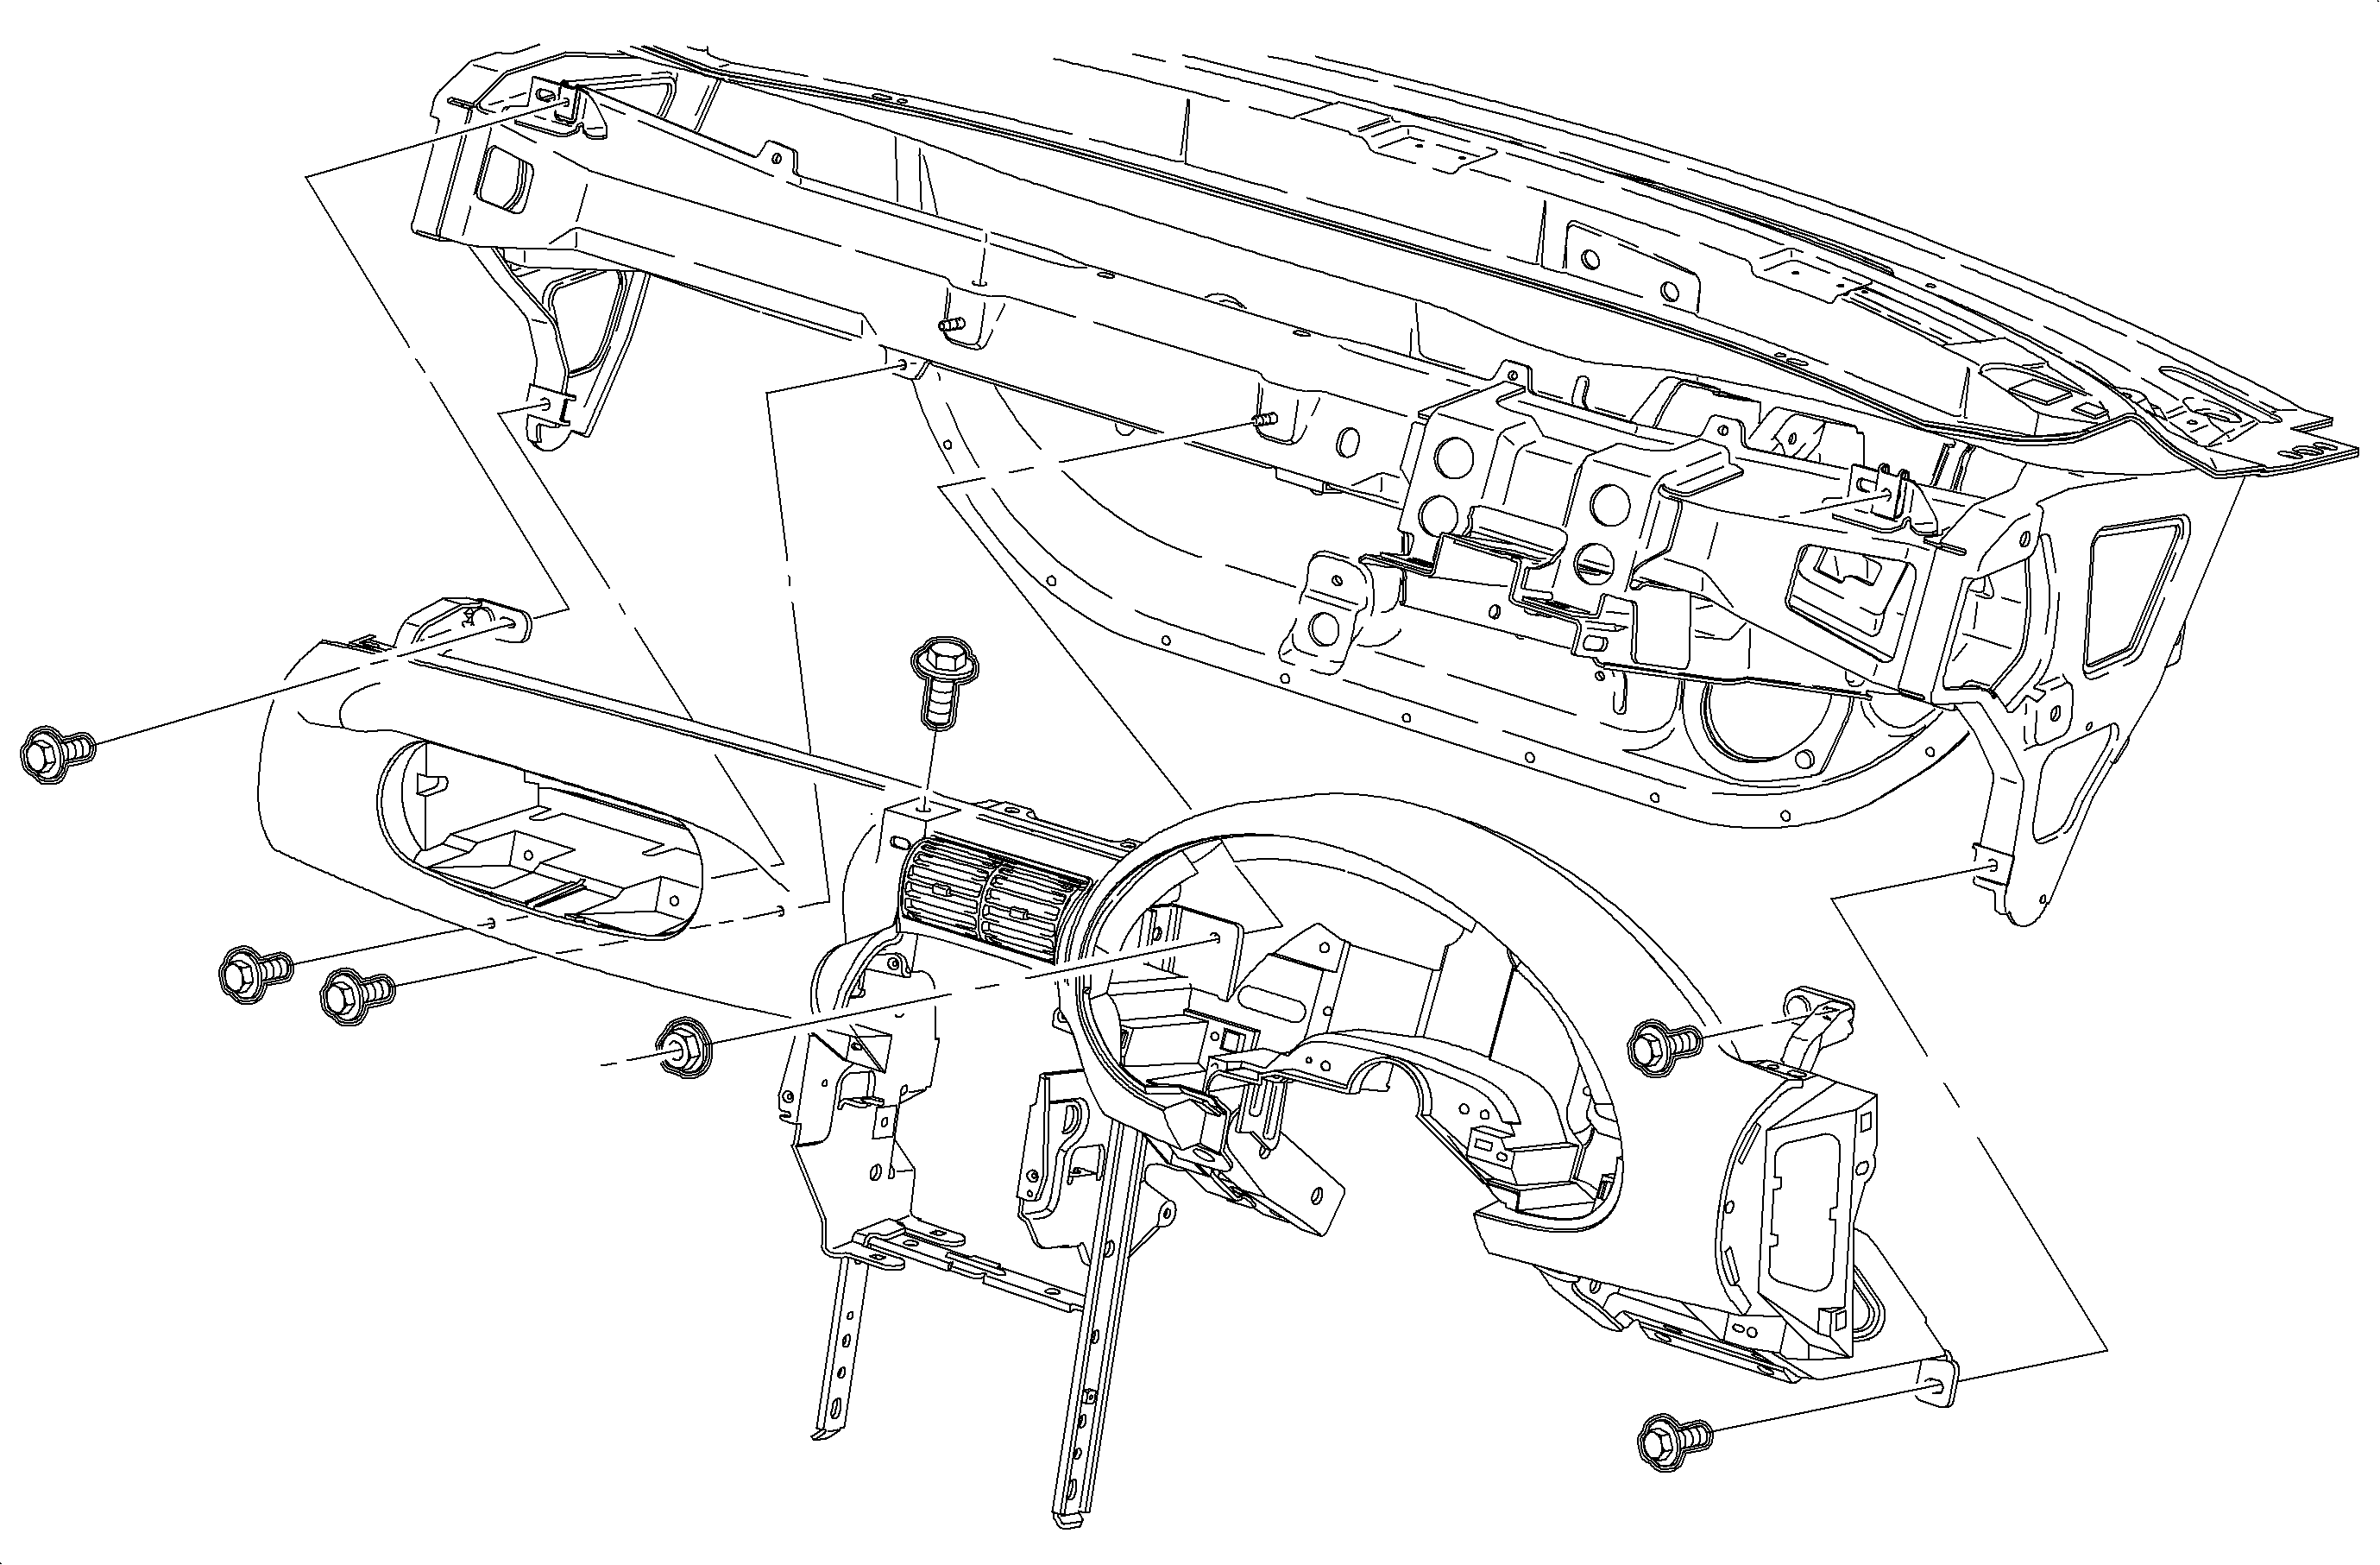
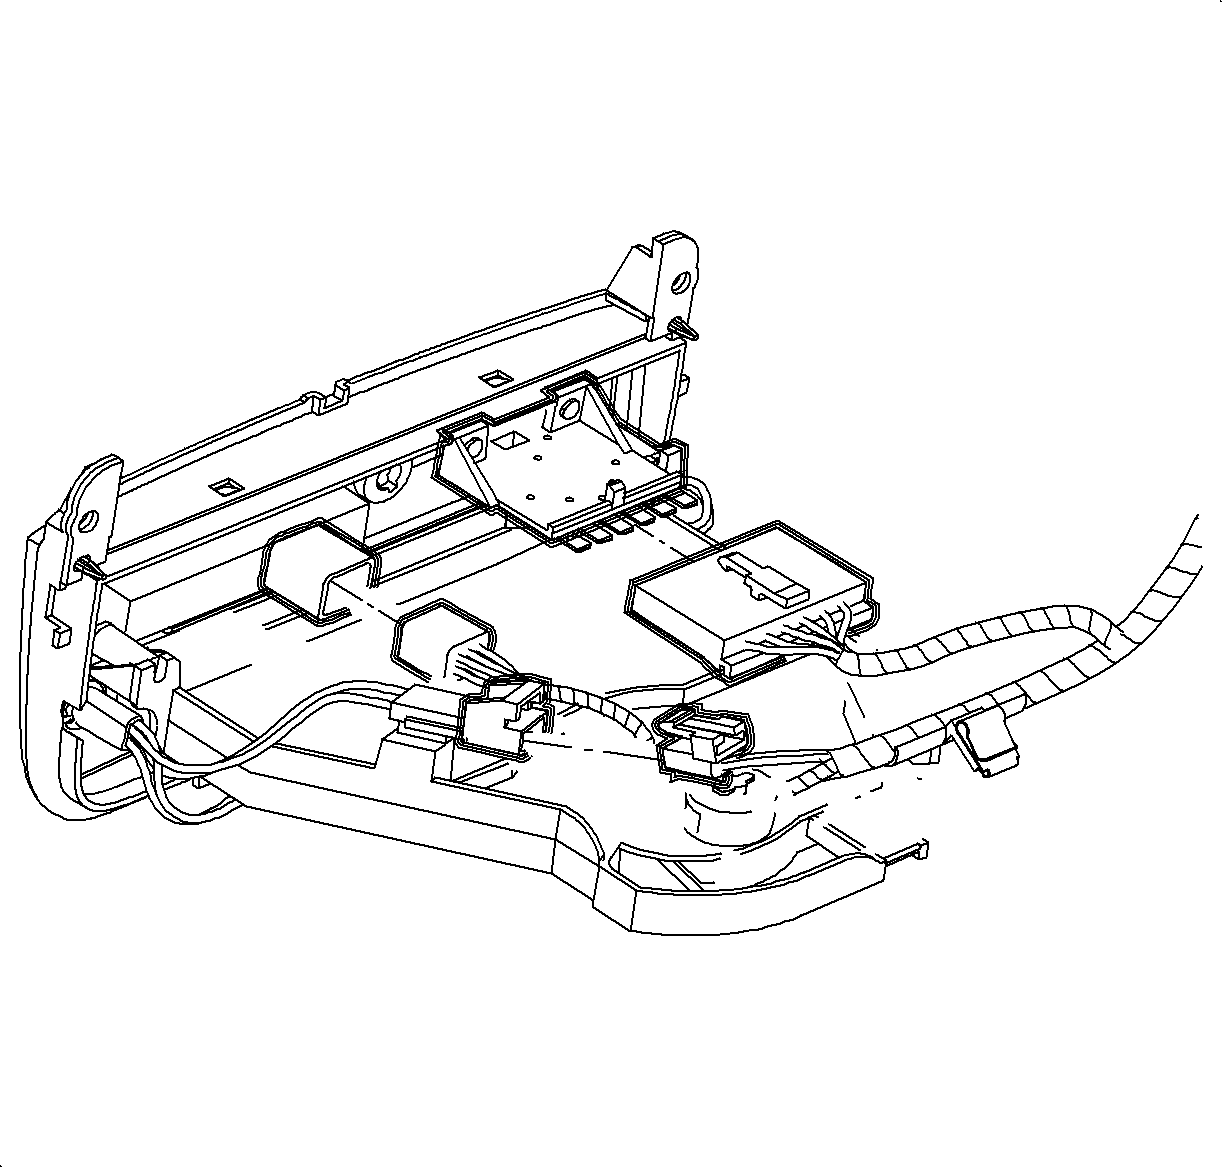
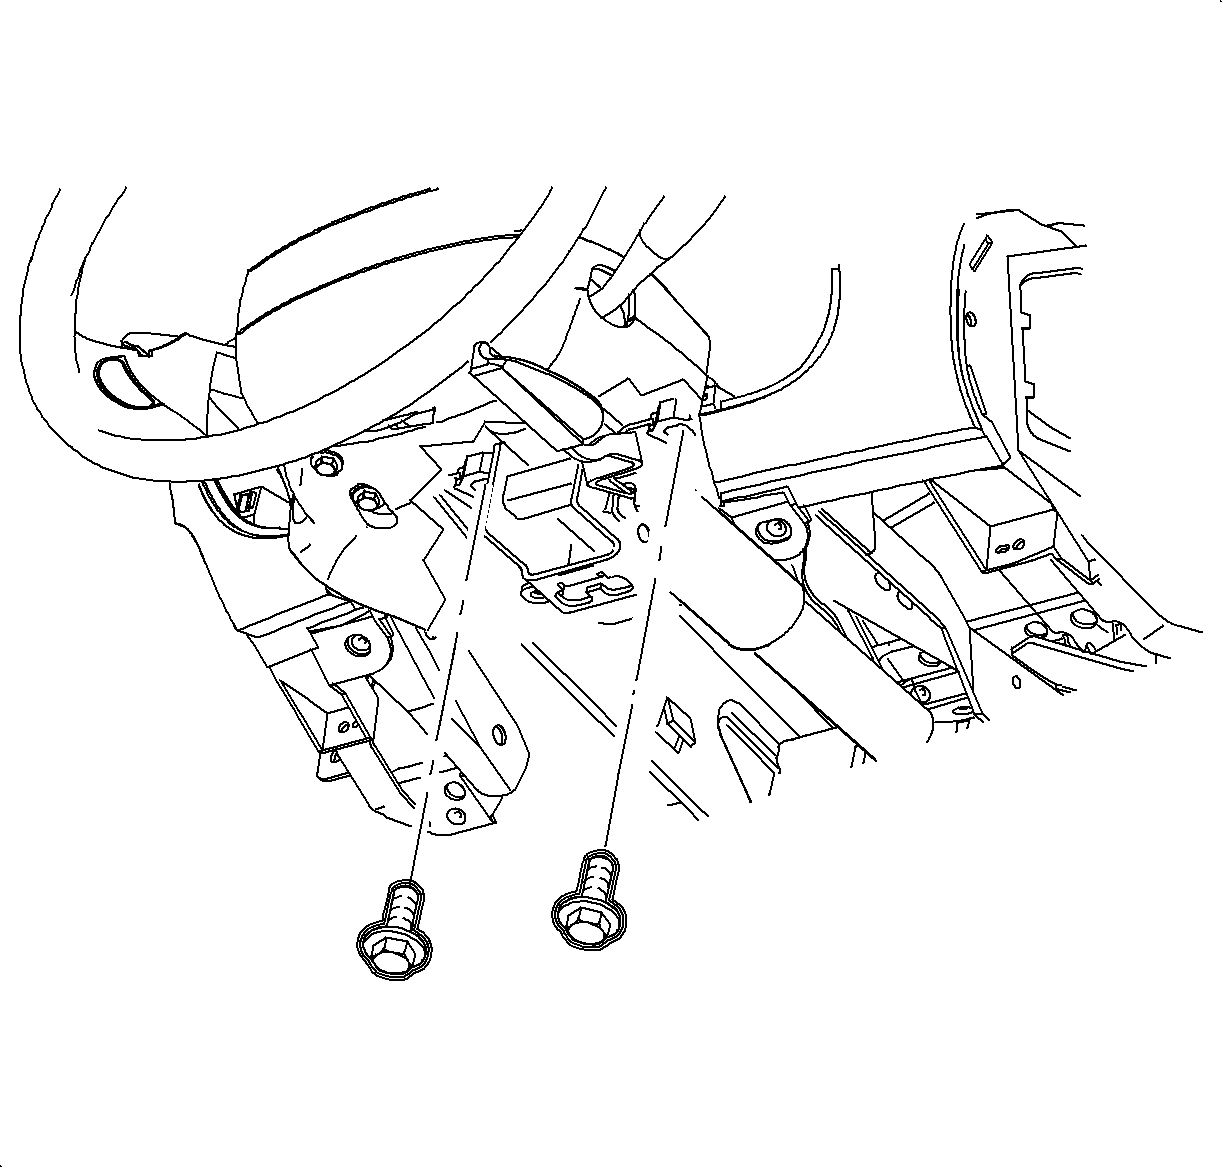
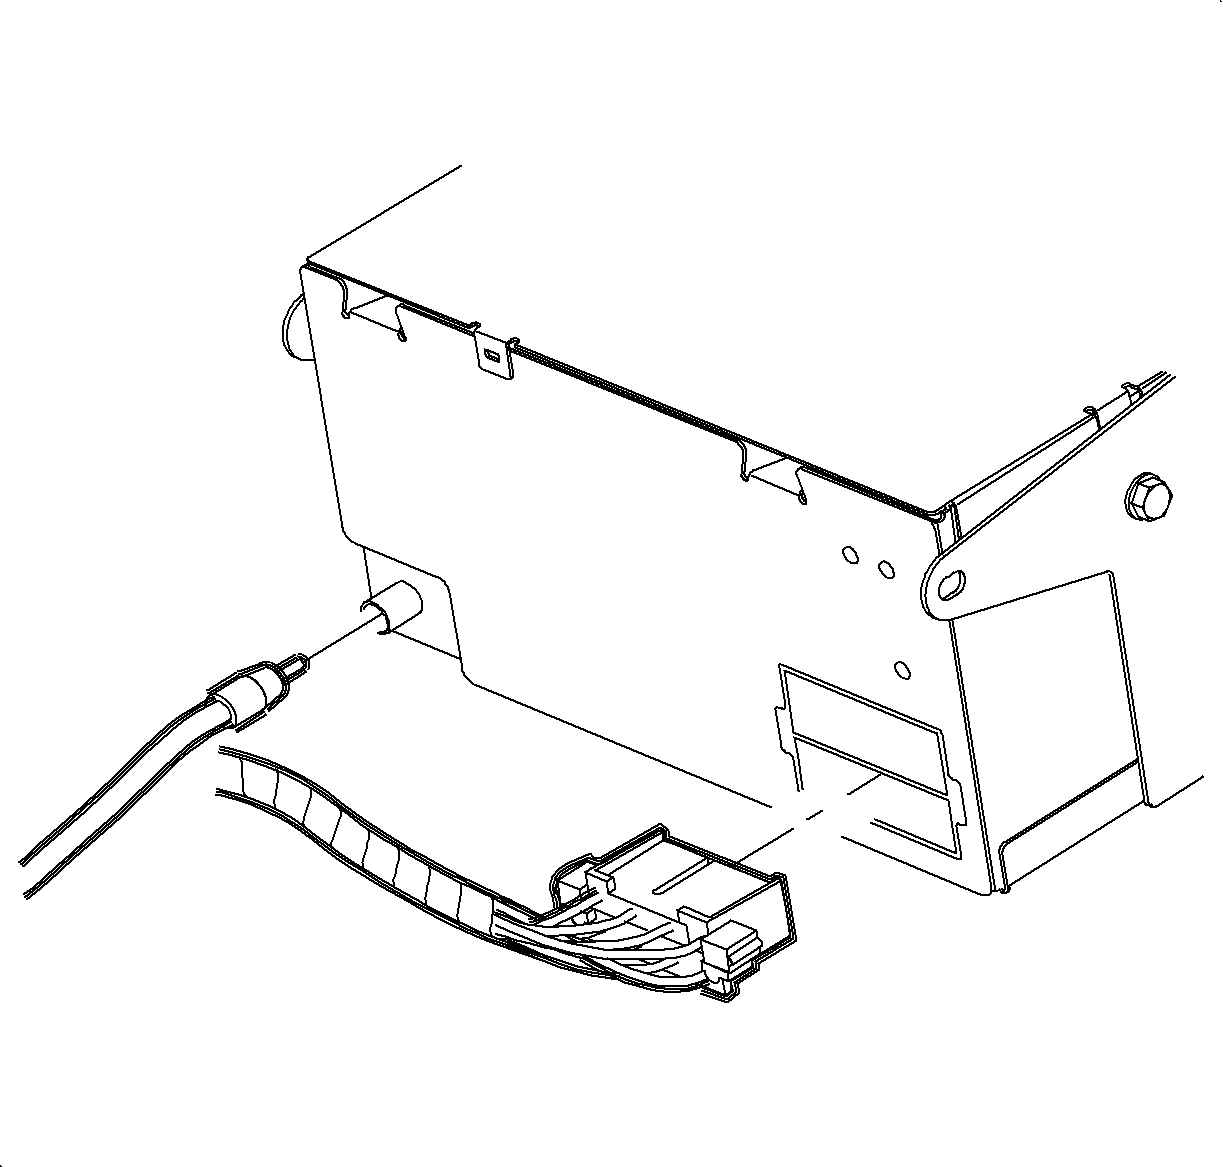
- Place the instrument panel junction block in position.
Important
Make sure the PSIR connector harness is on
top of the beam.
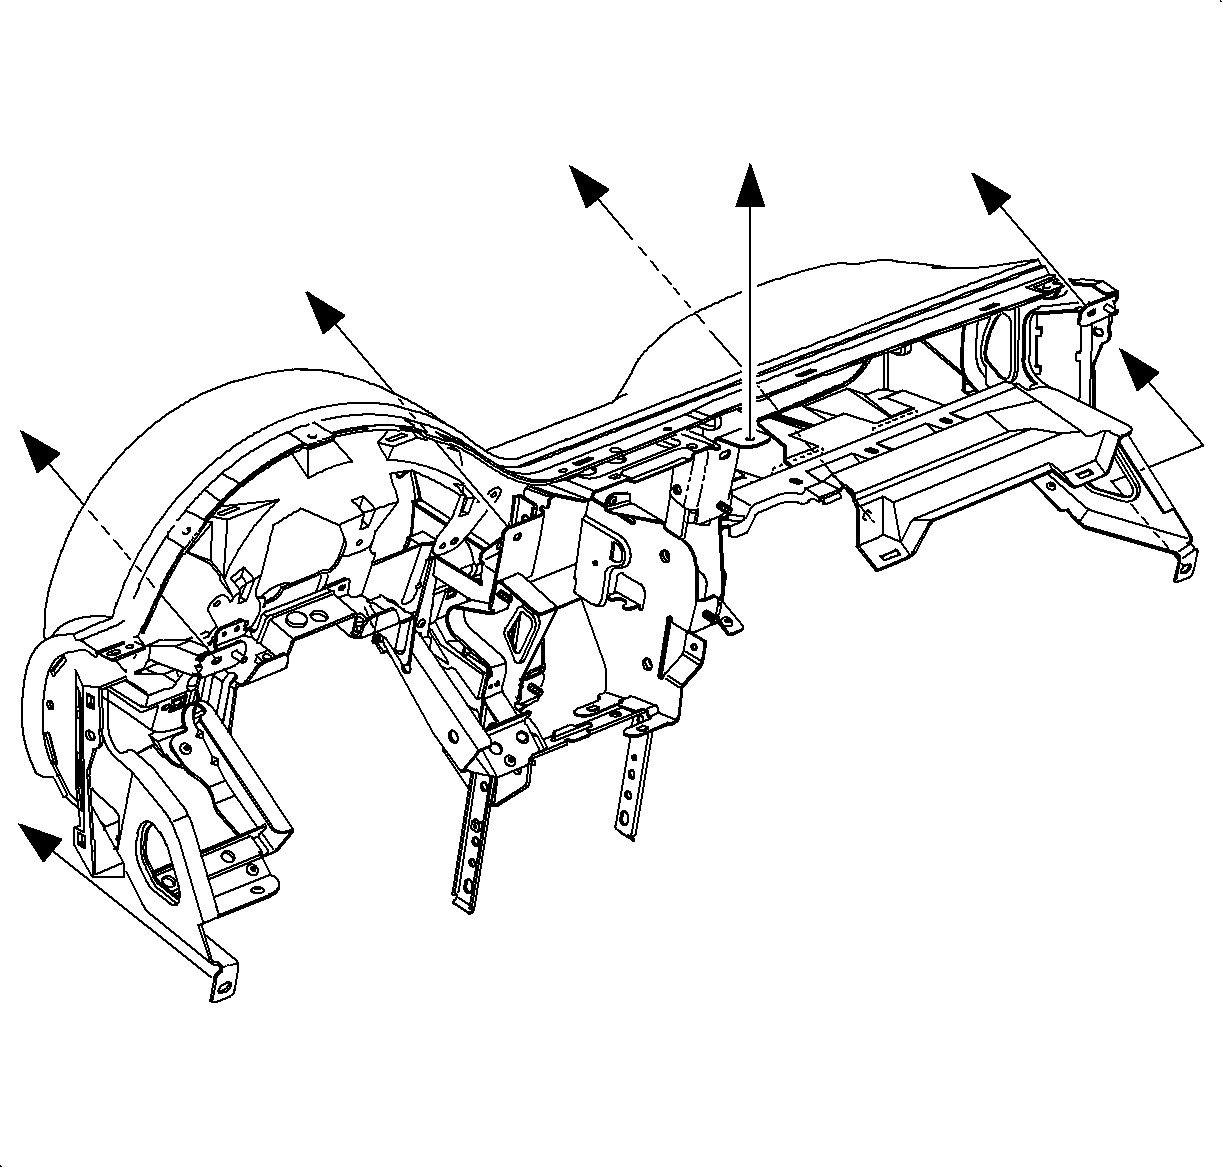
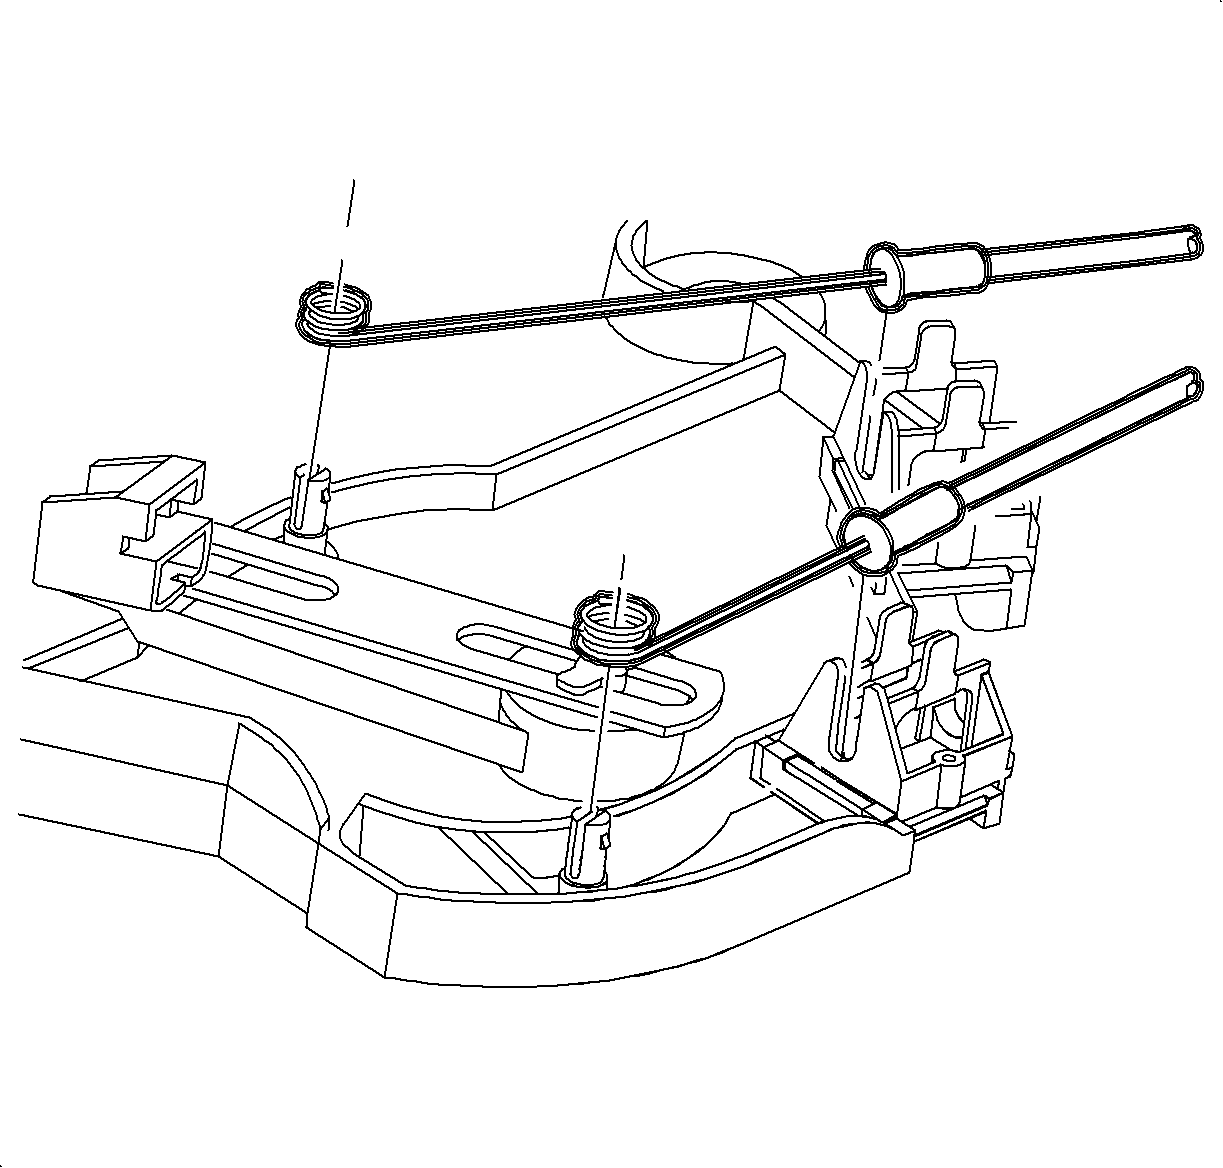
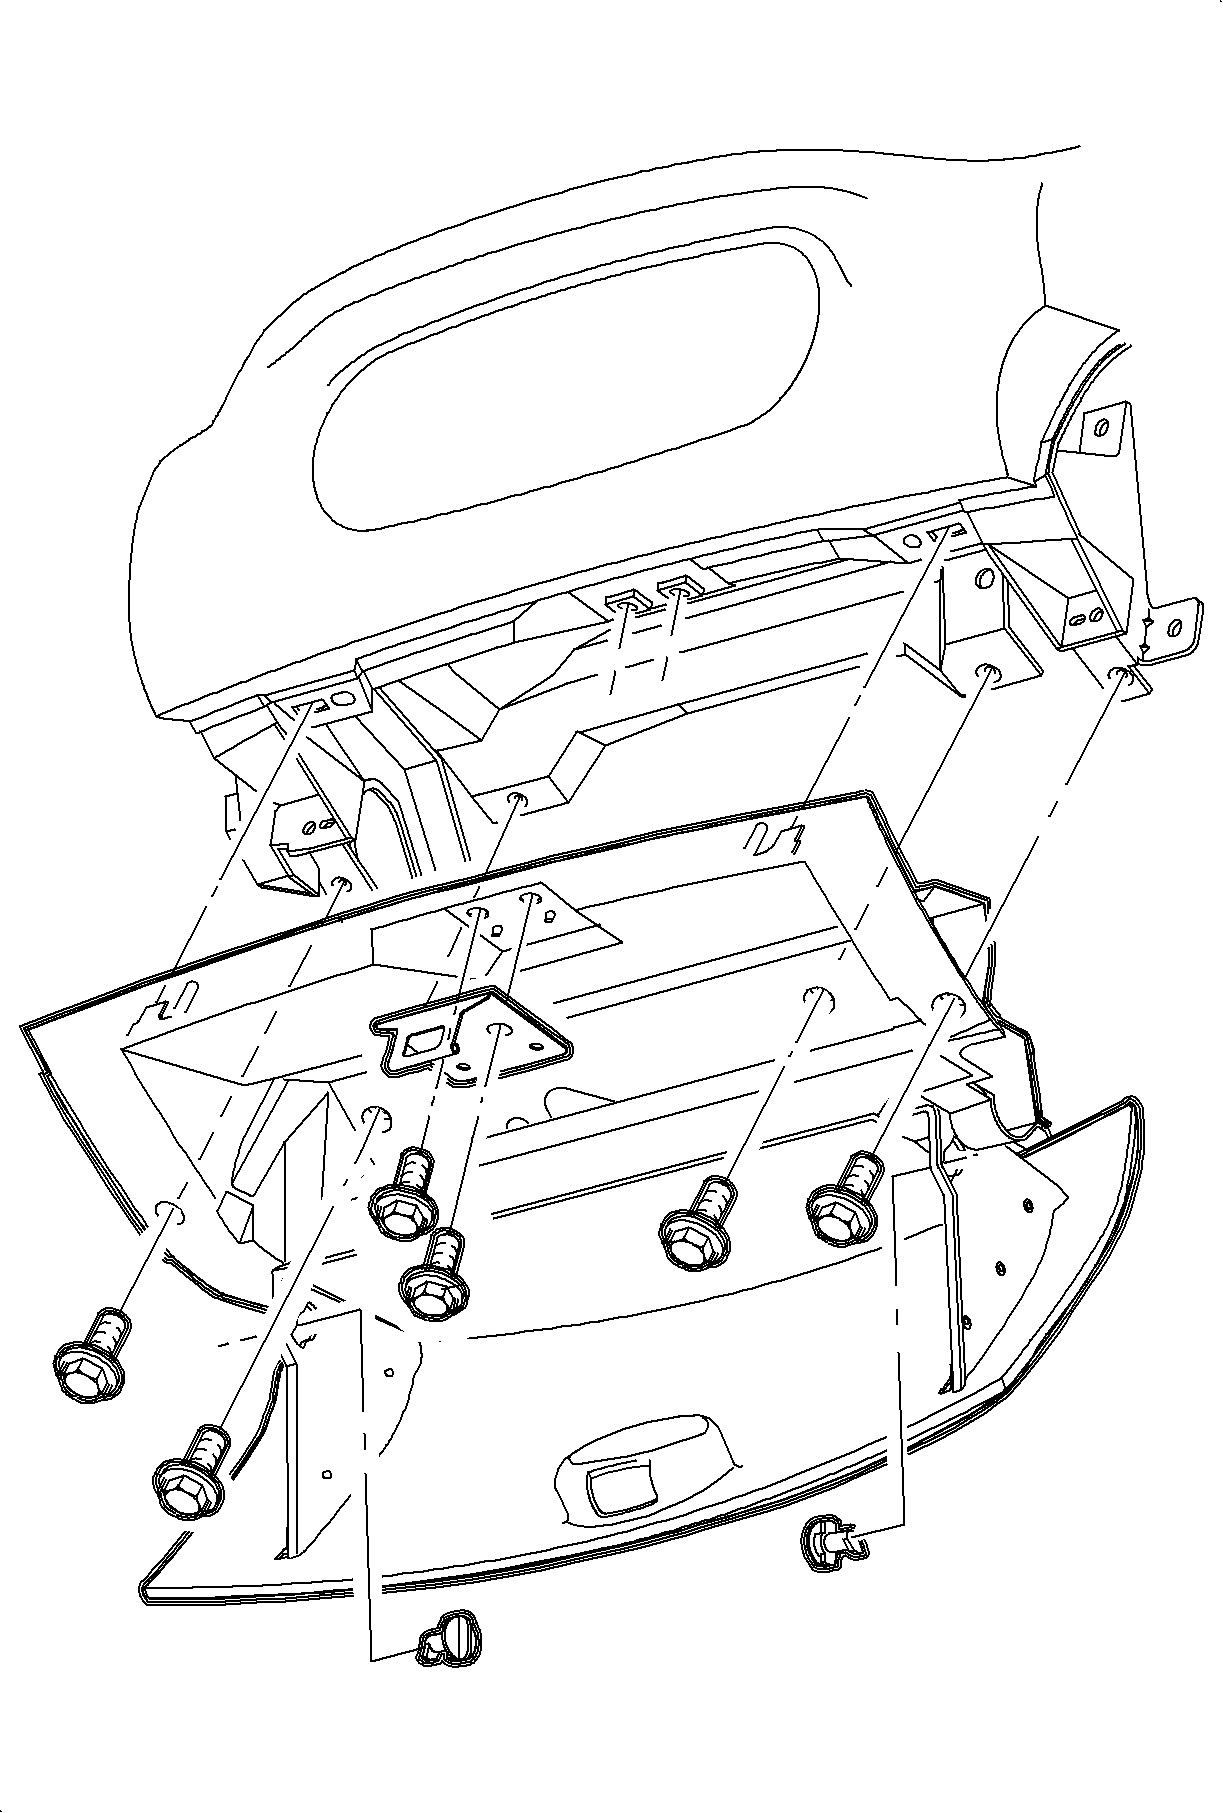
- Install the instrument panel pad/reinforcement assembly.
- Install and tighten the nut and bolts.
TightenTighten the bolts to 10 N·m (89 lb in).
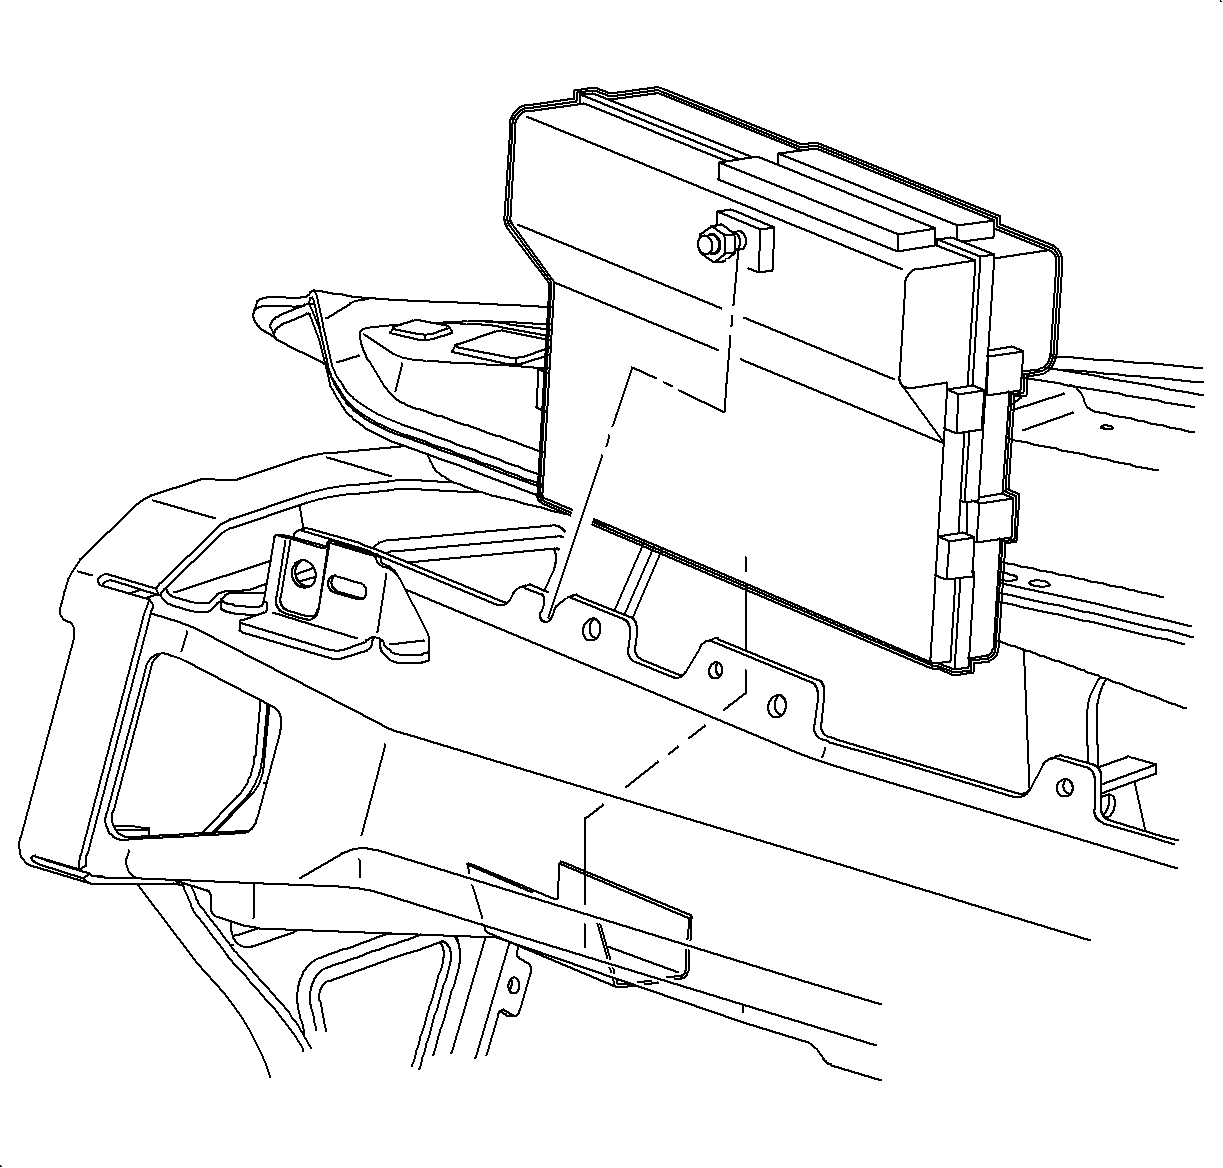
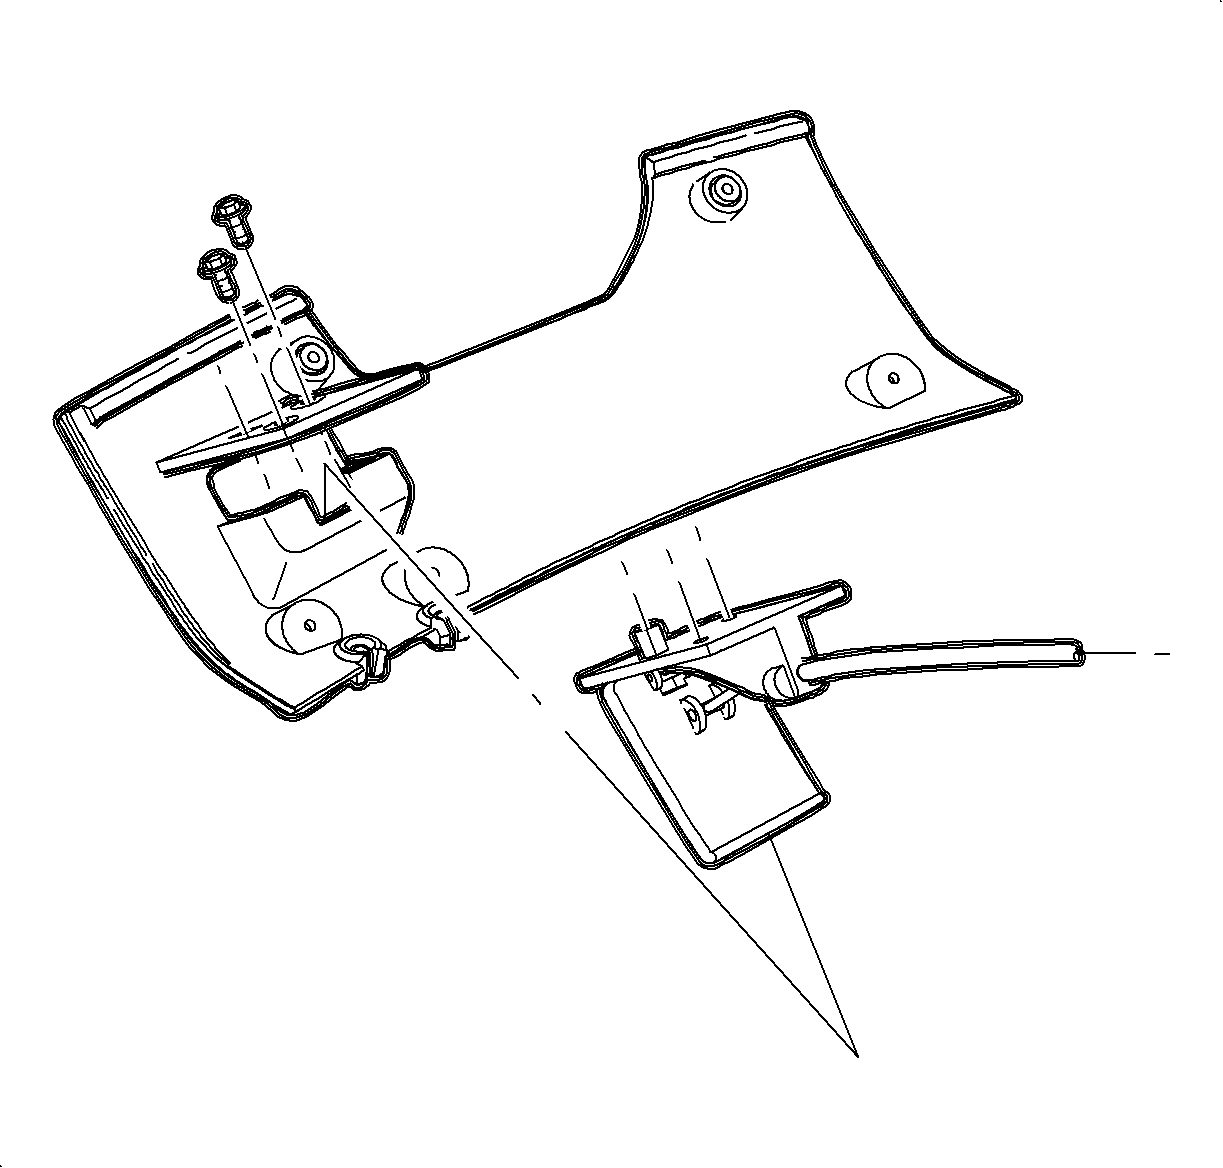
- Install the PCM into the mounting bracket and tighten the nut.
TightenTighten the nut to 10 N·m(89 lb in).
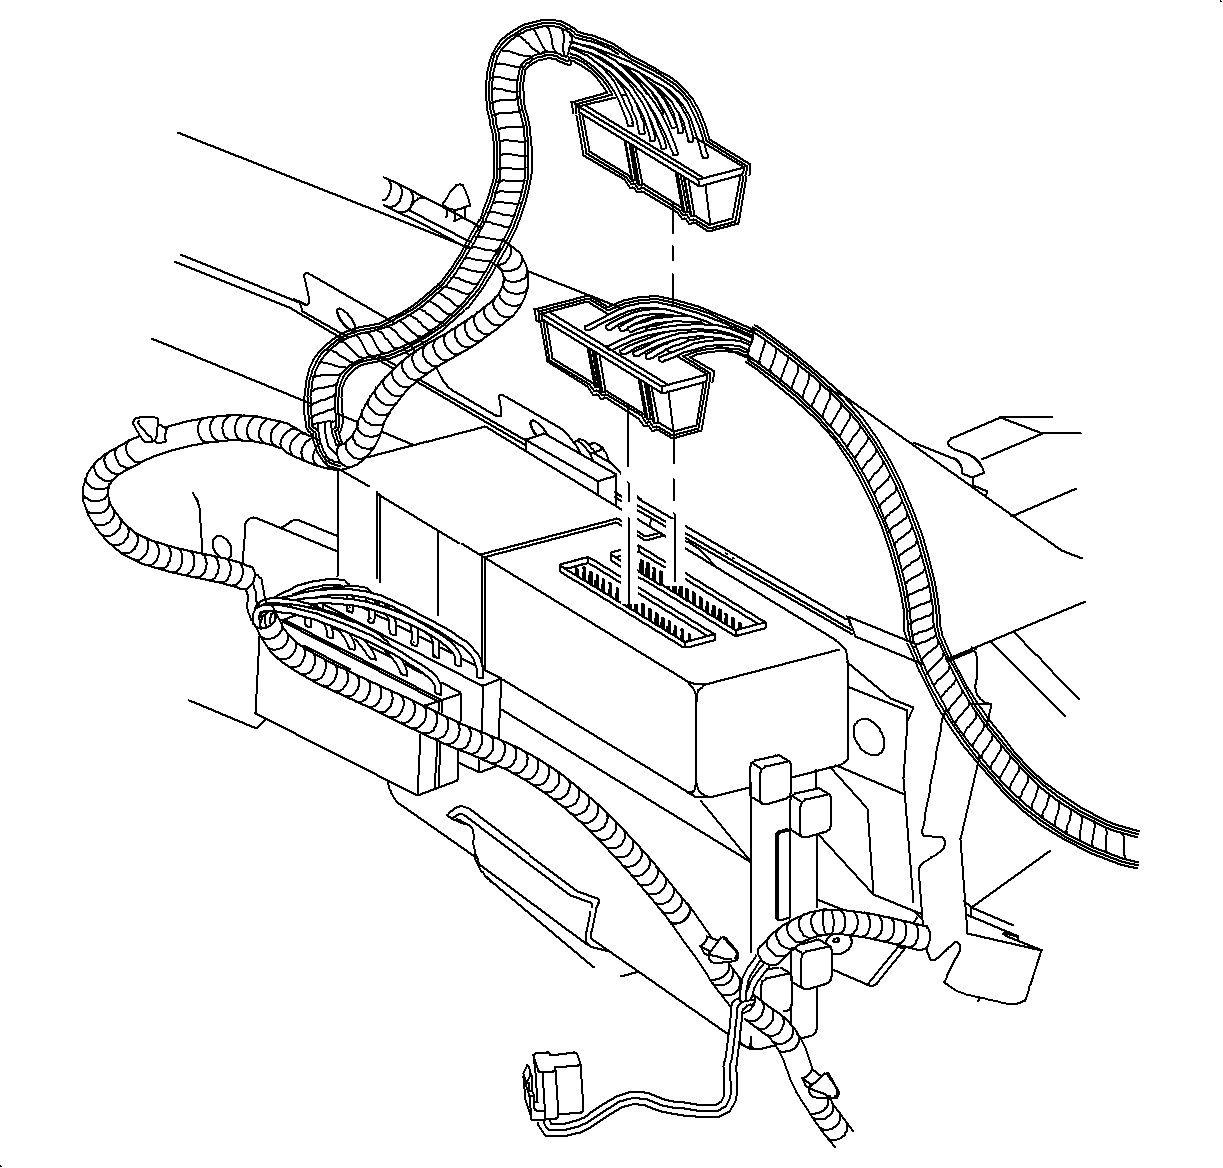
- Connect PCM electrical connectors.
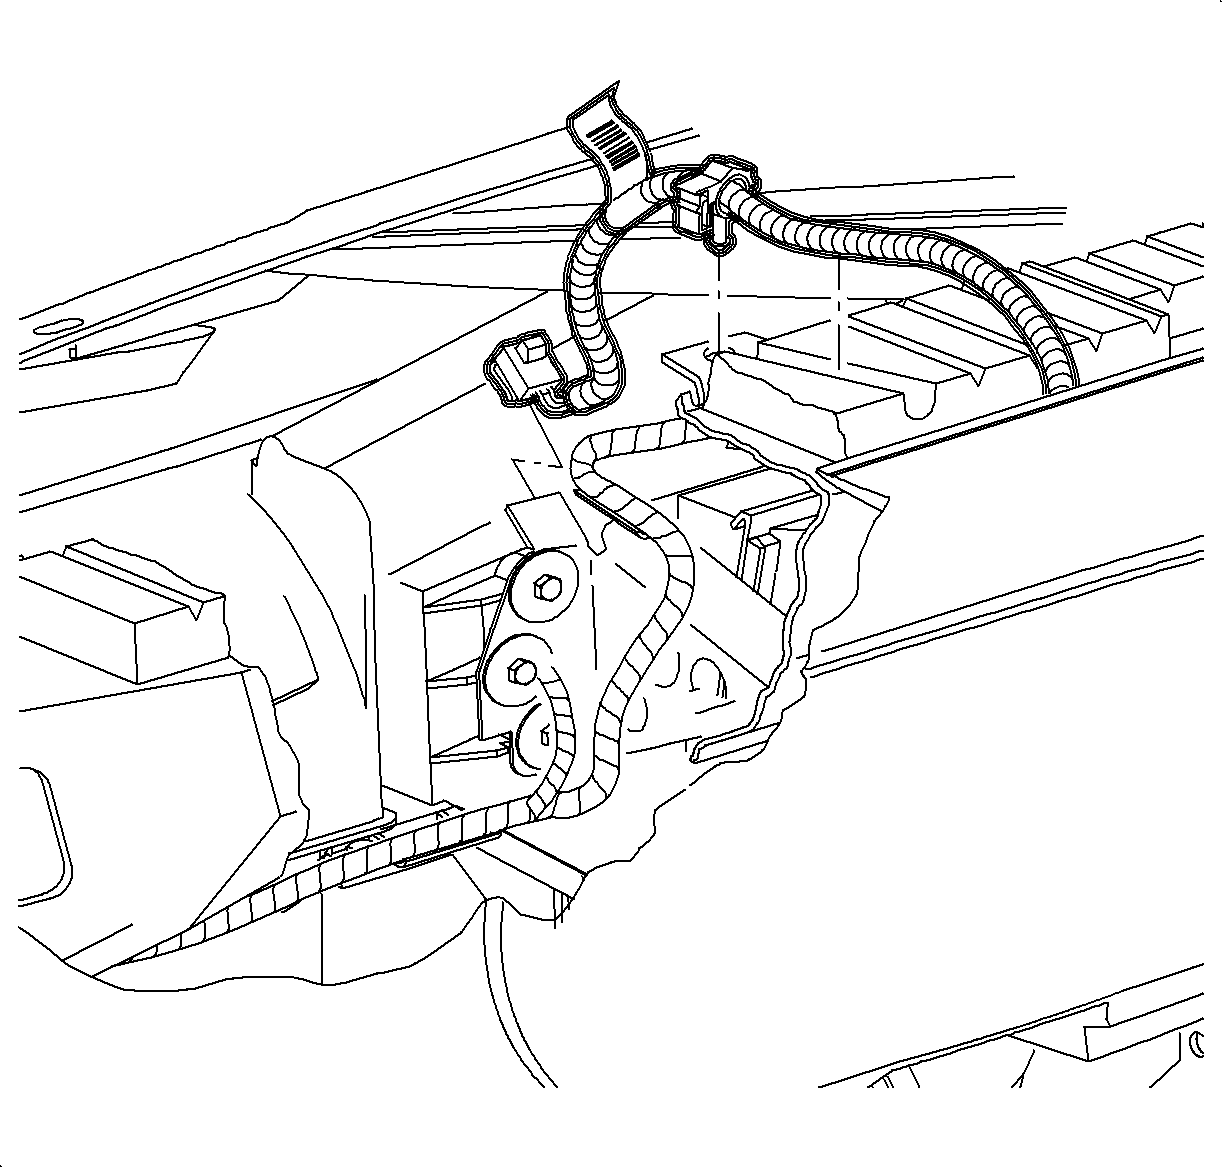
- Install the passenger side air bag harness to the energy
absorber and the cross-car beam.
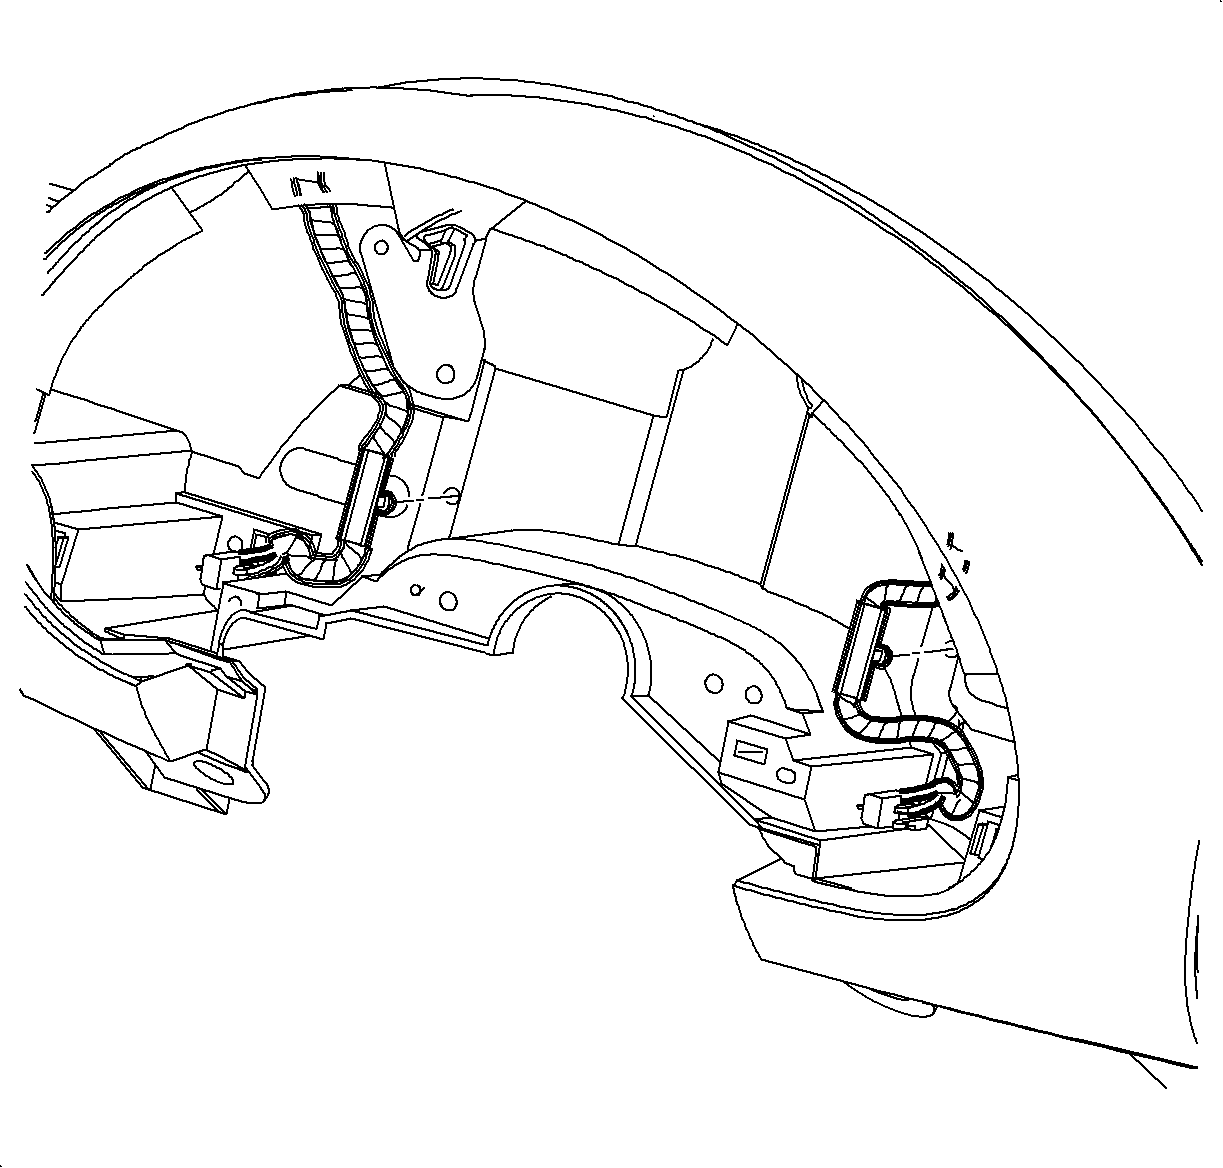
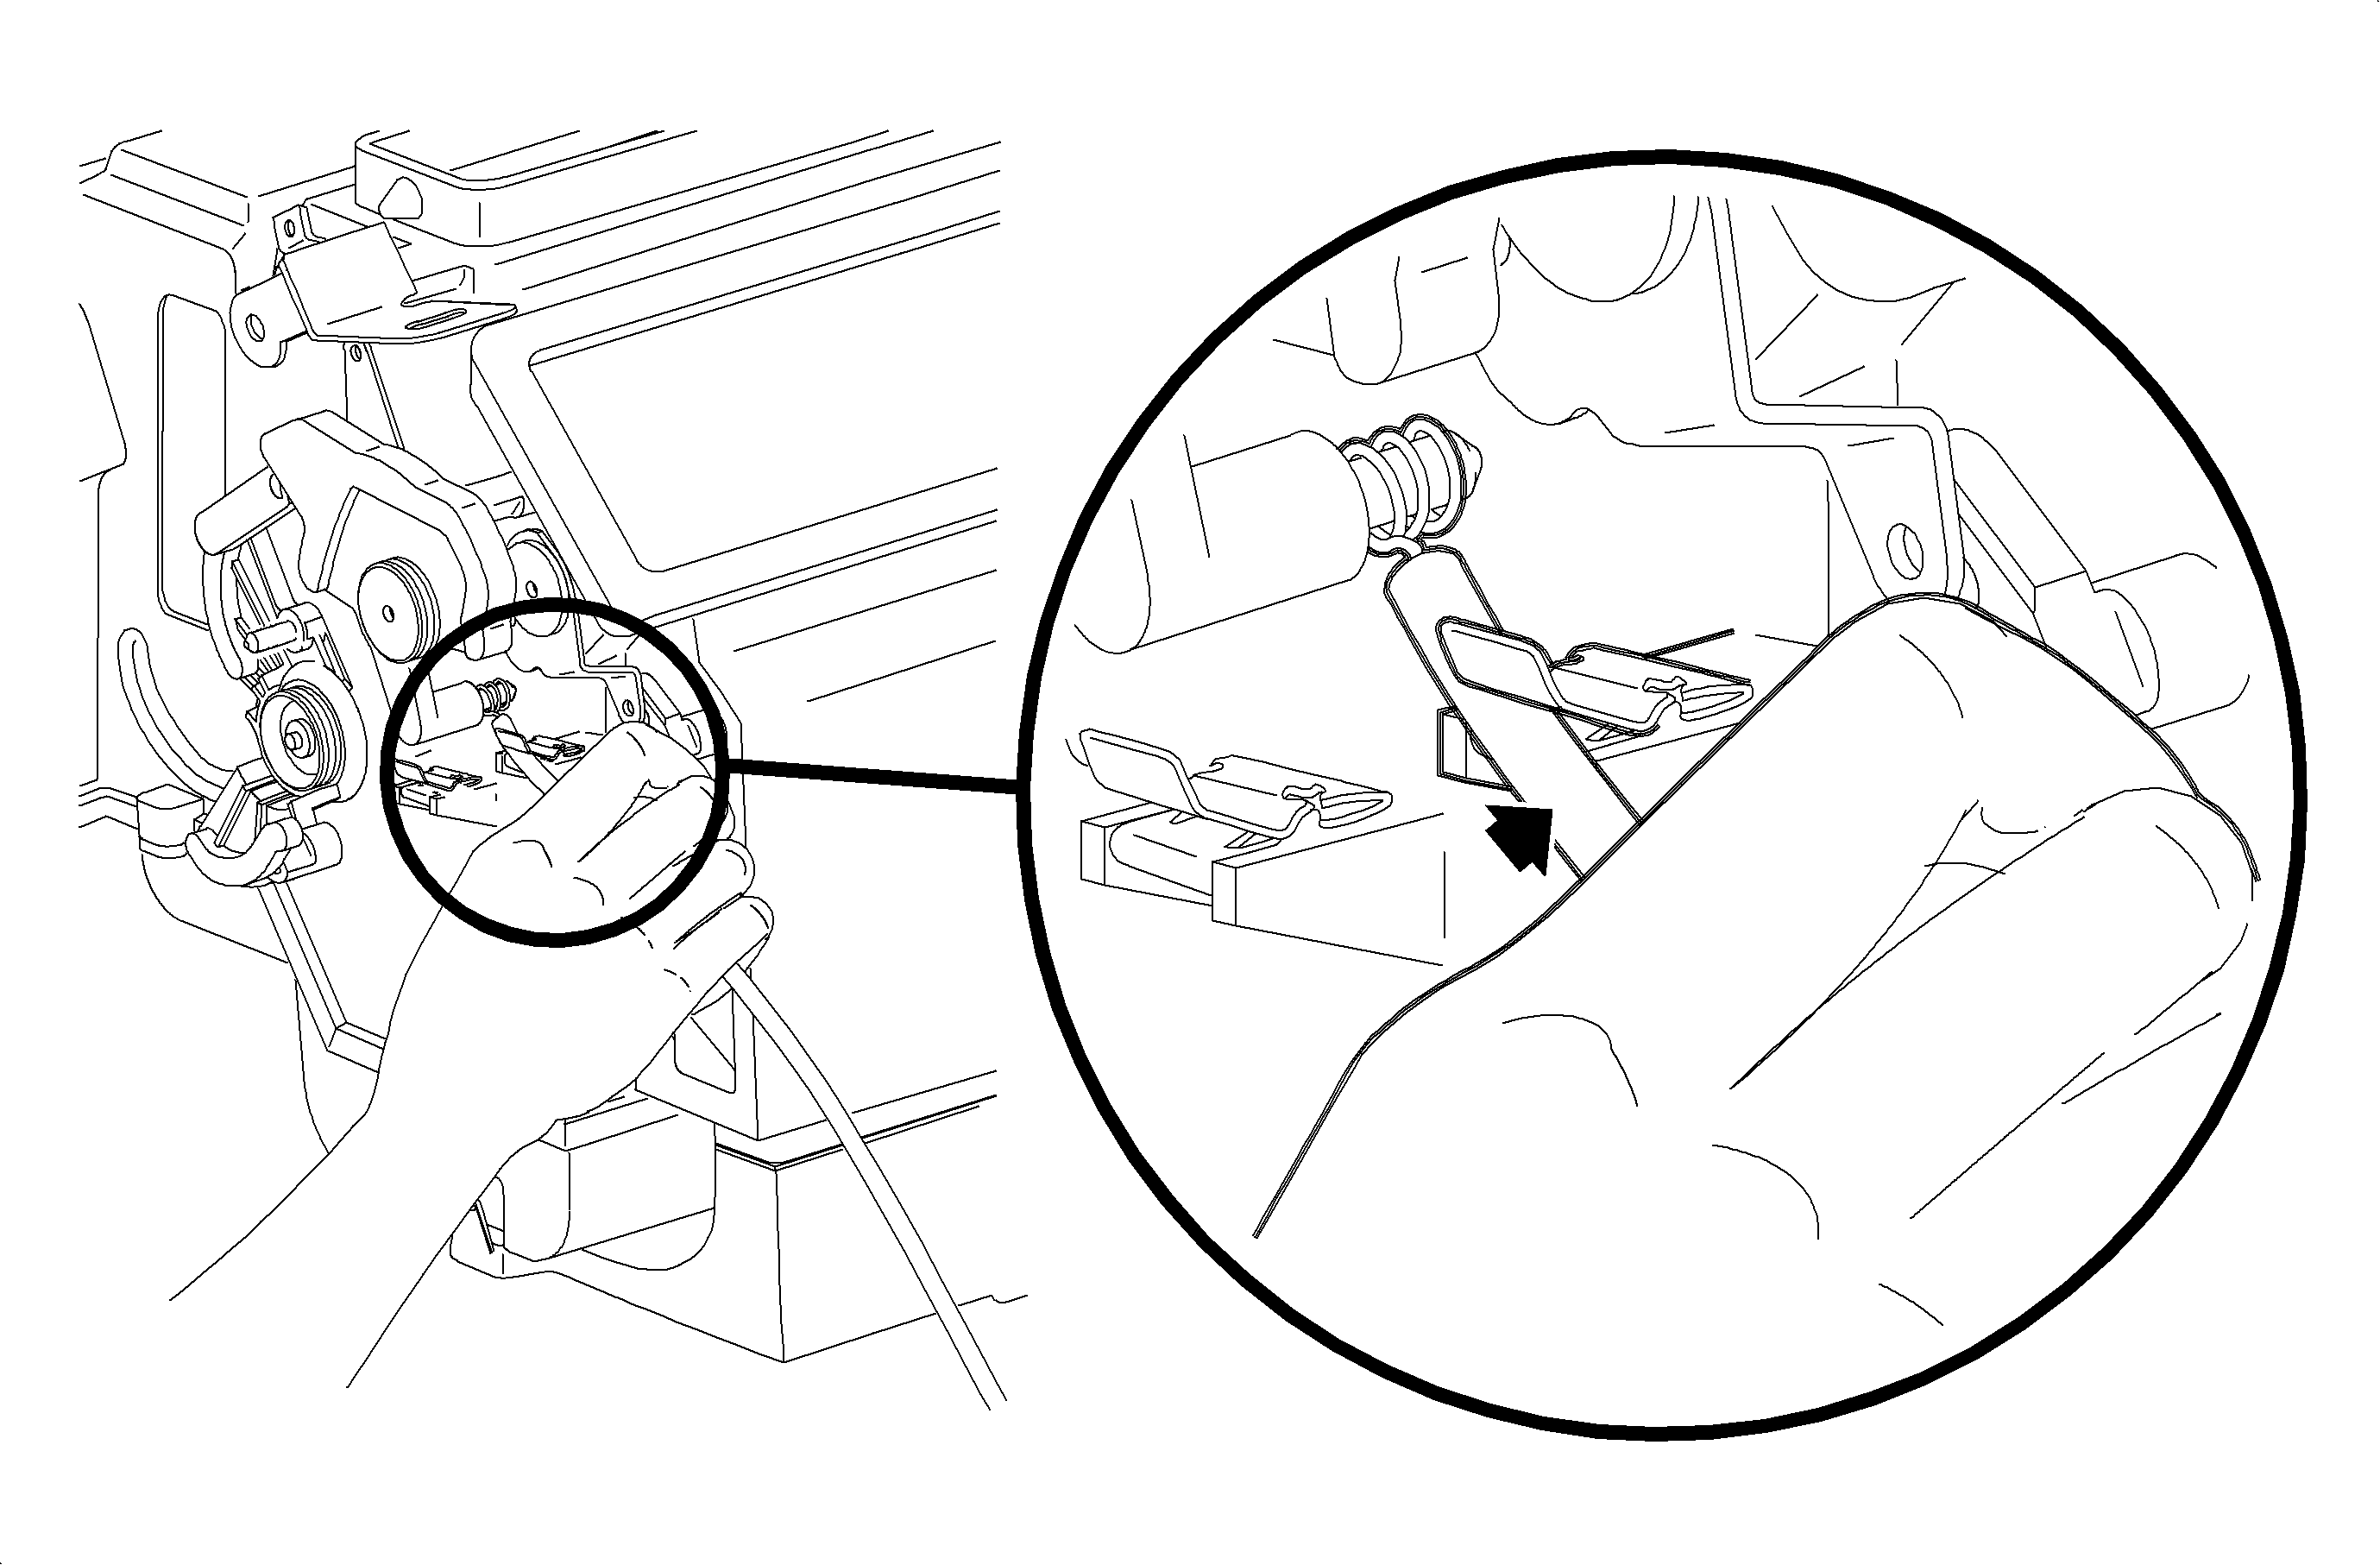
- Install the dimmer switch and the defroster switch wiring
harness to the instrument panel reinforcement. Replace the rosebud fasteners if damaged
during the removal.
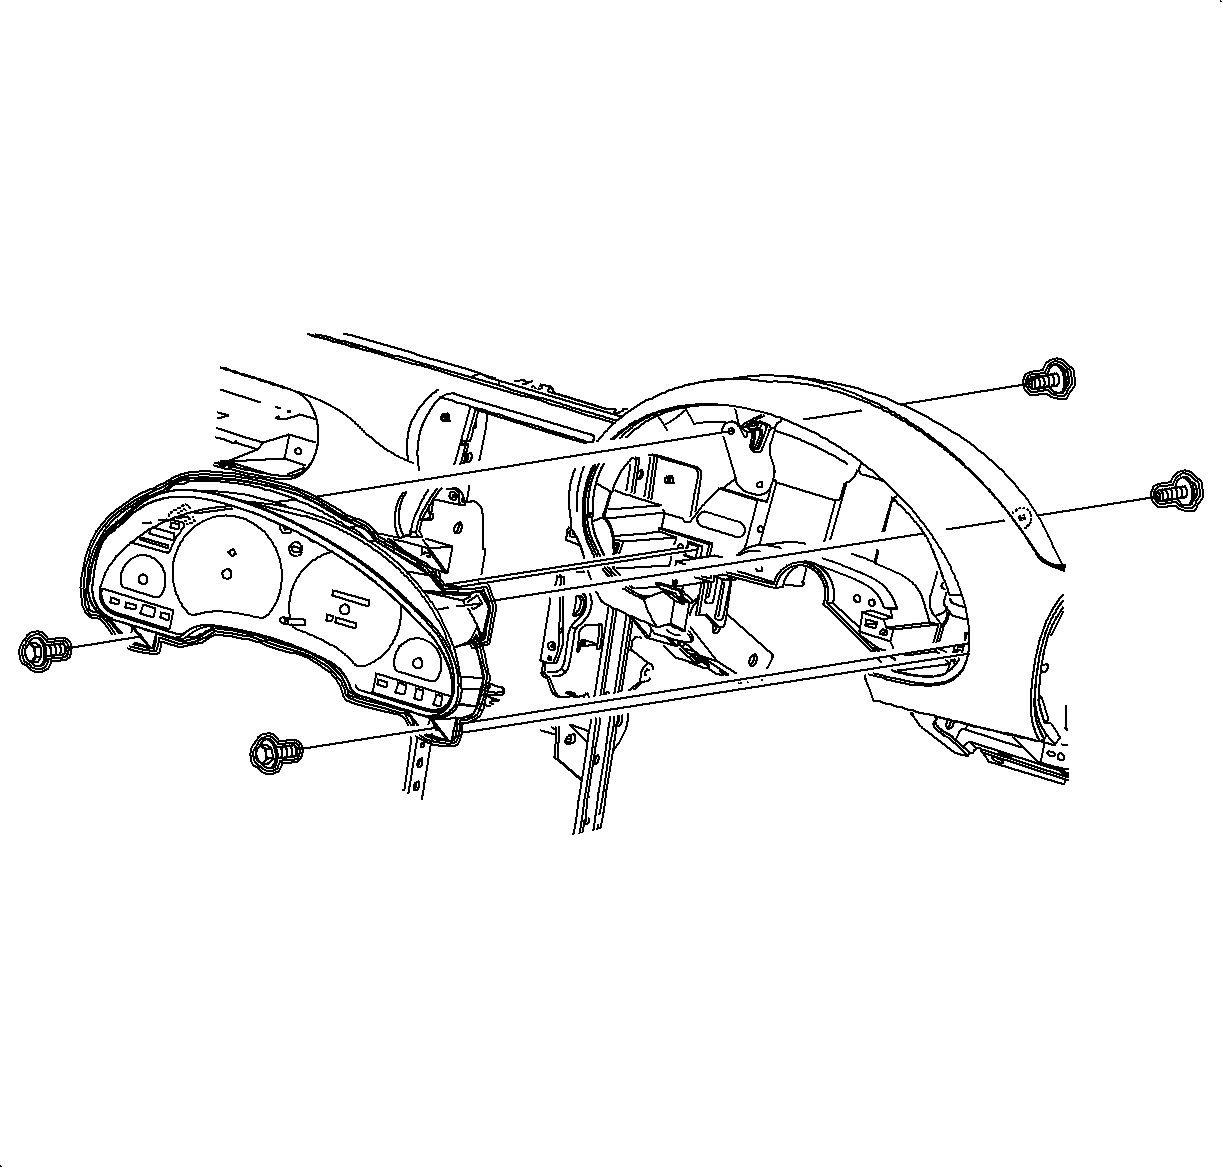
- Install the instrument cluster.
- Install front and rear screws.
TightenTighten the rear screws to 3 N·m (26 lb in).
- Connect electrical connectors to instrument cluster.
- Install the CPA.
- Connect electrical connector to dimmer switch
and defroster switch.
- Install the instrument cluster trim bezel. Push in at the clip locations.
- Install the push pin fasteners.
- Raise the steering column into position.
- Install and tighten the bolts.
TightenTighten the bolts to 35 N·m (26 lb ft).
- Connect the ignition switch electrical connector at the right steering
column bolt.
- Route the hood release handle assembly through the I/P and install it to the
steering column filler panel.
TightenTighten the to 1.5 N·m (13 lb in).
- Install the steering column filler panel and the DLC.
- Install and tighten the screws.
TightenTighten the screws to 2.2 N·m (20 lb in).
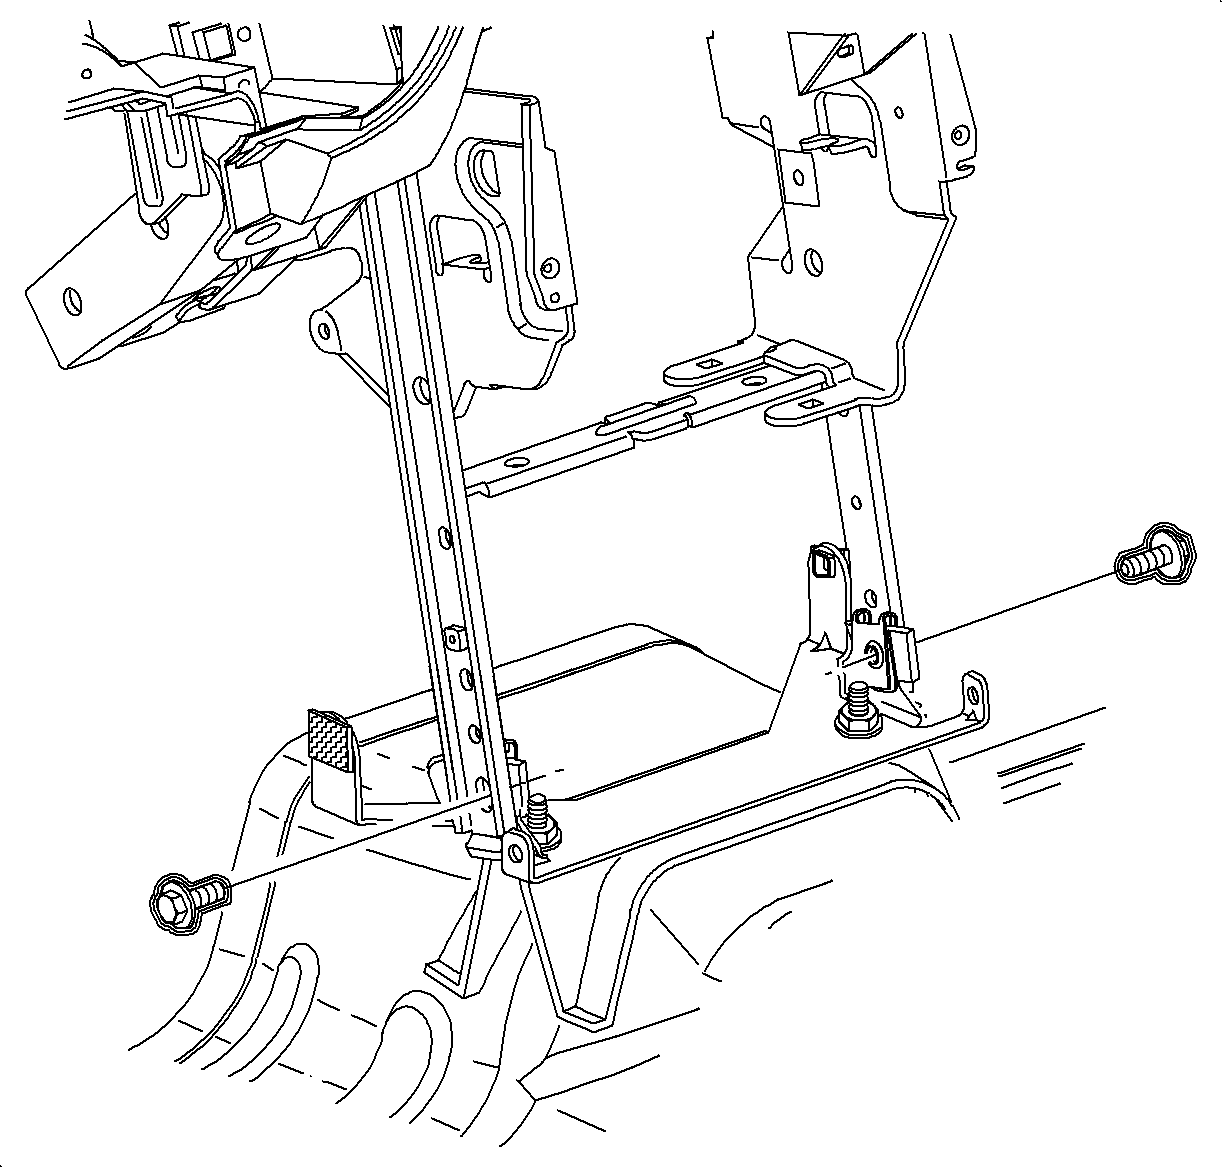
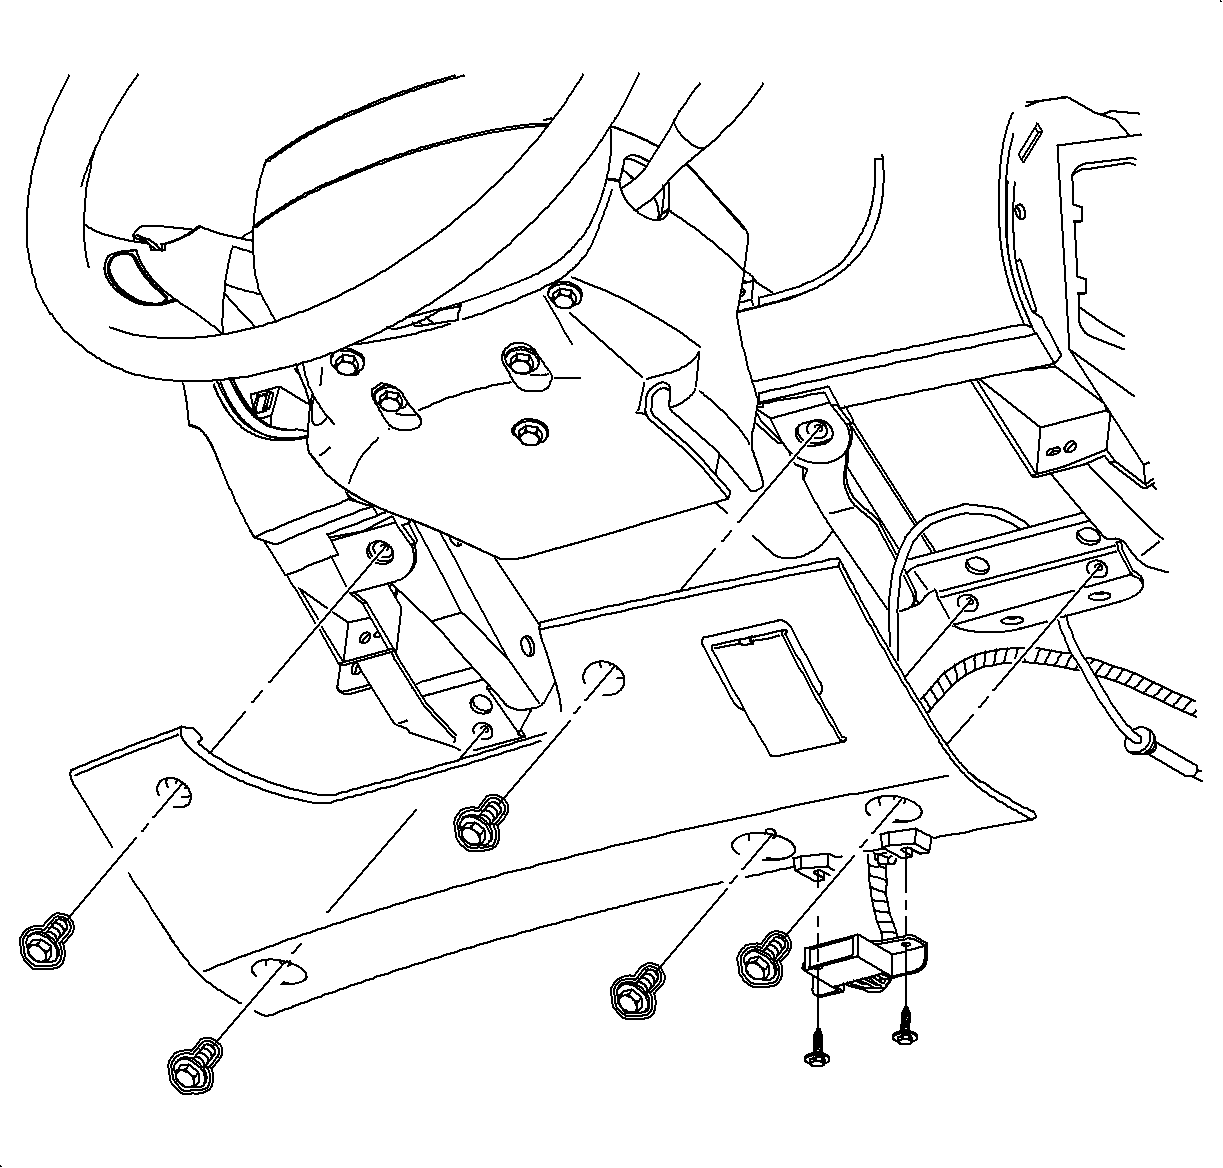
- Install and tighten
the bolts into the H-bracket.
TightenTighten the bolts to 25 N·m (19 lb ft).
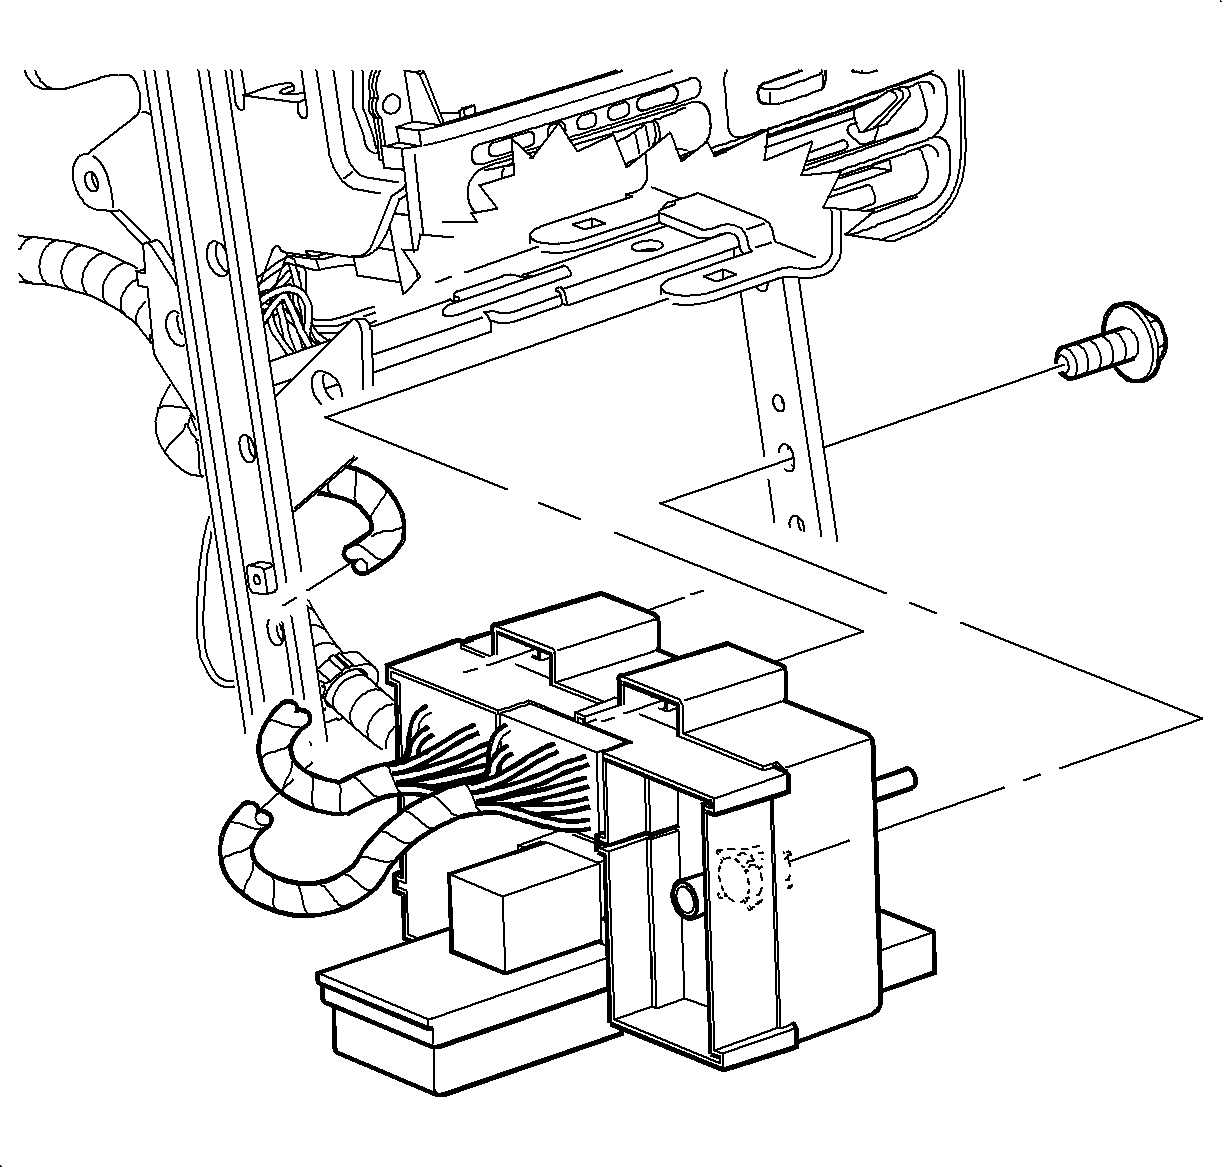
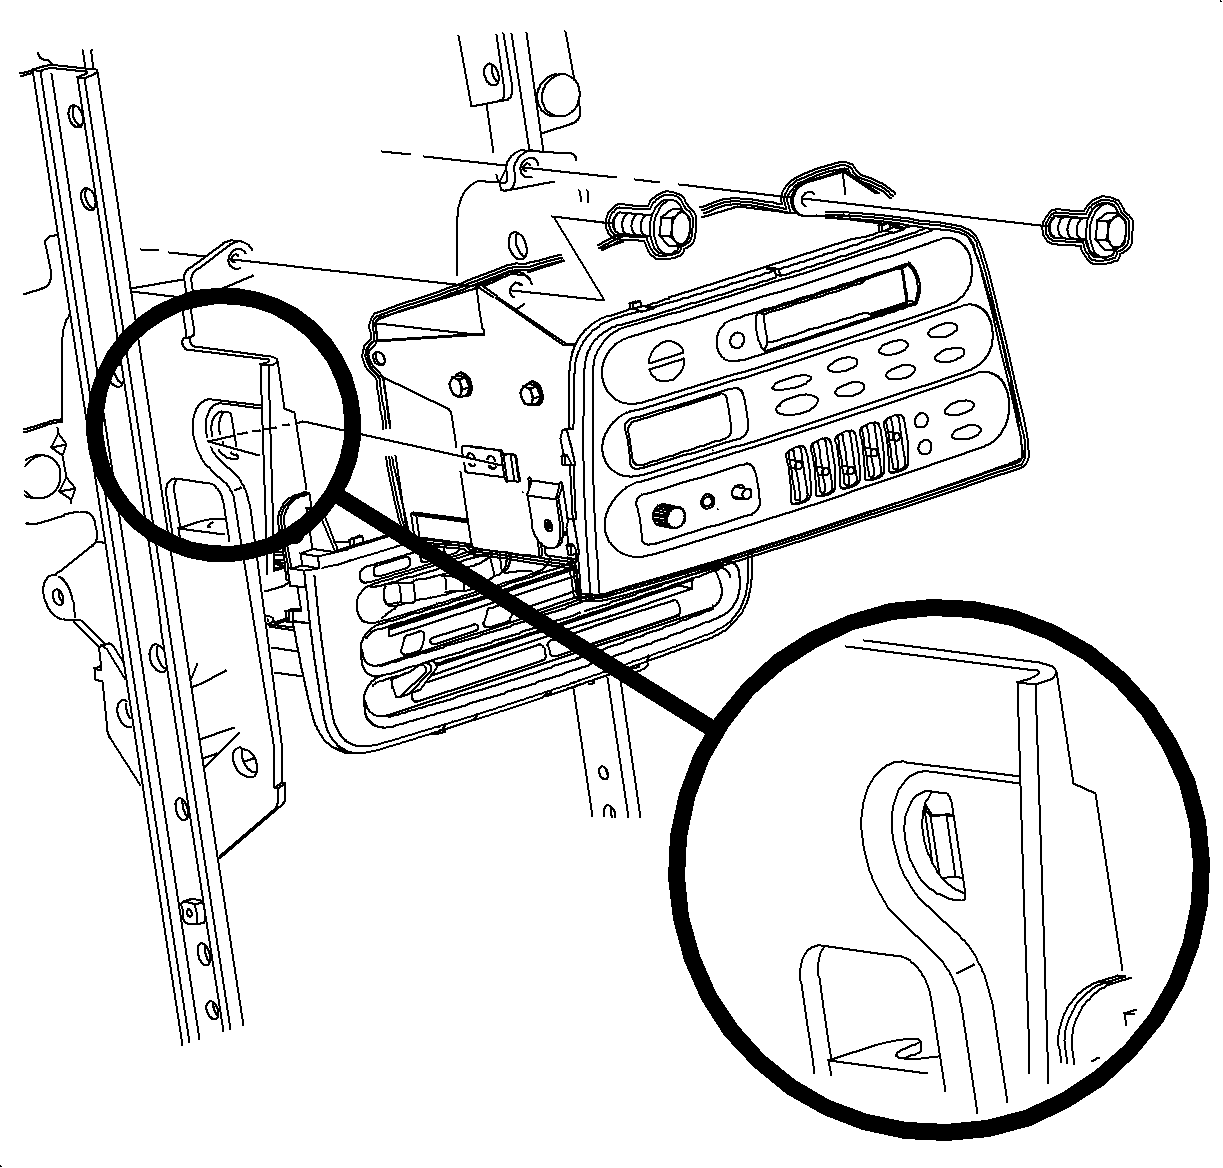
- Slide the instrument
panel junction block on the mounting pads to the lock tabs.
- Install and tighten the instrument panel junction block screw.
TightenTighten the instrument panel junction block screw
to 2.2 N·m (20 lb in).
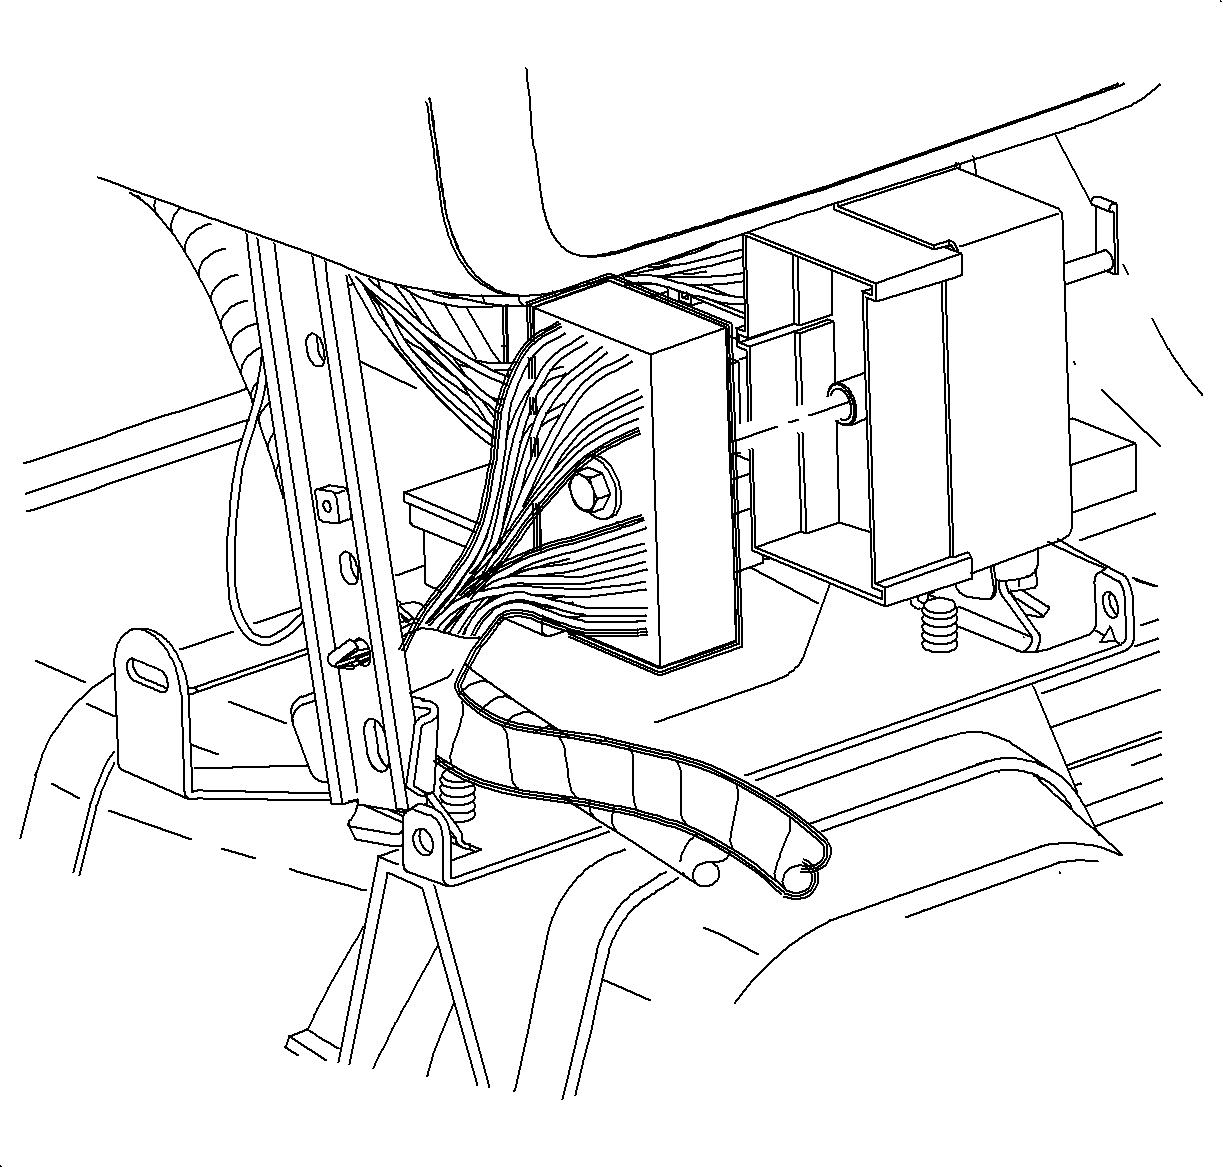
- Connect the rear electrical connector to
the instrument panel junction block.
- Tighten the screw.
TightenTighten the screw to 6.5 N·m (5 lb ft).
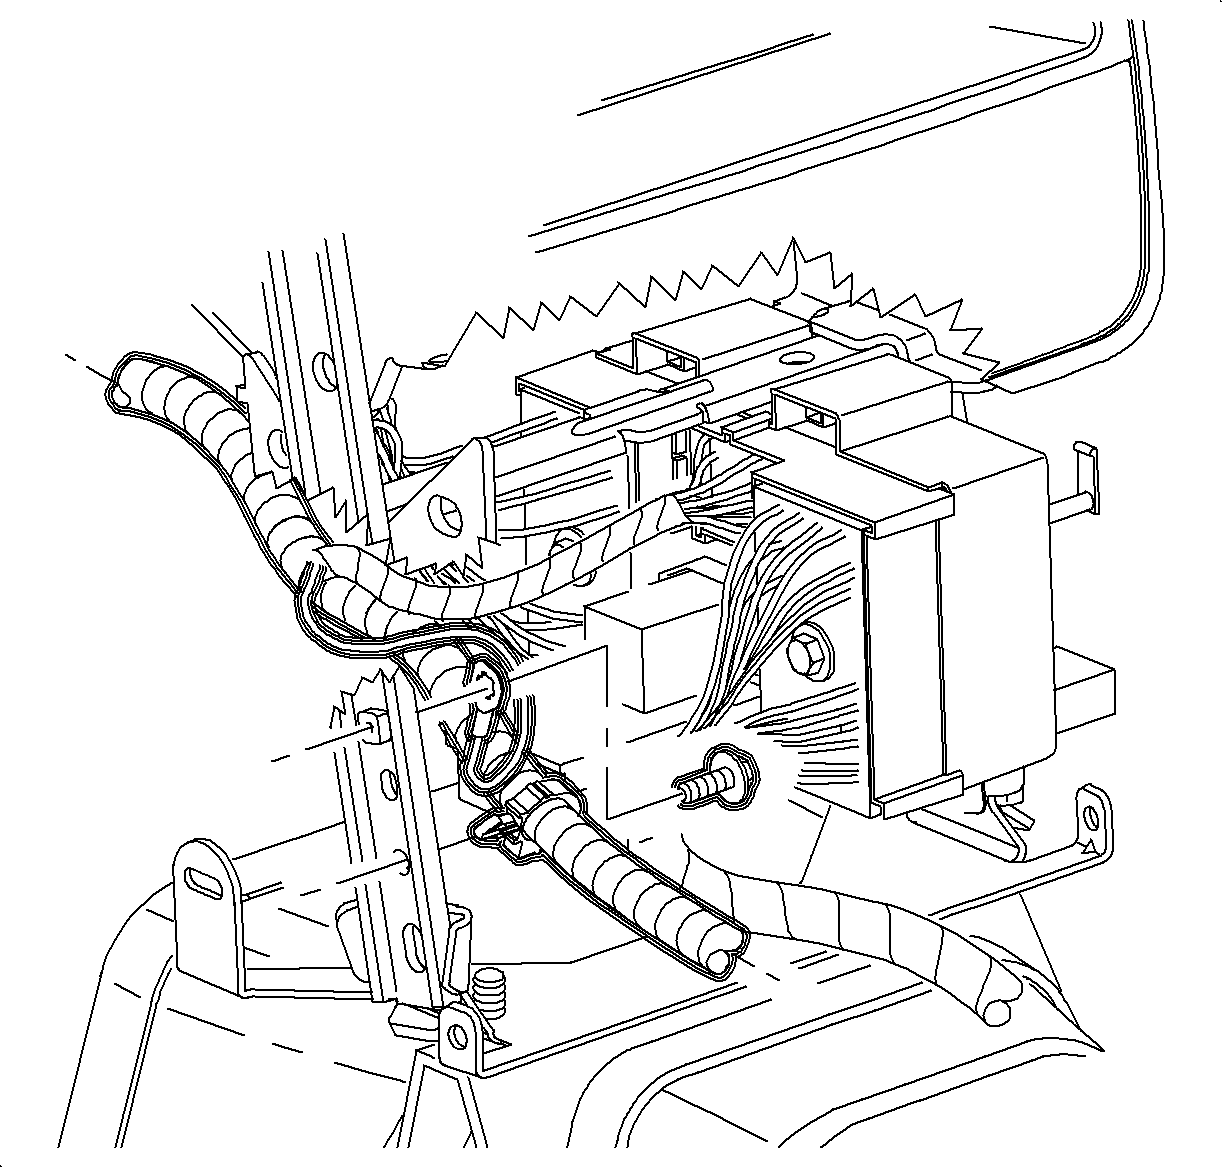
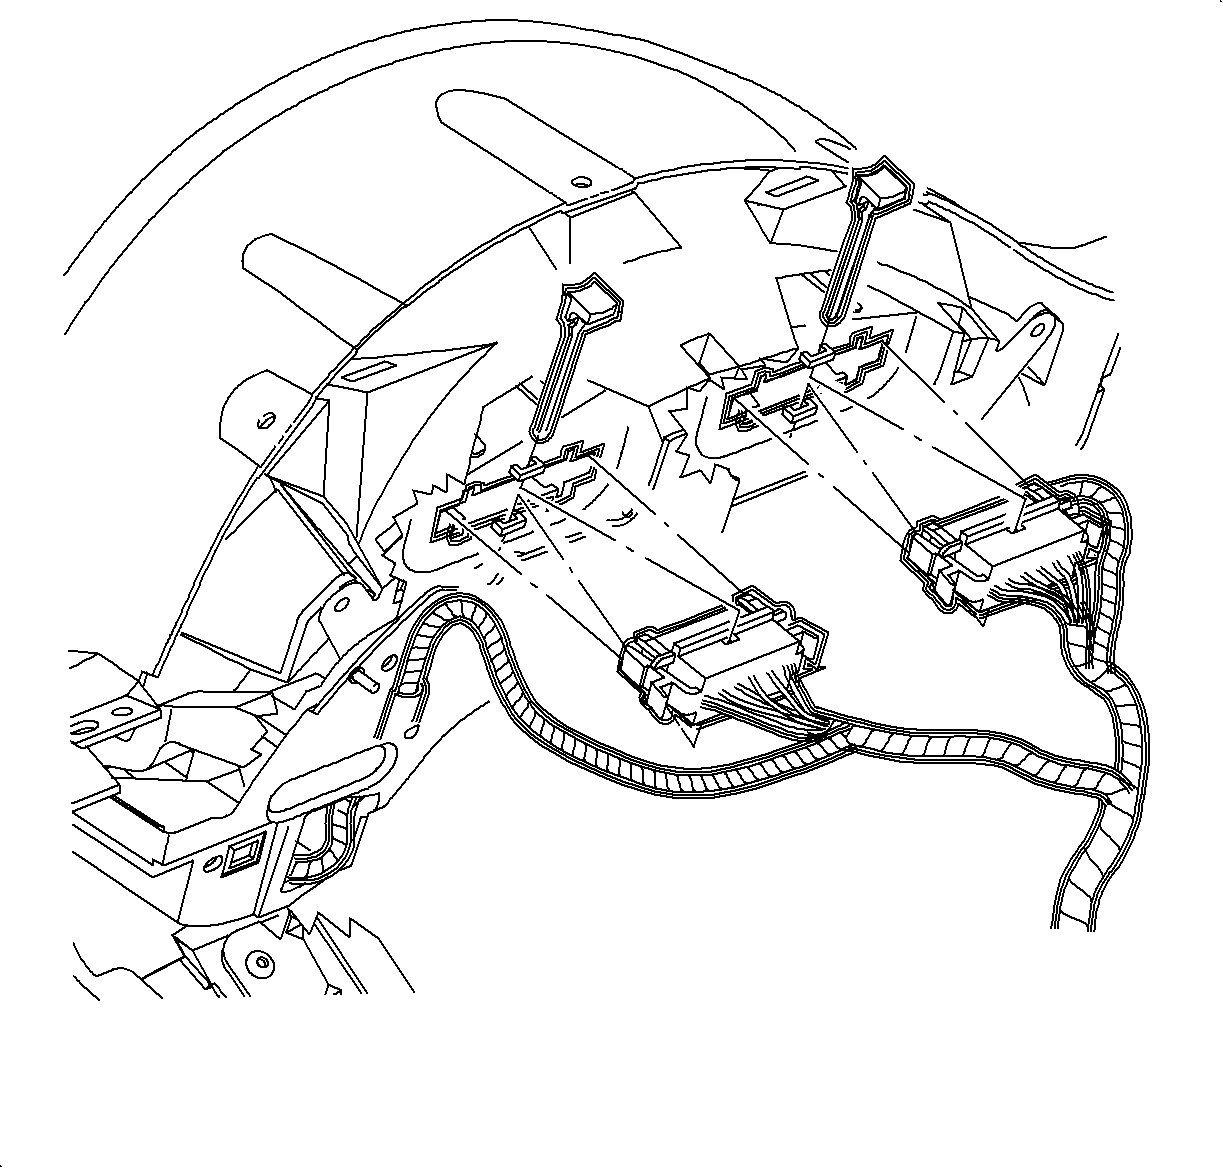
- Install the wiring harness rosebud, ground wire and the
screw to H-bracket.
- Tighten the screw.
TightenTighten the screw 2.2 N·m
(20 lb in).
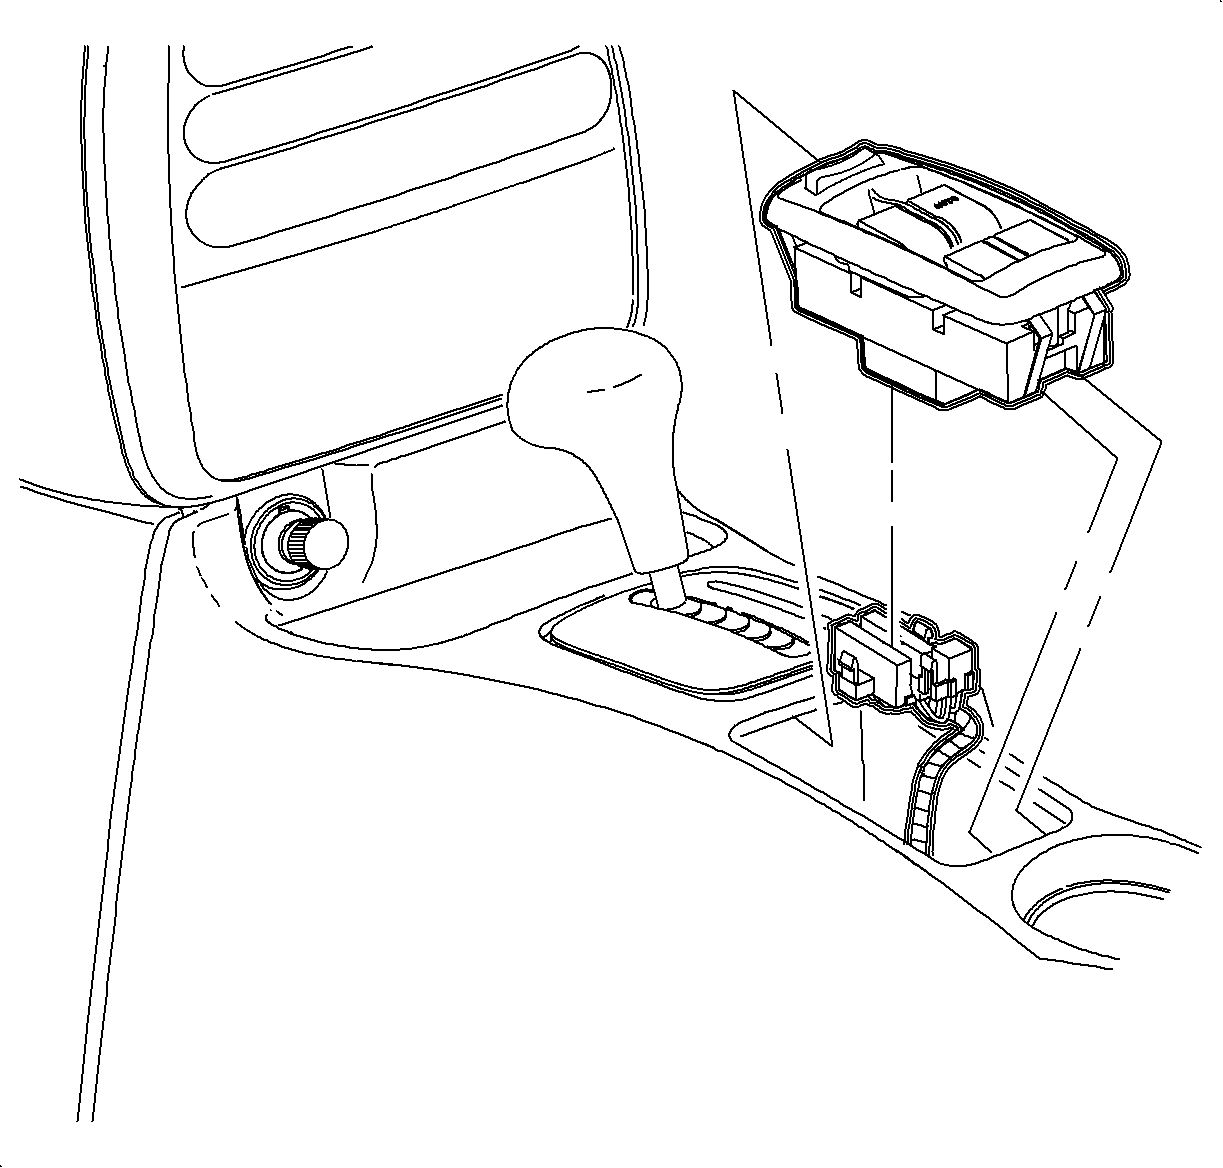
- Install the HVAC control
- Install and tighten the screws.
TightenTighten the screws to 2.5 N·m
- Install the temperature and mode cables over the pins.
Cable Identification:
- Temperature cable -- white
- Mode cable -- black
- Install the cable housings into the channel and push down to lock.
- Place the HVAC control mode lever completely to the right -- defroster
position.
- Verify that the mode cam is still in full counterclockwise position.
- Press the mode cable housing firmly into the retainer clip to lock.
- Move the HVAC control mode lever through the modes to verify the proper
installation.
- Place the HVAC control temperature lever completely to the right -- full
hot.
- Verify that the temperature cam is still in full counterclockwise position.
- Press the temperature cable housing firmly into the retainer clip to lock.
- Move the HVAC control temperature lever from hot to cold to verify the
proper installation.
Important
Make sure the wiring harnesses do not interfere
with the control lever movement.
- Connect the blower switch, A/C-Recirc and lighting electrical connectors.
- Connect the electrical connector and the
antenna to the radio.
- Install
the radio.
Important
Make sure the spring clips are seated in
the D-holes on both sides.
- Install and tighten the screws.
TightenTighten the screw to 2.5 N·m (22 lb in).
- Connect the traction control/fog lamp/hazard electrical connector, if equipped.
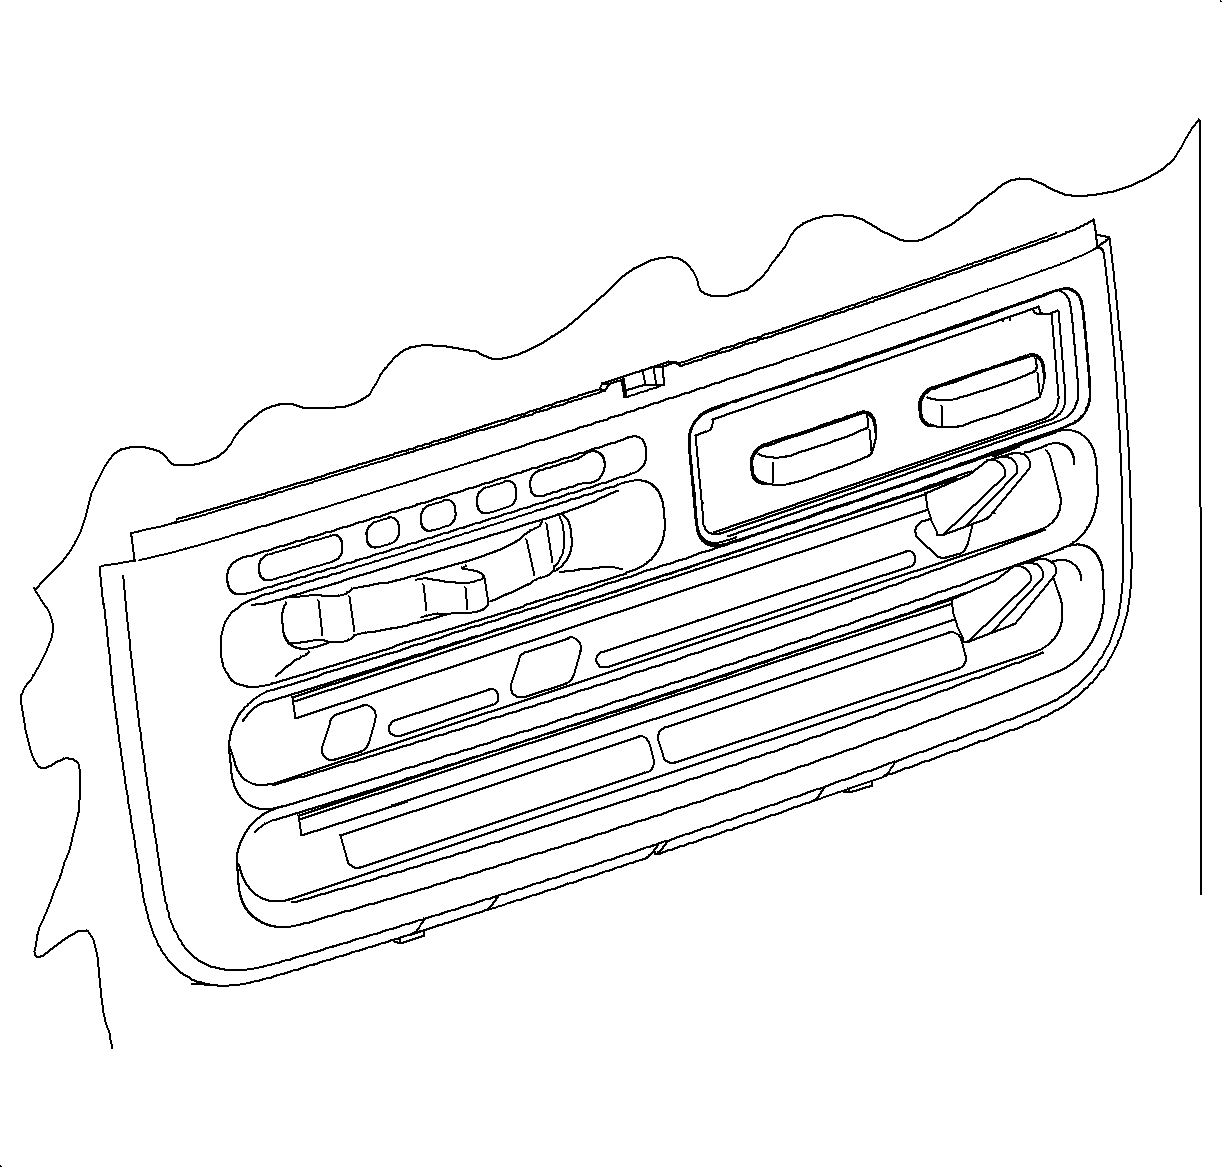
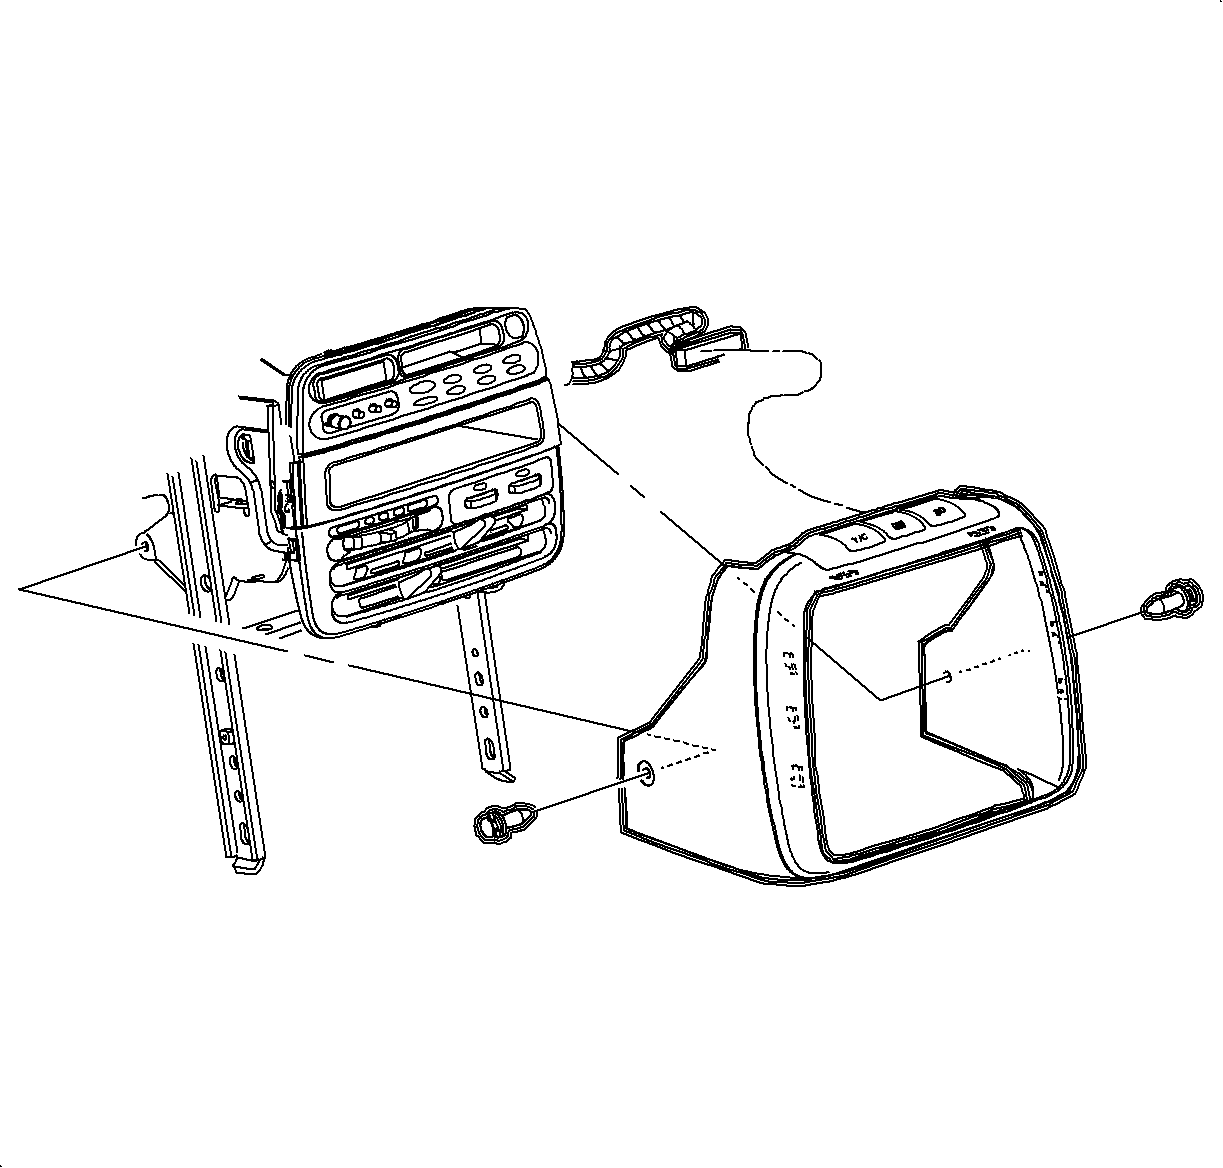
- Install the radio/HVAC control cover. Push in at the clip locations.
- Install the push pins and lock.
- Install the glove box and snap in at the clip locations.
- Install and tighten the screws.
TightenTighten the screws to 2.2 N·m (20 lb in).
- Install the glove box door stops.
- Adjust the striker as necessary.
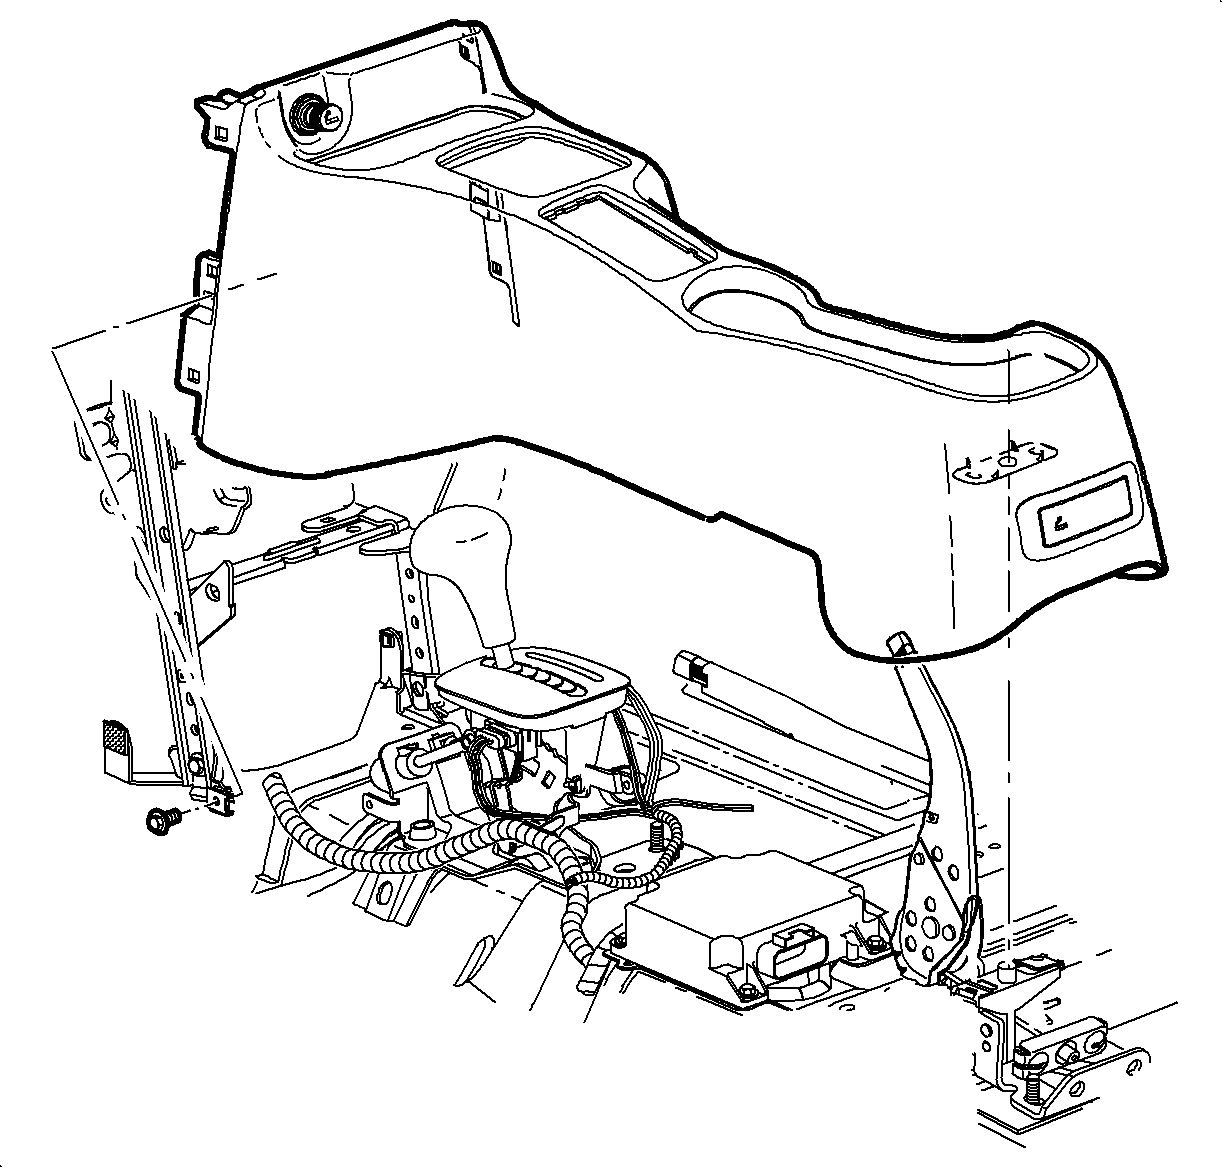
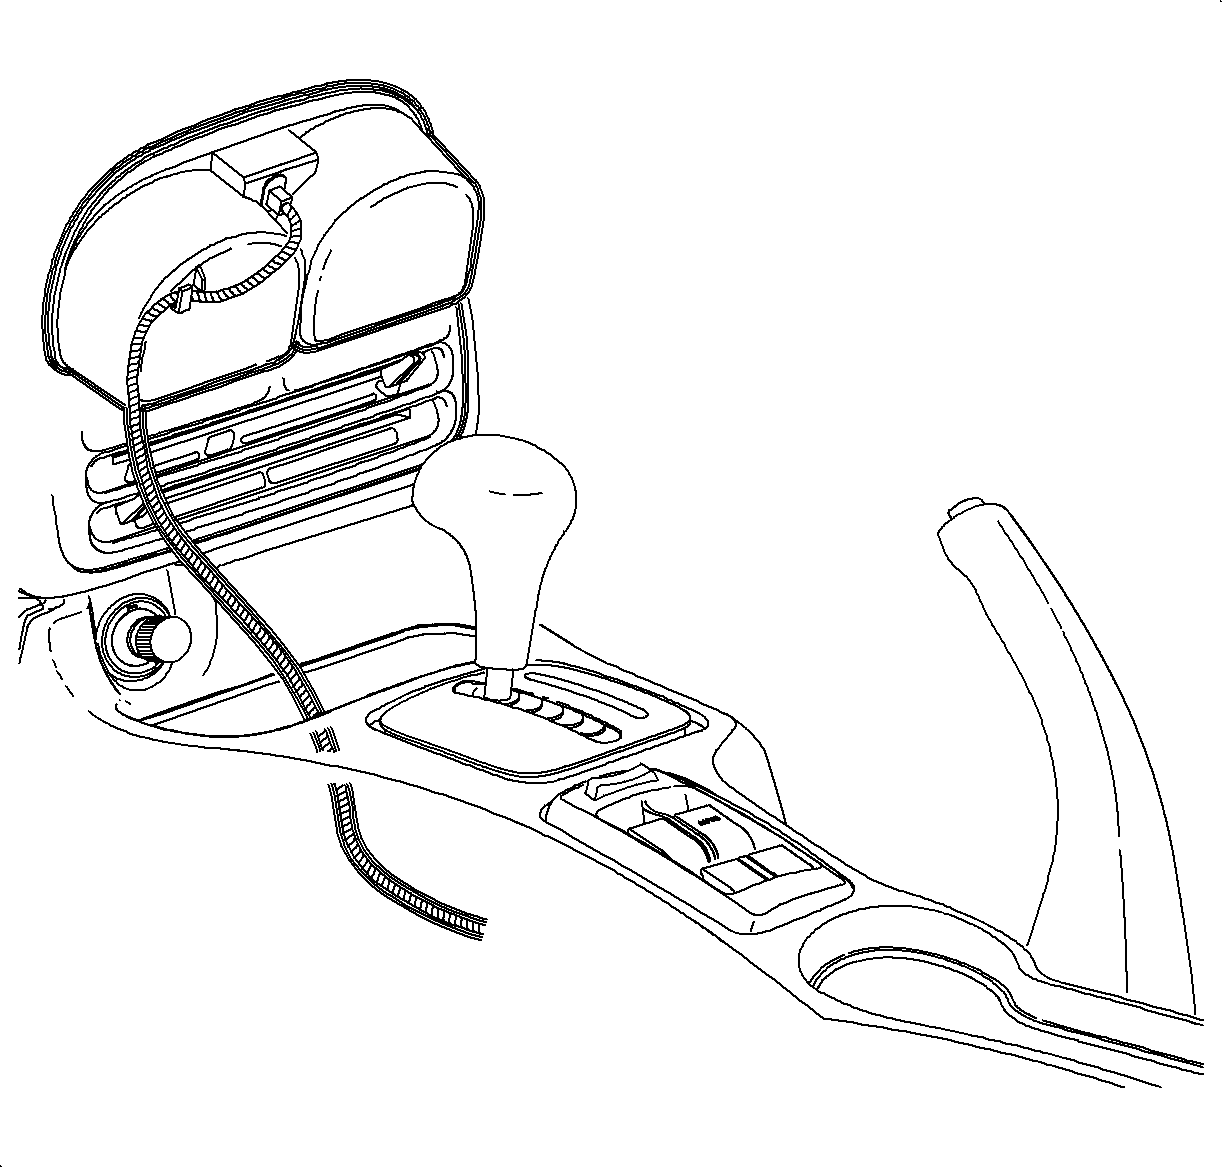
- Place the shifter in neutral.
Important
Make sure to place the window/mirror and
ashtray light connectors through openings into position.
- Lower the front of the console over the shifter.
- Lower the rear of the console over parking brake lever onto rear mounting
pad.
- Move the console rearward.
- Install the cigarette lighter bulb through the opening and rotate counterclockwise.
- Connect the cigarette lighter electrical connector.
Important
Make sure the upper tabs on the front of
the console engage the sheet metal on the lower I/P brace.
- Move the console forward into position.
- Install and tighten the front console screws.
TightenTighten the screws to 1.2 N·m (11 lb in).
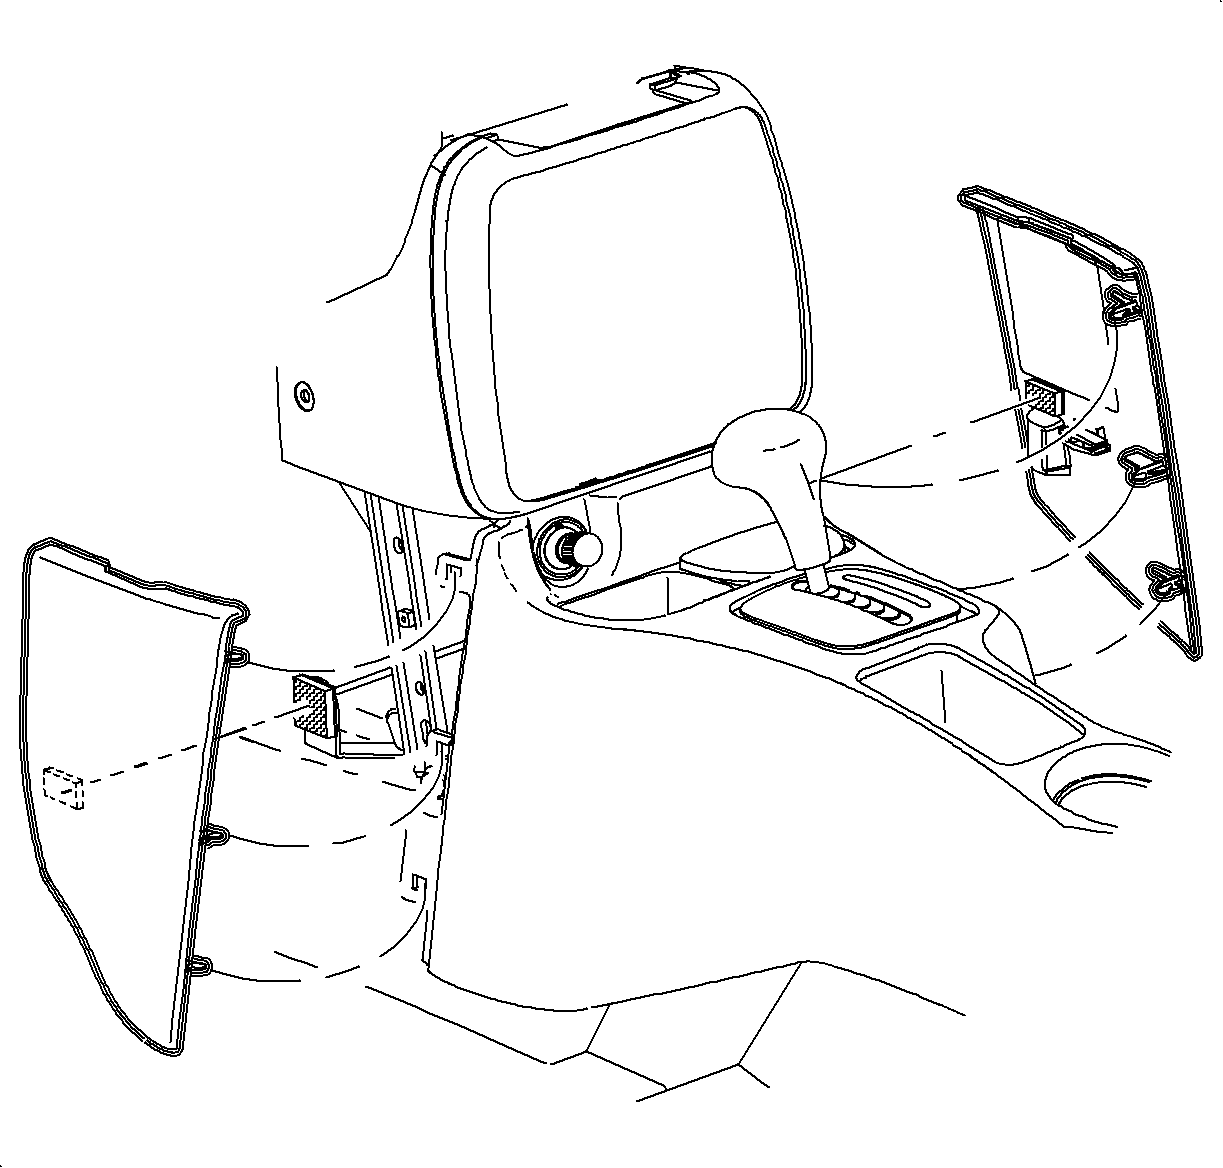
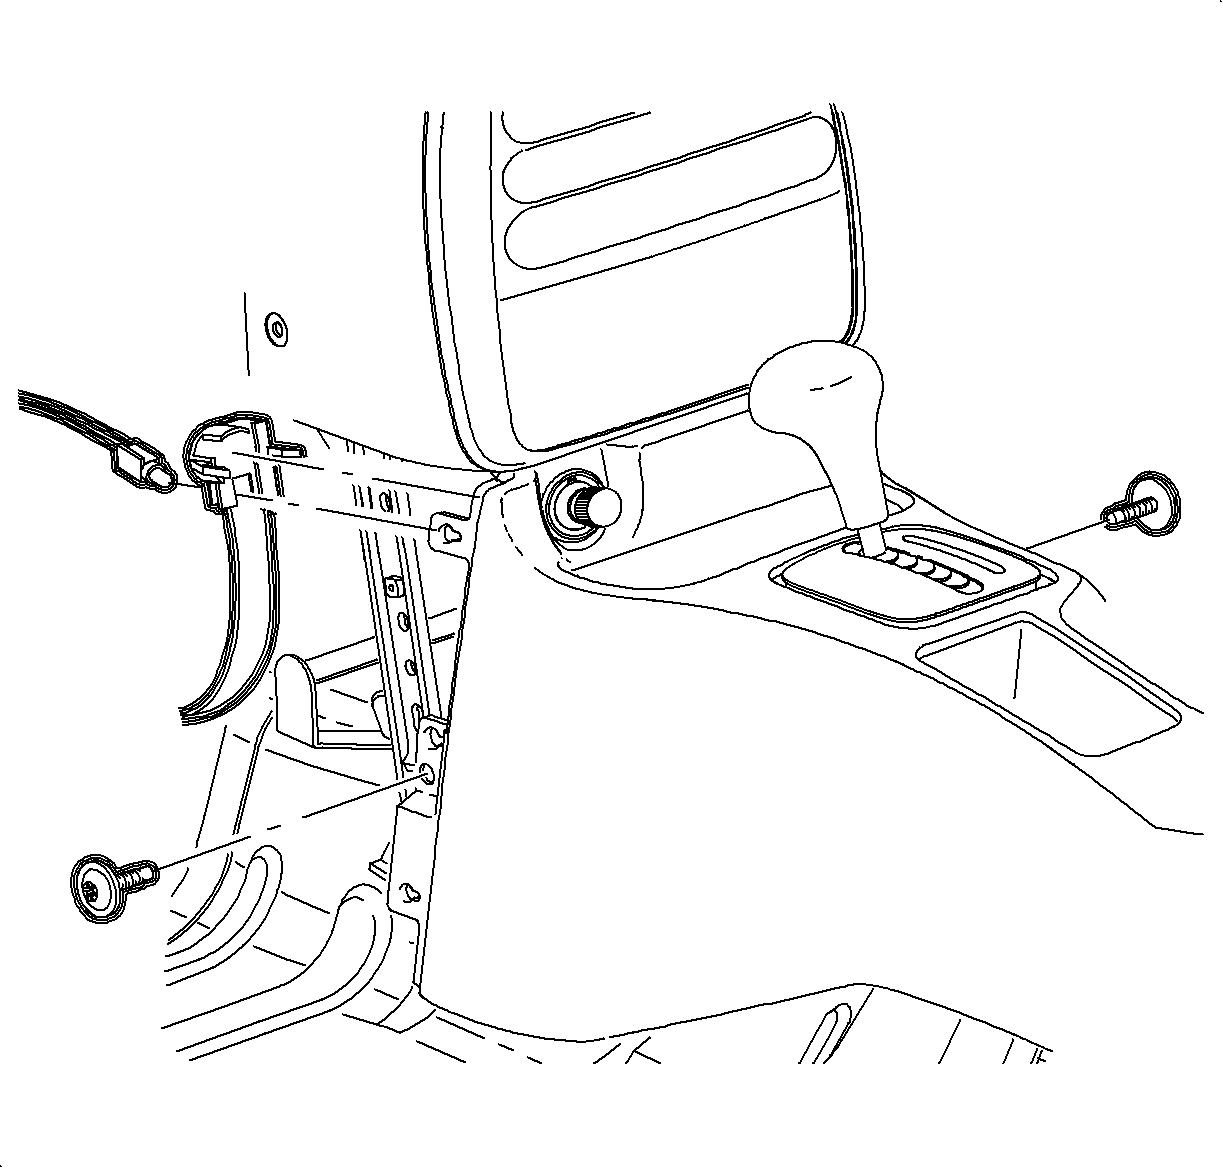
- Install the left and the right lower trim panel extensions
by inserting the hinges into the console openings. Then rotate towards the I/P retainer
and press firmly to engage the dual lock.
- For vehicles without
the console armrest:
- Align the rear of the console with the pin on the mounting pad.
- Install and tighten the screws.
TightenTighten the screws to 1.6 N·m (14 lb in).
- Install the screw cover.
- If equipped, connect the window/mirror switch electrical
connectors.
- Install the window/mirror switch by inserting the front edge into the
opening. Then push the rear edge down into position.
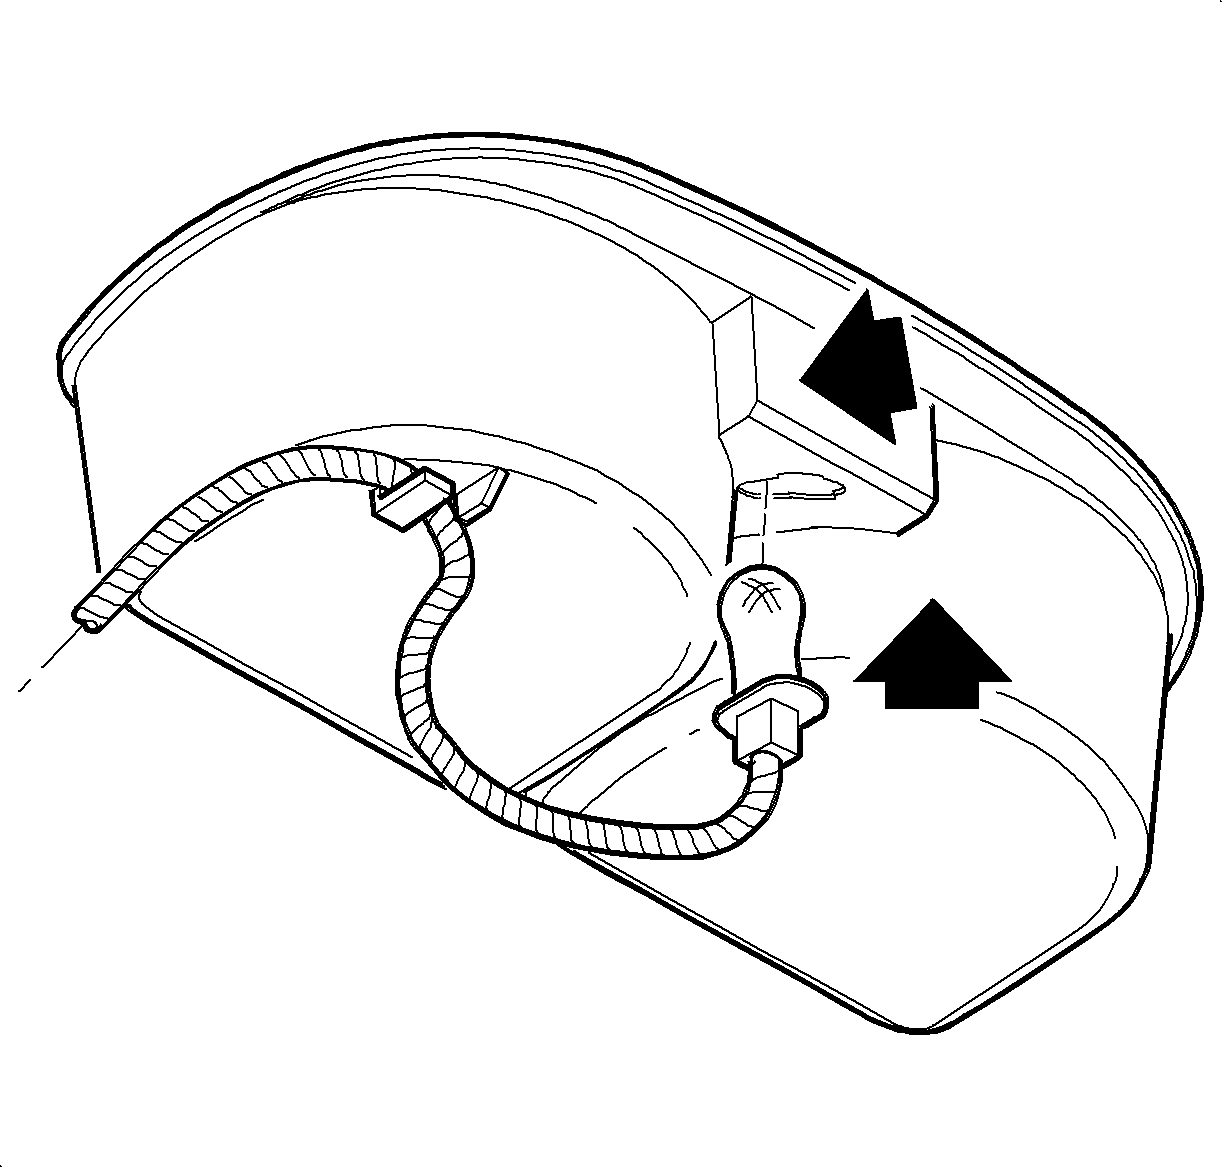
- Insert the bulb
through the opening until the bulb socket is flush with the cup holder. Push the socket
down to engage the lock tab.
- Install the wiring harness to the cup holder.
- Install the cupholder by inserting it through the console opening and
pushing it straight down.
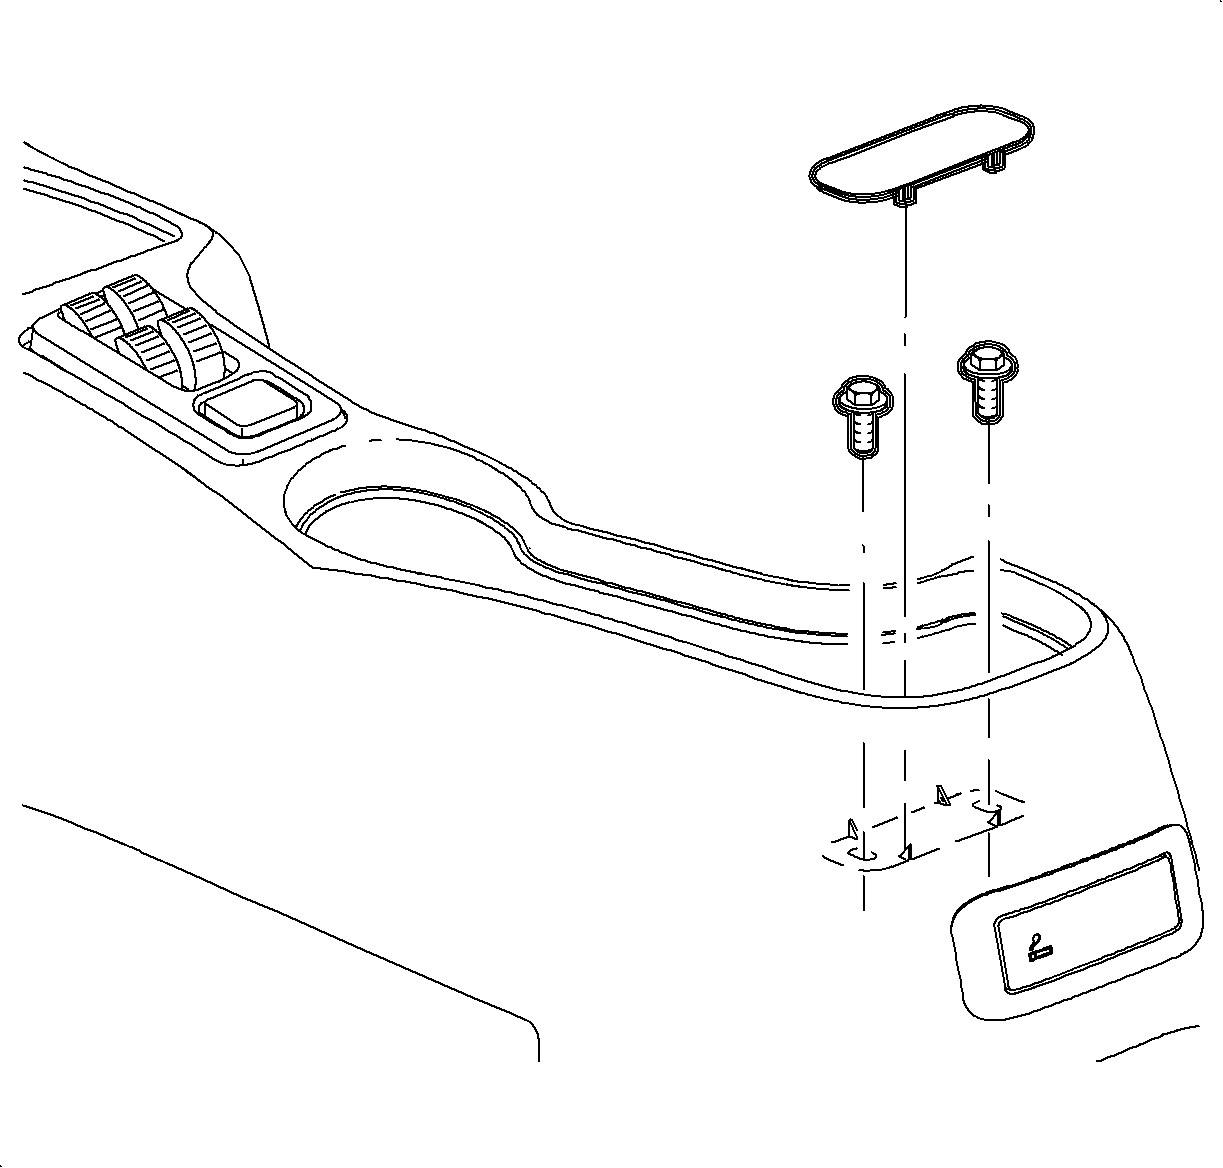
- Install the parking brake cover over the lever.
Notice
Do not overtighten screw or it may pull through cover.
- Install and tighten the screw.
TightenTighten the screw to 1.6 N·m (14 lb in)
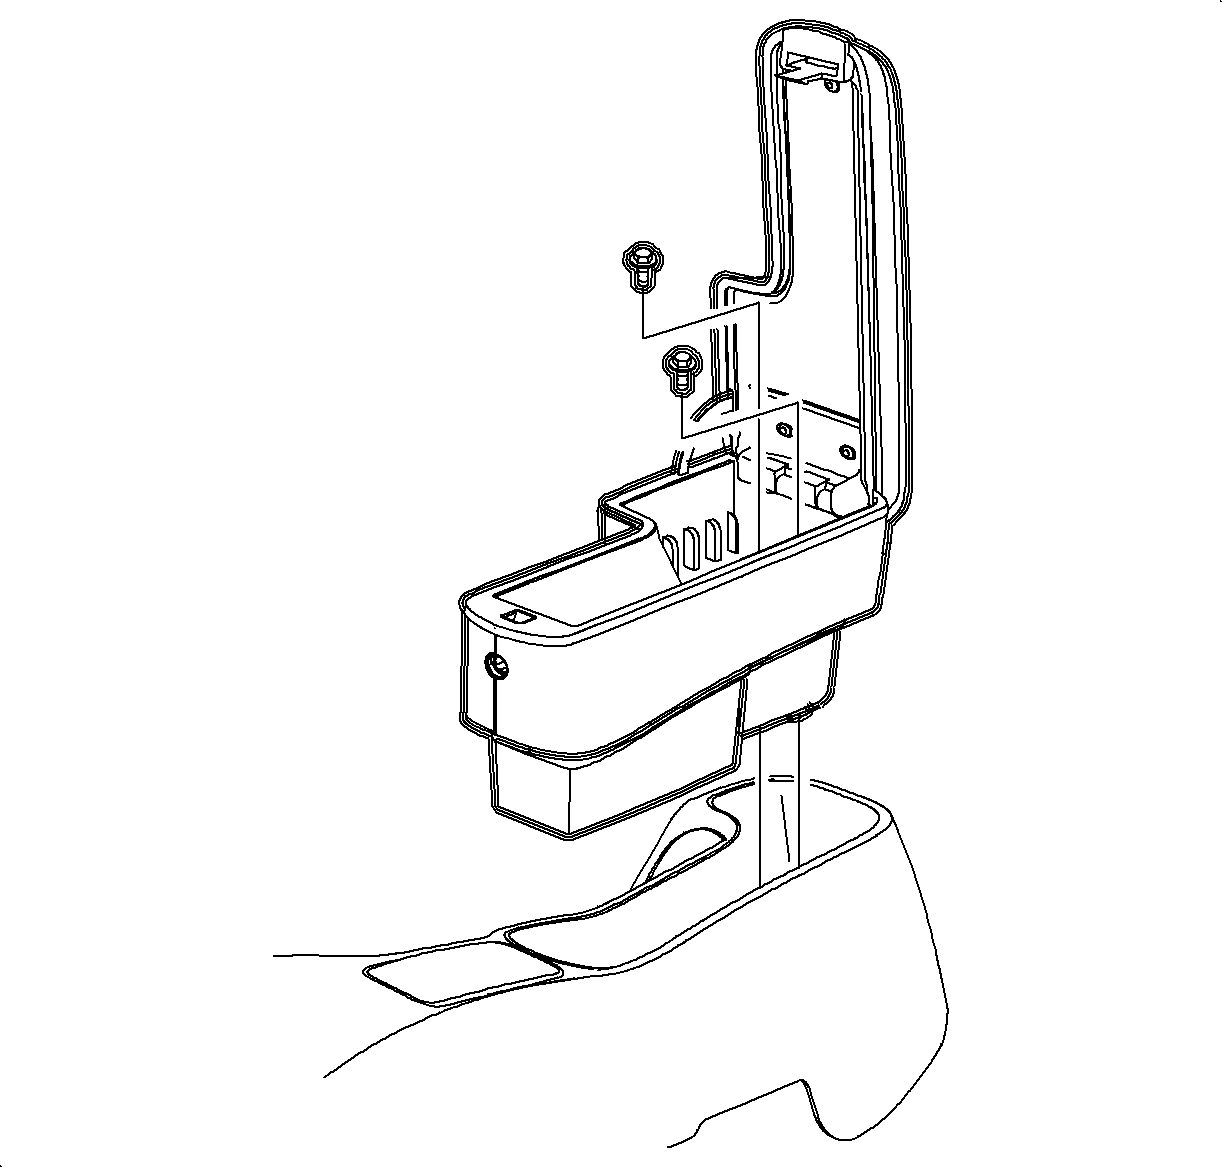
- Install the arm
rest unit into the console, if equipped. Install and tighten the screws.
TightenTighten the screws to 1.6 N·m (14 lb in).
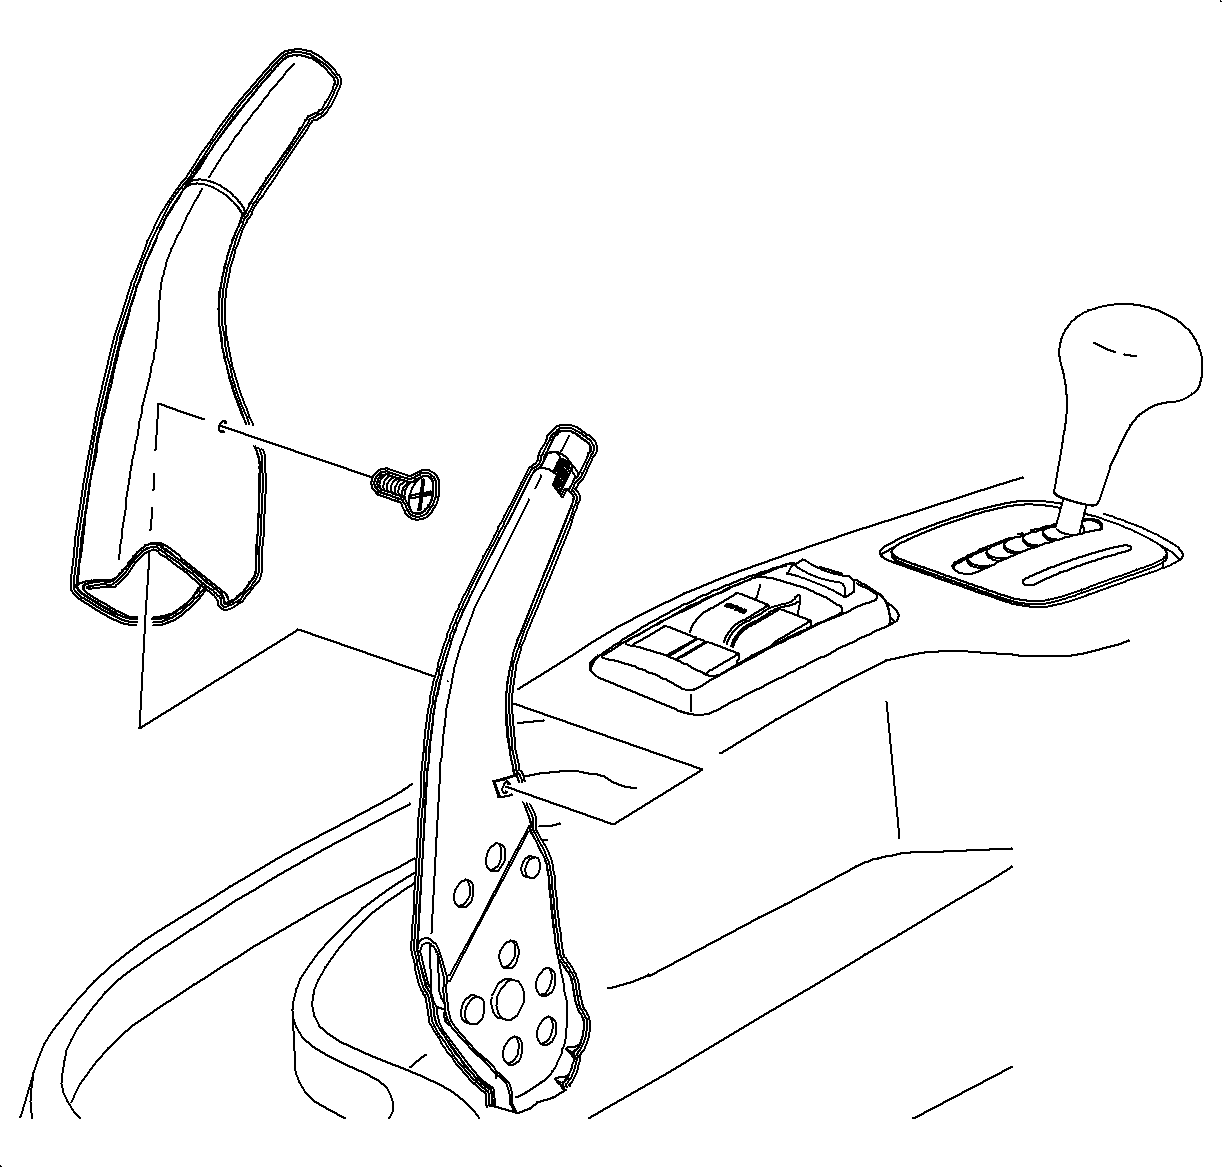
- Install the right and the left end cap assemblies.
- Install and tighten the screws.
TightenTighten the screws to 2.2 N·m (20 lb in).
- Enable the SIR system. Refer to Enabling the SIR System.